What Is TWRP Recovery & How To Install & Use It On Android [Guide]
TWRP recovery is one of the most powerful tools available for Android enthusiasts. Till just over a year back, ClockworkMod (aka CWM) was the go-to custom recovery for pretty much every mainstream Android device. Things have changed a lot since, with a newer player entering the game and gaining a lot of critical acclaim, as well as a huge user base. TeamWin Recovery Project – or TWRP recovery for short – is a fully touch-based custom recovery that was initially developed for Nexus devices, but has since been made available for countless other smartphones and tablets as well, in form of both official and third-party builds. Just like we took you through a very detailed tour of ClockworkMod recovery and its features, we’re going to guide you through all the features of TWRP recovery right after the jump.
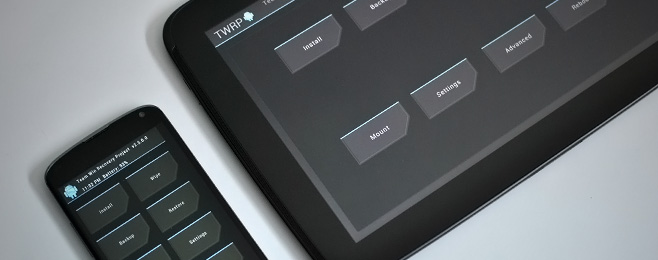
In case you aren’t familiar with the concept of a custom Android recovery, we suggest you check out our ClockworkMod recovery guide (linked above) and go through the ‘About Android Recovery’ section. That said, let’s take a closer look at TWRP recovery.
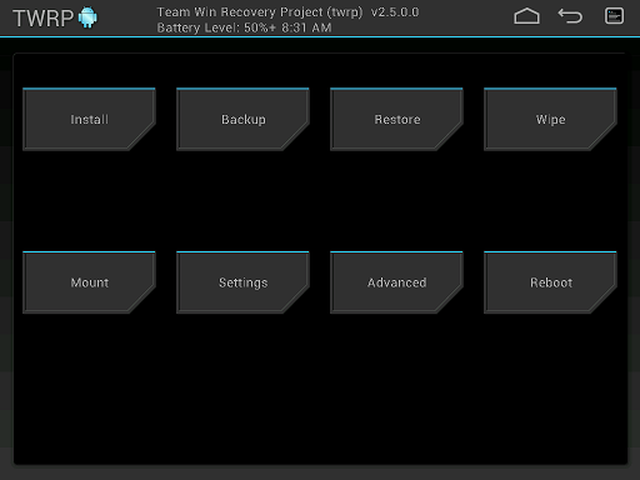
The first thing you’ll probably notice about TWRP recovery is its GUI that looks impressively modern when it comes to a recovery environment, especially compared to that offered by ClockworkMod. You get the same basic set of features that you’d expect from any modern and full-featured custom Android recovery, all laid out in a very organized manner with large, touch-friendly buttons that make using it a breeze. Furthermore, the tablet variants are actually tablet-optimized. Here, take a look for yourself:
TWRP Recovery Installation
Note: The screenshots and workflow shown in this guide reflect an older 2.x-era build of TWRP recovery. TeamWin’s official site now lists current 3.7.x releases, and the installation process has evolved significantly since this article was first written.
Installing TWRP recovery the right way starts at the official TeamWin device directory. Here is the current recommended approach:
- Go to the official TeamWin device directory at twrp.me/Devices and search for your device.
- Find your exact device model and codename — even phones with similar names can require entirely different builds.
- Open your device’s page and follow the official install method listed there, as instructions vary by device.
- Use the method appropriate to your device family: commonly fastboot boot or fastboot flash for most Android devices, Odin for many Samsung models, or the Official TWRP App if your phone is already rooted.
GooManager and flash_image are legacy methods that are no longer the normal path for most devices. You may still see them referenced in older guides, but we recommend following the device-specific instructions on the official TeamWin site instead.
Installing a custom recovery on Android
Supported Devices and Downloading the Right TWRP Recovery Build
TWRP recovery is not a one-size-fits-all download. Flashing the wrong recovery image — even one built for a phone with the same brand name — can soft-brick your device. Before you download anything, you need to confirm a few things.
Find your exact device model and codename. Android devices often share marketing names but have entirely different hardware. For example, a phone sold under the same name in two different regions may have a different codename — and require a completely different TWRP recovery build. You can usually find your codename in the Settings app under About Phone, or by searching your model number online.
Always download from the official TeamWin site or a trusted maintainer. The safest source is twrp.me/Devices. If your device has an official build listed there, download only from that page. If your device is not listed, community or unofficial builds may exist on XDA Developers, but you should verify the maintainer’s reputation and read the device thread carefully before flashing anything.
Understand the difference between official and unofficial builds. Official TWRP recovery builds are maintained by the TeamWin team or approved device maintainers and are listed on twrp.me. Unofficial or community builds are made by individual developers and may lag behind in updates or lack certain features. Neither is inherently unsafe, but unofficial builds require more due diligence on your part.
What if there is no current official build for your device? It means TeamWin or a maintainer has not yet released a verified TWRP recovery image for it. In that case, check XDA Developers for your device’s forum, look for an active unofficial port, and read recent posts to confirm it is stable before proceeding. Never flash a build simply because it mentions your phone’s brand.
TWRP Recovery Features
TWRP recovery gives you access to all the features you would expect from any custom recovery, and then some. Let’s take a look at them in detail.
Interface
The interface of TWRP recovery comprises large buttons that make it easy to spot the feature you require at a quick glance and select it with a quick tap. You’ll also find soft buttons for Home and Back here, along with one for the log view that shows progress of all the operations you’ve performed in recovery.
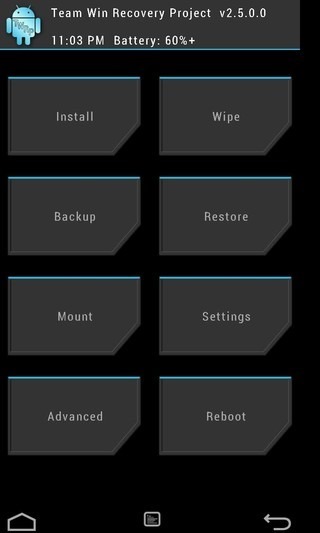
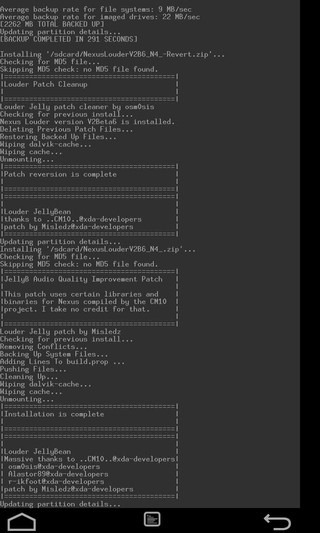
The log is normally shown automatically while any recovery operation is taking place, but goes into background when the operation is complete. By using the Log button, you can bring it up again if you missed out on anything, or needed to look up some info for troubleshooting purposes.
Install
As the name suggests, the Install option in TWRP recovery lets you install any recovery-flashable zip file to your device. This can be a ROM, a kernel, a mod, a theme, a system app – pretty much anything that’s available in the recovery-flashable zip file format.
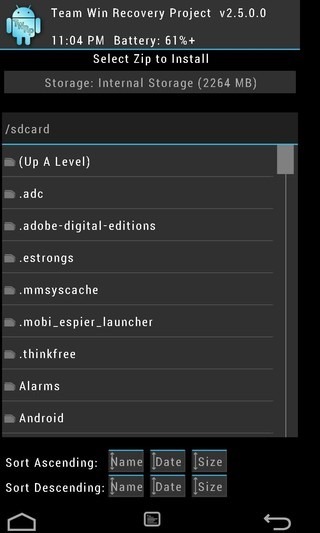
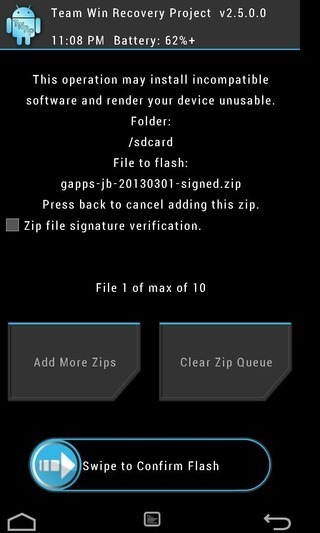
Upon hitting Install, you’re presented with the files and folders on your phone’s storage, from which you can select the file you want to flash. With the file selected, you can either swipe the slider to confirm and start flashing the selected file, or hit the ‘Add More Zips’ button to queue up more files for flashing one after the other in a batch – a feature we haven’t come across in any other custom recovery. It will present you with a file selection screen just like the first one, letting you add up to 10 files to the flashing queue before flashing them all in the selected order. You can also clear the queue any time by tapping the ‘Clear Zip Queue’ button to start file selection from scratch.
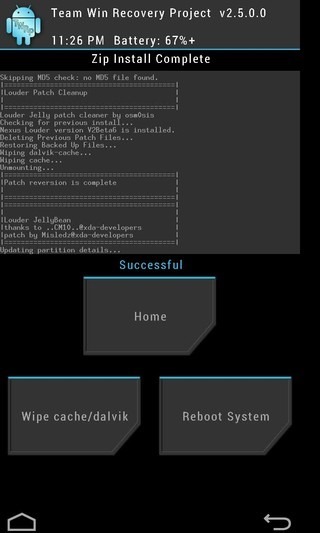
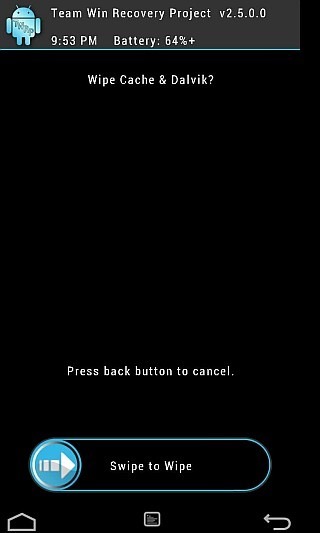
Once the flashing process is complete, TWRP recovery gives you some handy options for quick access to certain tasks that many users would need to perform after flashing, eliminating the extra steps required to pick them from their individual sections. These include wiping cache and dalvik cache, and rebooting the system, in addition to a Home shortcut.
Wipe
This section is dedicated to wiping all standard partitions on your Android device. By default, TWRP recovery offers you a full factory reset upon hitting Wipe, since it’s the most common form of wipe operation that most users need in recovery. This will wipe all your user data from the phone, including your installed apps, cache, and dalvik cache. This will not affect the internal or SD card storage area of your phone, meaning your documents, downloads, pictures, music, videos and other files will stay safe.
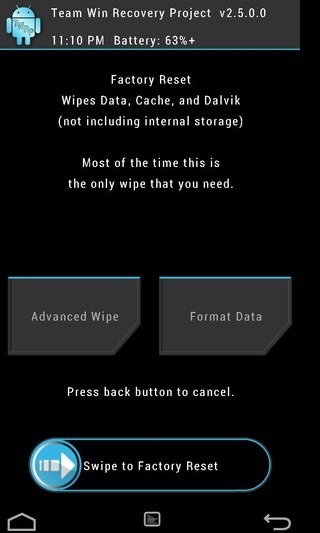
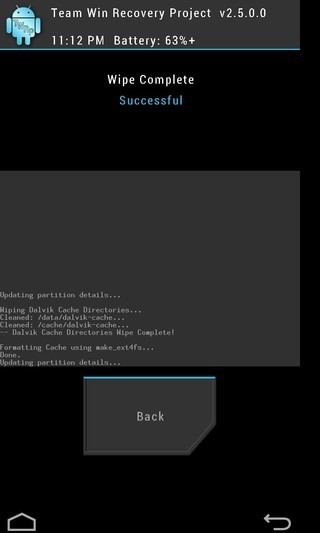
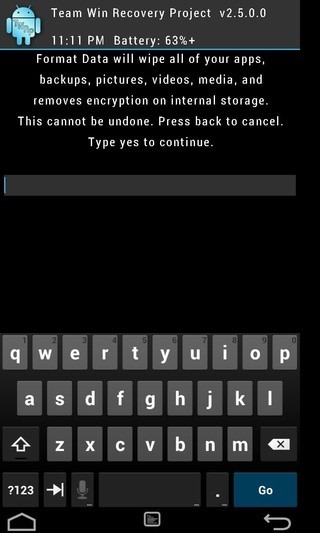
If you would rather want to wipe EVERYTHING including the aforementioned data, tap ‘Format Data’. This will wipe all your apps, backups, downloads, pictures, videos and media, and will also remove encryption on your internal storage, if you have applied it, essentially leaving nothing but the operating system itself on the device, in a complete factory state.
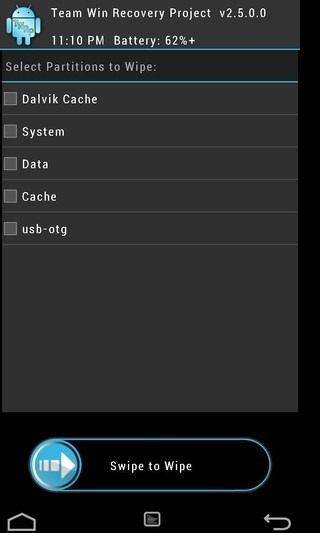
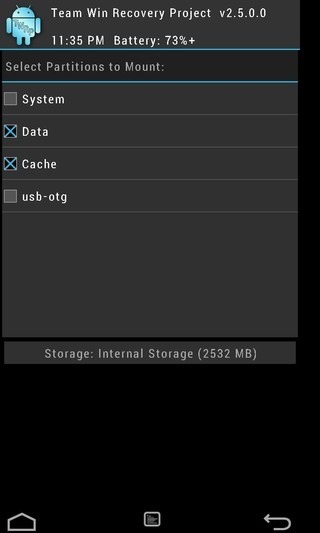
If you want to be more specific about the partitions you want to wipe, hit ‘Advanced Wipe’ instead. You can then select one or more common partitions to wipe specifically, leaving the rest untouched. The partitions available for wiping include system (where your operating system is stored), data, cache, Dalvik cache, and usb-otg in case of our Nexus 4, but may (or may not) include other partitions as well.
Just remember – if you are unsure of whether to wipe a partition or not, NEVER touch it, especially if it’s the system partition. If you are following instructions provided somewhere, wipe only the partitions that the instructions clearly specify to wipe, and leave the rest untouched. Otherwise, you might be stuck with a device with no operating system installed, or lose all your data stored on the device.
Backup
A timely backup can save you from a lot of hassle later on in case of any data loss due to a faulty installation or an operation performed by mistake in recovery mode. That’s why all custom recoveries for Android come with a backup feature (also called NANDROID backup). TWRP recovery’s backup section lets you take a backup of the current state of your phone, allowing you to select the partitions you want to be included in the backup, and even letting you give the backup a custom name on the go.
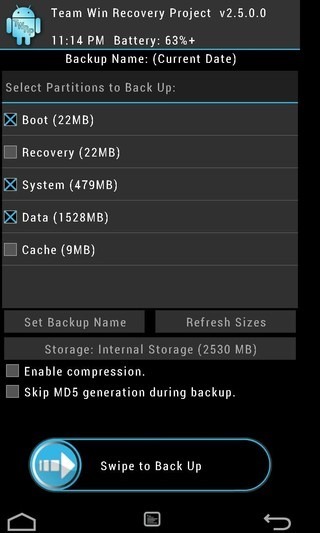
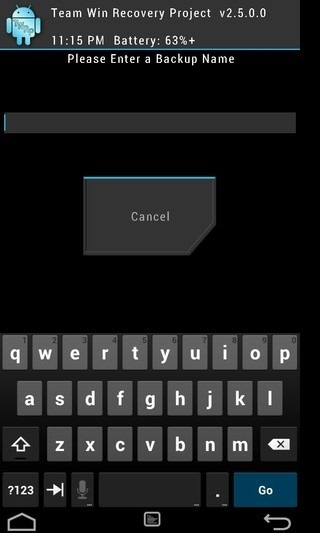
You are also shown your available storage space, and you can calculate if it’s enough for the backup, based on the sum of the individual partition sizes, that are shown with each partition.
Restore
This section lets you restore your phone to the state of any previously taken backup. Simply select the backup that you want to restore, optionally choose the specific partitions that you want to restore, and swipe the slider to begin the restore process.
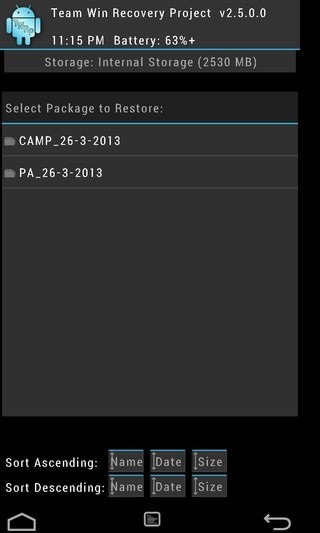
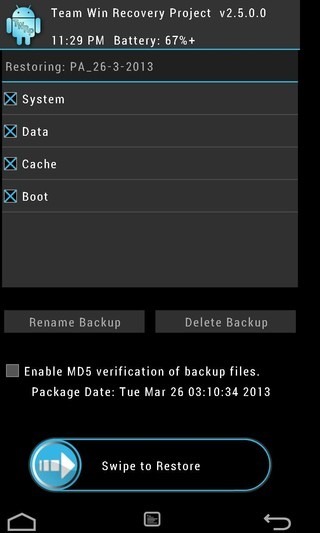
Do remember that restoring a backup will essentially wipe the current state of your phone, meaning any changes made after that backup will be lost. However, your internal or SD card storage will remain untouched, and any files that you may have added there after the last backup will still be there.
Mount
Most casual users will never really need this section, but for power users, this can be immensely useful. Here, you can mount or unmount several key partitions of your device, in order to access them over ADB (or certain areas of the recovery, as we’ll see later.) You can also see the amount of free internal storage available on your device here.
Settings
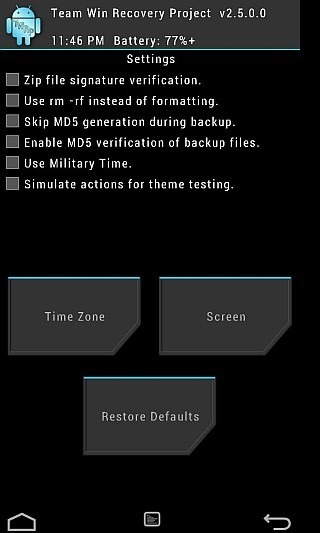
TWRP recovery lets you tweak a few recovery-specific settings, such as toggling signature verification for the zip files you flash, using the rm -rf command for wiping instead of the format command, wherever applicable, skipping MD5 generation during backup, enabling MD5 verification of backup files, using military-style time for the clock display, and a simulation mode in which you can test out recovery operations without actually performing them.
The simulation mode is super-useful for those creating custom TWRP recovery themes, letting them test themes out to ensure they apply properly to all areas of the recovery.
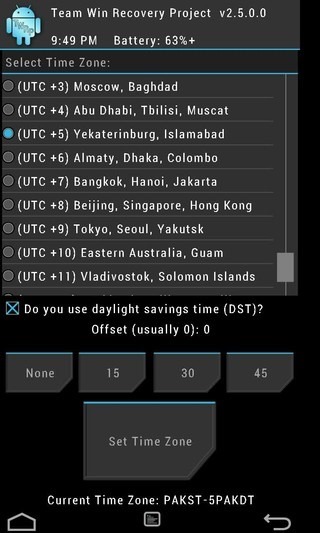
The Time Zone option lets you specify your own time zone for the time display in recovery mode, by choosing it from a list of all global time zones, and optionally specifying any offset if required.
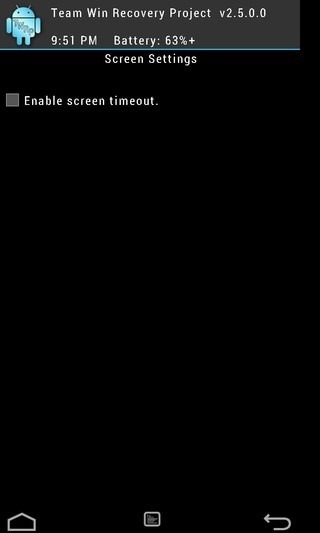
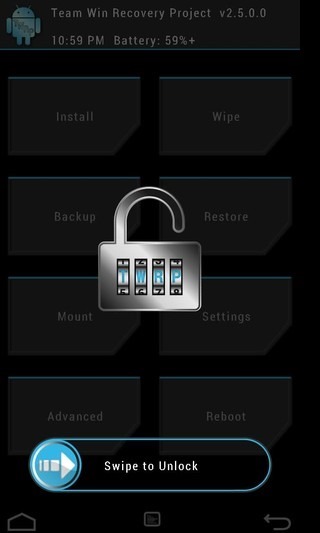
To keep things secure, TWRP recovery also comes with a lock screen that activates automatically after a predefined screen timeout period, and can be unlocked with a swipe similar to the unlock gesture on the iPhone, as you can see in the screenshot above. This option can be toggled from the Screen section.
Advanced
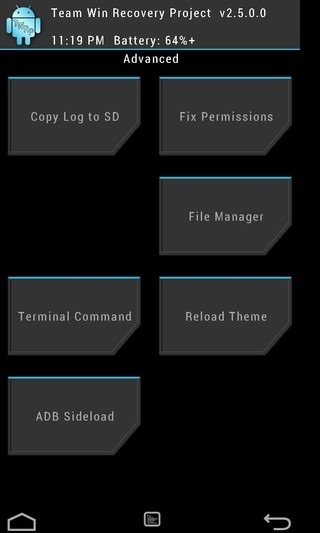
In the Advanced section of TWRP recovery, you’ll find some further features that many users might not require. You can copy the recovery’s log to SD card for accessing it later, which can be useful for debugging purposes. You can also fix file permissions, which can help if things aren’t working properly due to improperly set permissions for important files. There’s also a Reload Theme option that is useful for those developing a custom theme for TWRP.
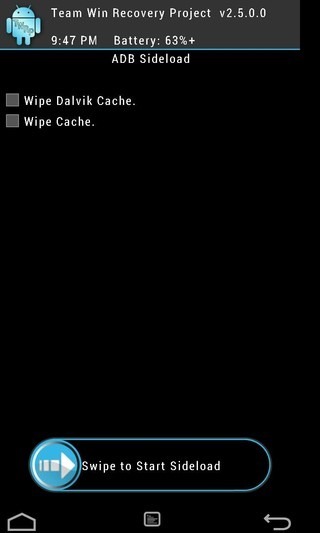
The ADB Sideload mode is also accessible from here, which essentially allows you to put your phone into a mode where files can be flashed to it from a computer using the ADB sideload command. This mode shouldn’t generally be required by anyone who doesn’t already know how it works, and those unfamiliar with it don’t really need to worry about it. For those who are going to use it, the Wipe Cache and Wipe Dalvik Cache options can come handy to ensure that both these cache partitions are wiped after the ADB sideloading process completes.
There are two more options here – Terminal Command and File Manager. These (especially the File Manager) deserve a section of their own, so let’s now take a look at them.
File Manager
Not many custom recoveries come with a built-in file manager, but TWRP recovery has taken things one step further by adding one to the mix. Once you launch it from the Advanced menu, you are shown the file or folder selection screen. Simply navigate to the file or folder you want to manage, and hit the ‘Select’ button. For conveniently locating the required file or folder, you can use the sorting options.
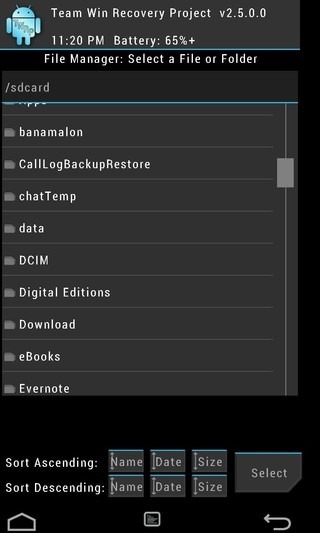
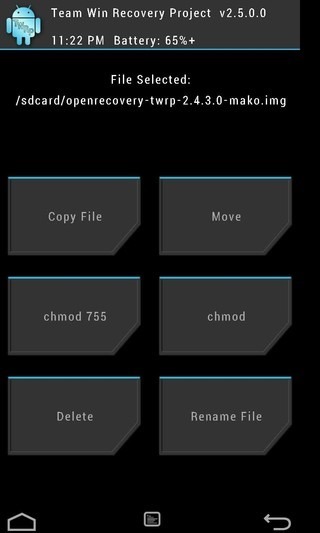
Once a file or folder has been selected, you can then copy or move it to another location, set its permissions to rwxr-xr-x (755) by using the ‘chmod 755’ button (note that rw-r–r– corresponds to 644, not 755), or to any other permissions you want by using the ‘chmod’ button, delete the item, or rename it. These options can come incredibly handy when attempting to fix things from recovery in case of any issues that have made the phone inaccessible in normal Android mode. However, use these only when you are sure of what you are doing, and don’t mess around with any files that you don’t know much about, or else you might end up harming your OS.
Terminal Command
The Terminal Command mode found in the Advanced menu lets you run a batch file that contains Terminal commands that you want to execute. These files usually have a .sh extension, and if you are unsure about this mode, just let it be, as you won’t exactly need it in that case. For those advanced users who do need to run such a file, TWRP recovery offers the same file selection interface in this section that’s featured in the other parts of the recovery, as we’ve seen above. Simply select the file and you’ll be able to run it right from recovery.
Reboot
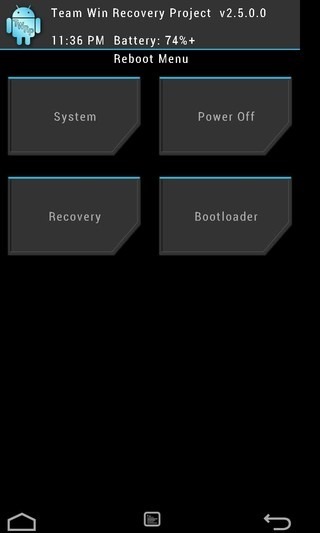
This menu provides you with handy options of rebooting your device directly into specific modes right from TWRP recovery. The options available include System (normal Android mode), Recovery, and Bootloader (fastboot mode). In addition, you can also directly power your device off from here.
Official TWRP App
TeamWin offers an official Android app, simply called the Official TWRP App, that makes it easier to find, download, and stay updated on the correct TWRP recovery for your supported device.
Here is what the app does and what it does not do:
- Find the right build: The app can identify your device and point you to the correct TWRP recovery image for it.
- Download and update: It lets you download the latest TWRP recovery image directly and notifies you when updates are available for your device’s build.
- Direct installation requires root: The app can flash TWRP recovery directly to your device’s recovery partition, but only if your phone is already rooted. Without root, you will need to use fastboot, Odin, or another method instead.
It is important to understand that the Official TWRP App does not bypass the need for an unlocked bootloader or remove any of the device-specific flashing requirements. It is a convenience tool, not a shortcut around the fundamentals.
If your device is supported and already rooted, the app is a straightforward way to keep your TWRP recovery up to date without touching a command line. You can find the Official TWRP App on the Google Play Store or via twrp.me.
Final Words
TWRP recovery is nothing short of a breakthrough when it comes to Android recoveries. It provides the most impressive user interface we’ve seen in recovery mode, making it a very easy-to-navigate GUI – a major jump from the traditional menu-based boring and complicated recovery interface found in most other recoveries including ClockworkMod. And the interface is just the icing on the cake; the several handy features offered by TWRP recovery that are nowhere to be found in other custom recoveries make it THE best custom recovery currently available for Android, period! It also allows users to theme it to their liking by editing an XML file, and fully conforms to the OpenRecovery standard for its recovery operations, rather than going for its own non-standard ways. This standards-compliance makes it compatible with the excellent GooManager app for scheduling flashing of files without leaving the Android environment.
TWRP recovery has replaced ClockworkMod on all our devices here at AddictiveTips, and we have no hesitation in recommending it to any Android user looking for a custom recovery for their device.

An update for anyone who comes here, as I did, from a search: from 2017 the “Official TWRP app” is available from the App Store; after installing the app, the app will installs TWRP itself. Search for “twrp app” to find its Web page with instructions. HTH
Hey,
It’s not in relation with the subject, but may I know how they took screenshots or how they did to have pictures of such quality from the phone ? Because if they can control the android with an app, program or something from another device on the recovery mode I’m interested !
(And could you please forgive my very bad English and don’t judge me too harshly, i hope you all understood 🙂 ! )
How to download and install TWRP on android phone. Step pls
What is the difference if TWRP is used on a rooted phone vs TWRP is used on a non rooted phone? Do they backup the same things? What is the backup/recovery file differences? Thanks
A late hello. I have an old LG G2 that I bought second hand a year ago, and when I went into software updates, I found myself in the TWRP menu. Gadzooks! What is this?
I assume the device was rooted and had TWRP installed before I bought it, but I still don’t understand how I ended up booting it up.
Anyway, thanks for the info. I will try to do a System Reboot tonight when I get home to see if I can get back into Android.
I am having the same problem. I have an LG G2 phone also. If you know of a fix as to how to delete this let me know.
I am looking for a TWRP Recovery version that will work for BLU Studio 6.0 LTE (Y650Q). And a Lollipop 5.1.1 ROM. Any ideas?
i dont know what to do……
how do i remove the recovery off a device
Very informative.. thank you very much!..
guys i need help my alcatel one touch idol was didnt open when i turned it off and it was undetected by any pc, pls teach me how to re open it..tnx guys
My phone is alcatel pop c 5. I am looking for custom rom. Please help
i ve this problem in my htc wild fire s “E:Unable to mount ‘/sdcard/'” my sd card is working well. i mounted it and checked in different devices.
my phone is not booting in recovery mode
i want a twrp recovery for samsung s2 gt-9100
please help
how to find your device name in twrp list?
With eyes
Perhaps a heads up: rw-r-r is not 755 but 644 🙂
after wiping data it says no os installed. what to do
How can update my twrp version 2.3?directy from recovery, by licking install?
yeah, this thing keeps popping up on my phone, freezing it and insisting that I update. But when I click “update” so it can shut up, then it goes to a screen which has no options to update.
thank… may i know something about reboot side.. if i press bootloader what happen to my device?it’s can brick my device or not? because i’m accidently press bootloader, and after that my screen device showing =>FASTBOOT mode… how long this mode take time to shut off or back to normal?… thank you very much
Just pull of your battery and reinsert it.then turn it on : )
Until now I was a perfect noob. Not anymore 😀
First time, I really got to know about the custom recoveries. Thanks man
I had tried both CWM and TWRP custom recoveries on my Android devices, found TWRP a better choice since it offered me touch controls and a built in file manager + terminal to perform useful functions. Although CWM’s touch version is also here, but haven’t got the chance to try it so far.
how to change the language because i cant install i cant understand chinese
Select 3 option in 2nd column than choose
Does anybody know how long it will take to simulate the actions of a new rom? Right now I have been simulating actions for 3 hours.
Really great info.
nice! currently using it
You can use ROM Manager for TWRP too …
Pls pls how can I do that without PC I need to have it on my device
Can we install TWRP recovery on Sony Xperia U ?? Where can I find the list of supported devices by TWRP ?
Btw, this is a very nice post 🙂
You can find it on TWRP website itself. Goto website select the version you want and there you can find the compatible devices.
Does this recovery support Sony Xperia U ??
Thanks for the information. Very helpful!
Thanks a lot! Very informative.