How To Assign Static IP Address In Ubuntu Linux
By Default Ubuntu uses DHCP settings to attain an IP Address for the system. However in many cases you may need to use a static IP address , if your Ubuntu system is using DHCP and you want to assign it a Static IP address then its not a big deal to configure it. Simply go through the following easy steps to achieve it.
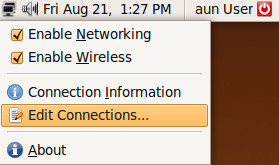
First of all, right click the network icon located in the top panel and select Edit Connections.
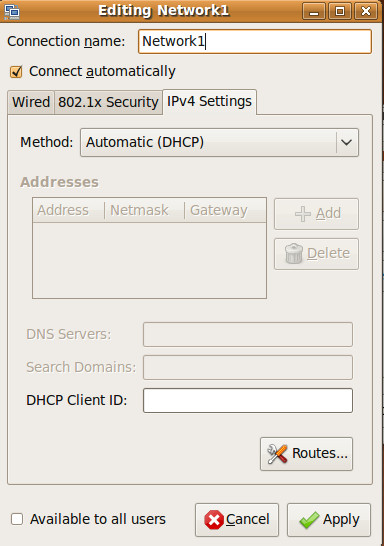
The Network Connection window will be displayed, now click the Add button to add a new network connection, and then go directly to the IPV4 settings tab.
Choose the Manual option from the Method drop down menu.
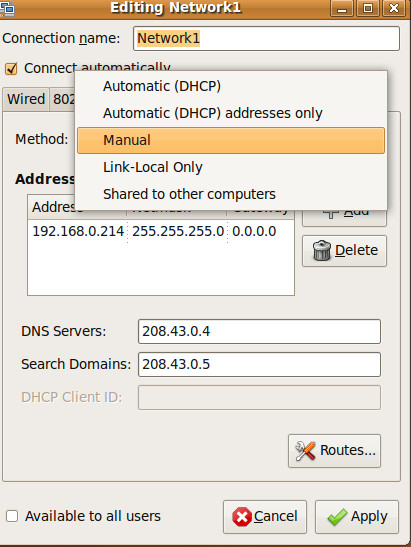
Now click Add and then enter the IP address, Netmask and Gateway information in the Addresses section.
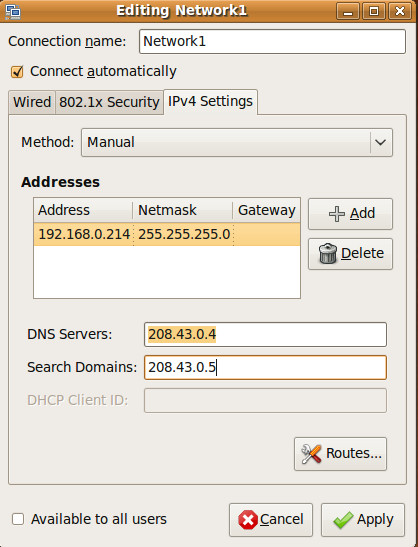
Click the Apply button to complete the configuration. Now you can use this newly created network connection which will have a static IP address. Enjoy!

thank you
it goods site for ubuntu, eassy way to finde my answer, so i live never forget site jugal kishore kushwah from ranchi
it goods site for ubuntu, eassy way to finde my answer, so i live never forget site jugal kishore kushwah from ranchi
it”s really work
You’d need to know that info regardless of what OS you are using. Typically, private home networks use 192.168.1.*, where * is whatever you want or need it to be. If you don’t understand the reason to set a static IP, you’re probably better off leaving it as DHCP.
255.255.255.0 is fine for most configurations. The Gateway is whatever your router is, often 192.168.1.1 or 192.168.1.99.
Wow I hate ubuntu. Classic linux advice:
> Now click Add and then enter the IP address, Netmask and Gateway information in the Addresses section.
Which IP address and information? Do you just make these up?
It has to be an IP address not given out to other devices on the network, preferably below the starting DHCP IP address range. Usually internal IP address start with 192.168.1.* Simply enter the Netmask information the example provides and leave the gateways at their defaults. Works for me.
hey this doesn’t work i cant apply the settimgs after its edited
Ok thx.
Thank you very much , it works for me , I Love UBUNTU !
Thank U Very much it works , I will be user of Ubuntu through out the rest of my life.
would there be a file created after you set the static ip? if yes, where its located. thanks