How To Increase Icon Spacing In Windows 7
Are you looking for a way to adjust the spacing between the icons on your windows 7 desktop? In Windows 7 now it is possible to increase the space between the icons. Simply go through the following easy steps to increase or decrease the icon spacing.
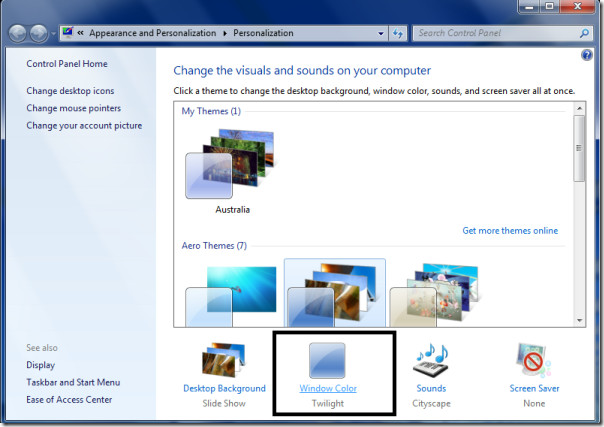
First of all, right-click on the desktop, and select Personalize in the drop-down menu. The Personalization dialogue box will be displayed, here choose the Window Color option.
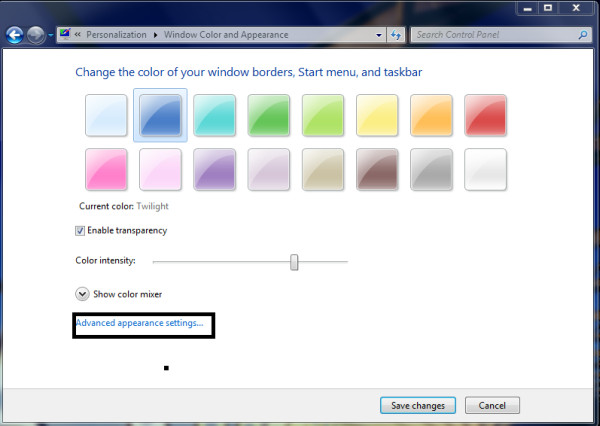
Now click the Advanced Appearance Settings option in the next dialogue box.
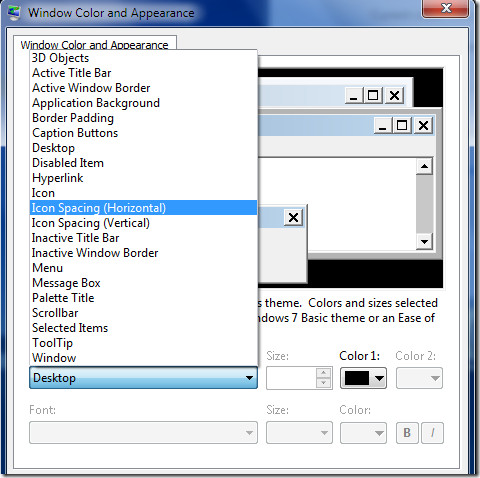
Choose Icon Spacing (Horizontal or Vertical) in the Item drop down menu.
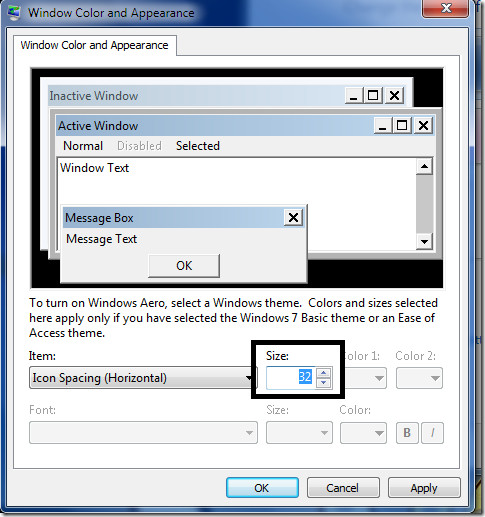
Enter the new icon spacing size.
Click Apply to complete the configuration and that is all. Enjoy!

Oh….just please give me 15′ with the bastards, just 15 minutes.
Excellent! Thanks!! This now sparked my memory to recall the file name to use in Start > Run > c:windowssystem32desk.cpl ,5
hey man thank u very very very much
Thank You! Thank You! Thank You!I can now screw my head back on!
Actually this is the way it’s always been for Windows, only now on Windows 7 you have to dig deeper into a misleading submenu called “Window color”. Logically, that should be more appropriately renamed Windows Appearance or Windows Theme. Whoever came up with the idea of “Window color” being associated with the overall appearance must be an evil genius who likes to f— with people’s head.