PhotoMerge: Add Text to Photos in Seconds
PhotoMerge is a free application for Windows that lets you add text to photos instantly. You can also add a specific date in all your photos, which can help bring old memories back. Once you have selected a text, you can batch apply it to all your photos inside a specific folder.
What Photomerge Usually Refers To When You Want to Add Text to Photos
If you landed here searching for “Photomerge,” there is a good chance you are actually looking for Adobe Photoshop’s built-in panorama-stitching feature — also available in Photoshop Elements. That tool is designed to automatically align and blend a series of overlapping photographs into one seamless, wide image. Here are three of the most common things people use Photoshop’s Photomerge for:
- Stitching overlapping landscape shots into a panorama: Shoot a scene across multiple frames from left to right, and Photomerge analyzes the overlapping areas to align and blend them into a single wide image with minimal manual effort.
- Combining multiple scans of a large document or artwork: When a scanner bed is too small to capture a large map, poster, or piece of artwork in one pass, you can scan it in sections and use Photomerge to reassemble the pieces into one seamless, full-size image.
- Using Photomerge variants in Photoshop Elements: Photoshop Elements includes several Photomerge-based tools — including Photomerge Panorama, Photomerge Scene Cleaner, and Photomerge Exposure — giving everyday photographers access to powerful multi-image merging without the full Photoshop subscription cost.
The tool covered in this article is a separate, free Windows utility — also called PhotoMerge — focused on batch text stamping and date overlays across folders of photos. If you need to add text to photos in bulk, continue reading below. If you came looking for Photoshop’s panorama workflow, we cover that in detail further down the page as well.
There are two versions available installer and executable, I tested the later since it is portable and can be carried anywhere easily. Just run the program and you will be shown a preview image with default settings. There are different ways to add text to photos using this tool, and these styles are listed in Profile.
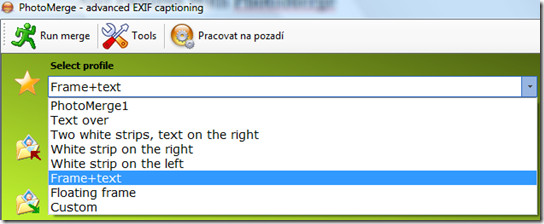
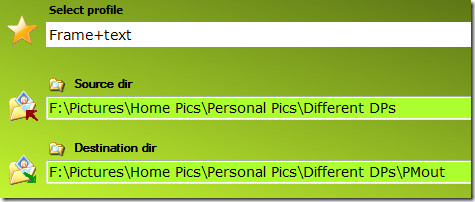
After you have selected the profile of your choice, select the source folder where your photos are located and it will automatically create a new folder inside it and mark it as destination folder.
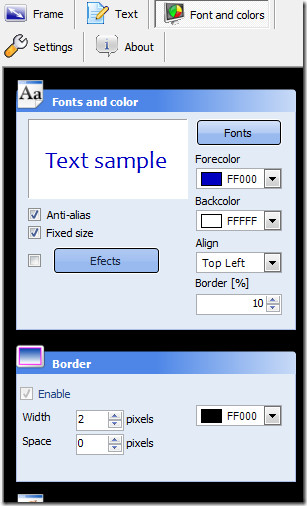
Once done, type the text you want to add to photos by going to the Text tab on the right sidebar and select the options by going to Font and Colors tab.
All changes will be displayed in the preview window when you hit Refresh button. Once you are ready, click Run Merge button and the text will be added to your photos instantly.
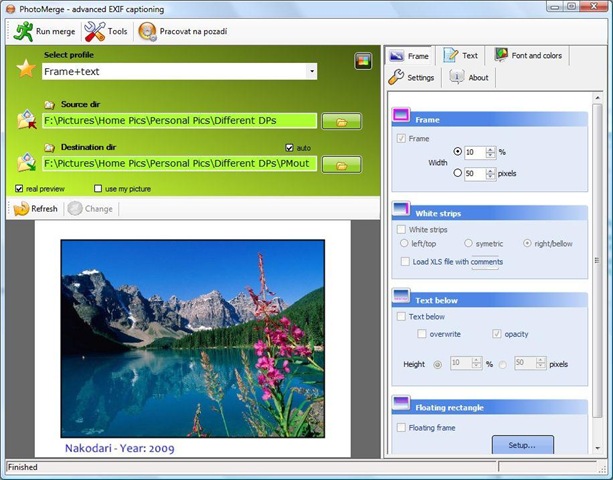
Below is the text I added to my display picture using this tool. It is a straightforward way to add text to photos without needing a complex editor.
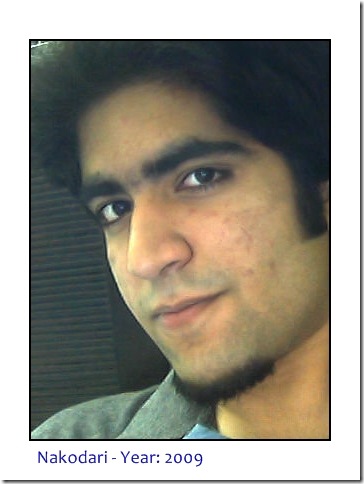
Features include:
- advanced text captioning in photos (file info, EXIF tags, etc…)
- batch processing
- framing, picture stamping
- new design (resizable window, themes, expandable tools, large preview, etc…)
- merge photos in background
- insert file info (creation date, filesize, …)
- insert baby’s age (couple of formats)
- insert a small graphics file
- real preview on current setting for more intuitive work
How to Add Text to Photos Using Photomerge in Adobe Photoshop Step by Step
If you are working in Adobe Photoshop or Photoshop Elements and want to stitch photos into a panorama, here is a complete walkthrough of the Photomerge process from shot to finished image.
Step 1: Capture Suitable Source Images
Good results start before you open Photoshop. When shooting your source frames, keep these guidelines in mind:
- Overlap each frame by 25–40%: Too little overlap and Photomerge cannot find matching reference points between shots. Too much overlap wastes frames without improving quality.
- Lock exposure and white balance: Set your camera to manual exposure or use exposure lock so every frame is lit identically. Mismatched brightness is one of the most common causes of visible seams.
- Use a tripod where possible: Keeping the camera at a consistent height and rotation point reduces parallax error, which is the main cause of ghosting and misalignment around foreground objects.
- Keep the lens focal length consistent: Do not zoom between shots. Even a small change in focal length will prevent accurate alignment.
Step 2: Load Your Files into Photomerge
In Photoshop, go to File > Automate > Photomerge. In the dialog that opens, click Browse to select your source images, or choose Add Open Files if the photos are already open in Photoshop. You can also drag files directly into the source list.
Step 3: Choose a Layout Option
Photomerge offers several layout modes. Selecting the right one for your scene makes a significant difference in the final result:
- Auto: Photoshop analyzes the images and applies the most suitable projection automatically. This is the best starting point for most situations.
- Perspective: Designates one image as the reference and distorts the others to match its perspective. Works well for narrow-angle panoramas but can produce strong warping on wide shots.
- Cylindrical: Projects images onto the inside of a cylinder. This reduces the bow-tie distortion that Perspective mode produces and is ideal for wide panoramas.
- Spherical: Maps images onto the inside of a sphere. Best used for 360-degree or very wide multi-row panoramas.
- Collage: Rotates and scales source layers to find the best overlap without distorting their content. Useful when perspective consistency matters less than individual image accuracy.
- Reposition: Aligns layers by moving them without any rotation or distortion. Use this when your images were captured under tightly controlled conditions.
Step 4: Enable the Blending Options
Before clicking OK, review the three checkboxes at the bottom of the Photomerge dialog:
- Blend Images Together: This is the most important option. It tells Photoshop to analyze the seam between each image and create smooth transitions using layer masks. Leave this checked in almost all cases.
- Vignette Removal: Corrects darkening around the edges of each frame — a common lens characteristic — before stitching. Enable it if your lens produces noticeable edge falloff.
- Geometric Distortion Correction: Compensates for barrel or pincushion distortion introduced by the lens. Particularly useful with wide-angle or fisheye lenses.
Click OK and let Photoshop process the files. Depending on the number and size of images, this can take anywhere from a few seconds to several minutes.
Step 5: Inspect the Seams
Once the merged document opens, zoom into any visible seam areas at 50–100% view to check for ghosting, color shifts, or misalignment. Look especially at areas with fine detail such as tree branches, fences, or architectural lines, as these are where stitching errors show most clearly.
Step 6: Crop or Fill Blank Edges
After stitching, the panorama will almost always have irregular blank or transparent areas around the edges where the frames did not perfectly align. You have two main options:
- Crop: Use the Crop tool to trim the image down to the largest usable rectangular area. This is the quickest and most reliable method.
- Content-Aware Fill: For areas where cropping would remove too much of the image, select the blank regions with the Magic Wand tool and use Edit > Fill > Content-Aware to have Photoshop intelligently fill the gaps based on surrounding pixels.
Flatten the image and save in your preferred format when you are satisfied with the result.
Troubleshooting Bad Photomerge Results
Even with careful preparation, Photomerge does not always produce a clean result on the first attempt. Here are the most common problems and how to fix them.
Insufficient Overlap Between Photos
If Photomerge reports that it cannot align some images, or if you see obvious mismatched sections in the output, the source frames likely do not share enough overlapping content. The fix is to reshoot the sequence with more overlap — aim for at least 30–40% of each frame shared with its neighbor. You cannot manufacture overlap in post-processing, so this usually requires going back to the original location.
Ghosting from Moving Subjects
People, vehicles, water, or foliage that moved between frames can appear as transparent duplicates or smeared blobs in the final panorama. In Photoshop, examine each source layer individually and use a brush on the relevant layer mask to hide the ghosted version and reveal the cleaner one from an adjacent frame.
Mismatched Exposure or White Balance
If you see a visible brightness or color shift at the seam between two frames, the source photos were captured with inconsistent camera settings. Prevention is the best fix — always lock exposure and white balance before shooting. If the photos are already captured, try equalizing their exposure and white balance in Camera Raw or Lightroom before loading them into Photomerge.
Parallax Error and Misalignment
Parallax happens when you rotate the camera around your body rather than around the lens’s nodal point, causing foreground and background objects to shift position relative to each other between frames. This is nearly impossible to correct fully in software. Reshooting with a proper panoramic tripod head, or choosing a scene with no close foreground objects, eliminates the problem at its source.
Soft or Visible Seams
If blending did not produce a seamless transition, check that “Blend Images Together” was enabled in the Photomerge dialog. You can also manually refine the auto-generated layer masks with a soft brush — painting with black hides content and painting with white reveals it, giving you precise control over exactly where each frame is visible.
Large Irregular Blank Areas at the Edges
Aggressive rotation between frames produces large irregular transparent borders. Cropping removes the problem quickly but may cut important parts of the scene. Use Content-Aware Fill to extend the image into blank areas, then inspect the filled regions at 100% zoom and retouch with the Clone Stamp tool anywhere the fill looks unnatural.
When Photomerge Cannot Solve the Problem
If Photomerge repeatedly fails to align a particular set of images, consider these alternatives:
- GIMP: Open the source images as layers and use the Align Visible Layers feature, or align them manually using guides. GIMP is free and handles many straightforward multi-image composites reliably. It also lets you add text to photos using its built-in text tool.
- Hugin: A free, open-source panorama stitcher that gives you granular control over control points, projection types, and lens correction. It has a steeper learning curve than Photomerge but handles difficult scenes — including 360-degree and multi-row panoramas — more robustly.
- Microsoft Image Composite Editor (ICE): A free Microsoft tool that handles panorama stitching automatically and exports to a wide range of formats including gigapixel-scale images.
Whether you want to add text to photos for watermarking, date stamping, or creative captions, the right tool depends on your workflow. The free PhotoMerge utility described at the top of this article remains one of the simplest ways to add text to photos in batch on Windows.
Enjoy!
