How To Install BlackArch Linux
BlackArch Linux is an Arch Linux-based security and penetration testing distribution (much like Kali Linux.) The operating system comes with many tools that you can use to test your security. Here’s how to install BlackArch Linux on your system.
Downloading BlackArch Linux
To download BlackArch Linux, you’ll need to head over to the official website. Once there, find the “Downloads” button, and click on it with the mouse. On the “Downloads” page, scroll down and locate “ISOs.”
After selecting “ISOs,” locate “BlackArch Linux 64 bit Slim ISO”. This version of BlackArch Linux is 4.4 GB in size and comes with a variety of security tools pre-installed, but not everything (like the 18 GB version).
Note: if you wish to download the BlackArch 18 GB ISO, feel free, although we won’t be covering it in this guide.
Once you’ve located “BlackArch Linux 64 bit Slim ISO,” click on it with the mouse. Selecting it will start up an HTTP download in your web browser. Alternatively, select the “Torrent” link next to it to download via a torrent client.
Creating BlackArch installation USB
To install BlackArch on a desktop or laptop, you must create an install USB. There are many ways to create an installation USB. However, in this tutorial, we will focus on making one with the Etcher tool.
Why Etcher? It is a cross-platform utility with the same UI on Mac OS, Linux, and Windows. So, the instructions are the same no matter what operating system you use to create a BlackArch installation USB.
Head over to the official Etcher website, download the tool and install it on your computer. Then, open it up and follow the step-by-step instructions below to create an installation USB for BlackArch.
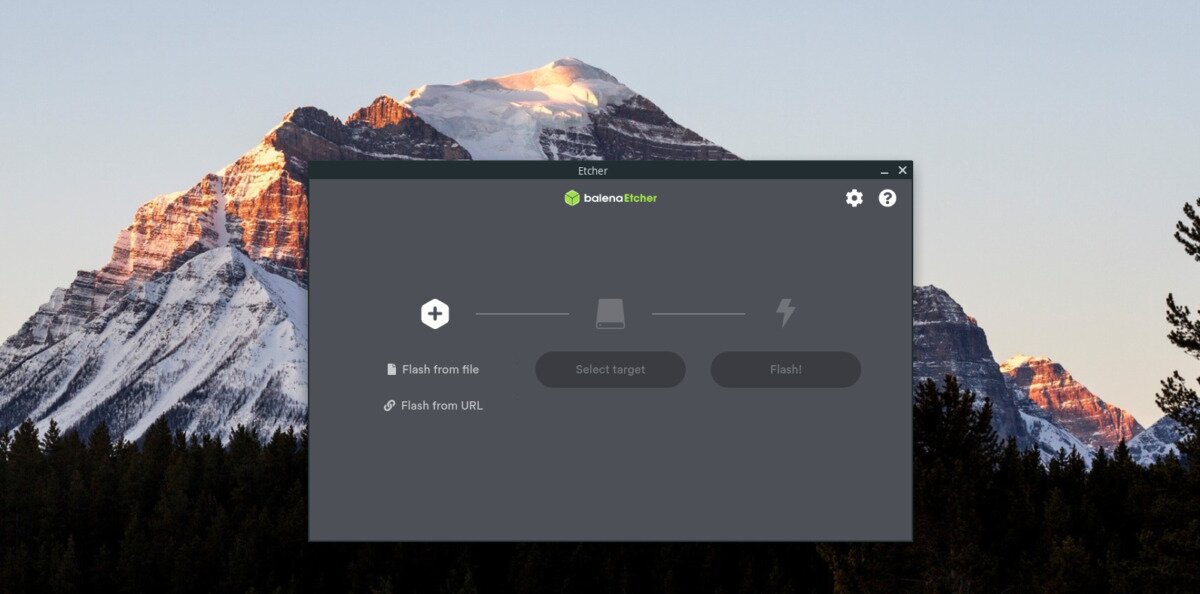
Step 1: Find the “Flash from file” button inside the Etcher application, and click on it with the mouse. Then, use the pop-up window to browse for the BlackArch ISO file downloaded previously to your computer.
Step 2: After selecting the BlackArch ISO file, find the “Select target” button in the Etcher app and click on it with the mouse. Once you choose it, a pop-up window will appear. Insert your USB, and pick it in the “Select target” window to use it with Etcher.
Step 3: Find the “Flash!” button with the mouse, and click on it to start the flashing process for BlackArch Linux. This process will take time, as the BlackArch ISO is 4.4 GB in size.
When the flashing process is complete, reboot your computer and log into the BIOS. Access the boot options and configure it to boot from USB so that you can load up the BlackArch installation.
Installing BlackArch Linux
To install BlackArch Linux, follow the step-by-step instructions below.
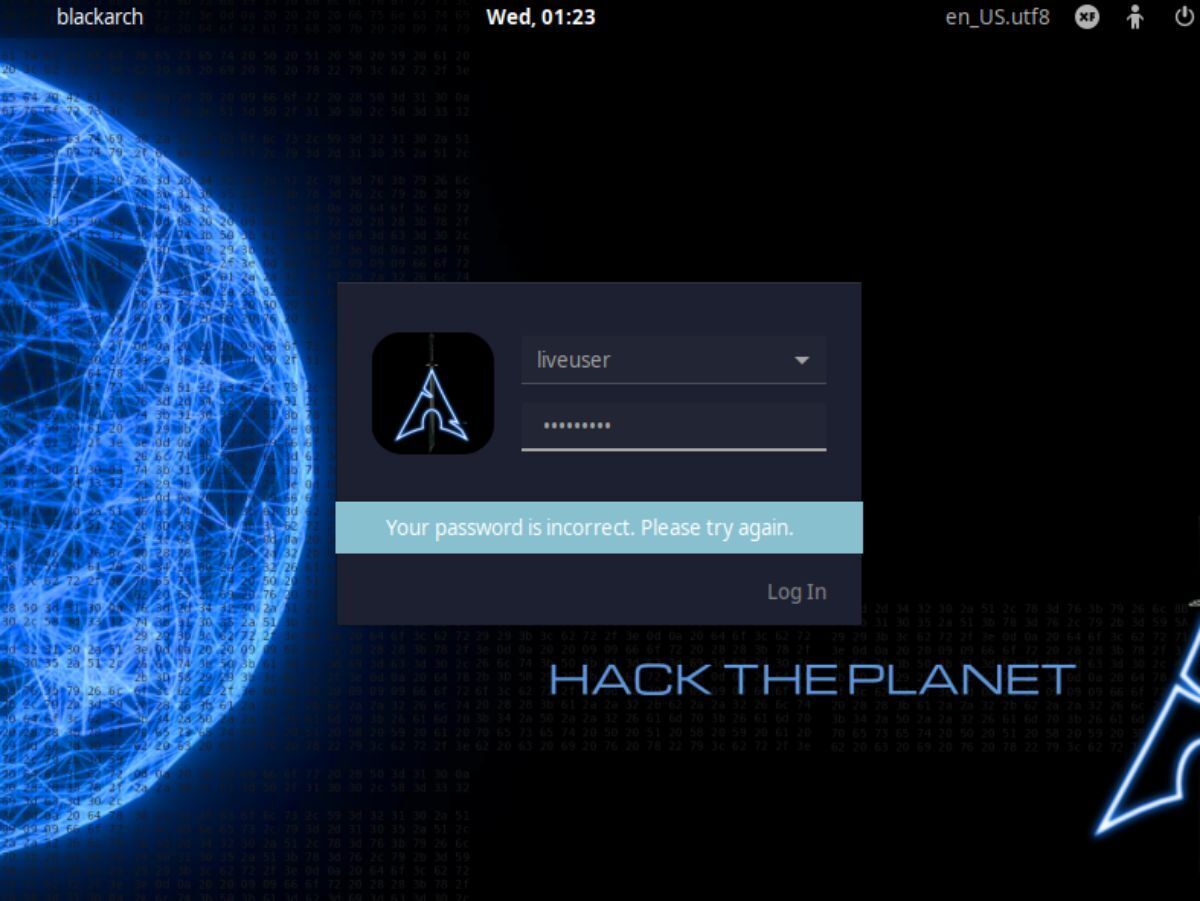
Step 1: On the BlackArch login screen, enter the password “blackarch.” Then, press the Enter key to access the BlackArch ISO desktop.
Step 2: Find the “Install BlackArch” icon on the BlackArch Linux desktop and click on it to open up the installer. After double-clicking on the installer, a password window prompt will appear. Enter “blackarch” as the password.
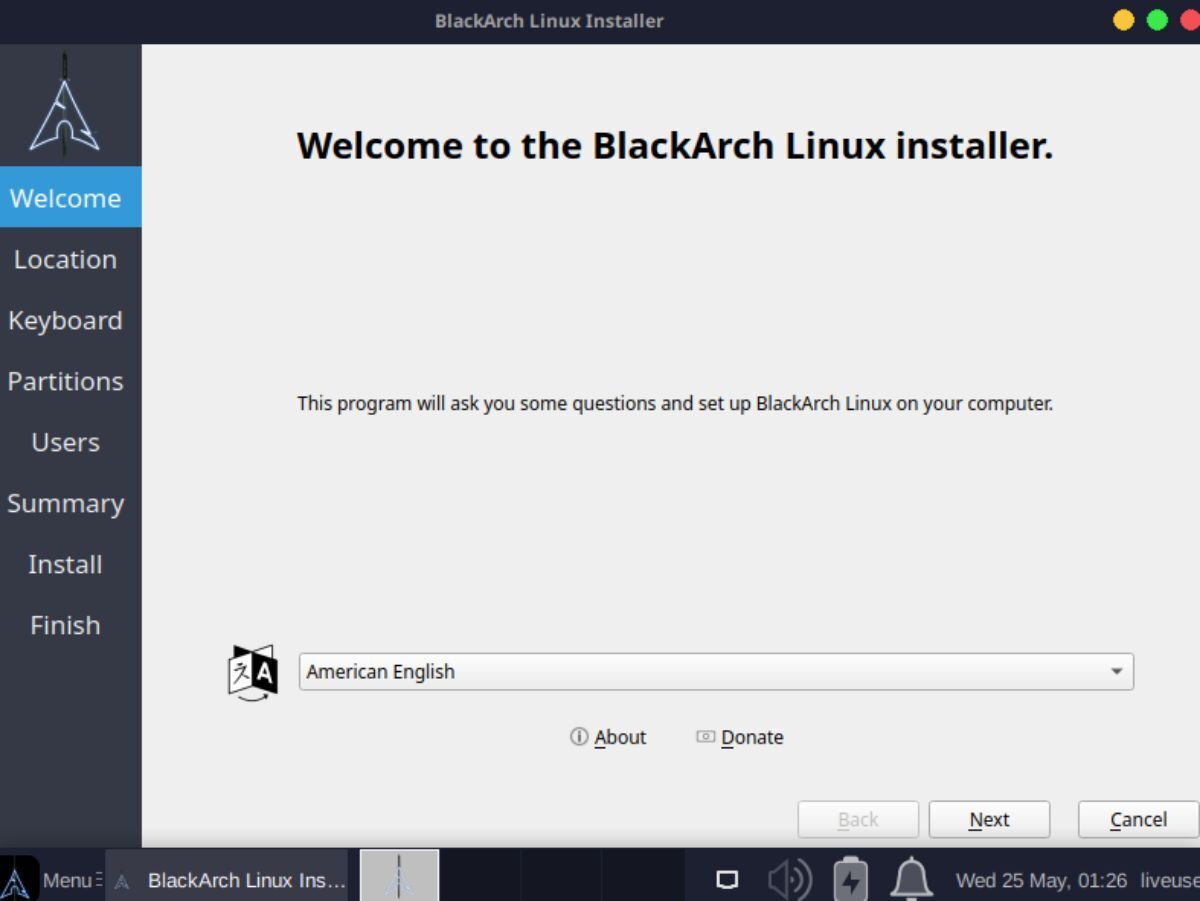
Step 3: Read the BlackArch welcome screen. Then, click on the “Next” button to move to the next page in the installer.
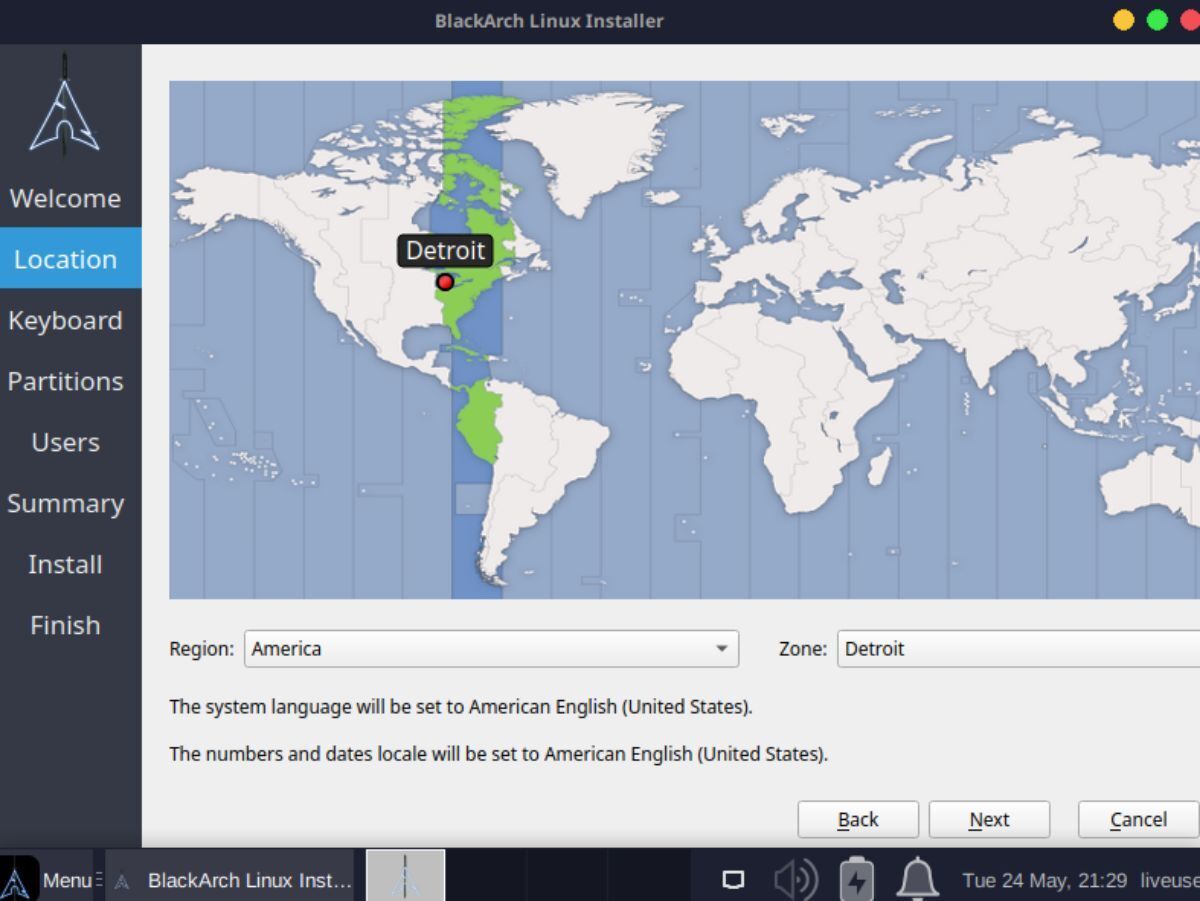
Step 4: Using the world map, select where you live. Doing this will allow you to set up the correct timezone for BlackArch Linux. Click “Next” to move to the next page when you’ve chosen your location.
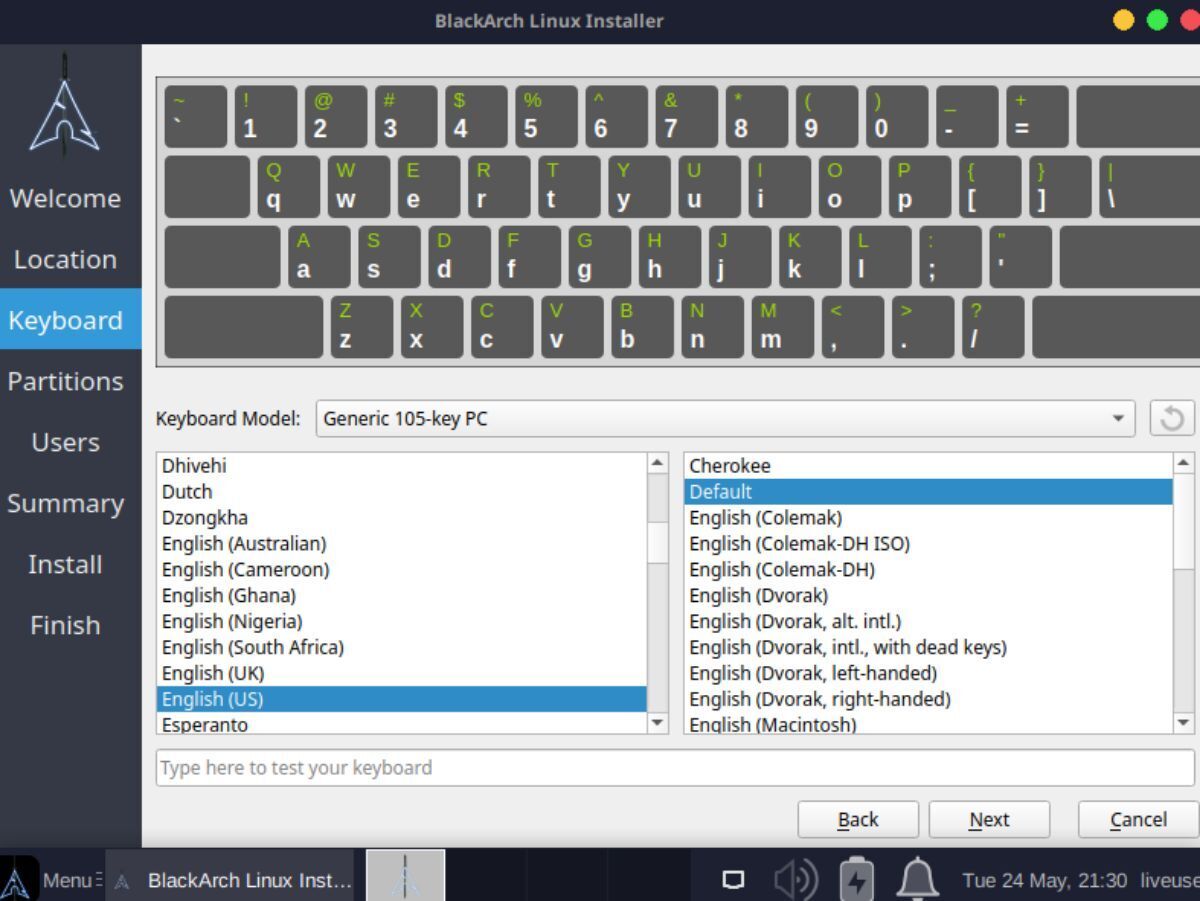
Step 5: You must now select your keyboard layout. Using the selector, choose the keyboard layout to use with BlackArch Linux. Click on “Next” when done to move to the next page.
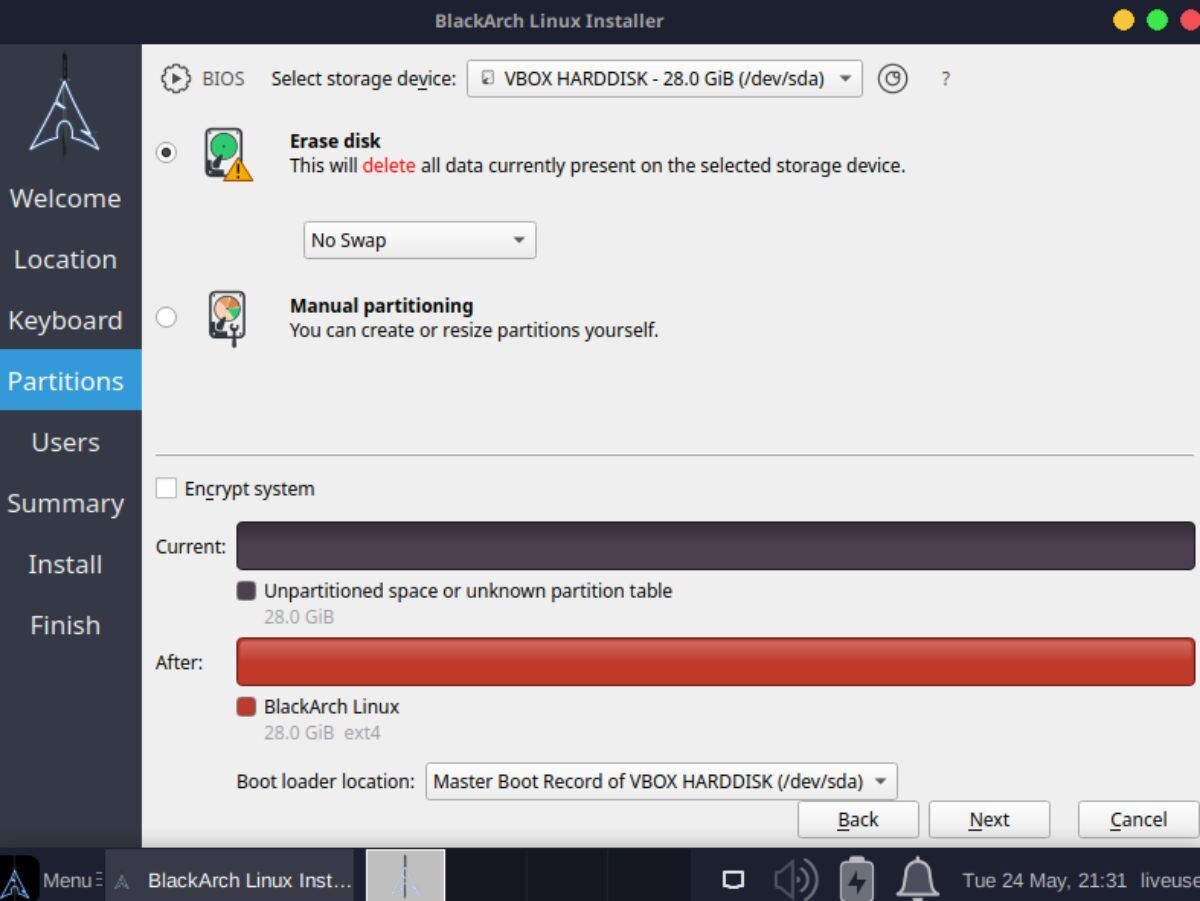
Step 6: After selecting a keyboard layout, you’ll need to choose a storage device for installation. Choose the drive you wish to install using the drop-down menu. Then, select “Erase disk.” Click “Next” when done to move to the next page.
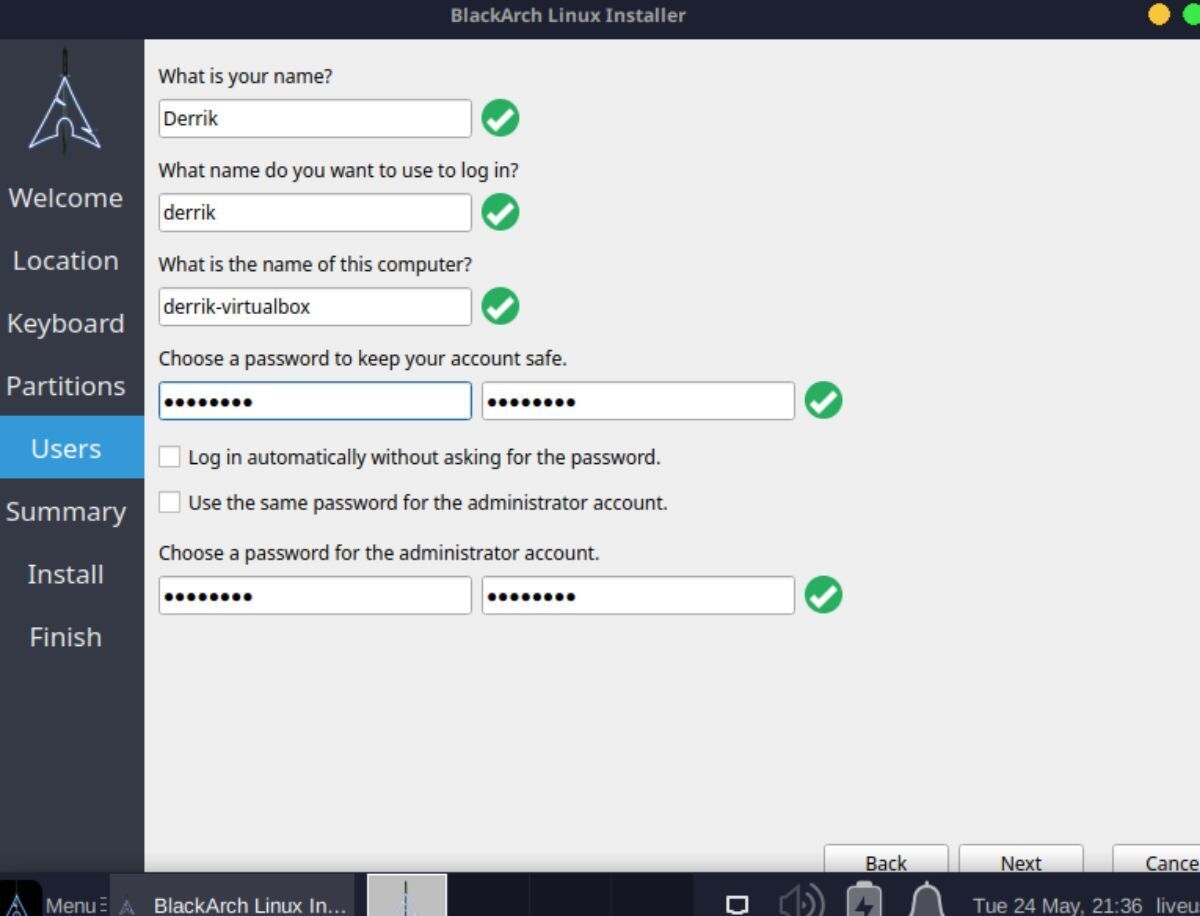
Step 7: Following setting up the hard drive setup, you’ll have to configure your username, password, computer name, and root password. Using the keyboard, fill out all text boxes.
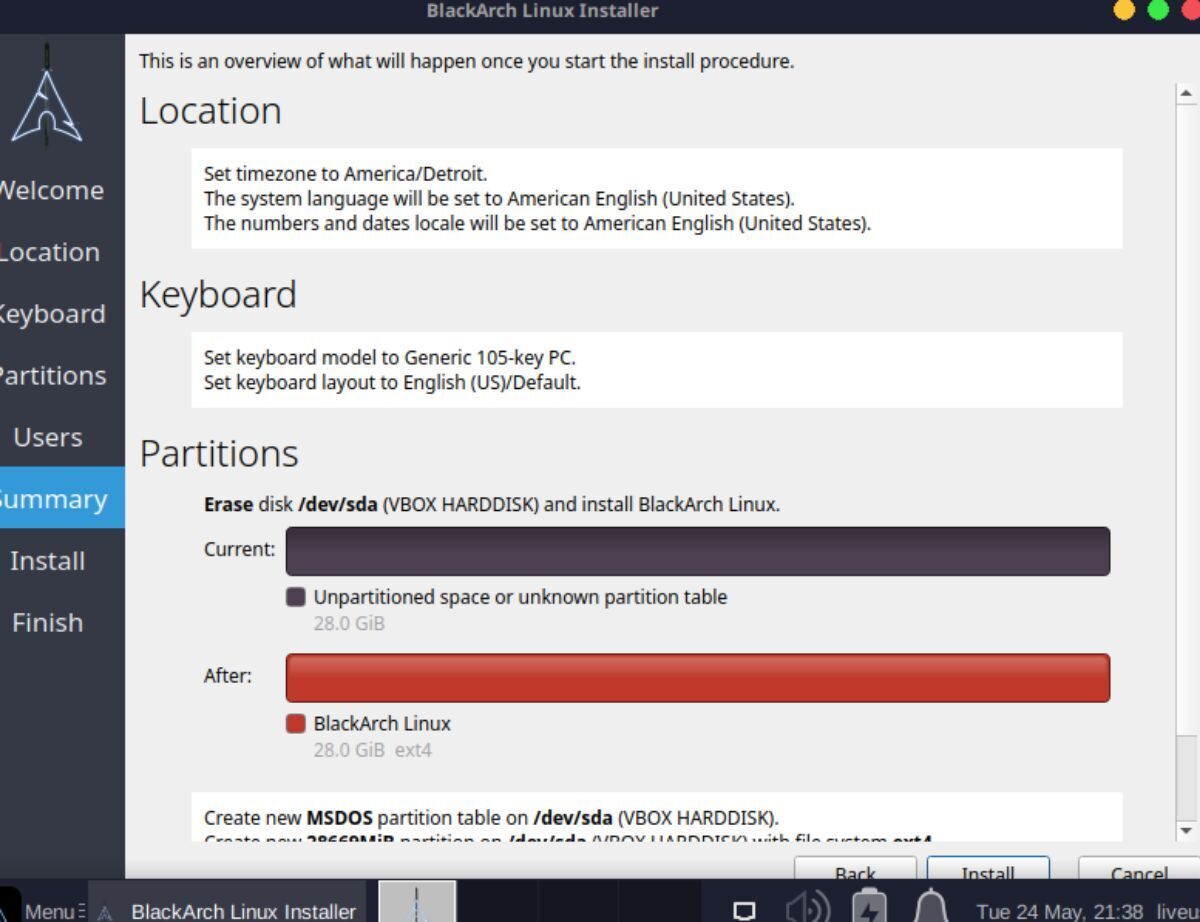
Step 8: With your username, computer name, password, and root password configured, the BlackArch installation tool will show you a detailed summary of what it will do during the installation process.
Take a look at this summary and read it to understand what will happen during the installation process. When you’ve finished reading the summary, click on the “Install” button to start the installation process of BlackArch Linux on your computer.
Step 9: When you select the “Install” button, BlackArch Linux will begin installing on your computer. This process will take some time to complete. When the process is finished, and BlackArch is set up on your computer, you must reboot to use your installed OS.
Log in to use BlackArch Linux on your desktop or laptop when you’ve finished rebooting.
