How To Set Up Rsync On Linux
These days, everyone has a Sync app. There’s Bittorrent Sync (now Resilio Sync), Syncthing and etc. These types of tools are gaining real traction in the server and consumer space, and they exist for one reason. They help users set up a local/internet based peer-to-peer syncing system. For the most part, these tools are pretty useful. That said, they can often take a bit to set up on different platforms (especially Linux). That’s why those looking to do a simple file sync between computers should instead consider using Rsync on Linux. It’s simple way to effectively (and quickly) transfer files over a network or the internet.
Installation
In this tutorial, we’ll be focusing on two tools: the Rsync command-line tool, and the Grsync GUI wrapper. Here’s how to install these programs on your Linux PC.
Note: you’ll also need to install SSH.
Ubuntu
sudo apt install rsync grsync
Debian
sudo apt-get install rsync grsync
Arch Linux
sudo pacman -S rsync grsync
Fedora
sudo dnf install rsync grsync
OpenSUSE
sudo dnf install rsync grsync
Other Linuxes
Rsync has been around since 1996. It is because of this, users should not have any issue finding and installing the app to their Linux PC, no matter how obscure. Search for “rsync” in your package manager and install it to the system. When it comes to the Grsync wrapper tool, it’s a bit iffy. Some Linux distributions may have it in their repositories, and some may not. To install it, open a terminal window, and search for “grsync”. Alternatively, download it from the website.
Using Rsync In The Terminal
The Rsync terminal tool is very powerful, and thus can be piped into a lot of different apps. That said, most users only really need to know the basics. Here’s how it works. To transfer all of the content of one folder directly to another, use this command:
Local to remote transfer
rsync -r /home/username/local/file/to/transfer/. user@host:/path/to/destination/folder
Remote to local transfer
rsync -r user@host:/path/to/remote/. /home/username/local/file/to/transfer/
These commands allow the user to directly, and recursively transfer all of the files in one folder to another either locally or remotely. Looking for more options? In the terminal, do: rsync -h and try out the many rsync switches and options available.
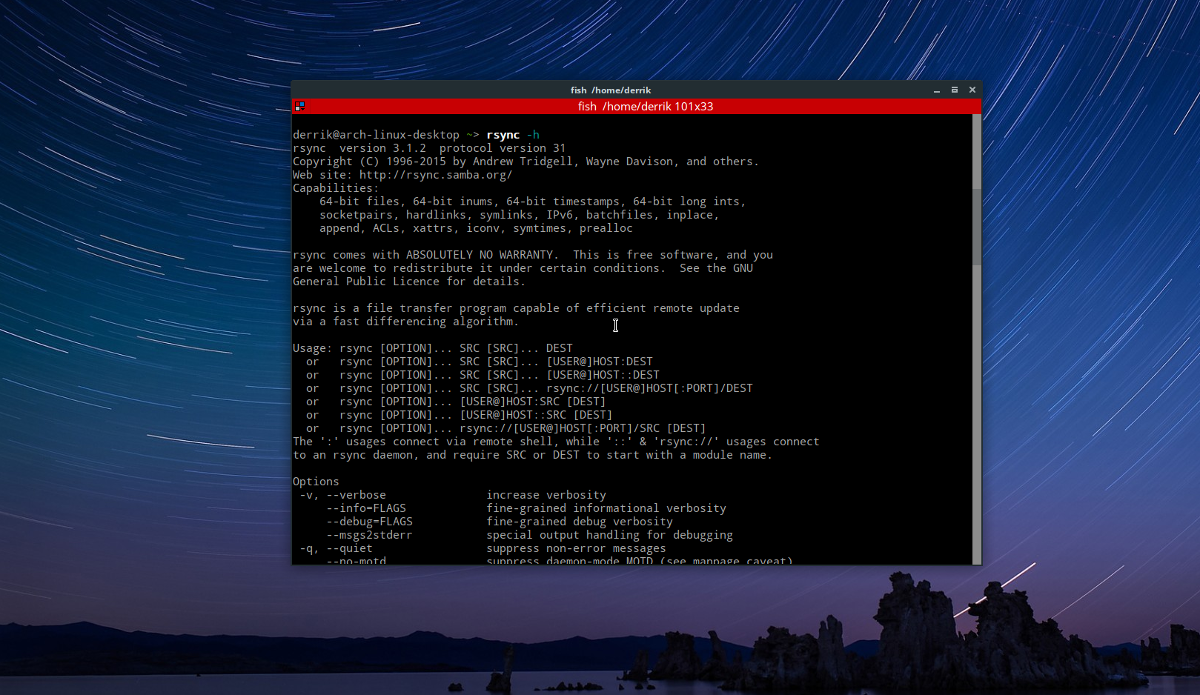
Note: The Rsync help notes are quite large. Often times the terminal may cut bits of it off (or at the very least users are forced to endlessly scroll through them). To make things easier, try saving the help instructions directly to a text file for later. It can be done with this command:
rsync -h >> rsync-help.txt
Using The Grsync GUI tool
For the most part, the Grsync tool really is the best way to use Rsync. This is because though the Rsync command itself is powerful, it’s syntax is quite confusing for those just looking to do a simple file sync. When it comes to terminal commands, this isn’t usually the case, however rules are meant to be broken.
Launch Grsync on your PC, and open the file manager too. Inside the file manager, find the local folder location you wish to transfer. If you’re receiving a transfer instead of sending one, find (or create) a destination folder.
After finding the location info, go to Grsync and start with the source setting. Click “open”, and browse for the local folder you’re looking to transfer. If the source is remote, write: user@host:/path/to/remote/.
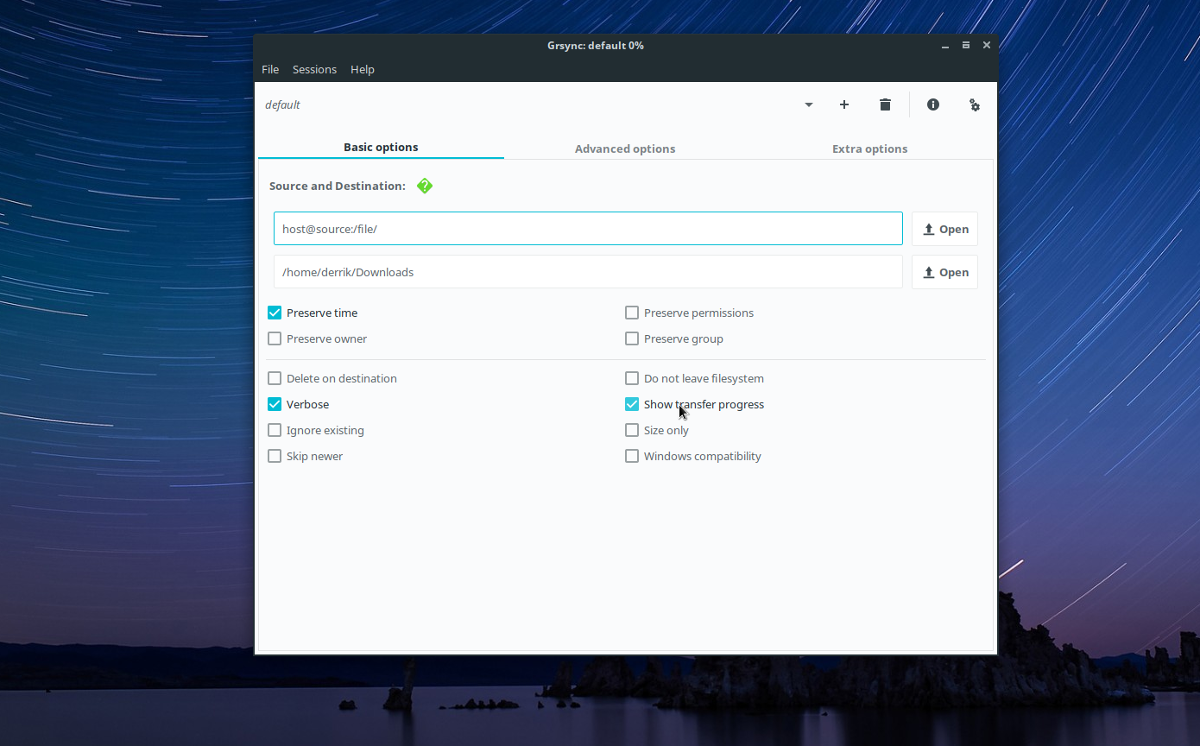
After entering/browsing for the source of the transfer, go to the next selection area. Click open to find a destination folder (if the transfer source is remote), or enter: user@host:/path/from/remote/ if you’re transferring over the network.
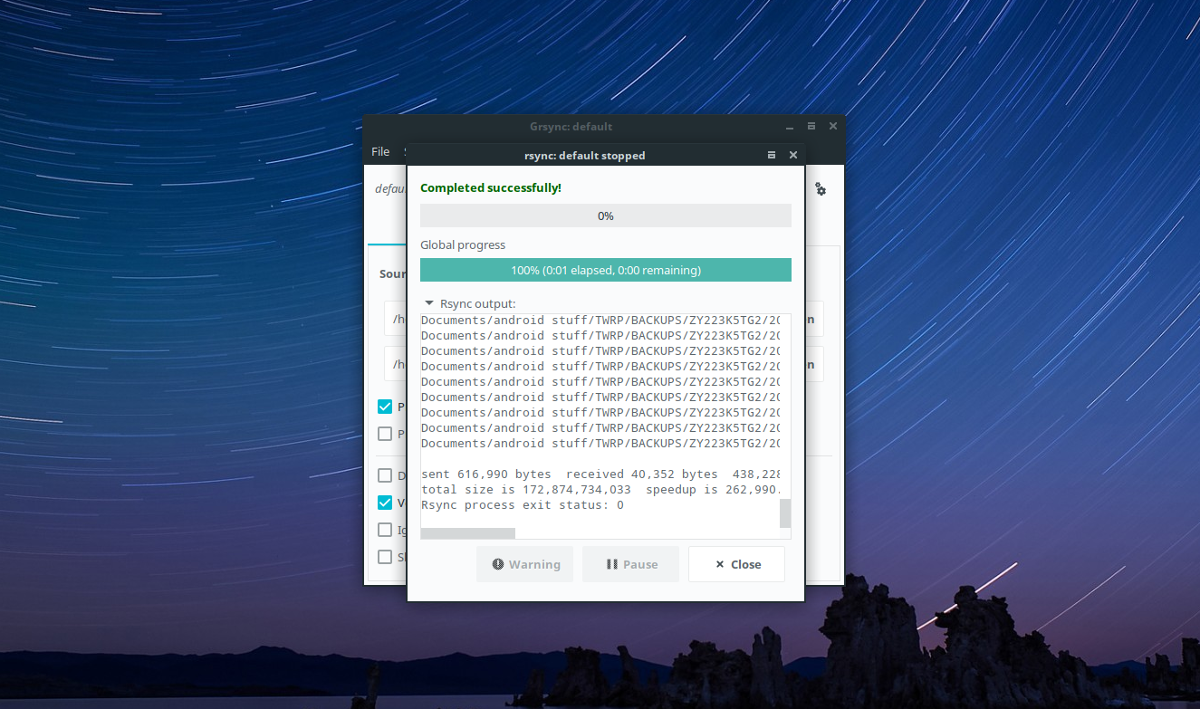
The Grsync tool has sane defaults, and doesn’t require any tinkering for the average user. To start the transfer, click the start button. When the transfer starts, a loading screen will appear. If you’re curious as to how Rsync is working, click the “rsync output” button. This will display a complete command output that the user can refer to.
Quick Grsync Tip
Not sure why your file sync isn’t working? Try using simulation mode. It allows users to tweak and set up an Rsync, and then run a simulation. No actual files are transferred. Instead, they’re simulated and output is given. This can help Rsync beginners tweak their transfer setups, detect errors and etc.
To access simulation mode in Grsync, click “File”, then click “Simulation”. Alternatively, open the Grsync simulator tool with the Ctrl + S keyboard shortcut.
Conclusion
Modern syncing applications have their use cases, that’s for sure. If you’re looking to distribute a bunch of files to 5 or 6 PC’s on a LAN or over the internet, Rsync isn’t for you. However, if what you want is to quickly keep a folder in sync between a few Linux PC’s Rsync is the clear winner here. There’s no need to mess with bar-codes, configure a web UI or log into an Android app. Just enter a command or use the Grsync tool and the transfer begins.
