Best Kodi Builds for 2025: Top Picks for Media Streaming
There’s a lot to love about the free media center software known as Kodi. The program makes it easy to organize and watch all of your movies and videos from a single interface, and it works on nearly every modern device, including smartphones, game consoles, and TV boxes. Third party add-ons give Kodi even more functionality by opening up a world of live streams. Want to watch an MLB baseball game as its being played? There’s an add-on for that. You can also take your Kodi customization a step further by installing builds, transforming your ordinary streaming experience into a masterpiece of sleek design.

What is a Kodi Build?
Kodi is completely open source, which means anyone can grab the code, customize it, and send out their own release. A number of development groups have started doing this as a way of delivering niche content to specific types of Kodi users. This has led to dozens of new builds released every year, some of which are more useful (and better built) than others.
Kodi builds can include everything from pre-installed repositories to exclusive themes and tweaked settings profiles. They can be centered around specific activities, such as watching live TV channels or sports, specific platforms such as touch-friendly mobile builds, or things like HD-only content. Regardless of the focus, each build uses Kodi as a core, which gives you the ability to customize everything to your heart’s content.
It’s important to note that many of these builds and themes rearrange Kodi’s base layout, which could make the instructions below difficult to follow. If you’re having trouble getting a new build running, switch back to the base skin by following the instructions below:
- Go to the Kodi main menu.
- Click on the gear icon, or find the settings page on your current theme.
- Choose “Interface settings”.
- Find “Skin”, which may be under the “Look and feel” category.
- Change the skin back to Kodi’s default, called Estuary.
- Return to the main menu with the layout restored.
Before Using Kodi, Get a Good VPN
Kodi is open source, virus free, and completely legal to use. Some of the third party add-ons bend that last definition quite a bit, however. Unofficial add-ons draw from streaming sources gathered by their developers. You never know where these videos came from or whether or not they were obtained legally, turning an innocent afternoon of movie watching into a potentially illegal activity.

VPNs encrypt your online traffic so it’s impossible for third parties to read. Hackers, government agencies, and even your service provider will be unable to determine what you’re doing on the internet or which sites you’re accessing, allowing you to surf and stream in complete privacy. Using a VPN is a good idea even if you don’t plan on accessing content of questionable legal origin, as a number of ISPs flag Kodi users and artificially slow down their connection speeds.
VPN encryption brings a host of other benefits, including:
- Watch videos from other countries on Netflix, Hulu, BBC iPlayer, and more.
- Protect your personal data while traveling or using public Wi-Fi.
- Stop websites and government agencies from tracking you.
- Prevent hackers from seeing or stealing your information.
- Unblock censored websites and geo-restricted content.
How to Choose the Best VPN for Kodi
VPNs sound like they should be complicated pieces of software; there’s encryption levels to discuss, acronyms to memorize, and lots of talk about government agencies and clever hackers. The good news is you don’t need to be a computer genius to take advantage of a VPN. All you really have to do is sign up, download, and start enjoying the open and private internet.
Choosing a VPN that best suits your needs can still be a little overwhelming. Fortunately, we’ve simplified the process by selecting the most important criteria, listed below. All of our VPN recommendations deliver these features and much more, so if you’re looking for the best VPN to use with Kodi, you’ve come to the right place.
Fast download speeds – Speed is king when it comes to Kodi streams. VPNs are a little slower than most standard internet connections, so you’ll want a service that puts a high priority on lightning-fast downloads.
Zero-logging policy – Keeping your activity private is of paramount importance. The foundation for this is a zero-traffic logging policy the VPN service never deviates from. If logs are kept, your data can fall into the wrong hands. If no logs exist, no record of your streams does, either.
Allowed traffic and file types – Some VPNs put a cap on bandwidth, throttle speeds, or even block P2P networks and torrent traffic. Any one of these restrictions can bring your Kodi streaming to a halt. Our recommended VPNs never monitor traffic or stop you from using the internet.
Server availability – A general rule for VPNs is the more servers, the better. A wider network gives you more options to find a fast connection with a close, lag-free server.
IPVanish
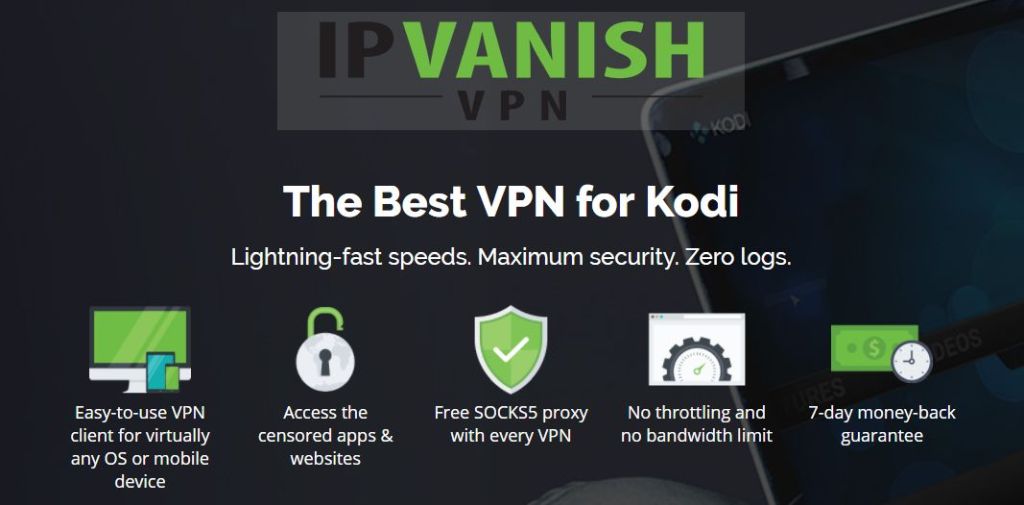
IPVanish has all the right ingredients for an incredible Kodi streaming experience. It’s fast enough to support HD videos, it has a great zero-traffic logging policy, it doesn’t block P2P or torrent traffic, and uses strong encryption to keep all of your activity hidden from prying eyes. IPVanish backs these incredible features up with a network of over 850 servers in 60 different countries, enough to guarantee you’ll find a fast connection no matter where you live.
IPVanish also includes the following:
- Custom apps for a wide variety of platforms, including desktops, laptops, and mobile devices.
- Fast and secure servers allow for incredible lag-free video streams through Kodi.
- Unlimited bandwidth and no restrictions on torrent or P2P network data.
- Download torrents with full privacy and anonymity.
EXCLUSIVE DISCOUNT: Get 63% off when you sign up for a year of IPVanish, just $3.99 per month! Each plan is covered by an amazing 7-day money-back guarantee, ensuring a risk free trial for your new, private internet connection.
Best Kodi Builds of 2022: How to Install and Manage
Kodi builds are a little different than add-ons. They’re usually obtained the same way, through repositories downloaded from group websites, and they’re installed through the Kodi interface just like an add-on. When it comes to using and managing them, though, Kodi builds are an entirely different creature. Most of them rearrange the Kodi interface, which causes some confusion.
To start with, Kodi builds can be hefty downloads. Add-ons usually weigh in at just a few MBs, but a build can be 100 MB, 200 MB, or even more. This means it can take a while to download, especially if the repository host site is slow (they often are). Due to the nature of Kodi’s interface you also won’t be able to run the download in the background. The best plan of action is to start the process and step away from your device for a few minutes.
With builds installed, you can now switch them from the main menu. Simply choose “Add-ons” followed by “Program add-ons” and you’ll see a list of your installed builds. Pick the one you want to activate and Kodi will apply the changes. You’ll often need to restart the program for all of the customizations to take effect.
There are two basic methods of installing builds: downloading and manually adding repos, and having Kodi download the repos for you. The latter is usually easier to do, and that’s the method we outline in the instructions below. Before you can do this, though, you’ll need to give Kodi permission to access external sources.
- Open Kodi and click on the gear icon to enter the System menu.
- Go to System Settings > Add-ons.
- Toggle the slider next to the “Unknown sources” option.
- Accept the warning message that pops up.
IMPORTANT: If anyone, like me, encounters a weird problem with the download stopping at 39.99MB saying the build failed to install, we identified the problem to be the antivirus program (or a firewall). I’m running Avast free and it was stopping me from downloading the full file; so make sure you disable your A/V for a while, until you install the builds.
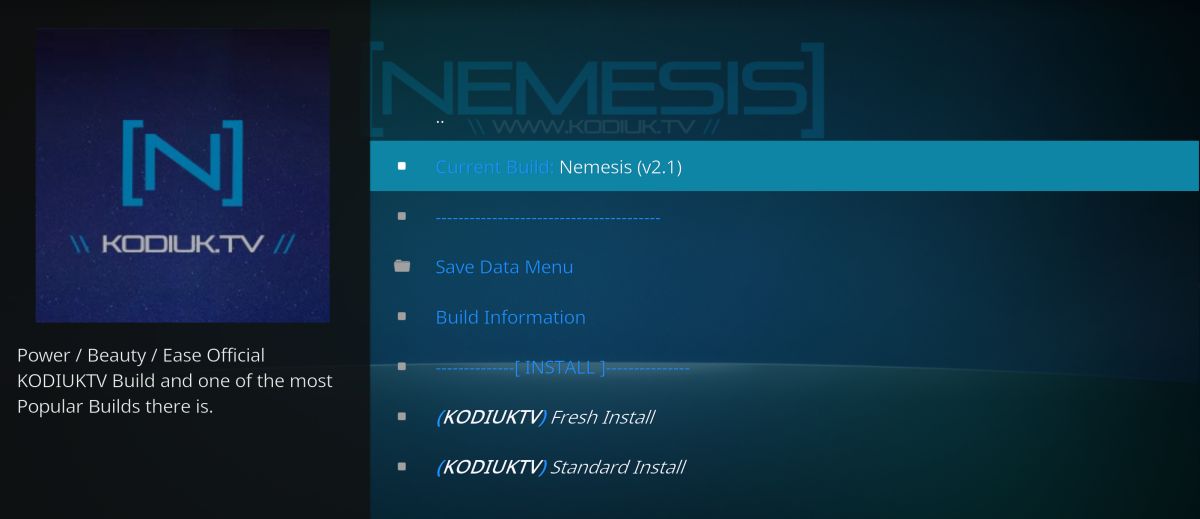
Nemesis – Simple but Useful
Nemesis is a Kodi build that doesn’t go crazy with customization. A lot of themes and designs like to throw massive images and garish colors all over the place, but Nemesis aims for simplicity, function, and style. It’s made by the KodiUK team, who operate the fantastic repository of the same name, and it includes basic add-ons for everything from movies to cartoons to sports to TV shows to kids’ content. It’s also a great build for mobile devices, too, all thanks to its straightforward design.
To install Nemesis, you’ll need to add the KodiUK repository, followed by a secondary add-on found within that repository. If you already have the KodiUK repo installed, skip to step 14 below.
How to install the Nemesis build
- Open Kodi on your local device.
- Click on the gear icon to enter the System menu.
- Go to File Manager > Add Source (you may need to click the double-dot to move to the top of the directory).
- Type in the following URL exactly as it appears: https://kodiuk.tv/repo
- Name the new repository “KodiUK”.
- Click “OK”.
- Go back to the Kodi main menu.
- Select “Add-ons”.
- Click the open box icon at the top of the menu bar.
- Choose “Install from Zip File”
- Select “KodiUK”.
- Search for this file and select it: repository.kodiuktv-1.0.0.zip (Note that the version numbers may change).
- Install the zip file.
- Go back to the Add-ons menu and click the open box icon again.
- Choose “Install from repository”.
- Find “KODIUKTV Repo”.
- Scroll down to “Program add-ons”.
- Choose “KODIUKTV Community Portal”.
- Read the messages that appear after installation completes.
- Go back to the Kodi main menu.
- Go to “Add-ons” then “Program add-ons”.
- Choose “KODIUKTV Community Portal”, then install.
- Enter the “Builds” folder.
- Select the latest version of Nemesis and install it.
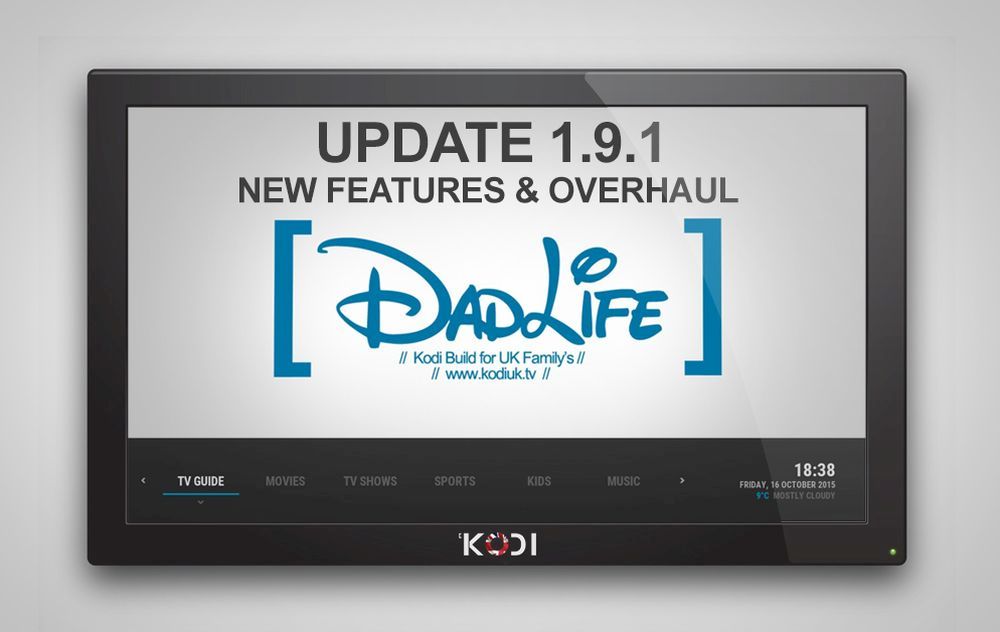
Dad Life – Kodi for Kids
Dad Life is one of the more single-minded of the Kodi builds, but it’s got a fantastic design that’s perfectly suited for kids and parents. The basic idea behind Dad Life is to make Kodi friendlier for children. It comes with a clean, simple skin and a handful of links to movies, TV shows, sports, kids programming, music, and YouTube videos. All you have to do is activate the menu, pick a show, plop the kids down and let Kodi keep them entertained.
To install Dad Life, you’ll need to add the KodiUK repository, followed by a secondary add-on found within that repository. If you already have the KodiUK repo installed, skip to step 14 below.
How to install the Dad Life build
- Open Kodi on your local device.
- Click on the gear icon to enter the System menu.
- Go to File Manager > Add Source (you may need to click the double-dot to move to the top of the directory).
- Type in the following URL exactly as it appears: https://kodiuk.tv/repo
- Name the new repository “KodiUK”.
- Click “OK”.
- Go back to the Kodi main menu.
- Select “Add-ons”.
- Click the open box icon at the top of the menu bar.
- Choose “Install from Zip File”.
- Select “KodiUK”.
- Search for this file and select it: repository.kodiuktv-1.0.0.zip (note that the version numbers may change).
- Install the zip file.
- Go back to the Add-ons menu and click the open box icon again.
- Choose “Install from repository”.
- Find “KODIUKTV Repo”.
- Scroll down to “Program add-ons”.
- Choose “KODIUKTV Community Portal”.
- Read the messages that appear after installation completes.
- Go back to the Kodi main menu.
- Go to “Add-ons” then “Program add-ons”.
- Choose “KODIUKTV Community Portal”, then install.
- Enter the “Builds” folder.
- Select the latest version of Dad Life and install it.
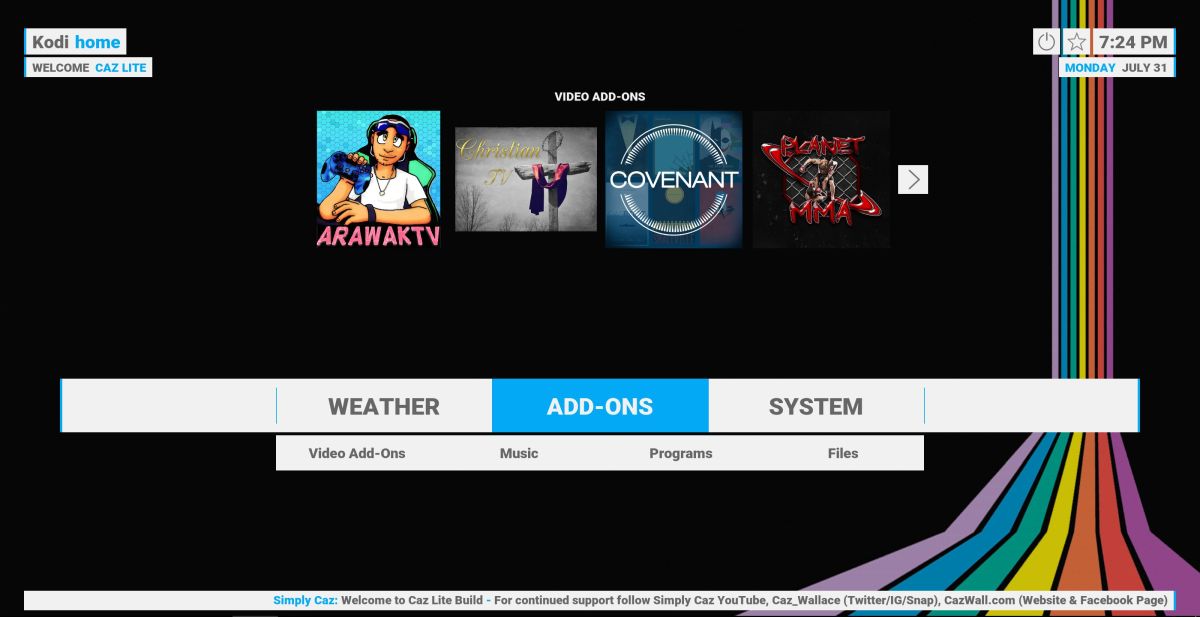
Caz Lite – Lean, Fast, Functional
Assembled by the Simply Caz team, Caz Lite is described as a bare-bones build that focuses on just the basics. You’re here to stream movies, not wade through a thousand menus with gigantic background images, right? With Caz Lite, you’ll get a handful of useful movie, TV, and sports add-ons along with an interface that’s completely clutter-free. With this straightforward design you won’t have a problem navigating Kodi on mobile or TV box devices, making it a fantastic all-purpose build.
To install Caz Lite, you’ll need to add the Simply Caz repository, followed by a secondary add-on found within that repository. If you already have Simply Caz installed, skip to step 14 below.
How to install the Caz Lite build
- Open Kodi on your local device.
- Click on the gear icon to enter the System menu.
- Go to File Manager > Add Source (you may need to click the double-dot to move to the top of the directory).
- Type in the following URL exactly as it appears: https://repo.cazwall.com/sc/
- Name the new repository “cazwall”.
- Click “OK”.
- Go back to the Kodi main menu.
- Select “Add-ons”.
- Click the open box icon at the top of the menu bar.
- Choose “Install from Zip File”.
- Select “cazwall”.
- Open the folder marked “Repository (Click Here)”.
- Install the file named repository.simplycaz-####.zip
- Go back to the Add-ons menu and click the open box icon again.
- Choose “Install from repository”.
- Find and click “Simply Caz Repo”.
- Go to “Program add-ons”.
- Scroll down and click on “Simply Caz Wizard”, then install.
- Go back to the main Kodi menu.
- Select “Program add-ons” and choose the Simply Caz Wizard.
- Go into the “Builds” folder.
- Select “Caz Lite” and install the build.
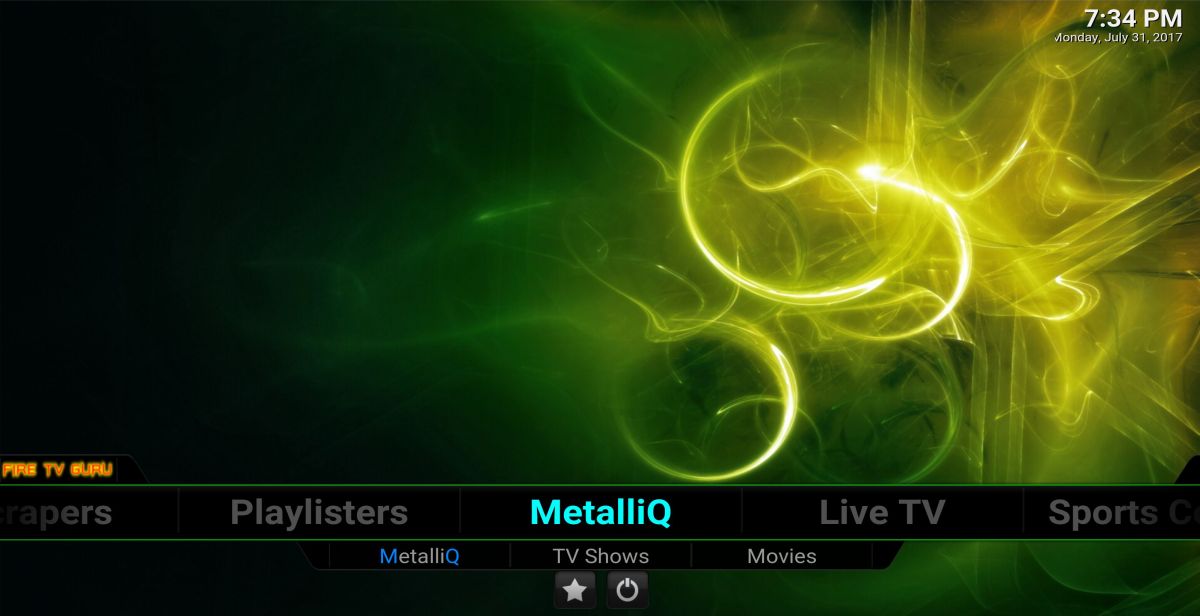
Fire TV Build – Easier Fire Stick Streaming
Few things are more frustrating than navigating a program built for touch screens using a six-button Bluetooth remote. Amazon Fire TV device users have been dealing with this for ages. It’s easy to install Kodi on an Amazon Fire TV Stick, but once you’re up and running you’ll quickly realize a better build is necessary. That’s where the Fire TV Build comes into play, which offers a lightweight download, a clutter-free interface, and easy access to the most commonly used add-ons for TV shows, movies, and sports streams. You couldn’t ask for a better Fire TV experience!
To install Fire TV Build, you’ll need to add its repository followed by a secondary add-on found within that repository. If you already have the Fire TV Guru repo installed, skip to step 14 below.
How to install the Fire TV Build
- Open Kodi on your Fire TV Stick.
- Click on the gear icon to enter the System menu.
- Go to File Manager > Add Source.
- Type in the following URL exactly as it appears: https://firetvguru.net/fire
- Name the new repository “firetvguru”.
- Click “OK”.
- Go back to the Kodi main menu.
- Select “Add-ons”.
- Click the open box icon at the top of the menu bar.
- Choose “Install from Zip File”.
- Select “firetvguru”.
- Install the file named repo.firetvguru.zip
- Go back to the Add-ons menu and click the open box icon again.
- Choose “Install from repository”.
- Find and click “Fire TV Guru”.
- Go to “Program add-ons”.
- Scroll down and click on “Fire TV Wizard”, then install.
- Go back to the main Kodi menu.
- Select “Program add-ons” and choose the Fire TV Wizard.
- Go into the “Builds” folder.
- Select the appropriate build version and install it.
How to Restore the Default Kodi Theme
Did you install a theme or build that locks up as soon as you launch? Don’t worry, there’s a quick and easy way to get Kodi back to normal. All you have to do is find Kodi’s “userdata” folder created during installation, navigate to the “addons” subdirectory, then delete the folder that contains the problem theme. If you need help finding your userdata folder, the most common locations are listed below:
- Android – Android/data/org.xbmc.kodi/files/.kodi/userdata/
- iOS – /private/var/mobile/Library/Preferences/Kodi/userdata/
- Linux – ~/.kodi/userdata/
- Mac – /Users//Library/Application Support/Kodi/userdata/
- Windows – Start > Run – type %APPDATA%\kodi\userdata – press <Enter>
Don't miss this great deal

Tried to install Kodi, caused my linux computer to keep crashing. Heading back to windows.!!!!!!
stupid.
Joshed, thank you for your most thoughtful and helpful reply. The help was greatly needed and appreciated.
Kodi crashes within two minutes and I get a popup that says Microsoft will search for a solution to my problem. Of course, I never hear anything from MS. My Lenovo X201 has an Intel i5 2.5 with 6 gigs of ram so it should be able to run the Nemesis build 2.2
Any ideas?
try another build.