How To Make A Virtual Machine In VirtualBox On Linux
There are many different ways to run virtual machines on Linux. By far one of the easiest (and most popular) ways of doing so is with Oracle VM Virtualbox. It’s a great tool that makes virutalizing on the Linux platform easy, and has tons of very useful, user-friendly features. When it comes to using Virtualbox on Linux, there are several things to understand. First, the Virtualbox VM manager is one of the most used VM tools on Linux and elsewhere. It is because of this that the installation process is pretty easy — for the most part. A lot of Linux operating systems distribute the software.
SPOILER ALERT: Scroll down and watch the video tutorial at the end of this article.
That said, the tool also requires a kernel module. On some Linuxes, the kernel module installs automatically with DKMS. This technology allows the necessary kernel-level software to be compiled at each software update. On others, users must enable the kernel modules manually, and may run into issues.
Use at your own risk.
Ubuntu
sudo apt install virtualbox
Debian
sudo apt-get install virtualbox
Arch Linux
sudo pacman -S virtualbox
During the installation, the user is asked to choose between two different options. The default is a DKMS setting that will automatically re-build the kernel modules. The other allows the user to do it manually.
If you’re not looking to deal with any trouble, press the Enter key to choose DMKS while installing the tool.
Fedora
sudo dnf install virtualbox
OpenSUSE
sudo zypper install virtualbox
Installing for other Linuxes
Along with being directly distributed via default software sources on Linux, users can grab a standalone .RUN binary, and install the Virtualbox VM tool manually. This option is perfect if your Linux distribution (for some reason) chooses not to distribute Oracle’s popular tool. Additionally, installing the binary version may be necessary if you’re looking for new software that the version on your operating system does not yet support.
Before installing it, you’ll need to do two things: install the kernel headers, and update the system. Kernel headers are necessary, as installing and compiling Linux kernel modules isn’t possible without them. Install them by looking through your operating system’s package manager, and searching for “kernel headers”.
Note: using the LTS Linux kernel? You’ll need to install the LTS headers.
Also be sure to install these packages, as they’re required for compilation: “gcc, make, autoconf, binutils, xorg-server-devel”. Understand that the names of these packages will vary depending on what Linux distribution you use. For best results, refer to your Linux operating system’s Wiki page for kernel modules.
With all the requirements met, head over to the Virtualbox website, and download the .RUN package. Look for the download link under “All distributions (built on EL5 and therefore do not require recent system libraries)”. Click on i386 for 32 bit, and AMD64 for 64bit.
When the file is on your PC, open a terminal window and use the CD command to go to the Downloads folder.
cd ~/Downloads
Then, change the permissions of the RUN file with the chmod command.
sudo chmod +x VirtualBox-*.run
Start the install process by directly running the Virtualbox .RUN file. Users can do this by right-clicking on the file in the file manager, or (preferably) with the terminal.
Note: if you’re going to install the Virtualbox binary via the file manager, be sure to open your file manager in root.
Start the install process by first gaining root.
sudo -s
Then, run the file.
./VirtualBox-*.run
As the installation process begins, the software will install to the system, the kernel modules will build and etc. When it’s finished, reboot your Linux PC. Soon after, Virtualbox will be ready to use.
Creating A VM
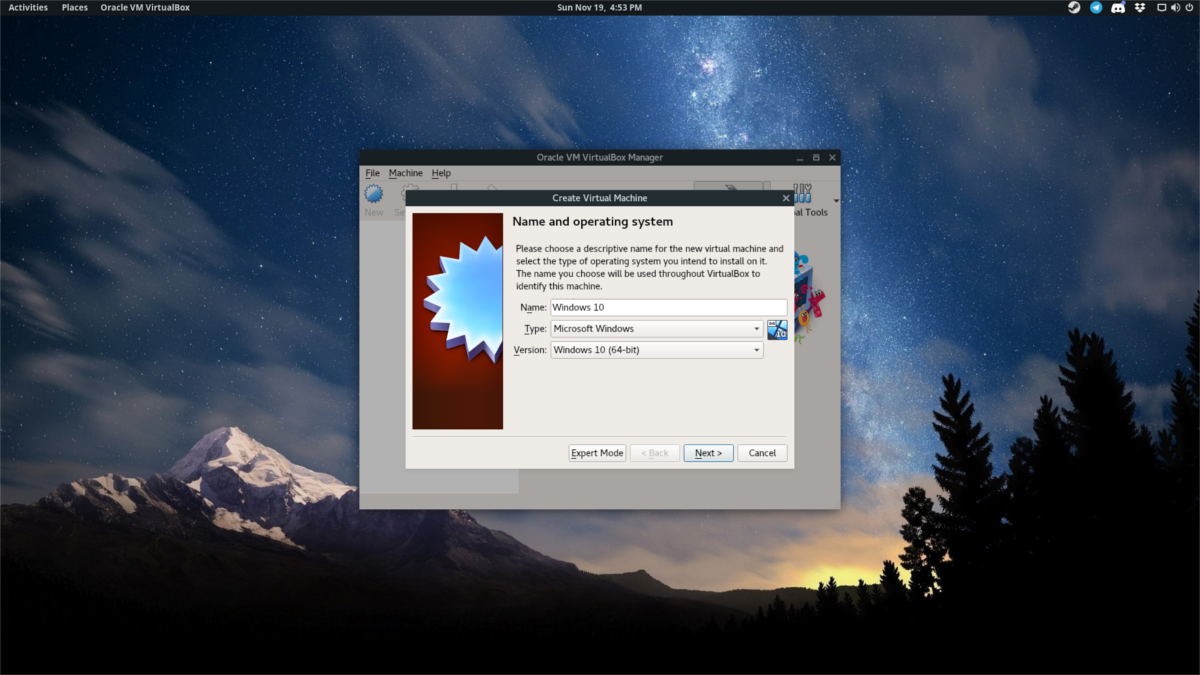
To create a new virtual machine, launch the Virtualbox tool. From here, click “New”. In this section, start typing the name of the operating system you’re looking to virtualize. This is actually very important, because as you do it, the program will look up defaults for the operating system (to make it easier to virtualize).
If for some reason, the operating system isn’t automatically detected, click the drop-down menu, and select the “type”. Also select the most applicable option under “version” as well.
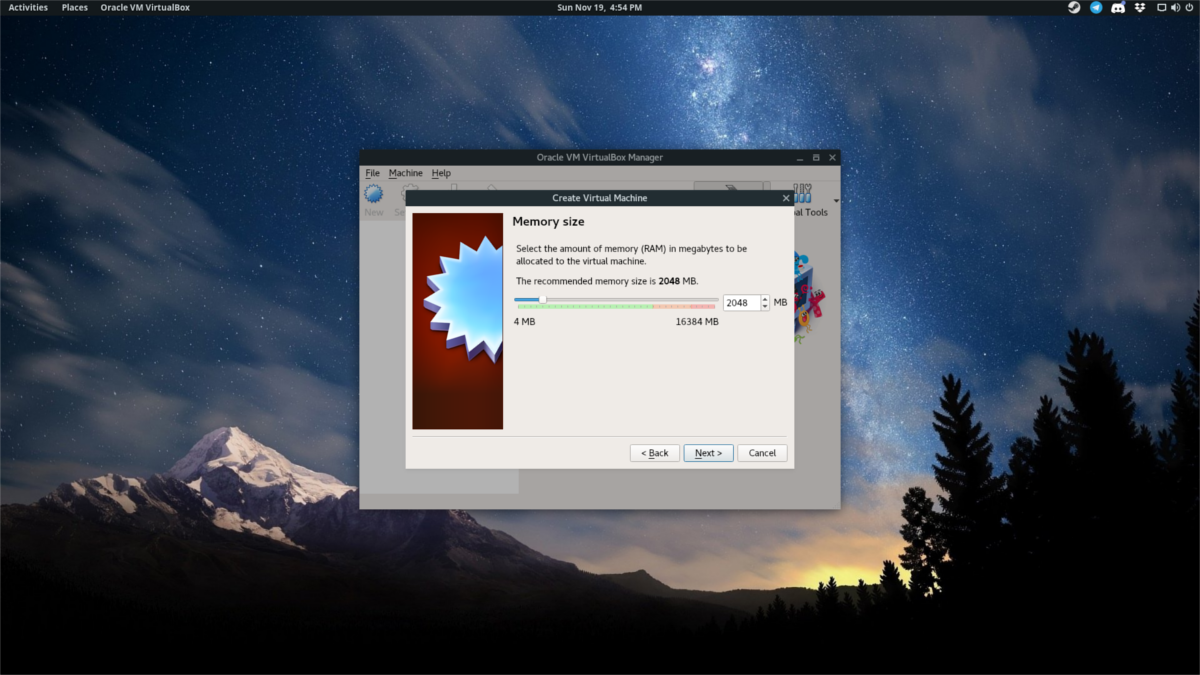
Click the next button to select the correct amount of RAM. If the software detected your OS automatically, it likely gave you enough RAM. Feel free to add more (or take some away) if you wish, by dragging the slider left or right. Then, click the next button to continue to the next page.
The third page is the hard drive creation area. Once again, if Virtualbox automatically detects your OS, don’t worry about this step. Just click next to go through it, and stick with the default options. If the tool didn’t automatically detect it for you, you’ll need to specify the size manually.
Note: be sure to select VDI during the hard drive process, unless you know what you are doing.
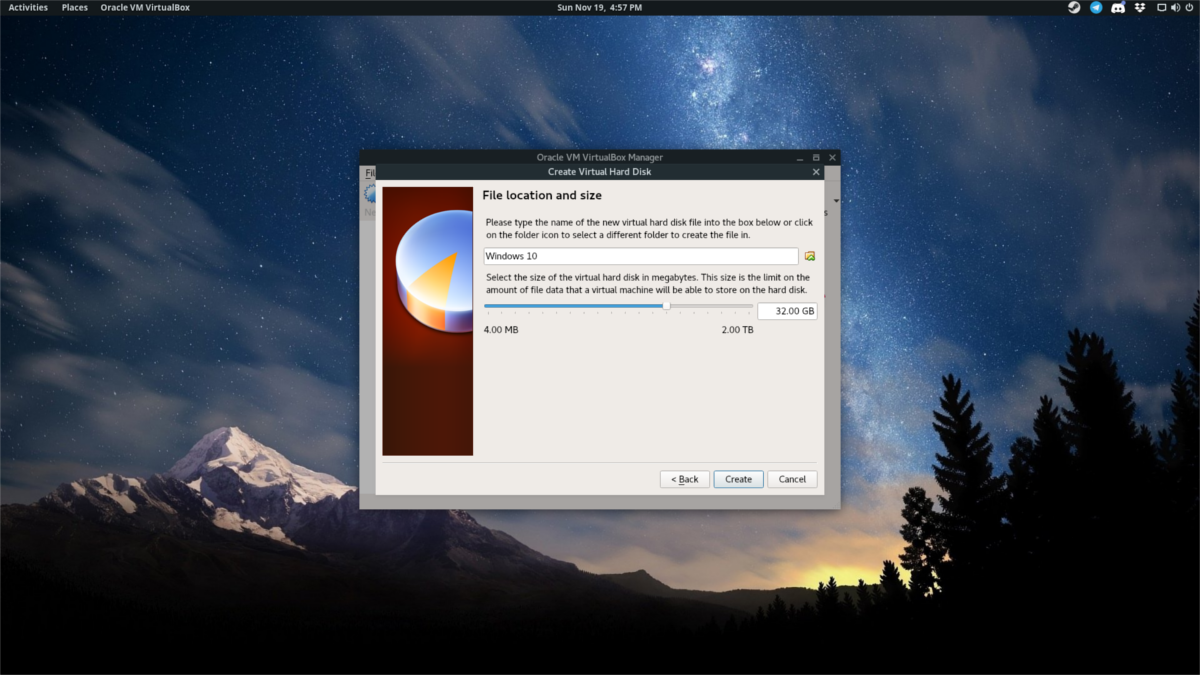
During the hard drive setup process, Virtualbox defaults to “dynamically allocated”. This means that the virtual disk will only expand as files get bigger. This is good for those who do not have a lot of physical space.
With the hard drive set up, the wizard is complete. Click “finish” to return to the main Virtualbox window. Start up your VM by selecting it and clicking “start”.
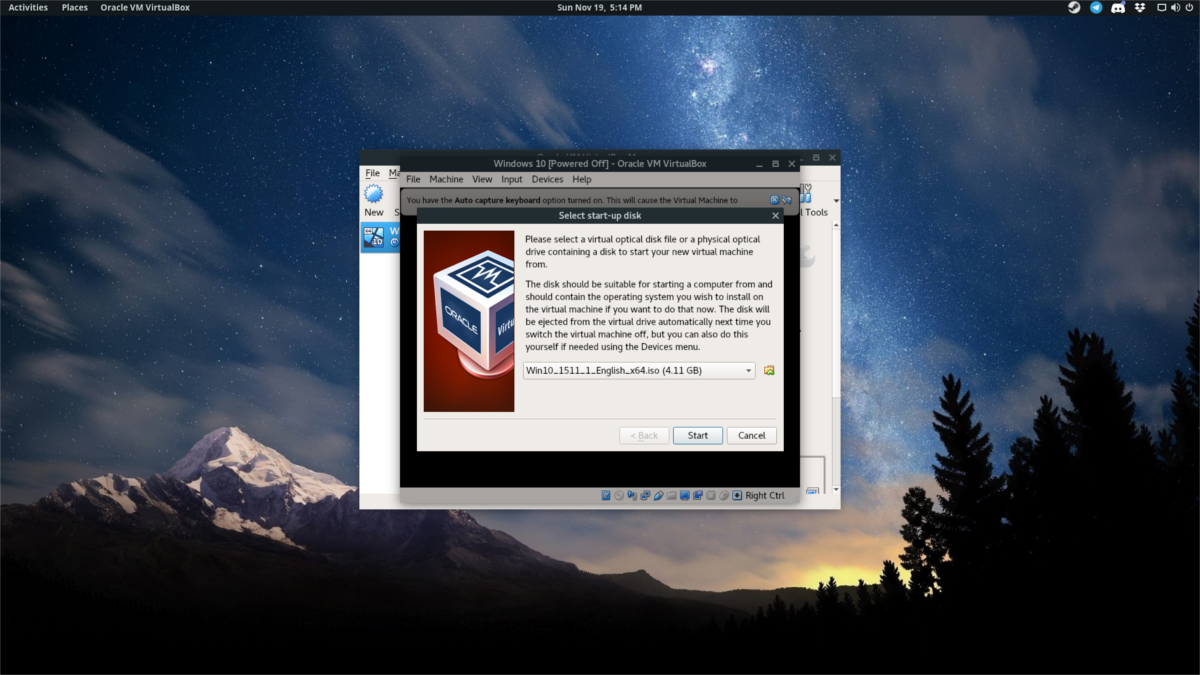
When the VM starts up, you’ll be asked specify the installation file for the operating system. Use the browser to navigate to the ISO file, and open it in VBox. Then, go through the installation process of the guest operating system. When it finishes, your VM will be usable.
Bridging Network Adapters
You may wish to give your virtual machine direct access to your network. Here’s how to do it in the Virtualbox tool. First, find the VM in the management area and right-click on it. From here, select “settings” to bring up the configuration area. This area has a ton of individual VM options. Disregard all of them except for “Network”.
By default, the VM accesses the network via NAT (network address translation). For most users, this option is sufficient. However, if you’re looking to allow your VM to directly interact with other machines on the network, it is best to change this to a new setting. The best option for giving the VM direct access is “bridged”.
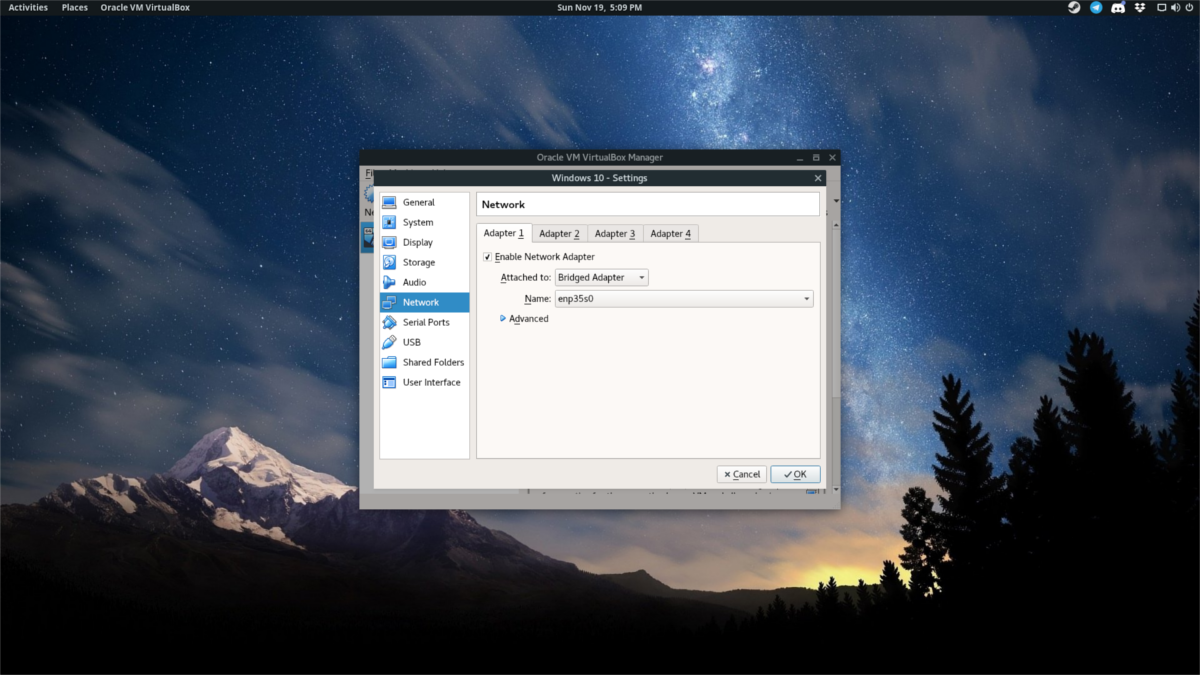
Select the drop-down menu next to “Attached to” and select “Bridged Adapter”. Then click “OK” to save the settings. As you power your VM back up, it will be visible on the network, and be able to see/interact with other machines.
