How To Set Up A Wifi Hotspot On Linux
Creating a wifi hotspot on Linux is fairly easy. To start off, find the network icon in the panel on your PC. Find “edit connections”, or “wireless settings”, or something similar. The main goal is to get the network tool open where the system lets the user modify all of the network connections, ipv4/ipv6 settings and etc.
Keep in mind that though most (if not all) desktop environments use Network Manage and the NM applet for connections. The way it is put to use differs which is why we’re going to go over how to set up a hotspot network connection under the different types of Network Manager applets and tools.
Note: for a Wifi hotspot to work, you’ll need to disconnect from your current wireless access point, and use ethernet to share internet. The hotspot/access point setting in Network Manager on Linux should automatically share your wired internet over the access point.
Gnome 3.26+ Instructions
Though Gnome Shell uses the Network Manager tool, the design and overall way to editing network connections is completely different from other desktop environments. This is extra true with version 3.26, which totally re-designs the settings area, network connections area, wifi settings and etc.
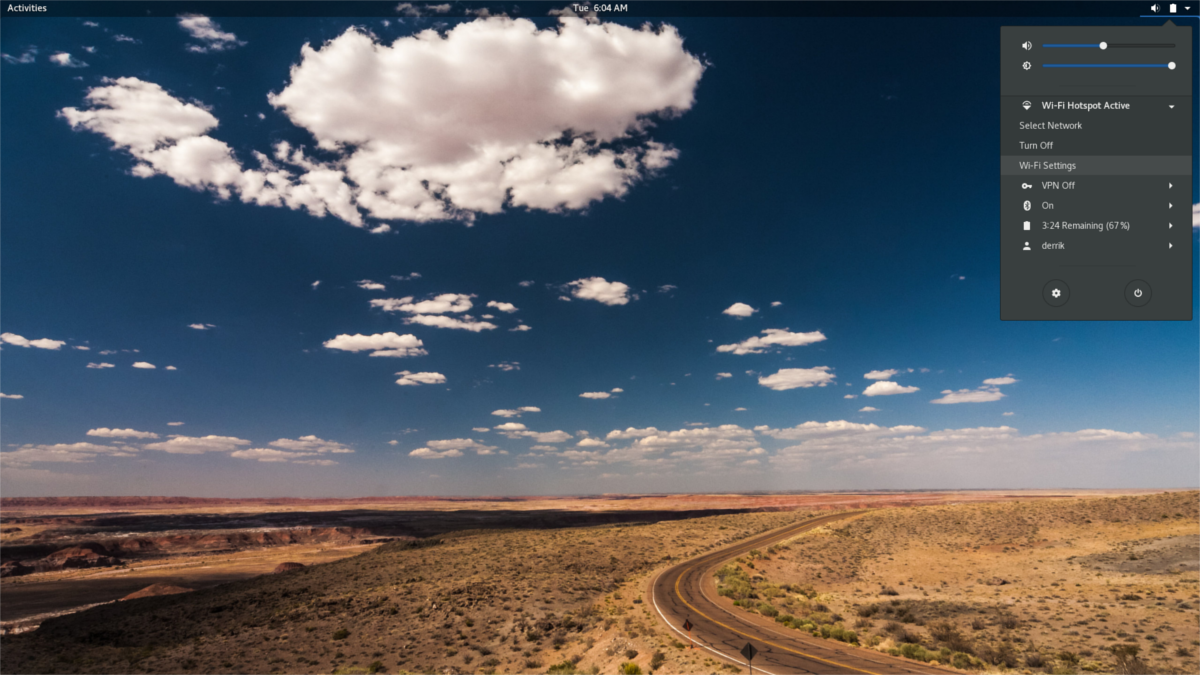
To get started, click the right-hand section of the Gnome panel to open up the quick settings panel. From here, find the wireless connection icon. Click on the wireless icon to expand the settings further, and find “Wi-Fi Settings”. Selecting “Wi-Fi Settings” will open up the Gnome network connection tool.
Inside the Gnome Wi-Fi settings tool, look for a menu next to the window controls (a vertical 3 dot button next to a slider). In the slider, select the option to “connect to a Hidden Wi-Fi Network”.
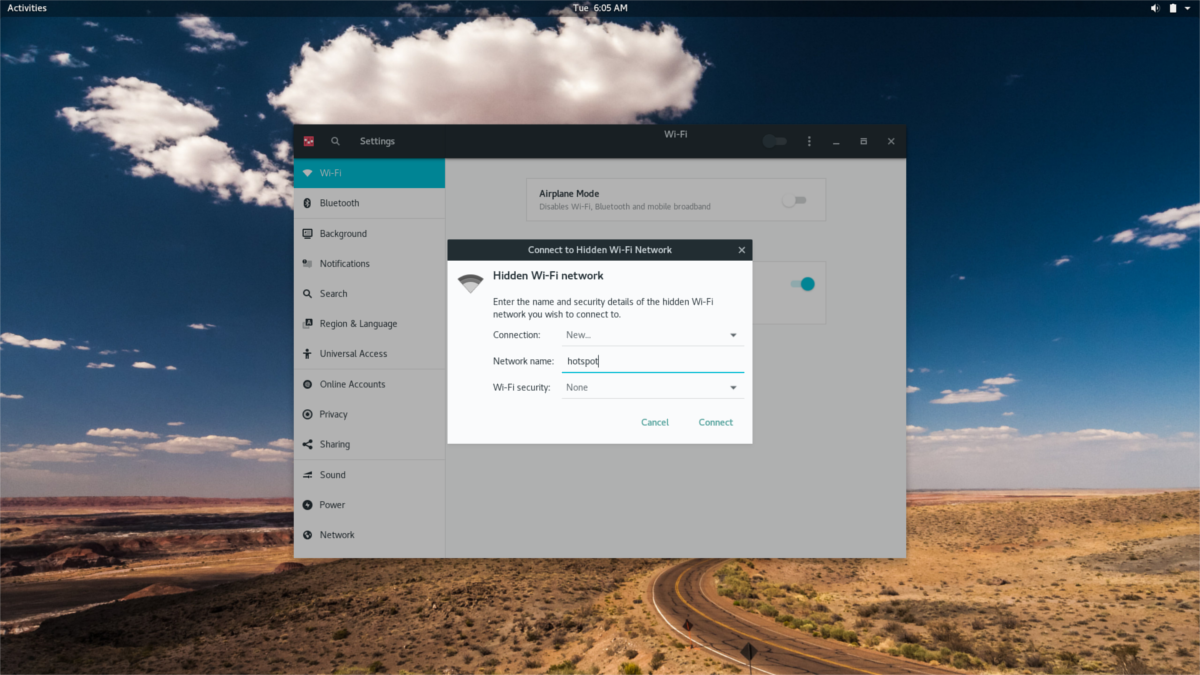
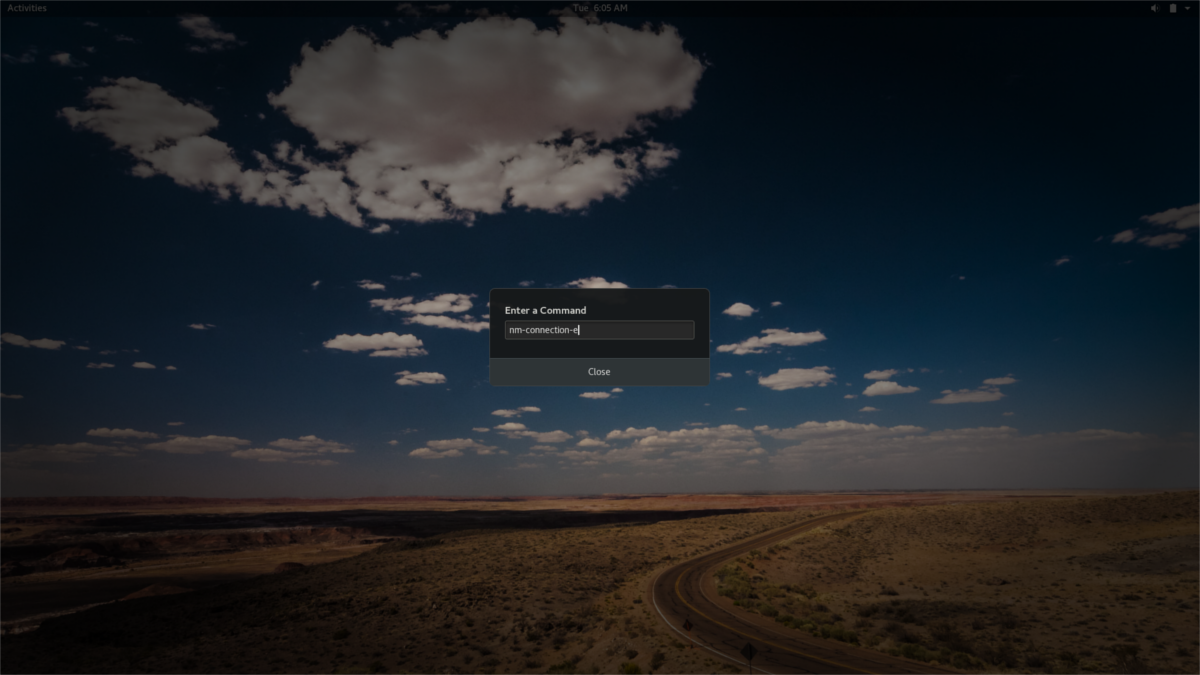
This section is important, as it’s the start of creating a hotspot. Enter the network name you’d like to use under “Network name” and then click the connect button. If you need inspiration for your hotspot name, check out some creative WiFi names. Then, press ALT + F2 on the keyboard, and enter the following command:
nm-connection-editor
Inside the connection editor, you’ll notice the hidden network you tried to connect to earlier. Select it, and click the gear icon to edit the settings. Look for a drop-down menu that says “Mode”. Click the drop-down menu, and select “hotspot”.
From here, select “Wi-Fi”, then select “WPA & WPA2 Personal”. Enter a secure password for your wireless hotspot. After filling all these settings out, the Wi-Fi hotspot will be available for other devices around to connect to.
KDE Plasma Instructions
Creating a hotspot is a little different on KDE Plasma than other desktop environments. This is due to the fact that it does not use GTK or other Gnome related things, so a lot of the network tools are very different.
First, find the Wi-Fi connection tool on the KDE Plasma panel and click on it to open the menu. Inside the menu, be sure that you’re not connected to any networks (if you are select disconnect).

Click the settings button in the right-hand area of the menu to open up the KDE network configuration tool. Inside the network tool, look to the bottom left for a + sign and click it to create a new connection.

When creating a new connection, several options appear. Find the setting “Wi-Fi (shared)” and select it to make a hotspot.
Selecting the hotspot option immediately brings up the network creation tool. Not many of these settings need to be changed. Just change the SSID and the security settings.

Find SSID and enter the name of the hotspot. Then, select the “Wi-Fi Security” tab. Find the “Security” drop-down menu, select the “WPA/WPA2 ” option, and enter a password for the hotspot. When done click save. When everything is saved, the hotspot will be visible to other Wi-Fi enabled devices nearby.
Universal Network Manager Applet Instructions
Press ALT + F2, and enter the following command to bring up the Network Manager connection editor. Be sure that you are not currently connected to an existing wireless network.
nm-connection-editor
Alternatively, find the Wi-Fi icon on the panel, right click it and select “edit connections”.
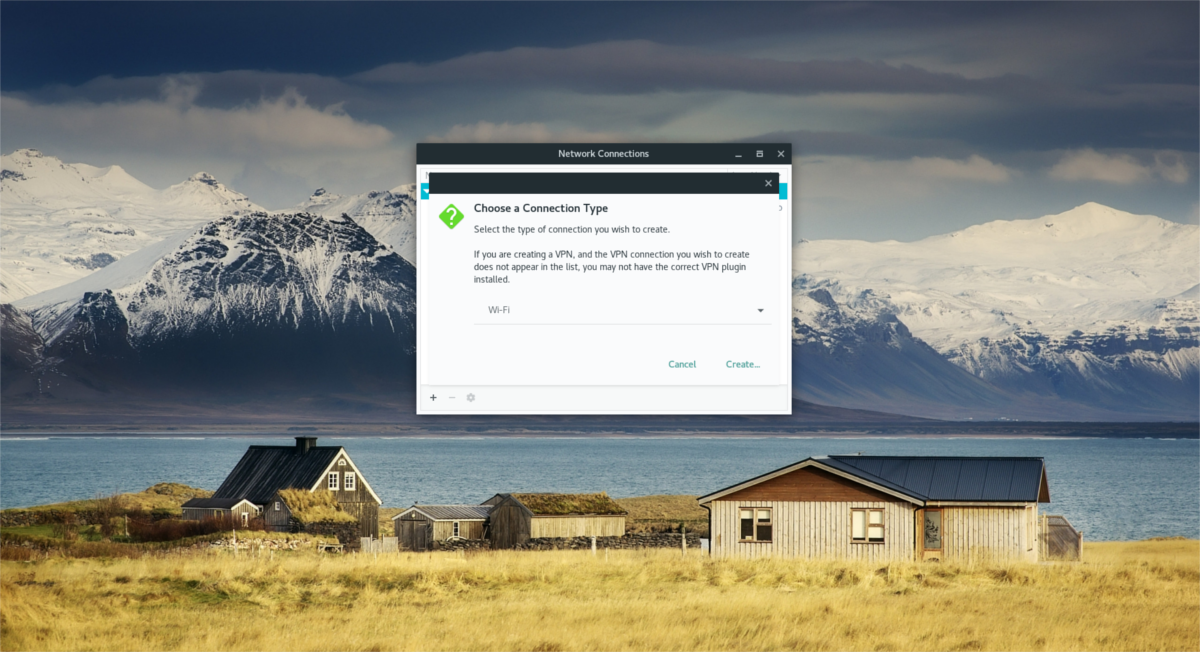
Inside the connection editor, click the + sign to create a new connection. Creating a new connection brings up a “new connection” popup with a drop-down menu. Select “Wi-Fi” to continue.
At the top, find “connection name”. This isn’t the name of the hotspot, but the name of the entry in network manager. Select the text area, and enter “wireless hotspot connection”.
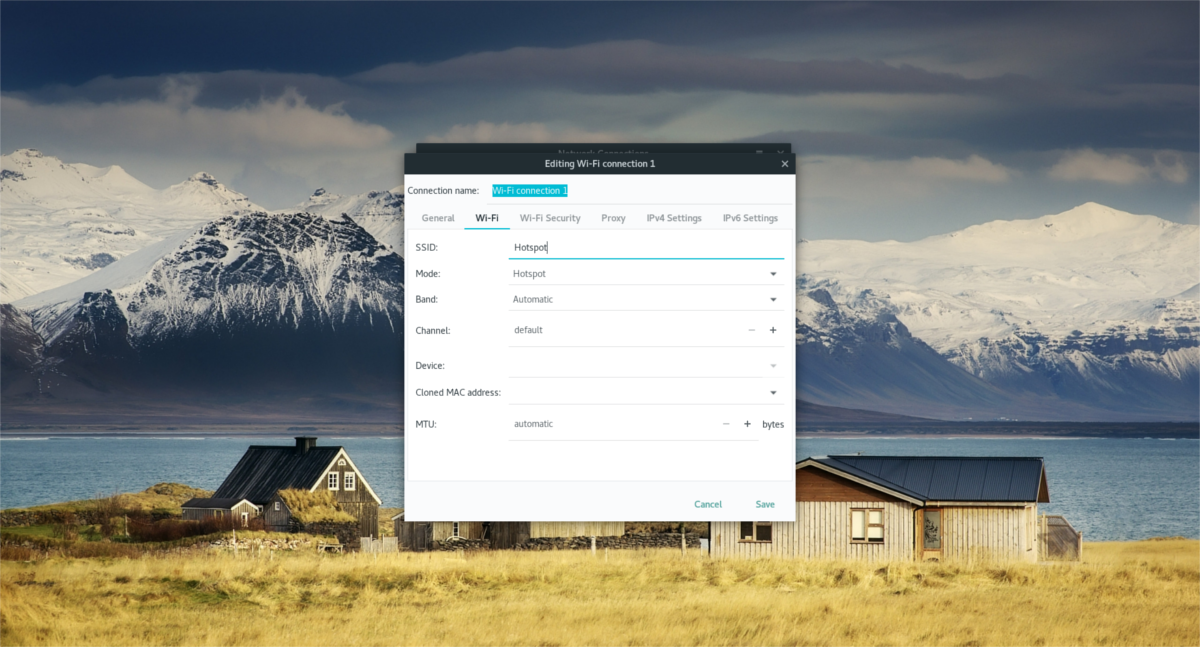
The next step is to give the new hotspot an SSID so that other wireless devices can communicate with it. Find “SSID” in the connection editor, and enter “Linux Hotspot”, or whatever you’d like to call the hotspot.
Find “Mode”, and click the menu next to it. In the menu, select “hotspot” to turn the connection into a wireless hotspot.
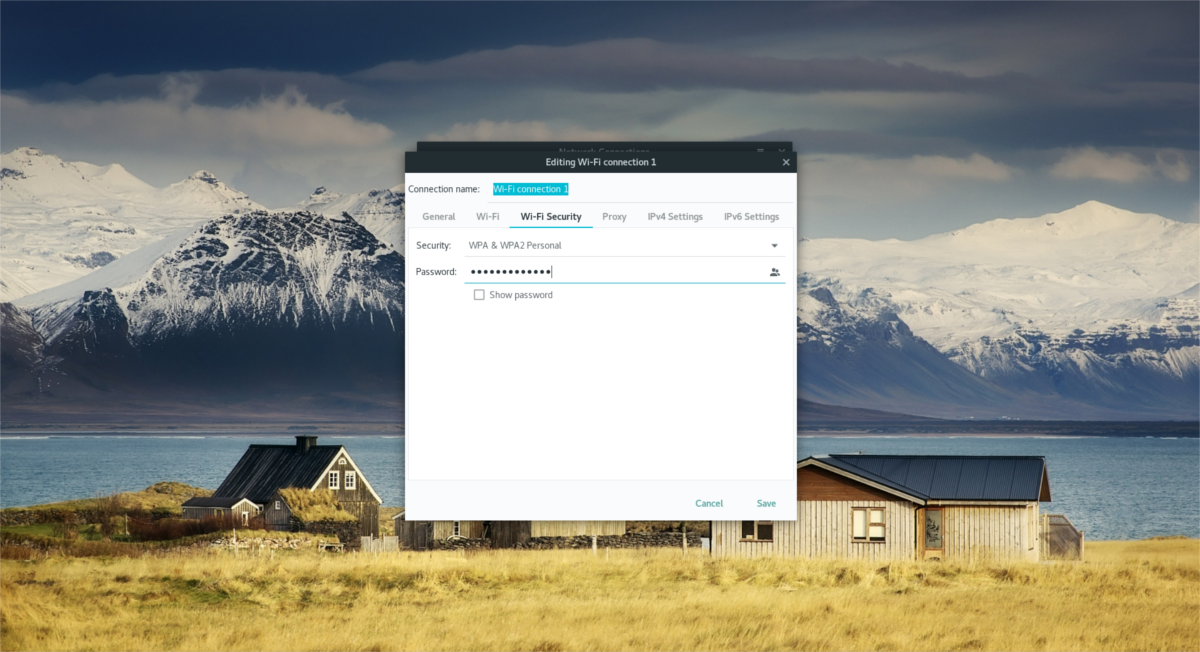
Lastly, click the Wi-Fi security tab in the connection editor to set the encryption key for the new hotspot. By default, the Network Manager tool has it set to “none”. Click the menu, and select “WPA & WPA2 Personal”. Then, enter a hotspot password.
When all the information is filled out correctly, click “save” to save the edits to the connection. From here, the Wi-Fi hotspot will be visible to all wireless enabled devices.
