How to Enable Secure Boot for Windows 11: Best 2 Methods
Windows 11 requires Secure Boot to defeat malware and ransomware from hijacking your computer during the operating system (OS) startup. Therefore, you need to enable Secure Boot on your PC to use Windows 11. Continue reading to find out how to enable secure boot for Windows 11.
What Is Secure Boot?
The latest firmware specification Unified Extensible Firmware Interface aka UEFI introduced Secure Boot as a completely new interface between BIOS/firmware and the operating system.
If you fully configure and enable Secure Boot, it’ll help your PC fight against tough malware that tries to hijack the device during OS boot up.
It’s responsible to validate the digital signatures of key OS files, unauthorized option ROMs, and boot loaders. Secure Boot suspends all malicious programs at the system boot level.
How to Enable Secure Boot for Windows 11
You can enable Secure Boot in your motherboard if it supports the feature. Try any of the following methods to enable the feature provided that the motherboard supports it:
1. Using Windows Advanced Startup
Windows 10 Recovery menu can help you access the UEFI mode of any compatible motherboards. Here are the steps to try:
- Click on Start Menu and then open the Windows 10 Settings app.
- Select the System menu from the sidebar.
- System menu options will open as a list on the right-side panel.
- Scroll down and select Recovery.
- For the Advanced startup option, click on the Restart now button.
- After the reboot, a blue screen will appear with the Troubleshoot option. Click on that.
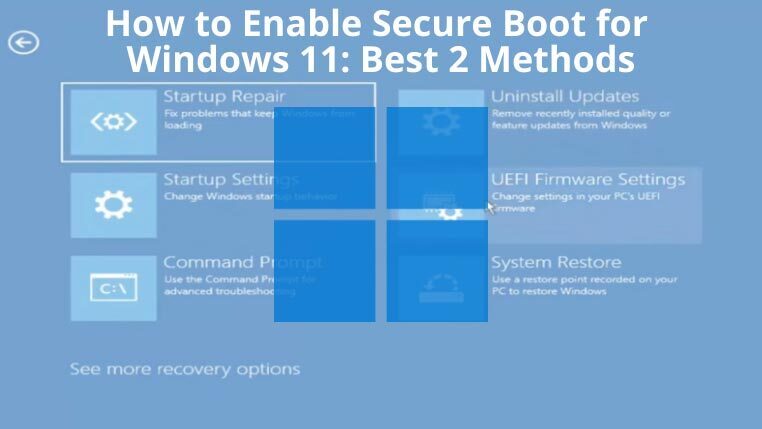
- In the following screen, choose Advanced options and then select UEFI Firmware Settings.
- Click Restart to access the UEFI BIOS mode.
- Go to Security Settings or Boot menu in the UEFI BIOS.
- Locate and activate the Secure Boot.
- Press F10 to save the changes and close UEFI BIOS.
The PC will start up and go to Windows 10 desktop. Hence, you have successfully activated Secure Boot if you’ve followed the above steps.
2. Using Motherboard BIOS Settings
The fastest way to make changes in your motherboard firmware is through the BIOS settings. BIOS settings also let you enable the Secure Boot feature if the device supports it.
The first method also takes you to the BIOS settings but through a guided tour. If you’re proficient with the motherboard settings then you should try this method. Exercise caution while making changes in the BIOS, since any mistake can cause malfunctions.
Once ready, try these steps to enable Secure Boot:
- Restart your computer.
- When you see a prompt to access BIOS settings, press the F2 or Delete key. Some devices may require you to press Esc, F10, or F12.
- The Secure Boot feature should be in the Boot or Security menu of the BIOS.
- Once located, select the Secure Boot feature and hit Enter.
- Change Disabled to Enabled and hit Enter.
- Now, press F10 to close the BIOS by saving the changes you have made.
You should have successfully activated Secure Boot by now.
Conclusion
The tutorial assumes that you’re following along the steps on a compatible device that has UEFI BIOS and Secure Boot options. You can now enable the Secure Boot feature on your PC now that you’ve gone through how to enable secure boot for Windows 11 tutorial. Enjoy the all-new experiences of Windows 11 for work and entertainment in a secure environment.
