Clean Install Windows 11 for a Truly Fresh Start
A clean install of Windows 11 is the “start over completely” option. You erase what’s on the drive and install Windows fresh, rather than upgrading or trying to fix things with a reset.
You might do this if your PC feels slow, weird issues keep coming back, or you want a clean slate while upgrading from Windows 10.
This guide walks you through the whole process: what a clean install really does, what to back up before you start, how to make the installer, and then finally, how to reinstall Windows.
What a Clean Install Really Means (And How It’s Different From a Reset)
A clean install is similar to a reset, but not exactly the same.
By “clean install,” we mean Windows is installed on an empty/clean drive. Everything that was there before, like all your files and apps, is gone. You’re starting from scratch as if the PC just came out of the box. This is why a clean install is often called a fresh install. It’s the most reliable way to fix bigger issues, but it comes with the disadvantage of full data loss if you don’t back up your stuff first.
Conversely, you have a factory reset. A reset reinstalls Windows using files that are already on your system (you don’t need to make an install disc/drive), and usually gives you the option to keep your personal files if you want to. It’s quicker and safer than a clean install if you just want to freshen things up, but it can also bring old issues back with it because it doesn’t wipe the drive.
An in-place upgrade from Windows to Windows 11 is even lighter because it reinstalls or upgrades Windows while keeping your apps and files and settings. It’s convenient, which is why most people prefer it, but it’s also the least effective if your PC is already a mess.
| What It Does | Keeps Files? | Best For | |
|---|---|---|---|
| Clean install: | Wipes the drive and installs Windows from scratch | No | Fresh start, serious issues, selling a PC |
| Factory reset: | Reinstalls Windows using built-in recovery tools | Sometimes (your choice) | Fixing minor problems quickly |
| In-place upgrade: | Reinstalls or upgrades Windows over the current setup | Yes | Moving to Windows 11 with minimal disruption |
Get Things Ready Before You Install Anything
Before you jump into a clean install, slow down for a few minutes and get your setup in order. Prepping now saves you from losing your data or realizing halfway through that you don’t have what you need!
Once this part is done, you’ll be ready for the actual installation steps. The rest of the process is mostly following prompts, but this is the part that makes sure nothing important gets lost along the way.
- Make sure your PC actually supports Windows 11. This includes things like TPM 2.0, Secure Boot, and a supported CPU. If your computer can’t run Windows 11, the installer will stop you later anyway, so you may as well confirm this now.
- A clean install wipes everything on the drive, so back up your user profile, including your photos, downloads, saved projects, and anything else you care about. You can copy your files to an external drive, upload them to cloud storage, or transfer them to another PC. If you’re not sure what to back up, stay on the safe side of things and copy everything.
- Take note of the current state of things, assuming you plan to replicate it. Your apps won’t stick around after a fresh install, so make a list of the programs you’ll want to reinstall and make sure you know your account passwords. Unfortunately, this part is easy to forget until you’re staring at a blank desktop with none of your personal files.
- Grab a USB flash drive and product key. You’ll need a flash drive with at least 8GB of space to create the installer. In most cases, you won’t need to enter a product key during setup, but if your PC didn’t previously run Windows 11 or Windows 10, keep it handy just in case.
- Download the Media Creation Tool. This is Microsoft’s official program for creating Windows 11 installation media. You’ll use it to turn your USB drive into a bootable installer, which is what lets you perform a clean install.
Making the Bootable USB You’ll Use to Install Windows 11
To perform a clean install, you need installation media you can boot from. This is usually a USB flash drive with Windows 11 on it (CDs work, but they’re slower and not all PCs have a DVD drive). The tool Microsoft provides handles most of this, but it will erase the USB drive you use.
1. Ready your flash drive. You’ll need at least 8GB of space. Everything on that drive will be wiped during this process. Larger drives (16 GB or more) are better, but not necessary.
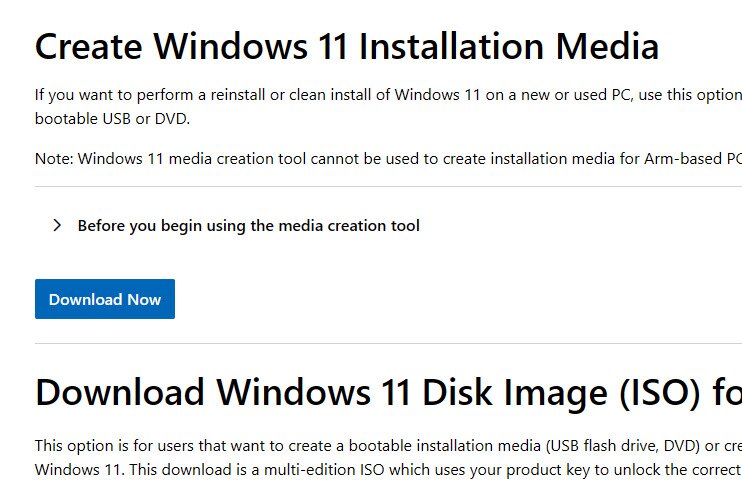
2. Go to Microsoft’s Windows 11 download page and click Download Now under the Create Windows 11 Installation Media section.
Tip: The Media Creation Tool is usually your easiest method, but if that doesn’t work for you, you can also download a Windows 11 ISO and use a program like Rufus to make a bootable USB manually.
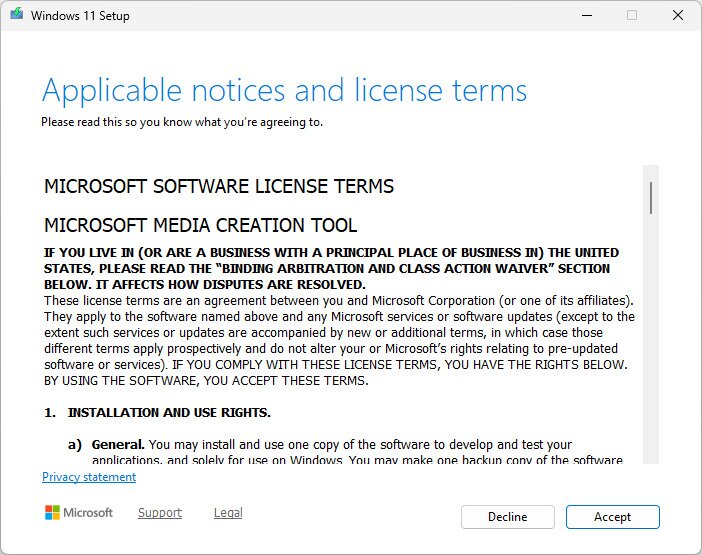
3. Double-click the file you downloaded; it’s called MediaCreationTool.exe and accept the license terms when prompted.
4. When asked, pick Create installation media (USB flash drive, DVD, or ISO file) and then choose Next.
5. Pick the drive you want to use from the list. Remember: this will erase everything on it, so make sure it’s either already empty or that you don’t care for the files on it to disappear (back them up if you do).
6. Wait while the tool downloads the latest Windows 11 files and makes your USB device bootable. This can take a bit of time, depending on your internet speed and how fast the drive is.
7. Once it finishes, close the program and eject your device. It’s now ready to boot from on the PC where you want to install Windows.
Installing Windows 11 From the USB
Now you’re ready for things to actually start happening. Once you boot from the installation media, Windows walks you through setup with on-screen prompts. I’ll call out the spots where people usually hesitate or make mistakes so that you know what to click and why.
- Plug the USB drive into your PC, then restart the computer. As it turns back on, press the boot menu key for your system (try F12, F11, Esc, or Del). Then, choose your USB drive from the menu. On some laptops, you may need to enter BIOS/UEFI first and temporarily change the boot order.
- Wait for Windows Setup to load. If it worked, you’ll see the Windows logo and then the Windows 11 setup screen.
- The first setup prompts ask for your language, time format, and keyboard layout. Pick what you normally use, then click Next.
- Click Install now. If Windows asks for a product key and your PC already had Windows 10 or Windows 11 activated before, you can usually choose I don’t have a product key and continue.
- If prompted, pick the Windows 11 edition that matches what you had before (Home vs Pro). This is important for activation later.
- When asked which type of installation you want, select Custom: Install Windows only (advanced). This is the option that enables a clean install.
- You’ll now see a list of partitions on your drive. To fully clean install Windows, delete each partition on the main drive until you’re left with Unallocated space. This is the point of no return for data loss, so only do this if you’ve already backed everything up.
- Highlight the unallocated space and click Next. Windows will automatically create the partitions it needs and begin installing.
- The installation steps run on their own from here. Your PC will restart a few times. Don’t remove the USB drive until Windows moves past the setup screens.
- After installation, you’ll go through some initial setup for connecting to Wi-Fi, signing into your Microsoft account, creating a PIN, and deciding on basic privacy settings.
- When you land on the fresh Windows 11 desktop, you can start installing drivers, running updates, and restoring your backed-up files.
What Happens to Your Files When You Reinstall Windows
When you do a fresh install of Windows 11, everything on that drive is erased, including every file, app, custom setting… everything. It’s as if you threw out the drive and bought a new one. Once the Windows installation starts, there’s no way to keep anything unless it was backed up beforehand.
Other options aren’t as aggressive. An upgrade keeps your files and apps, and a factory reset may let you keep your personal files, but both can carry old issues into the refresh because they aren’t true clean install.
If you want the best results performance-wise, a clean install is the right move, but only if you back up your files first.
Common Problems During a Windows 11 Clean Install (And How to Fix Them)
Most clean installs go smoothly, but when something does go wrong, it usually falls into a small set of common issues. Fortunately, it’s usually fixable without starting over completely.
Here are some examples:
- The PC won’t boot from USB. This usually means the system never actually tried to start from the installer. Go back into BIOS or UEFI and double-check that the USB drive is selected as the boot device. On some computers, you also need to disable Fast Boot or enable USB boot support before it will work.
- If Windows 11 says your PC isn’t compatible, it’s almost always related to system requirements like TPM 2.0 or Secure Boot. Check your BIOS settings to make sure TPM is enabled and that Secure Boot is turned on. If your PC’s hardware truly isn’t supported, the installer will block you no matter what.
- No Wi-Fi or network during setup. Some laptops don’t include network drivers in the default installer. You can skip network setup temporarily and install drivers later, or download the Wi-Fi driver from your manufacturer on another device and copy it over with a USB drive.
- Windows won’t activate after installation. If this PC was previously activated with Windows 10 or Windows 11, activation usually happens automatically once you’re online. If not, make sure you installed the same edition (Home vs Pro). If it still won’t activate, Microsoft’s activation troubleshooter can usually fix it.
- Missing drivers after installation. This is a huge problem for lots of people because a clean install usually leaves you with basic drivers only. Run Windows Update first, as it installs most drivers automatically (the essentials, at least). Anything that’s still missing can usually be found on your laptop or motherboard manufacturer’s support page.
Still stuck? Microsoft’s official Windows 11 installation guide and support pages are the best places to check next.
Frequently Asked Questions
How do I do a clean install of Windows 11?
Create a bootable USB with the Media Creation Tool, boot from it, choose the custom install option, delete existing partitions, and install Windows on the unallocated space.
Is a clean installation better than an upgrade?
It’s better if you want a fresh start or need to fix serious problems, but it takes more time and requires backing up your files first.
Does a clean install of Windows 11 erase everything?
Yes. Every single app and file on the drive is removed during the installation process.
Can I clean install Windows 11 without losing files?
Only if you back them up somewhere else first. A clean install itself doesn’t retain personal files.
What’s the difference between a clean install and a factory reset?
A clean install wipes the drive and installs Windows from scratch, while a factory reset reinstalls Windows and may let you keep your files.
Do I need a product key to reinstall Windows 11?
Usually no. If the PC was already activated before, Windows will reactivate automatically once you’re online.
What should I do if Windows 11 won’t install from USB?
Check BIOS or UEFI settings, confirm the USB is set as the boot device, and make sure system requirements like TPM and Secure Boot are enabled.
Can I use the same USB for multiple installations?
Yes. You can use the same bootable USB on multiple PCs as long as it still works.
How long does a clean install of Windows 11 take?
The install itself usually takes 20 to 40 minutes. Extra time will be needed for setting up initial options, copying files back to the PC, updating Windows, installing drivers, etc.
Do I need an internet connection to install Windows 11?
Yes, Windows 11 requires it, and it’s vital after installation for activation and updates.