How To Turn Off Indexing Of Your Local Drive In Windows 7 / Vista /XP
If you are sick of slow loading speed or want to increase the performance of your Windows further, then turning off Indexing of your local drive is another simple way of boosting the performance. This option is automatically set in Windows XP, Windows Vista, and Windows 7. Indexing is enabled because it helps Windows index your files and folder for faster search.
You must be thinking why turn it off, Microsoft enabled it due to a reason? Well, yes, basically you are right here but sometimes Microsoft doesn’t use it’s brain. Microsoft might have forgot to make their search better and more powerful because they were focused more on releasing Windows on time. You can use Google Desktop or Windows Search alternatively which are both faster than the build-in search and ofcourse more powerful.
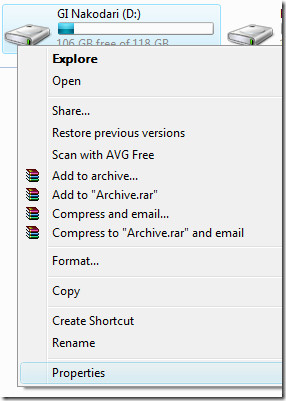
To Turn Off Indexing on your local drive open My Computer, right-click any Local Drive(C, D, etc) and go to Properties.
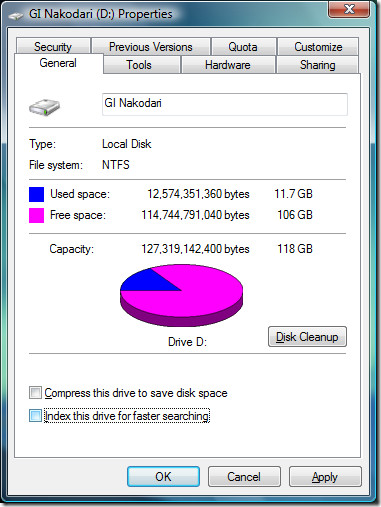
Now in the General tab you will find a checkbox at the bottom named “Index this drive for faster searching”, uncheck it as shown in the screenshot below.
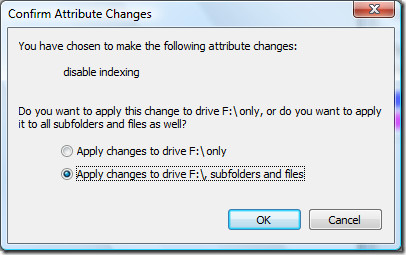
It will now ask if you want to turn off indexing only in the root of the drive or you want to turn off indexing for all files and folders? Select “Apply changes to all files and folders” and click OK as shown in the screenshot below.

Now sit back while Windows turns off indexing for each and every file, it might take few minutes because every file has a system attribute that tells Windows if it can be indexed or not, so it has to be updated for all files.
Note that if you turn of Indexing where your Windows is installed, in suppose lets say drive C, then it will not effect other drives, other drives(D, E, etc) will still be indexed by Windows. If you want to completely turn off indexing then you will have to do it turn by turn with every drive.
To enable indexing, just follow the above procedures, but instead of unchecking, just check the box where it asks if you want the drive to be indexed.
For further tips to increase the performance of your computer, have a look at this post “How To Manage Your Startup Programs Easily, An Easy Way To Increase System Performance”


A FEW MINUTES? more like 4 hours
I am using an ssd, does turning off indexing need to write or delete information in every files in the drive?
C drive indexing comes back no matter how many times I disable it using your instructions. The service itself is off but no matter how many times I ‘sit back’ and watch the indexing bits removed, after a reboot my C drive once again shows indexing is on.
my win 7 pro looks different to the above – instead of “Index this drive for faster searching”, I get
“Allow files on this drive to have contents indexed in addition to the file properties”.
Which left me scratching my head – is that being indexed or not ? 🙂
Go to control panel >Indexing Options >Advanced and check there what is being indexed – I dont know if you need to be admin (I’m on admin a/c with uac on highest setting)
To the above comments; XP Home does not have all features of XP’s operating system. I haven’t got a copy of XP handy but this feature is most likely in XP Pro.
Thanks, after trying several things in XP to get it to turn off. This worked.
Um, yes it does.
My XP home does not have the indexing check box.
Idiot.. XP does not have an indexing option