Why Does My Screen Keep Dimming? (Windows 10 and newer)
If your laptop or other Windows device keeps dimming, it’s likely due to an auto-brightness feature that is often turned on by default. This feature senses the light in the room and adjusts your brightness to compensate. Dark room? Dim screen. Bright room? Bright screen. You can easily turn this off in the same area that lets you adjust the brightness of your device (usually by tapping a button next to the brightness bar).
Windows 10 and 11 include a similar screen brightness feature. If you’re wondering why does my screen keep dimming, then keep reading for several solutions you can employ, like editing Device Manager and other settings.
How to Fix Windows 11 & 10 Screen Dimming
In this article, we’ll go over screen dimming issues that occur on Windows 10 and newer computers. All screens have a backlight which determines how bright or dim they are. The brightness of a screen will span a certain level ranging from very dim to exceptionally bright. Depending on how you have your work station set up, and how much light is in the room, a user is free to choose how bright the screen is, and to change it whenever they need to.
Brightness can be changed from a keyboard, buttons on a monitor, and from settings provided by the operating system that is installed on a system. All three will change the same setting and are essentially different ways to doing it. Regardless of how you change the brightness of the screen, it will remain set at a level until you choose to change it again.

- Open Control Panel. The quickest way is to search for it from the Start menu.
- Go to Hardware and Sound.
- Select Power Options.
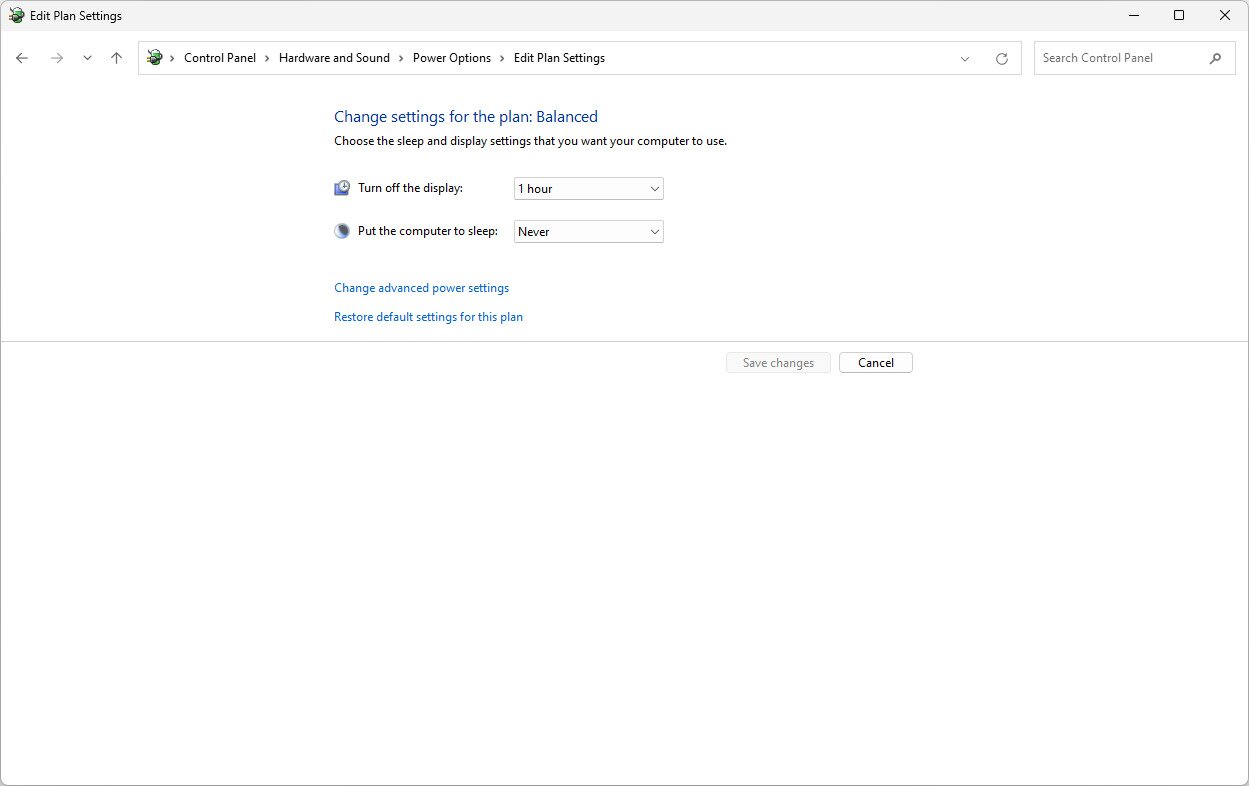
- Choose Change plan settings next to your current power plan.
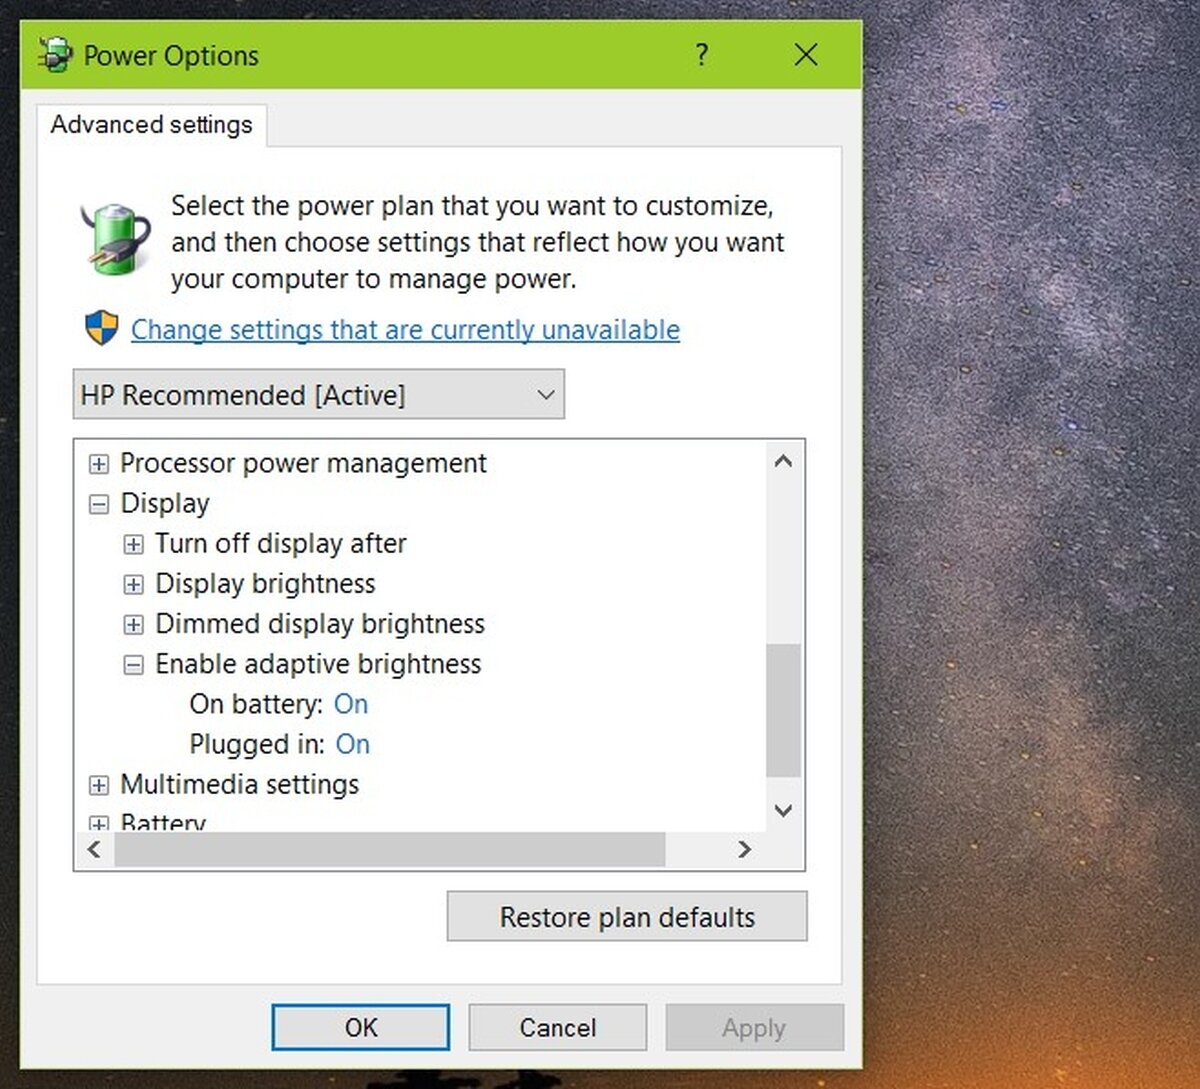
- Select Change Advanced Settings.
- Expand the Display settings.
- Expand Enable adaptive brightness under it.
- Turn it off for both battery and plugged in states.
- Press OK.
- Repeat this for all power plans you use.
Adjust Color Display Settings
iPhone users may recognize a feature called True Tone, which is a display setting for making colors more accurate, which can sometimes lead to screen dimming. While Windows doesn’t have True Tone, exactly, many Windows PCs have built-in color display settings that can be similarly adjusted. Keep in mind, you may have different settings based on the manufacturer and model of your Windows PC. Overall, however, you can reach your system’s color profiles like so:
- Go to Start
- Go to Settings
- Go to System
- Go to Display
- Go to Color profile
- From here, you can calibrate the display, remove certain color profiles or even automatically manage color for apps. Feel free to play around a bit and see if changing your color settings helps with your screen dimming issues
Disable Night Light
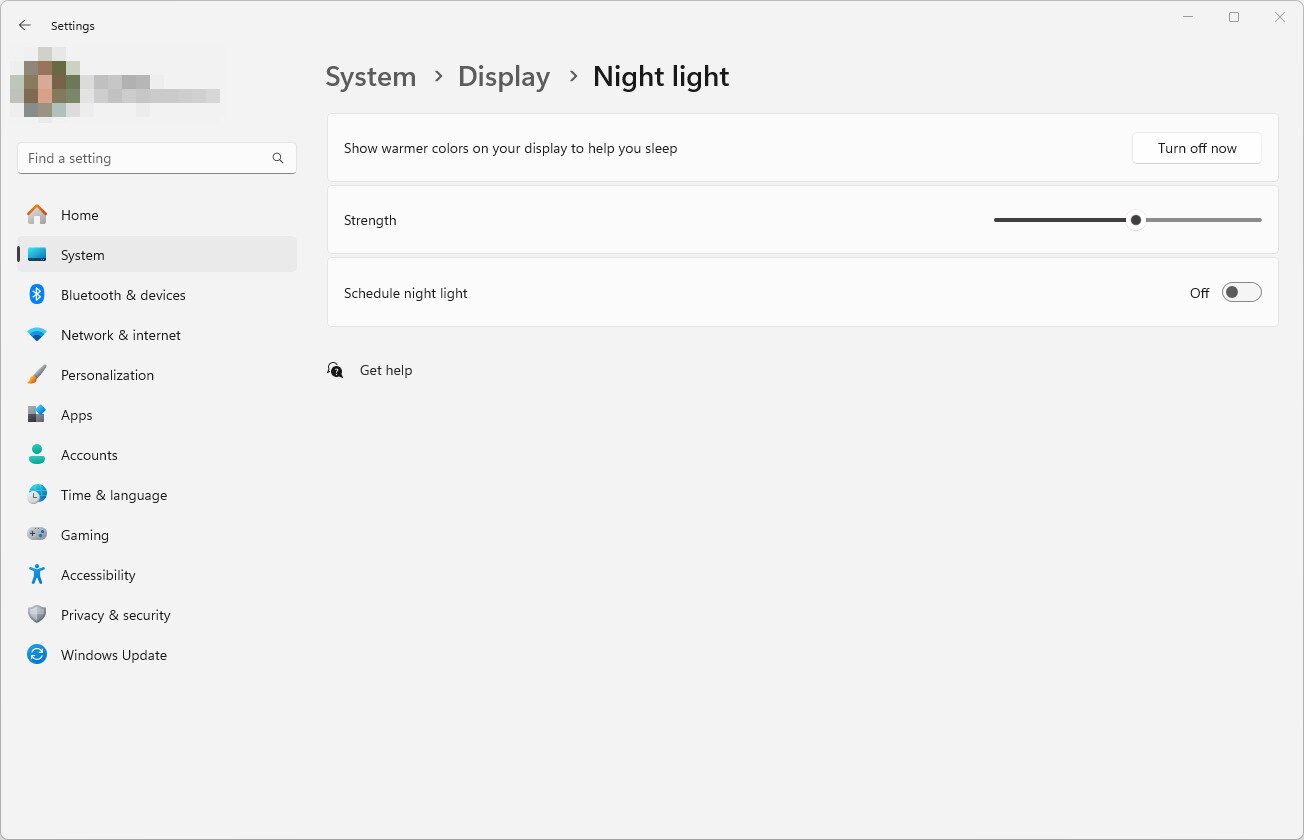
Night light is a feature in Windows 11 that will automatically adjust the screen brightness of your computer to show warmer colors. The idea is to help you sleep or correct vision problems that might occur from a bright screen. This feature is typically manually enabled, but depending on your setup, you might even have the scheduled night shift enabled, meaning the screen dimming automatically adjusts at certain times of the day. You can disable this easily through the Settings app to prevent your screen from dimming unexpectedly.
- Open Settings via Win+i.
- Select System and then Display > Night light from the right pane.
- Select Turn off now at the top of Settings to instantly fix the screen brightness issue.
- If the Schedule night light toggle is on, switch it off.
Tip: Some users report that automatically dimming the screen with night light improves battery health on their laptop. However, it’s wise to turn this feature off if the screen dims when you don’t want it to, like when you need to see the real display color (e.g., when using photo editing tools).
Update graphics drivers
While uncommon, outdated graphics drivers can cause the screen to dim or brighten. Updating drivers to the latest version should fix the problem. You can do this through the display adapters area of Device Manager. If you’re still asking why does my screen keep dimming, driver updates are one of the key fixes.
- Open Device Manager.
- Expand Display adapters by pressing the arrow next to the category heading.
- Right-click the on-board graphics card and select Update driver.
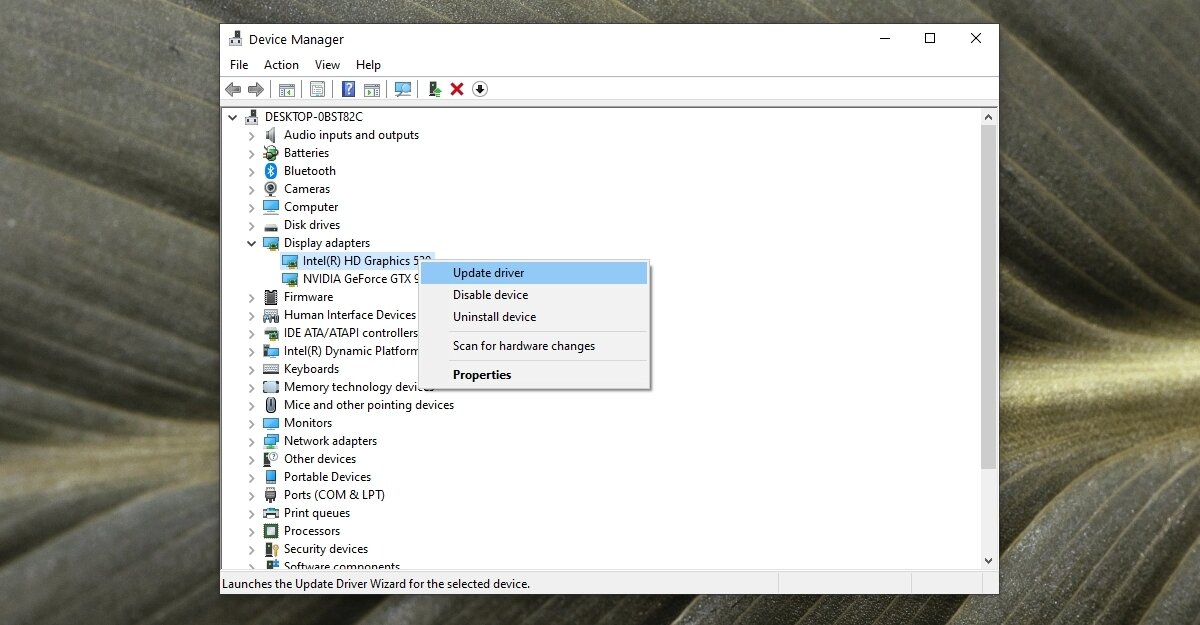
- Select Search automatically for drivers.
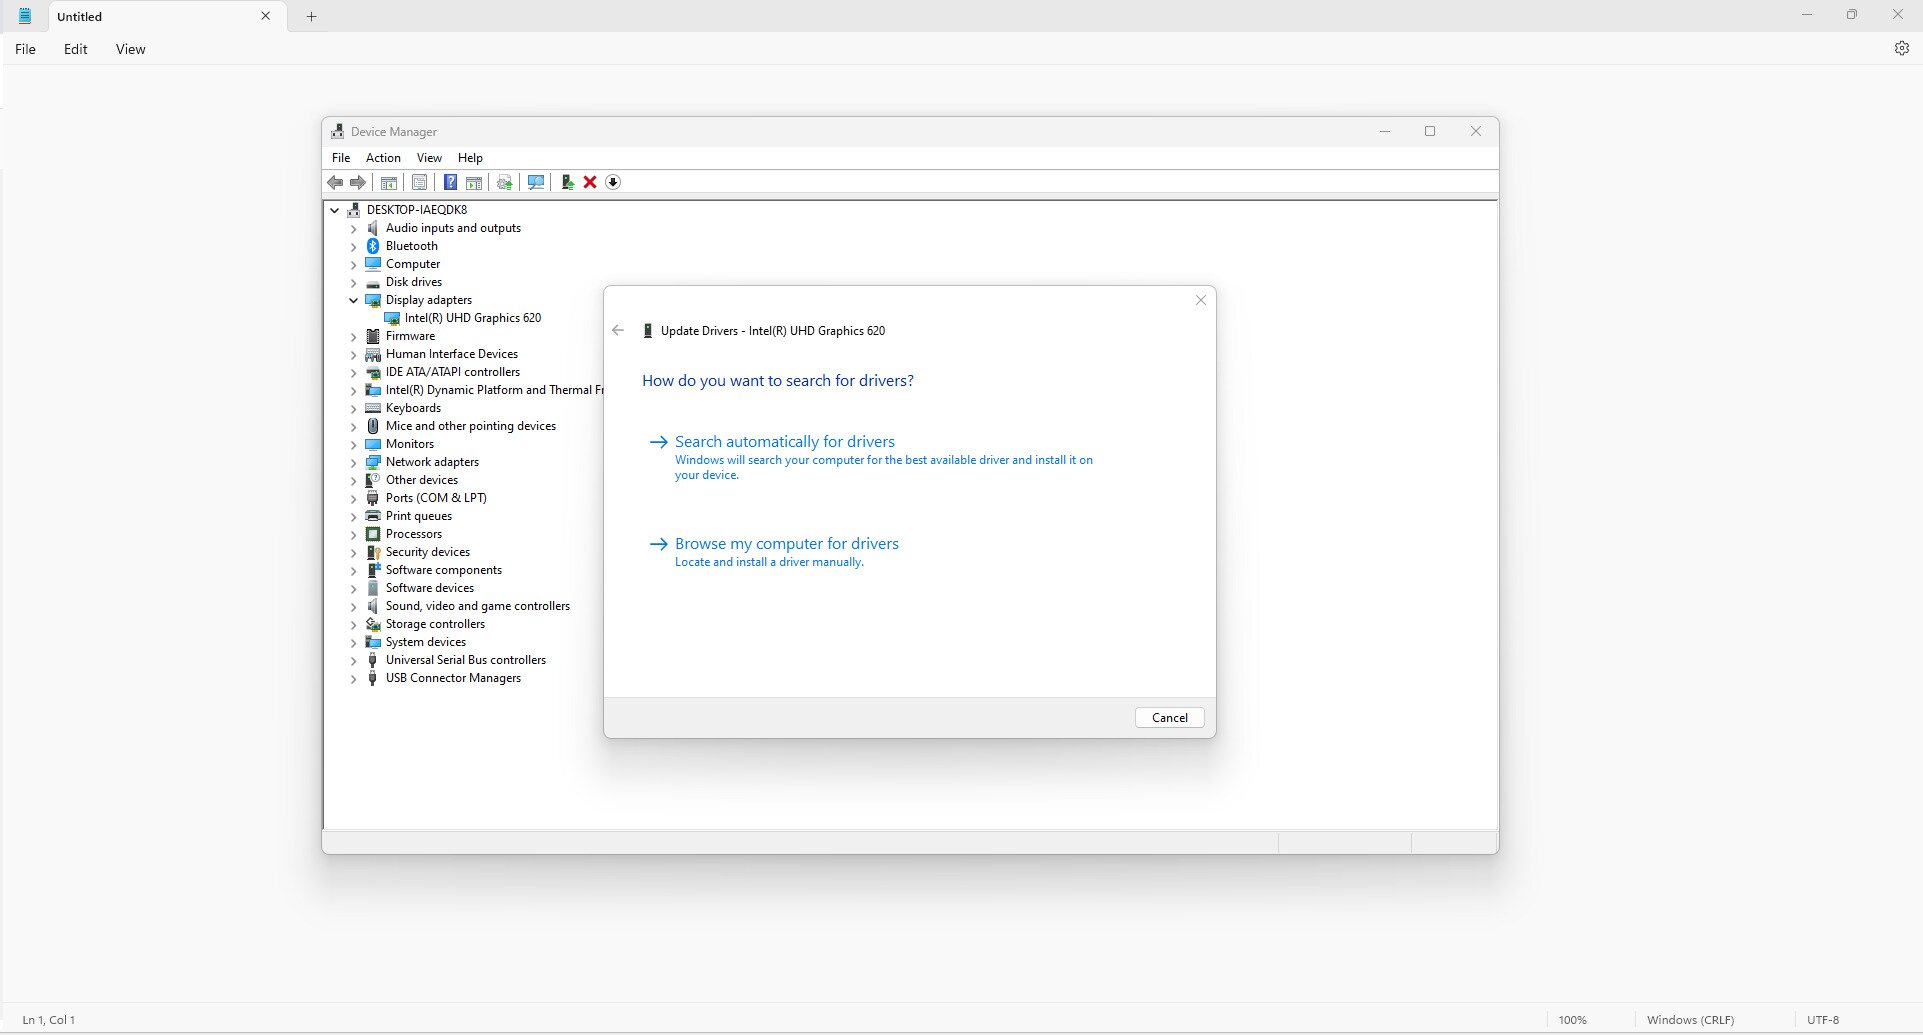
- Repeat this for the GPU chip, if you see it.
- Restart your computer. Here’s how to reboot Windows 11.
Calibrate the color of the display
Windows 10 and newer include a tool that can improve the color of your display to make sure you see colors as they really are. This can indirectly help if your screen keeps dimming or showing odd colors.
- Search Windows for calibration, and then open Calibrate display color when you see it in the search results.
- Move the window onto the display you want to calibrate.
- Select Next on the welcome screen.
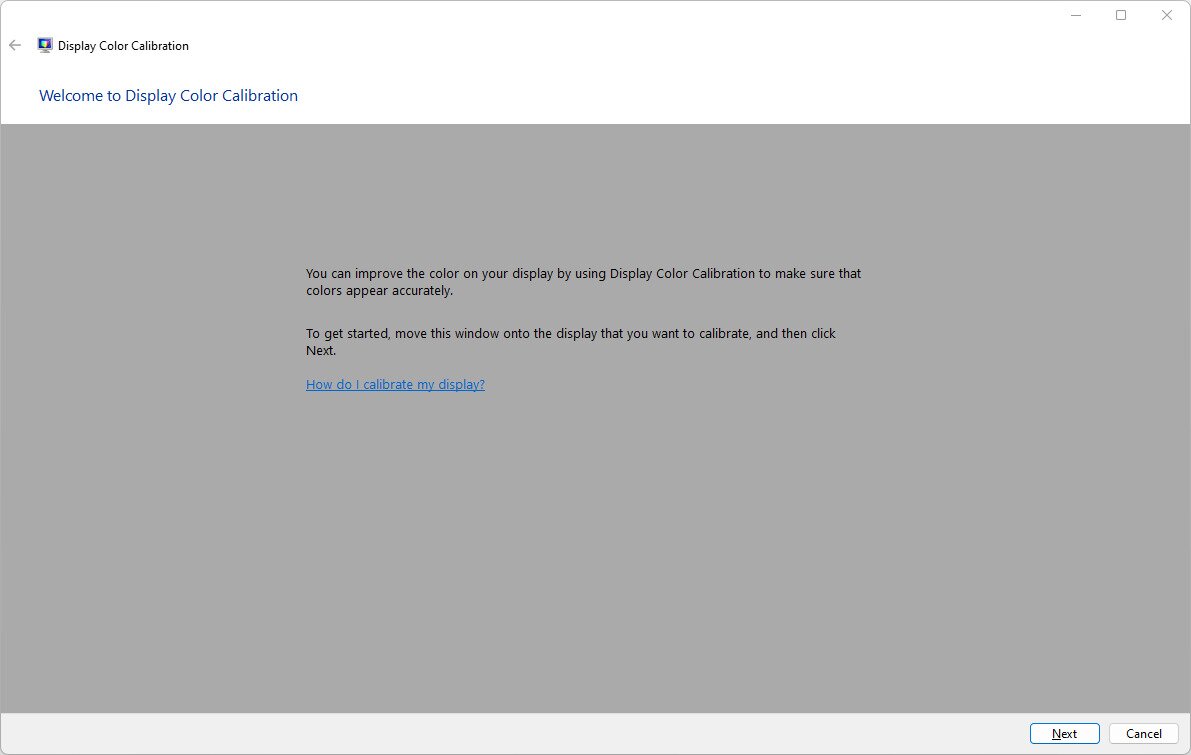
- Follow the on-screen steps by pressing Next after you read each step. You’ll be told how to use your monitor’s menu buttons to adjust screen brightness and contrast, color balance, and more.
Run Power troubleshooter
Windows 10 has a troubleshooter for power-related problems (e.g., a system component is unable to draw as much power as it needs in order to function). Windows 11 includes some troubleshooters, too, but it does not have one for power-related problems. This tool can help if your screen keeps dimming due to power fluctuations.
- Open Control Panel.
- Use the drop-down menu at the top right to change the view to Small icons.
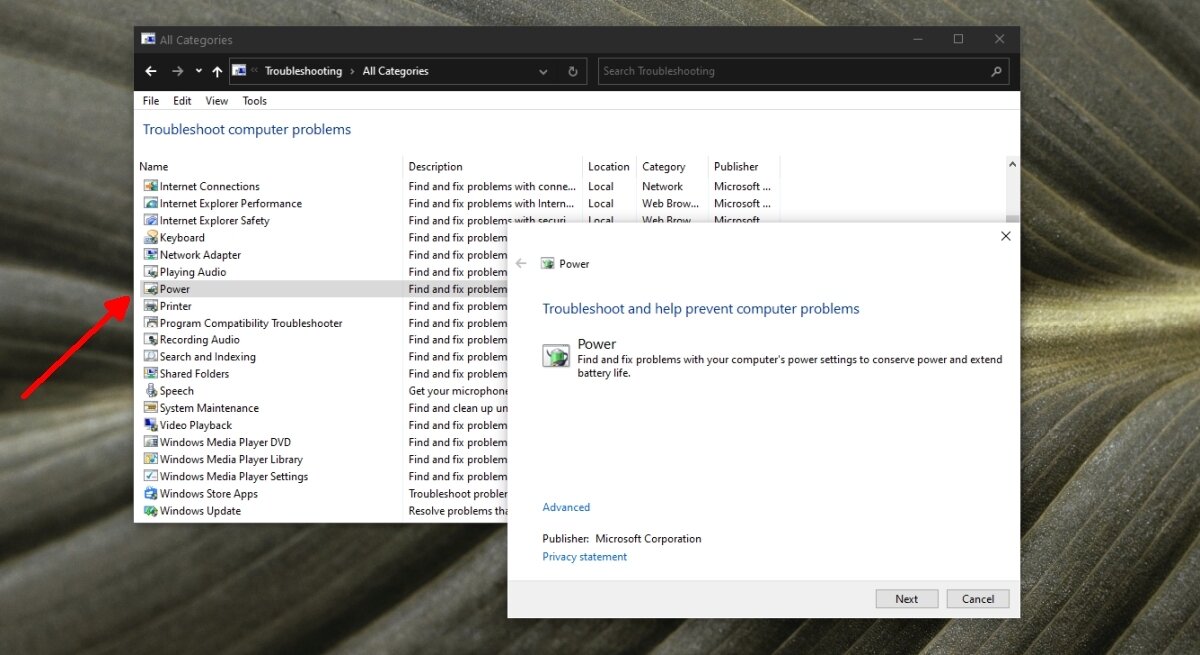
- Select Troubleshooting.
- In the column on the left, select View All.
- In the list, select Power.
- Run the Power troubleshooter and apply all fixes it recommends.
- Restart the computer.
Examine power sockets, ports, and wires
If your system isn’t getting a steady current, it may be triggering a change in the power plan. Power plans can change based on the source of power (battery or DC). Run through the following fixes to see if any of them can address why your screen keeps dimming.
- Make sure the laptop is securely plugged in.
- Make sure the current isn’t fluctuating. If it is, using a current stabilizer will help.
- Make sure the socket the laptop is connected to isn’t damaged.
- If you’re using an extension board, make sure its wire isn’t damaged.
- If you’re using an extension board, make sure it isn’t overloaded and that nothing connected to it is causing electric surges.
- Remove any power-hungry items that may be connected to the same board/socket.
Change screen resolution
It’s possible that you’ve set a screen resolution that isn’t the best for your display. The screen dimming and brightening may be a result of various apps or the OS trying to work with the screen resolution that’s been set. Adjusting this can also help when you’re asking why does my screen keep dimming.
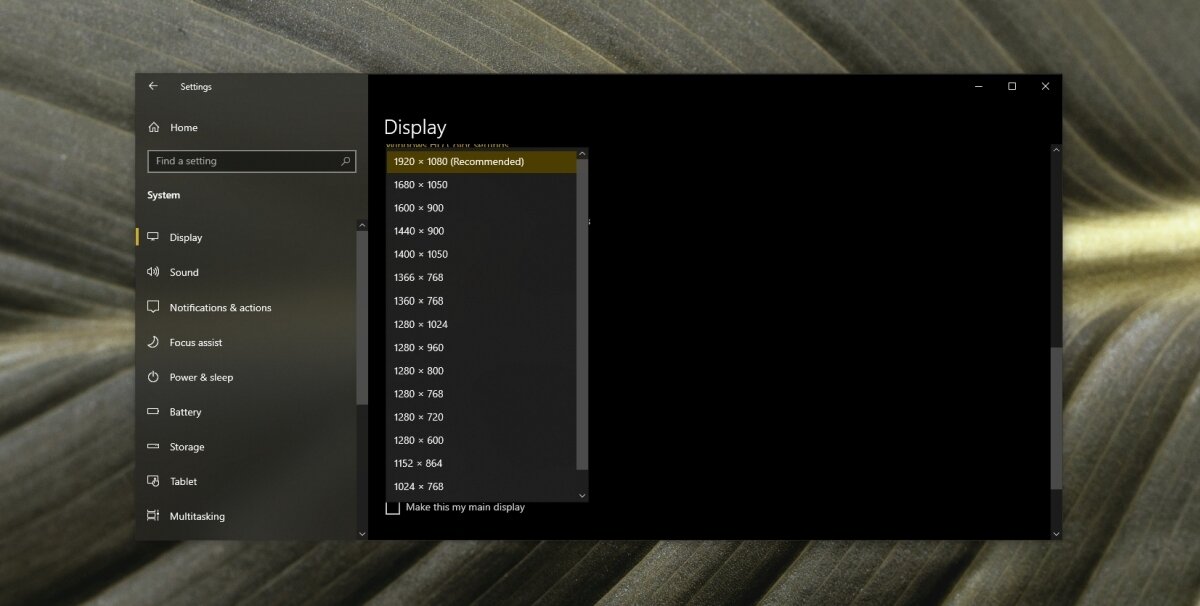
- Open the Settings app (Win+i keyboard shortcut).
- Go to System > Display.
- Open the Display resolution dropdown.
- Select the resolution that has ‘Recommended’ written next to it.
- Restart your PC for good measure.
Edit Windows Registry
If the above steps haven’t worked out to disable auto brightness, there is another potential software solution before we move onto the hardware step coming up next. This involves editing the Windows Registry (a critical part of the Windows OS), so be careful to stick to these steps and nothing more. This may finally stop your screen from dimming automatically.
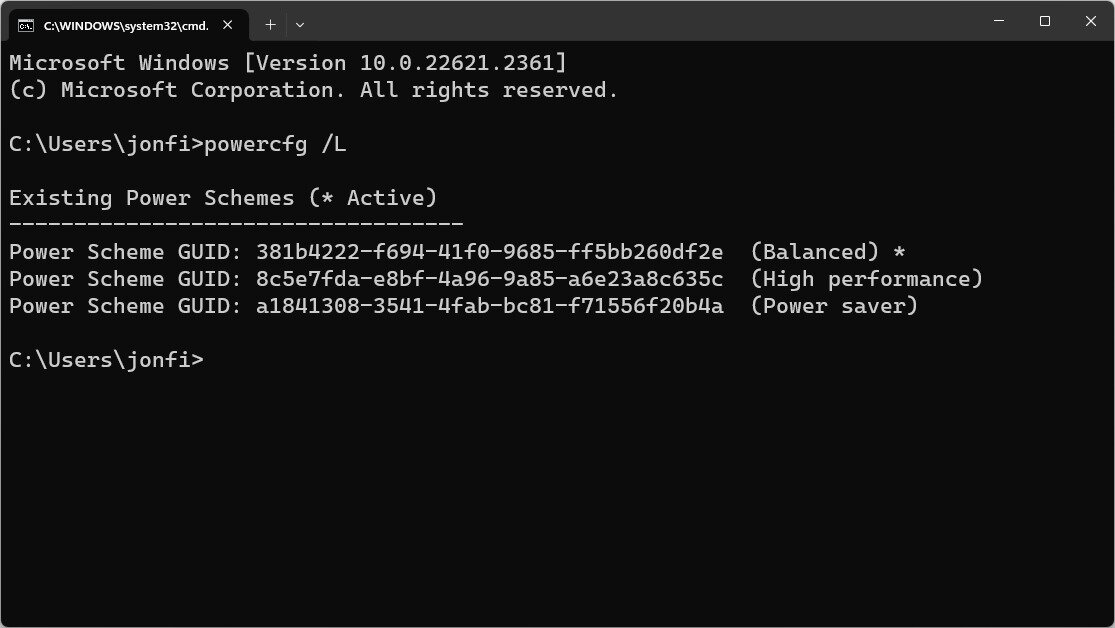
- First, open Command Prompt and enter this command:
powercfg /L - Copy the GUID next to the power plan you want to edit, and paste it somewhere like Notepad. The one with the asterisk is probably the one you want to copy.
- Open Registry Editor. One quick way is to search Windows for regedit, and then select the utility from the search results.
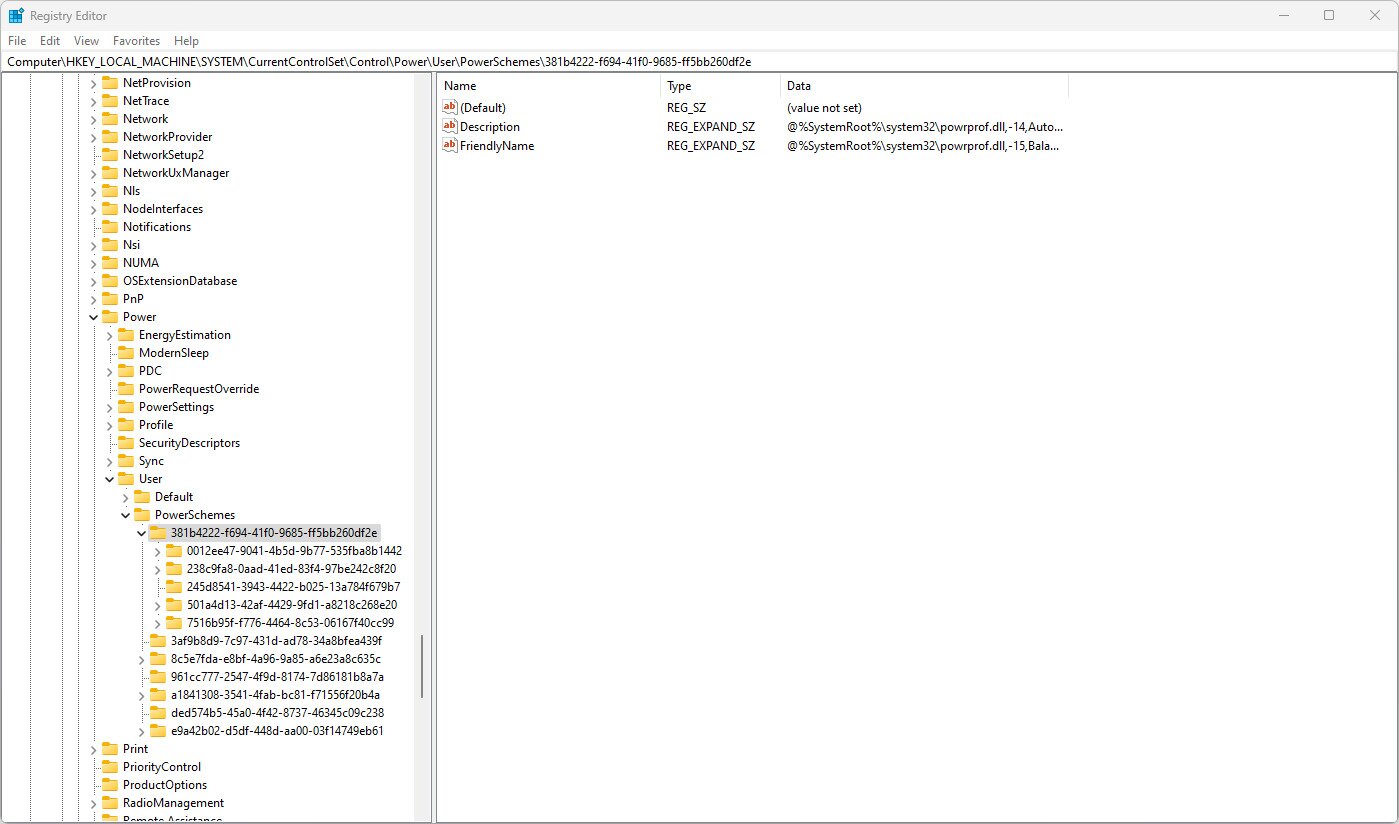
- Copy the following path, and then use it to jump to that location in Registry Editor:
HKEY_LOCAL_MACHINE\SYSTEM\CurrentControlSet\Control\Power\User\PowerSchemes - Using the GUID you recorded earlier, open the registry key/folder that corresponds to that value. In our example, it’s 381b4222-f694-41f0-9685-ff5bb260df2e.
- Within that key, open this subkey:
7516b95f-f776-4464-8c53-06167f40cc99 - Continue one more time to open the next subkey. You should now see a value in the right pane called ACSettingsIndex. Double-click it.
- Change the Decimal value to any number between 0 and 100 to specify the screen brightness for when your laptop is plugged in.
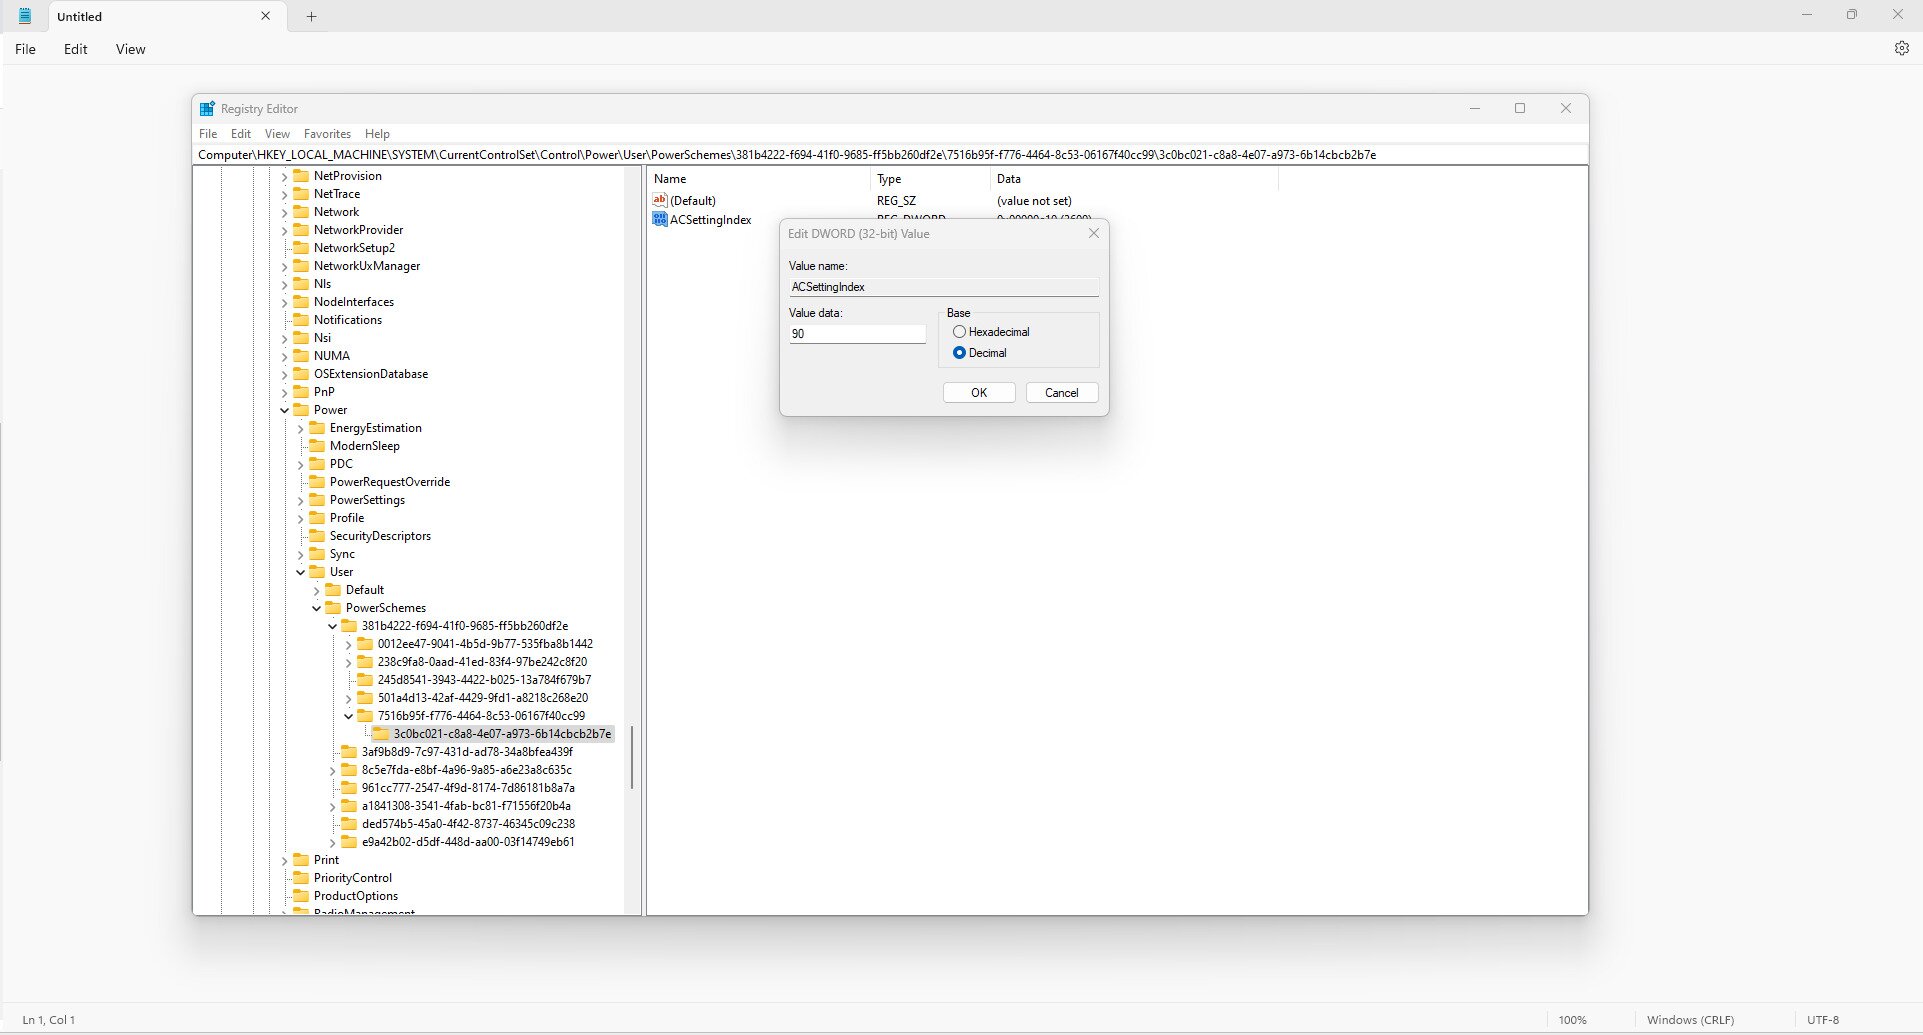
- Select OK to save. Reboot your computer to apply the changes.
Examine potential hardware problems
Hardware problems may be causing the screen to dim or brighten and that means you have to take the laptop in to be fixed. Your laptop’s battery, power supply unit, or graphics card may either have come loose or they may have been damaged. Opening it up is the only way to check. If something has come loose, the repair shouldn’t take too long or cost too much. If a hardware component has been damaged, you will have to replace it.
Try Using Attention-Based Features to Keep Your Screen Active
Many Windows PCs use power saving features, such as dimming the screen if it doesn’t sense a human looking at it. If you’re experiencing this, you may want to try using attention-based features that prevent it from doing so. These features use sensors (like your built-in camera) to see if you’re paying attention to your screen, such as tracking your eye movement. If they sense you’re engaged with your screen, they can often prevent annoyances like screen-dimming. Windows 11 PCs may already have presence sensing built-in. Here’s how to check and adjust it if needed:
- Go to Start
- Go to Settings
- Go to System
- Go to Power & Battery
- Choose Screen and sleep
- From there you have the option to have the screen “Automatically turn off my screen when I leave,” or “Automatically wake up my device when I approach.” Just toggle on or off your selection
You can also adjust presence settings further from this menu. Here’s how:
- From the same Screen and sleep screen, choose More options (located next to Automatically turn off my screen when I leave or Automatically wake up my device when I approach)
- Now you’re accessing Presence Sensing settings, which means you can make adjustments such as:
- Specifying how close you should be before the screen wakes up
- Specifics on how long before the screen should turn off after leaving
- Battery saver options
- Allowing specific apps permissions to use presence sensing
- Choose if you want the screen to dim when you look away, etc.
There may be other built-in presence sensors and features, depending on the brand and model of your Windows PC. Newer types tend to have more of these capabilities out of the box, so look into your individual model to see what other options you may have access to.
Try to Keep Your Screen Active
Similar to attention-based features is screen timeout settings. As you know already, presence settings will dim your screen or turn it idle if the sensors don’t detect your presence. Screen timeout is a similar power saving feature, except it is based on how long you have been inactive on your PC versus if it actually senses you present. This means if you haven’t moved your mouse or typed on your keyboard, the screen will turn off after a certain period of time. While this may or may not cause screen dimming issues, it is helpful to know how to adjust your screen timeout parameters, as it is closely related. Here’s how:
- Go to Start and type Settings
- Click on Power & battery
- Click Screen and sleep
- From there you should see several options for screen and sleep specifics, such as how long you want it to wait before turning the screen off during times of inactivity
Even with your screen timeout settings in place, you may find that your screen goes inactive even if you’re using it. This could be due to you reading long pieces of text or doing hands-free activities that may not register on your PC as being active. There are several solutions to your screen turning off too soon:
- Turn your screen timeout settings to “never” or a longer period of time (as covered above)
- Use attention-aware settings and apps if available (as discussed previously)
- Use third-party apps to keep your screen awake, such as Microsoft PowerToys or Wakeful
- Try playing a video or other media in the background to keep the screen awake
- Adjust power settings by typing Control Panel in the taskbar, choosing Power Options, Change Plan Settings, and choosing “Never” under the Put the Computer to Sleep menu
Laptop Screen Brightness Changes On Its Own? CONCLUSION
Problems with a display usually happen when a graphics-heavy app like a game is being run.
If you game often, and you’re not careful about your system heating up, it is possible that a hardware component is damaged and is causing these screen brightness issues.
If not, it may simply be an outdated driver causing your screen to keep dimming.
Did this work for you? Let us know in the comments below.

Doesn’t address my issue. My screen is being dimmed by Microsoft setting in win 10 and I no longer have access to the brightness slider. It darkens only the right side of the monitor to make it difficult to read the task bar or icon text. It appears to be malicious software behavior that alters win 10 settings that users can no longer access like screen brightness. When I reboot my PC the screen displays a perfect blue color that shows no darkening and after it loads the desk top it darkens the right side of the screen. All my power options are fully enabled and turned on. This isn’t a power issue for my desktop. It’s malware.
The first solution worked perfectly. Thanks a million!
Or, …
Windows Update just fired off another set of downloads and the “dimming and brightening” is the OS trying to get your attention to restart the computer.