How To Repair Damaged And Corrupted Office Documents Easily
Have you ever opened your MS Word, MS Excel, or MS PowerPoint files only to find that you cannot access them anymore? Knowing how to repair corrupted office documents can save you hours of frustration, especially when the file contains important data from a school project or research work. These circumstances really happen once in a while and the reasons vary from one user to another. I used to skip sleep at night just to retype those lost documents — and it is only now that I discovered there are actually reliable ways to recover Microsoft Office documents (Word, Excel, PowerPoint), which I will share with you in this post.
How to Repair Corrupted Office Documents Using the Built-In Recovery Tool
All versions of Microsoft Office include an extensive Auto Repair and Recovery tool built right into the application. This option allows users to recover their corrupted Microsoft Office files in the event of a failure or human error. To access it, open the Office application, go to File > Open, browse to the damaged file, click the dropdown arrow next to the Open button, and select Open and Repair.
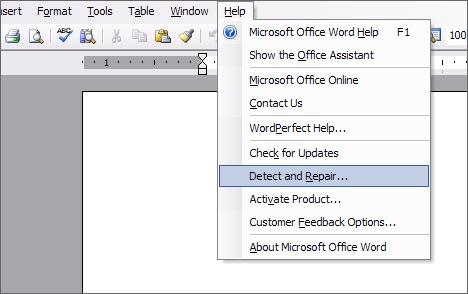
However, this recovery tool is not perfect. The detect and repair engine is fairly basic and may not be powerful enough in cases of critical corruption. If the built-in tool fails, try the app-specific fallback steps below before turning to third-party solutions.
App-Specific Recovery Steps for Word, Excel, and PowerPoint
When Open and Repair does not fully restore your file, each Office application has its own additional recovery option worth trying. Here is what to do for each one.
Microsoft Word
If Word cannot repair the document, you can still salvage the plain text content using the built-in text recovery converter. In Word, go to File > Open and browse to the damaged file. Before clicking Open, find the file-type dropdown at the bottom of the Open dialog (it usually defaults to All Word Documents) and change it to Recover Text from Any File. Open the file with this setting selected. Word will strip away all formatting and attempt to extract whatever readable text remains. You will lose tables, images, and layout, but your written content has a good chance of coming through intact.
Microsoft Excel
When you use Open and Repair on a damaged workbook, Excel may present you with two options: Repair and Extract Data. If Repair fails or the file is too severely damaged, choose Extract Data. This mode attempts to pull out raw cell values and formulas even when formatting, charts, and macros cannot be recovered. It is not a complete restoration, but it is often enough to recover the data that matters most. Always work on a copy of the damaged file rather than the original so you have something to fall back on.
Microsoft PowerPoint
If a presentation file will not open at all, try a slide-import workaround. Create a brand-new, blank presentation in PowerPoint. Then go to the Home tab, click the dropdown arrow beneath New Slide, and select Reuse Slides. Browse to the damaged .pptx file and PowerPoint will attempt to read and import the individual slides from it. This will not recover animations or embedded media, but it can salvage your slide content and text in many cases.
3rd Party Tools to Repair Corrupted Office Documents
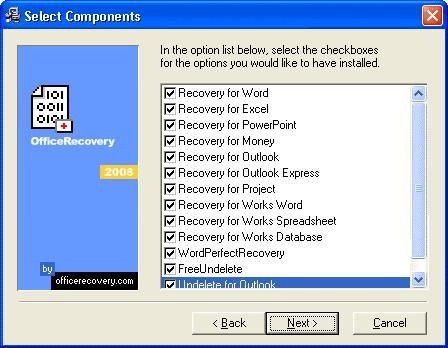
Office Recovery
Doc Recovery
When the built-in tools and app-specific methods are not enough, dedicated third-party repair utilities can go deeper. Many of these tools are available as desktop applications or browser-based services, so it is worth knowing what to look for before choosing one.
When evaluating a third-party repair tool for modern Office files, check for the following before committing to a purchase or upload:
- Format support: The tool should explicitly support DOCX, XLSX, and PPTX — the standard formats used by Microsoft 365 and Office 2016 and later. Legacy format support (for older .doc or .xls files) is a bonus, not a requirement for most users today.
- Microsoft 365 compatibility: Some tools have not kept pace with how Microsoft 365 saves files. Confirm the tool lists compatibility with files created in recent Office versions.
- Password-protected file support: If your damaged file was password-protected, not all tools can handle it. Check this specifically before purchasing.
- Free preview before payment: Reputable tools let you preview recovered content before you pay. If a tool asks for payment up front with no preview, treat that as a red flag.
- Desktop vs. online: Desktop-based tools keep your file on your own machine. Browser-based services require uploading your document to a third-party server — which is a significant privacy consideration for sensitive files. Choose accordingly.
The tools linked above are established options in this space. When browsing for alternatives, apply the criteria above to make sure whatever you choose is suited to current Office files rather than only legacy formats.
Recovery From Temporary Files
If the file will not open at all, Office may have saved an unsaved or auto-recovered version that you can retrieve. The first place to check is directly inside the application. Open the relevant Office app, go to File > Info, and look for the Manage Document (Word), Manage Workbook (Excel), or Manage Presentation (PowerPoint) button. Click it and select Recover Unsaved Files (or Recover Unsaved Workbooks / Recover Unsaved Presentations). Office will open a folder showing any drafts it saved automatically before the file was lost.
If nothing shows up there, you can check the AutoRecover and UnsavedFiles folders directly. In Windows, these are typically found at the following paths (replace YourUsername with your actual Windows username):
- Word AutoRecover files:
C:\Users\YourUsername\AppData\Roaming\Microsoft\Word\ - Unsaved Word drafts:
C:\Users\YourUsername\AppData\Local\Microsoft\Office\UnsavedFiles\ - Excel and PowerPoint unsaved drafts:
C:\Users\YourUsername\AppData\Local\Microsoft\Office\UnsavedFiles\
Word AutoRecover files typically use the .asd extension rather than a .tmp extension. To open an .asd file, go to File > Open in Word, change the file type to All Files, browse to the location above, and open the .asd file directly.
Modern Office documents are saved as .docx, .xlsx, or .pptx files. If you do find any temp or AutoRecover file you want to test, always make a copy first and work on the copy — never attempt to rename or manipulate the only version of a file you have. Once you have a safe copy, you can try changing the extension to the appropriate modern format (.docx, .xlsx, or .pptx) and opening it in the relevant Office application.
It is worth noting that temporary and AutoRecover files are not always available — Office may clear them automatically after a clean shutdown. This is why enabling AutoSave and AutoRecover in your Office settings is strongly recommended as a preventive measure. You can configure the AutoRecover interval under File > Options > Save in modern versions of Microsoft Office.
Tips to Prevent Corrupted Office Documents in the Future
While it is important to know how to repair corrupted office documents, prevention is always better than recovery. Here are a few habits that can help protect your files going forward:
- Always save your work frequently using Ctrl+S and enable AutoSave if you use Microsoft 365.
- Avoid force-closing Office applications — always use File > Close or exit properly.
- Keep backup copies of important documents on an external drive or a cloud storage service.
- Avoid saving files to unreliable storage media such as failing USB drives or unstable network locations.
- Do not work directly from a USB drive while it is plugged in. If the drive is accidentally disconnected or removed while a file is open and being written to, corruption is almost guaranteed. Copy the file to your local drive first, work on it there, and copy it back when done. Always use Safely Remove Hardware before unplugging any external storage device.
- For important or frequently updated files, save them to OneDrive or SharePoint and enable AutoSave. Both services maintain full version history, meaning you can roll back to an earlier version of a file at any time — even if the current version becomes corrupted. For local files, make sure AutoRecover is enabled under File > Options > Save so Office can recover your work after an unexpected crash or power loss.
- Keep your Office installation up to date, as Microsoft regularly releases patches that address stability and file-handling issues.
Following these practices significantly reduces the risk of file corruption and ensures that your important data remains safe and accessible at all times.
And you are done — and have also saved hours of work. 😀
If you find any problem with this method, please let us know in the comments. We will do our best to help you out.

AWESOME! You saved my @$$ with that last trick. Thank you!
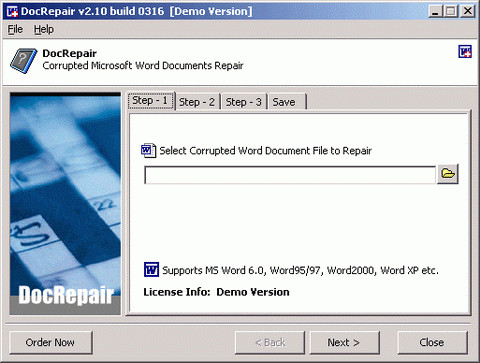
The demo version of DocRepair is useless. It states that “certain words will be replaced by ‘DEMO'” — but in fact it will not even produce a saved file so that you can find out if it worked.
I’m happy to pay the $80 if the thing works…but I have no way of knowing if it actually will produce anything useful if I cannot proceed to actually save my document (I don’t care if a bunch of the words are replaced with “DEMO” — at least I’ll know it works!).
sir when i try to open the document it gives the message of ms dos encoding message and it cant open the word file tell me plz the way to recover i had try the open all method but not worked i am waiting for ur replysaqlain abbas