How to Install Fonts on Windows 10 & 11: Step-by-Step Guide
There are a number of ways you can install fonts on Windows 11 (and 10), with varying methods and complexities to also consider. In this article, we’ll cover all the personalization options to add fonts, with step-by-step instructions so you know exactly what to do and which method suits you best. You can spruce up your PowerPoint presentations or other design projects in no time.
Understanding Font File Types and Where to Download Fonts
Before we get into the actual instructions of how to install multiple fonts, it can help to understand the common font file types:
- .ttf file: This stands for TrueType font file, the industry standard developed by Microsoft and Apple. They are still commonly used today.
- .otf file: OpenType is often used for desktop publishing and is high-quality, making it ideal for printing.
- .woff: Web font format that is basically a compressed version of ttf or otf, but it is optimized to load fast on the web.
- .woff2: This web font format is just like .woff, but it loads even faster due to optimized compression.
For Windows, you’ll want to specifically look for .ttf files and .otf files only. The other types are not usually compatible.
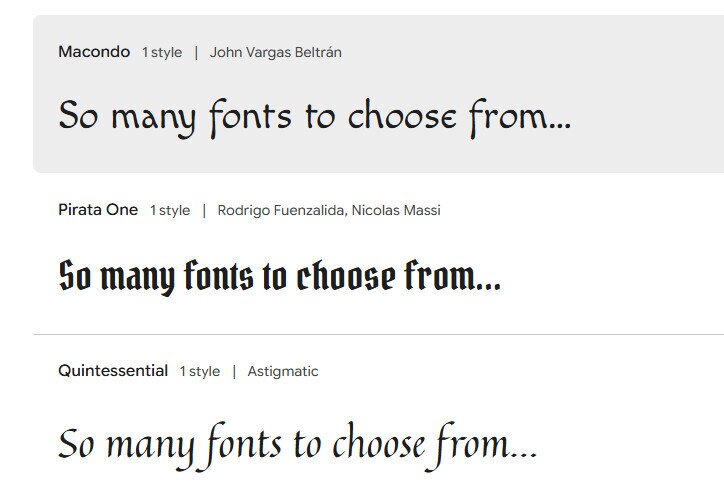
Now that you know the most common types, where do you go to download fonts? You might be swayed by sites that offer free fonts, and they certainly do exist. However, it’s important to choose only trustworthy sites, as you may accidentally install malware or other harmful content on your computer.
Our recommendation is to only choose highly reputable sources, such as Adobe Fonts, Google Fonts, or the Microsoft Store. There are plenty of safe options to choose from; just do a little homework first to make sure you’re downloading fonts that are safe.
Preparing Font Files for Installation
As mentioned, before you install fonts, you’ll need to download them from a reputable source first. Assuming you’ve done this, you’ll then want to prep them for the actual installation process. Some tips for this:
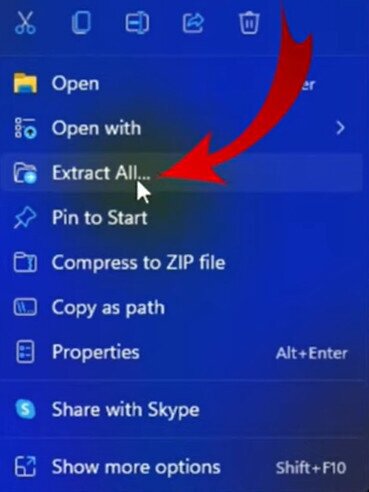
- Look for the downloaded fonts, which are usually in a ZIP file. You’ll need to extract the files, which will unzip them.
- Right–click on the ZIP file.
- Select Extract to extract files, at which point you can choose where to save them
- It should show you the font file types at this point. You can then choose to organize the fonts by styles, types, or other parameters. If you want to install multiple fonts, you’ll need to extract all of them.
5. At this point, you should be ready to move on to the installation.
Methods to Install Fonts in Windows 10 & 11
Here are the various ways to install fonts for Windows. Note, versions 10 and 11 are usually pretty much identical in their instructions. Meanwhile, here’s how to check what version of Windows you have.
Method 1: Right-Click Install (Fastest)
The right-click install is the easiest way to install .ttf files and .otf files. It takes seconds and is probably the most common method:
- If you’re using a .ttf or .otf file, make sure you extract the files first from the ZIP file.
- Right-click on the file.
- Choose Install. You can also choose to install for all users if you want everyone who uses the computer to have access to the fonts.
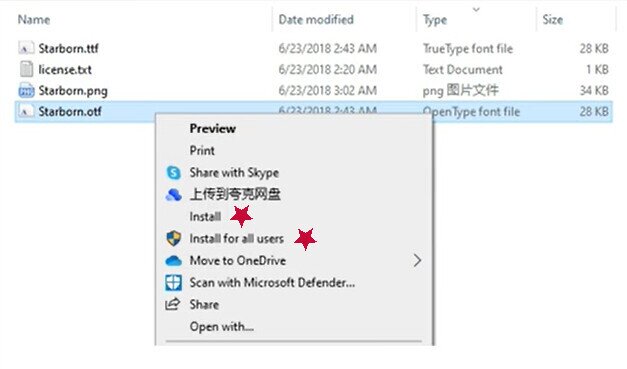
4. You may be prompted to let the program make changes to your computer. Before selecting Yes, be sure you trust the source you downloaded the font from.
5. The new font should now be available for use.
Method 2: Drag and Drop (for Windows 10 and Windows 11)
An easy way to add fonts to Windows 10 or Windows 11 is to drag and drop them. Here’s how:
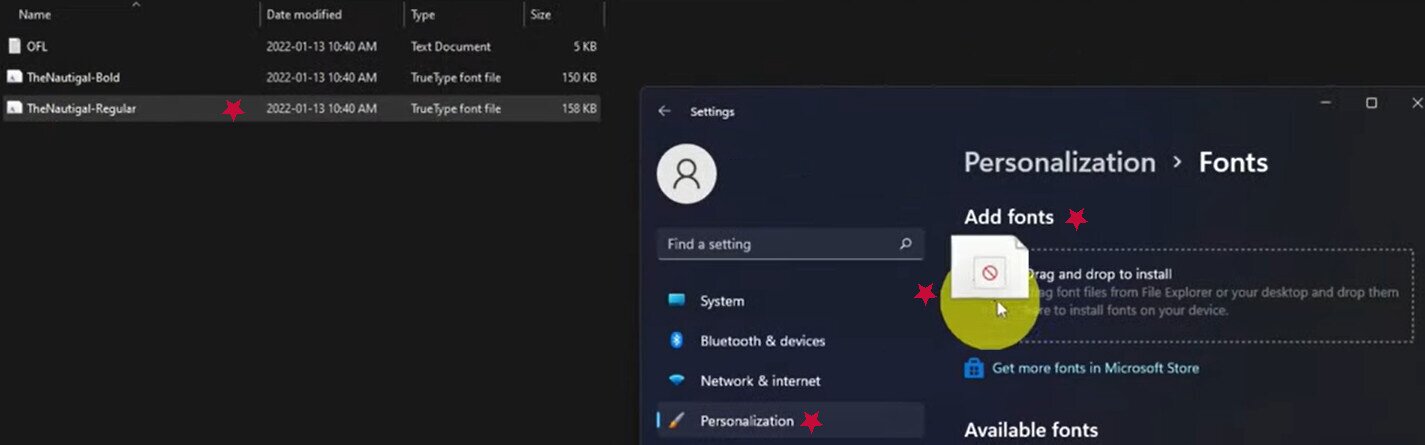
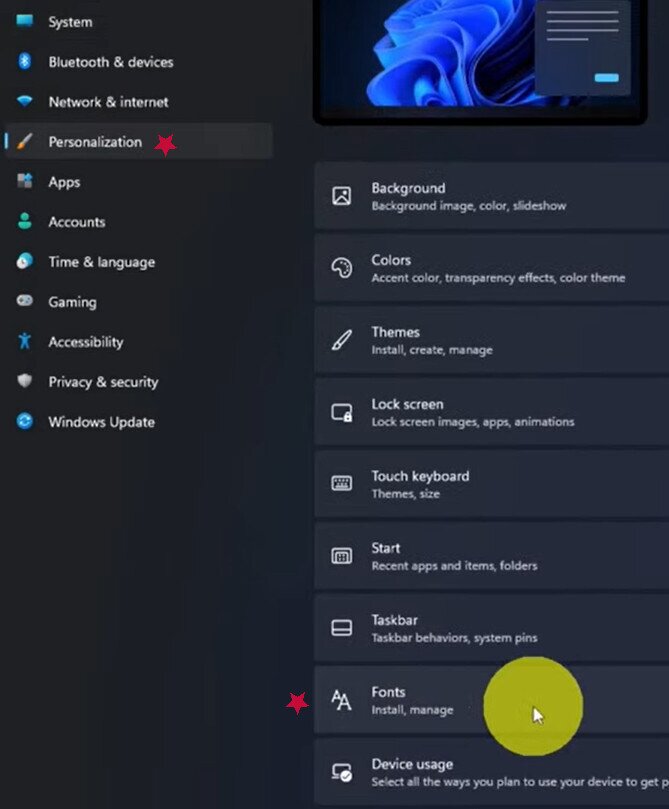
- Go to Settings.
- On the left of the screen, choose Personalization.
- In the Settings Personalization screen, go down to Fonts and click.
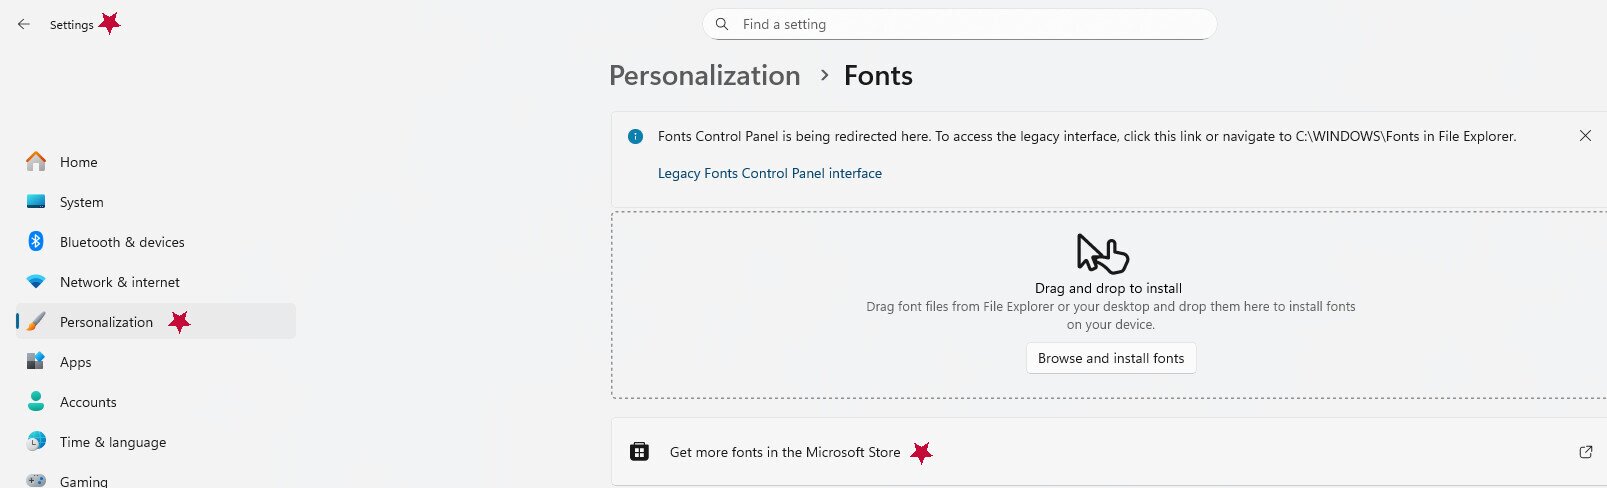
- From there, you’ll see all of your currently installed fonts. You can drag and drop your new font by selecting the font file and dragging it (by holding down the mouse button) and pulling it into the Add fonts area, which looks like this:
5. At this point, it will already start installing the new font.
Method 3: Copy and Paste into the Fonts Folder
Some people prefer to use File Explorer to access their fonts folder location and copy paste fonts directly from there. Here’s how:
- First, copy the new font file you want to add (make sure you extracted it first).
- Then, open File Explorer.
- Go to This PC (it’s on the left side of the screen).
- Double-click on Local Disk (C:).
- Look for the Windows folder and then double-click it.
- Look for the Font folder and double-click it to open it.
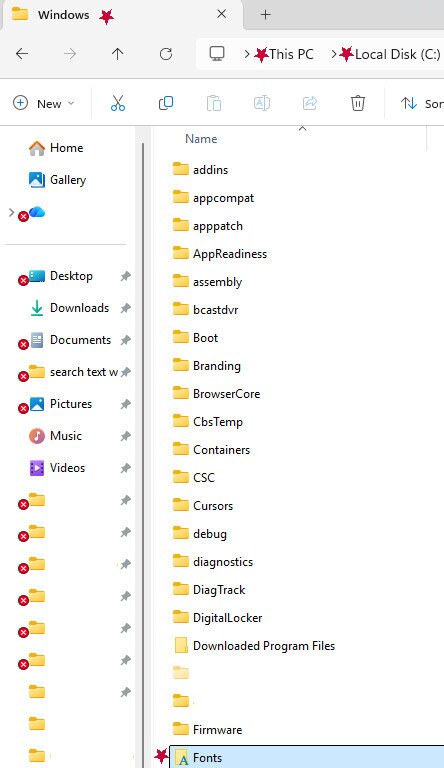
7. Paste the new font inside this folder. Note, it’s very easy to install multiple fonts this way.
8. The font will automatically be installed system-wide; however, if you have a program open while doing this, you may have to close it before the new font is available.
Method 4: Double-Click to Install Fonts
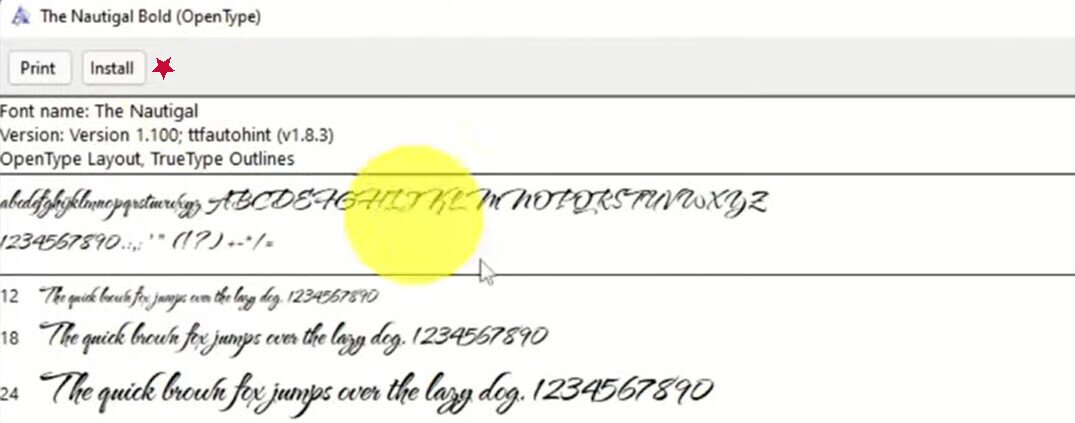
Another extremely easy way to install fonts is to simply double-click on the newly extracted font file. It should open in the font previewer. Near the top of this window is an Install button, along with a preview of how the font will look. Simply click Install if desired.
Method 5: Install Fonts from the Microsoft Store
If you want to add fonts from the Microsoft Store, the process is slightly different from installing one you downloaded from a third party. Fortunately, it’s also very easy to navigate:
- Go to Settings.
- Go to Personalization.
- Go to Fonts.
- Choose Get more fonts in Microsoft Store.
5. Choose the font you want and then click Get or Buy.
6. Once purchased or selected, the new font will automatically download and install on your computer.
Method 6: Install Fonts via Command Prompt (Advanced)
This is a more complex way to add system fonts via a command prompt install. The Command Prompt is a way for users to interact directly with the operating system without a graphical interface. You can perform granular, advanced commands and have greater control over the system. For those who want to add fonts through this method, here are the basic steps:
- 1. Push the Windows key and the S key at the same time, and then type cmd into the address bar.
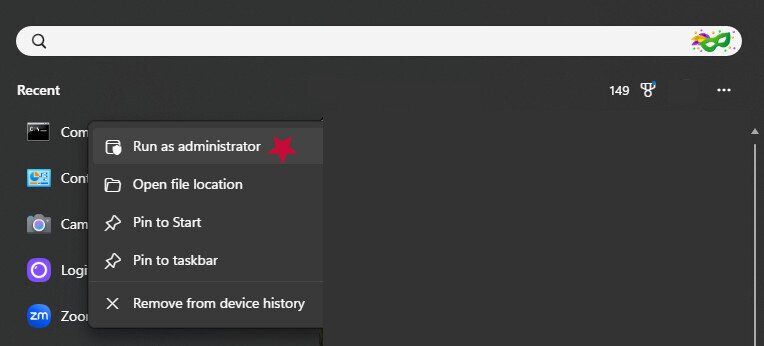
- 1. You’ll see Command Prompt appear in the pop-up menu. Right click it and choose Run as Administrator.
3. To copy your new font into the system fonts folder, you’ll want to use the command:
copy “path\to\fontfile.ttf” “%windir%\Fonts”
4. However, it’s important that you replace “path\to\fontfile.ttf” with the path to your actual font file.
5. There should be a confirmation message that says something like 1 file copied.
6. Close any open programs and restart them to allow the new font to be applied.
Managing and Using Installed Fonts
Here are some tips to manage fonts and take advantage of installed ones in programs such as PowerPoint and Word:
- To see already installed fonts: Go to Settings, then Personalization, then Fonts. This should show you all currently installed fonts, along with a font preview window so you can see the look before making your selection. You can click on them to get more details, such as how many font faces are available. Another way to check installed fonts is to go to the actual File Explorer Font file, as instructed earlier in this article.
- To uninstall fonts: You can either go to Settings > Personalization > Fonts, then click the ellipsis to uninstall a font, or open the fonts folder and right-click a font to delete it, which will uninstall it.
- Searching for a font: The Fonts page via Settings/Personalization also has a search bar so you can manually search for an installed font.
- PowerPoint fonts: Many system fonts are widely available in your programs and apps; however, they may not work in PowerPoint or other programs. This can be a common issue, so it helps to be aware of it in advance.
- Try installing the full font family: Installing the files for the entire family (such as bold, italic, etc.) gives you more options when using fonts in programs like Word or PowerPoint.
Troubleshooting Font Installation Issues
Here are some common problems users may run across when installing fonts:
- New fonts don’t appear in apps like Word or PowerPoint: There are a few possible fixes. Make sure the apps/programs weren’t open when you added the new font. If they were, close and reopen them and see if the font is now available. If that doesn’t work, try a full system restart, as some programs only recognize newly installed fonts after Windows refreshes resources.
- Fonts are not installed: Make sure the font file was not corrupted or unsupported. For the most part, only .ttf and .otf files are supported in Windows, unless the unsupported files are able to be converted.
- Try installing for all users: Certain fonts may require system-wide installation for all users to be properly installed. Try the installation process again, and be sure to right-click Install for all users. You can also check whether the font appears in the Windows font folder (Control Panel > Fonts) to confirm it was added correctly.
- Caching issues may be the culprit: If the cache isn’t updated correctly, it can cause issues with installing fonts. Try rebooting your computer and starting the installation process again. You can also try clearing your Windows font cache.
- Incompatible third-party fonts: Some fonts downloaded from third parties may not be compatible with all Microsoft Office apps, so they may work in some programs but not in others.
- Make sure you downloaded all of the font files: Some fonts have multiple files that need to be downloaded and extracted, so be sure you’re not missing any.
Personalization: Changing System Fonts in Windows

It’s helpful to know that Windows doesn’t have a simple way to change computer fonts for the entire system UI. That requires modifying the registry, and that can cause display issues and other problems. You would also need administrative permissions to change system fonts at this level, so also keep that in mind. The risk of ensuing issues is often not worth the effort of registry changes, and many users choose not to pursue this method.
Fortunately, there are other adjustments you can easily make. For instance, you can adjust the text size by going to Settings > Accessibility > Text Size, and sliding the size to your preferred setting. This is especially helpful for those with visibility issues.
For instance, you can modify the size of the text by going to, sliding up the size to your preferences. This is especially helpful for those with visibility issues.
For applications such as PowerPoint, Excel, and Word, you can adjust your fonts in the toolbar dropdown menu, which lists all available fonts for that program. Usually, installing new fonts on Windows will also add fonts to these apps, but there are exceptions when they may not be compatible system-wide.
Other personalization options include changing the display scaling of system fonts. You just go to Settings > Accessibility > Text Size, then choose how you want to scale your text.
[file:scale; alt:Windows font scale menu]
You can also adjust fonts through many browsers, such as Chrome. Go to Settings > Appearance > Customize Fonts.
[file:chrome-fonts; alt:Chrome fonts menu]
Font Installation Methods at a Glance
| Method | Difficulty | Compatibility | Best For |
| Right-click Install | Easiest | Windows 10, Windows 11 | Quick, one-font installation for beginners |
| Copy-paste | Fairly Easy | Windows 10, Windows 11 | Installing several fonts at once |
| Double-Click | Very easy | Windows 10, Windows 11 | Previewing a font before installing |
| Drag and Drop | Fairly easy | Windows 10, Windows 11 | Bulk installation via the fonts window |
| Microsoft Store | Fairly easy | Windows 10, Windows 11 | Finding and installing new fonts in one place |
| Command Prompt | Advanced | Windows 10, Windows 11 | Scripted or advanced font management |
Frequently Asked Questions
How do I install a font I have downloaded?
There are a variety of methods, such as right-click install, double-click install, copying and pasting into the Fonts folder, and other tactics. For detailed guides, take a look at the earlier sections of this article.
Can I install multiple fonts at once in Windows?
Absolutely. Just select all of the font files you want to install and then right-click to install them. You can also copy and paste multiple fonts into the Fonts folder at once.
Where is the fonts folder located in Windows?
It’s located in the Local Disk (C:), which is accessible via File Explorer. A quicker way to access it is to open File Explorer, click This PC, then paste “C:\Windows\Fonts” (without the quotes) into the address bar at the top right of the screen. It should take you right to it.
Why isn’t my new font showing up in Word or PowerPoint?
Some possible causes for this problem could include:
- The program was open when you installed the font, and you need to close and reopen it.
- You didn’t install fonts for all users, so it wasn’t a system-wide installation.
- You’re using an older version of PowerPoint or Word that may not be compatible with the new font.
- The font file may be corrupted.
- The installation didn’t complete and needs to be redone.
How do I remove or uninstall a font in Windows?
Uninstalling a font is simple. Just go to Settings, then Personalization, then Fonts. From there, all of your installed fonts should be visible. Just click the ellipses next to the font you want to remove, then select Uninstall.
Is it safe to download free fonts from the internet?
It can be, but it’s important to only choose reputable sources. Look for sites with high traffic, good reviews, and strong user popularity. Google Fonts is a good example of a source with free font options.
Conclusion
It’s easy to add fonts and customize personalization options in Windows, and it’s especially handy to have so many methods to choose from when installing. While some fonts may cost money, there are many free fonts from sources such as the Microsoft Store or Google Fonts, so you can experiment with new looks for no cost.
If you’re interested in more personalization tips, here is how to install fonts on Ubuntu, as well as our guide on text formatting and fonts in Discord.