How to set up Kodi media center on a Chromebook
Kodi media center is an excellent, free, and open-source app perfect for managing your media. It can handle movies and TV show files locally, or over a network via NFS, SMB, FTP, etc.
If you’d like to set up Kodi on your Chromebook to watch your favorite local media, this guide is for you. Here’s how you can set up Kodi media center on a Chromebook.
How to enable Linux support on Chrome OS
Linux support must be enabled on your Chromebook to install the Kodi media center application in Chrome OS. Thankfully, it is very easy to enable Linux on most Chromebooks.
To start, open up “Settings” in Chrome OS. You can do this by clicking on the clock in the Chrome OS taskbar, and selecting the “gear” icon. Once inside of the “Settings” area, find the “Advanced” section, and click on it to expand its options.
After expanding the “Advanced” options, look for “Developers” and click on it. Then, locate “Linux development environment.” Find the “Turn on” button, and click on it to enable Linux support in Chrome OS.
Upon enabling Linux support in Chrome OS, a Terminal window should pop up. If it doesn’t, launch the “Terminal” app from the Chrome OS app menu. Once the terminal is open, find “penguin,” and select it with the mouse.
When you select “penguin,” you’ll gain access to the Debian Linux container installed on your Chromebook. From here, run the apt update command to check for updates.
sudo apt update
After checking for updates in the Debian Linux container, run the apt upgrade command to install any pending upgrades. Be sure to do this often, to keep your Linux container up to date.
sudo apt upgrade
How to install Kodi media center on Chrome OS
The Kodi media center application is installable on Chrome OS via the Linux container. Ensure you have the Chrome OS terminal app open (launch it via “terminal” in the app menu.)
Once the terminal window is open, search for “penguin,” and click on it. When you select “penguin,” you’ll load up the Debian Linux container’s command-line interface. From here, you can use the apt install command to install the “kodi” package.
sudo apt install kodi
Upon entering the command above, the Debian Linux container will tell you that it is about to install a lot of packages. These packages are everything Kodi needs to run successfully on Linux. Press the Y key to confirm you wish to install Kodi.
When the Kodi app is installed, it will appear in the Chrome OS app menu under “Linux apps”.
How to add media to Kodi
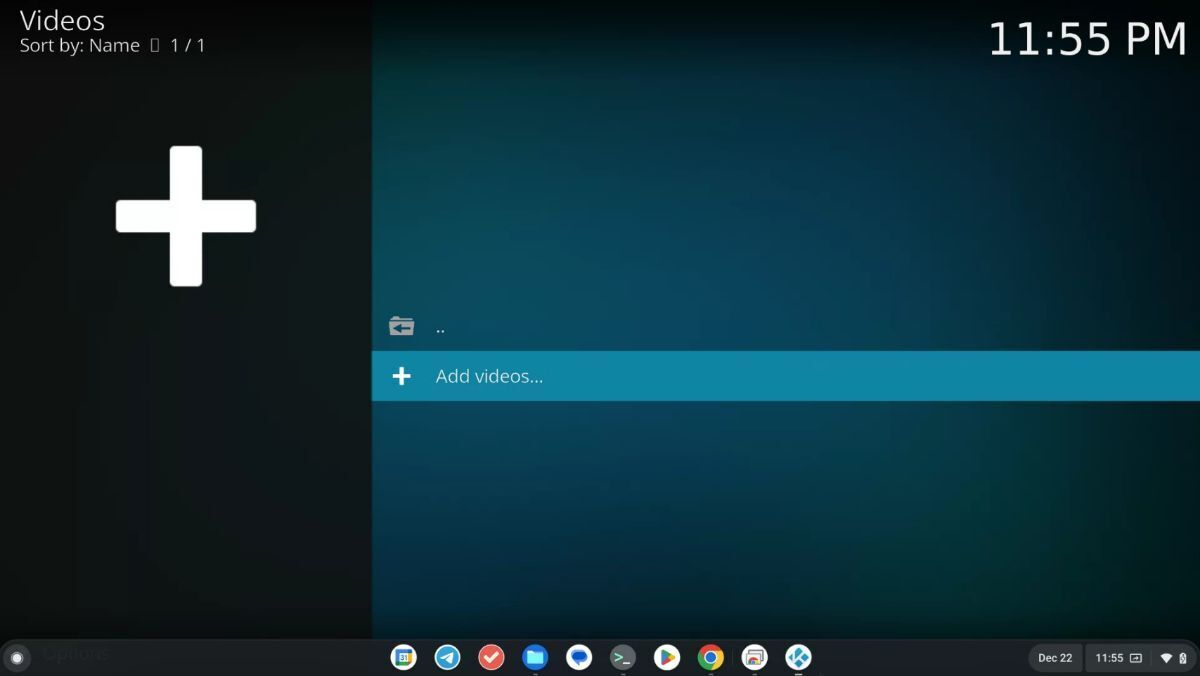
To add media to Kodi on your Chromebook, start by selecting the section you wish to add. For example, if you wish to add some movies, find the “Movies” area. Once you’ve located the section you wish to add videos to, find the “Enter files section,” and click on it with the mouse.
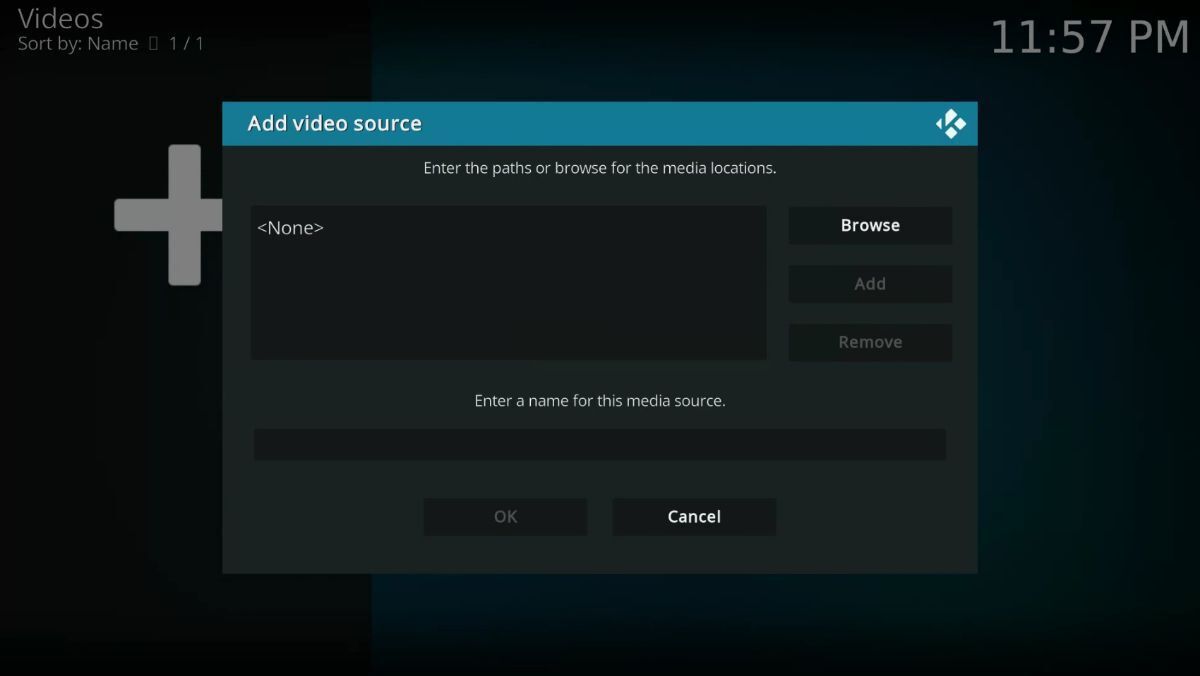
After selecting your media section (Movies, TV Shows, etc) locate the “Add videos..” button, and click on it with the mouse. Selecting this option will load up the “Add video source” pop-up. From here, click on the “Browse” button.
Once you’ve selected the “Browse” button, you’ll be asked to browse for a new share. If you’ve placed movie files in your “Linux files” folder, select the “Home folder.” Alternatively, if you’re an expert, and wish to add a network share, select one of the options.
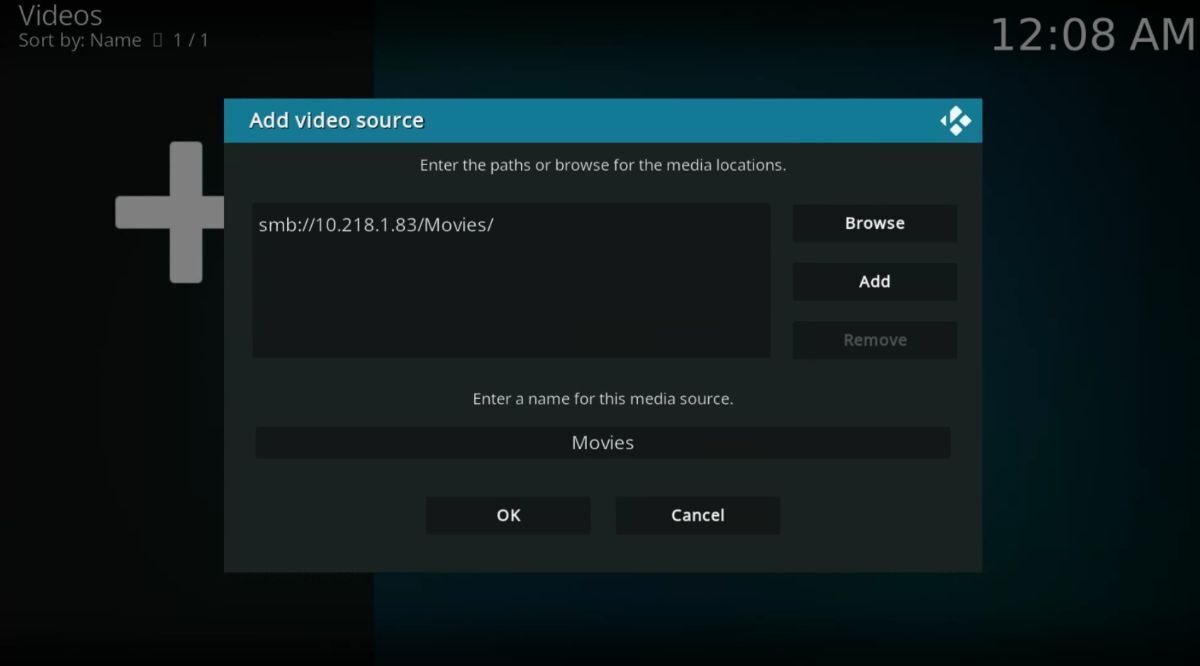
When you’ve located your files, click the “OK” button. When you do this, Kodi will add your media files as a source. After you’ve added the file location as a source, click the “OK” button again.
After clicking the “OK” button a second time, the “Set content” window will appear.
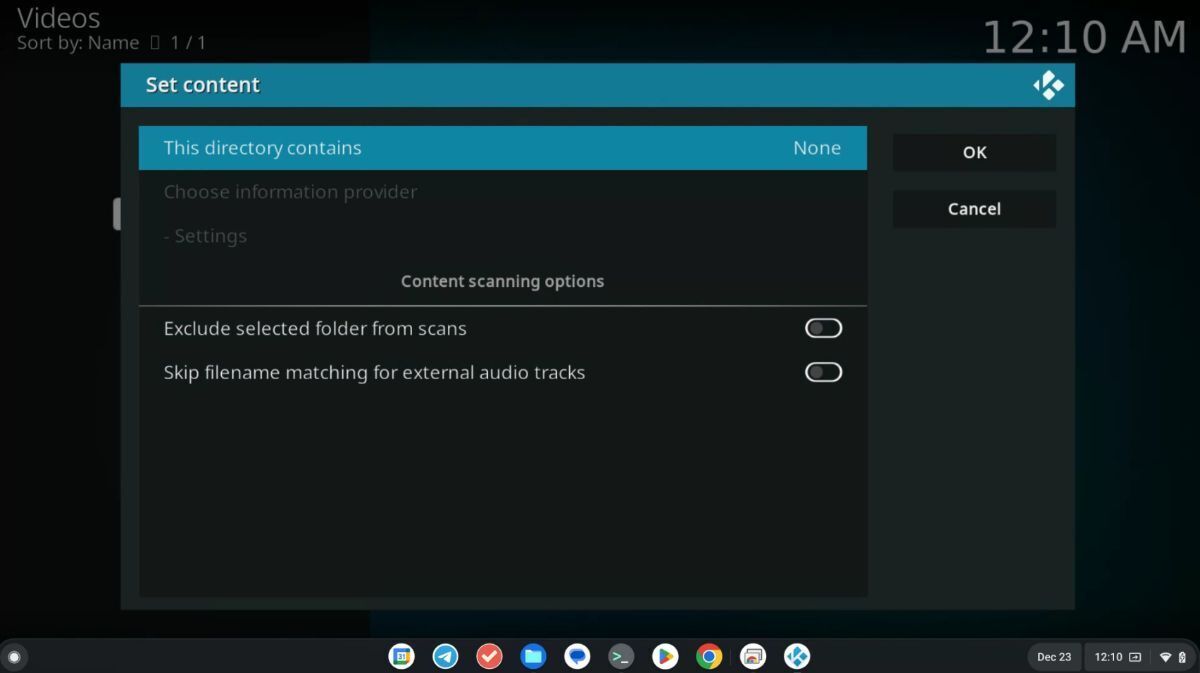
In the “Set content” window, find the “This directory contains” section, and click on it. Then, set the content of the video files you are adding to Kodi. For example, if you are adding movies, set the content to “Movies.”
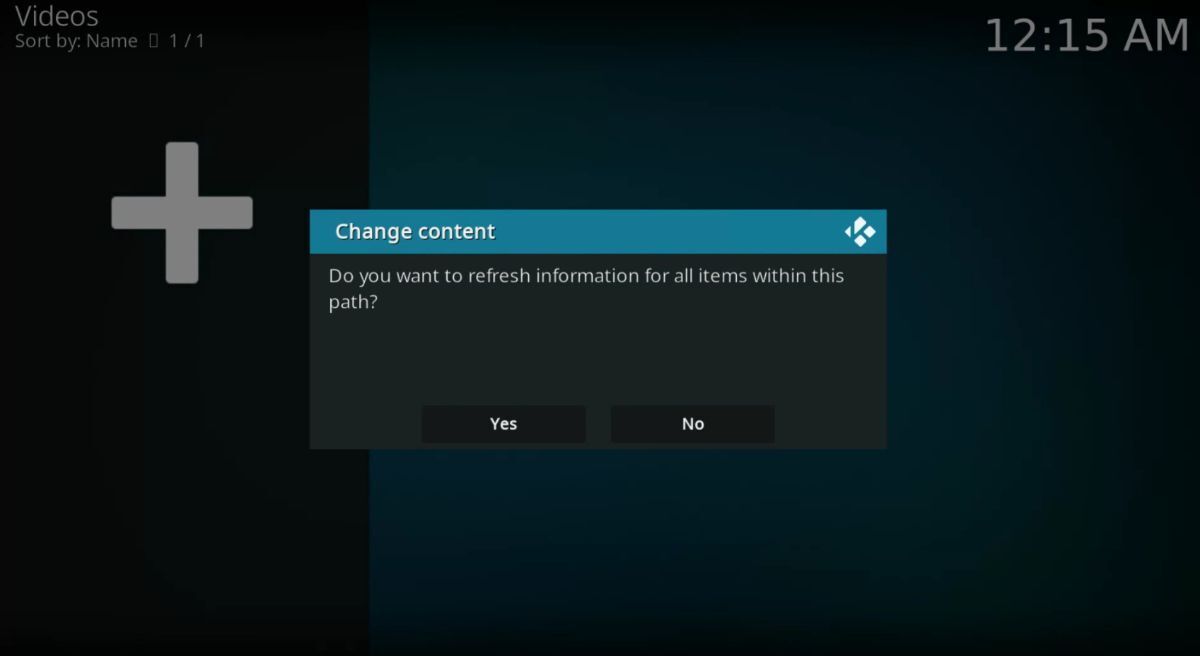
After setting the content for your videos, Kodi will ask you if you wish to refresh information for all items within the path. Click the “Yes” button. Selecting “Yes” will check all of your video files against TV and movie databases. This process could take some time, so be patient.
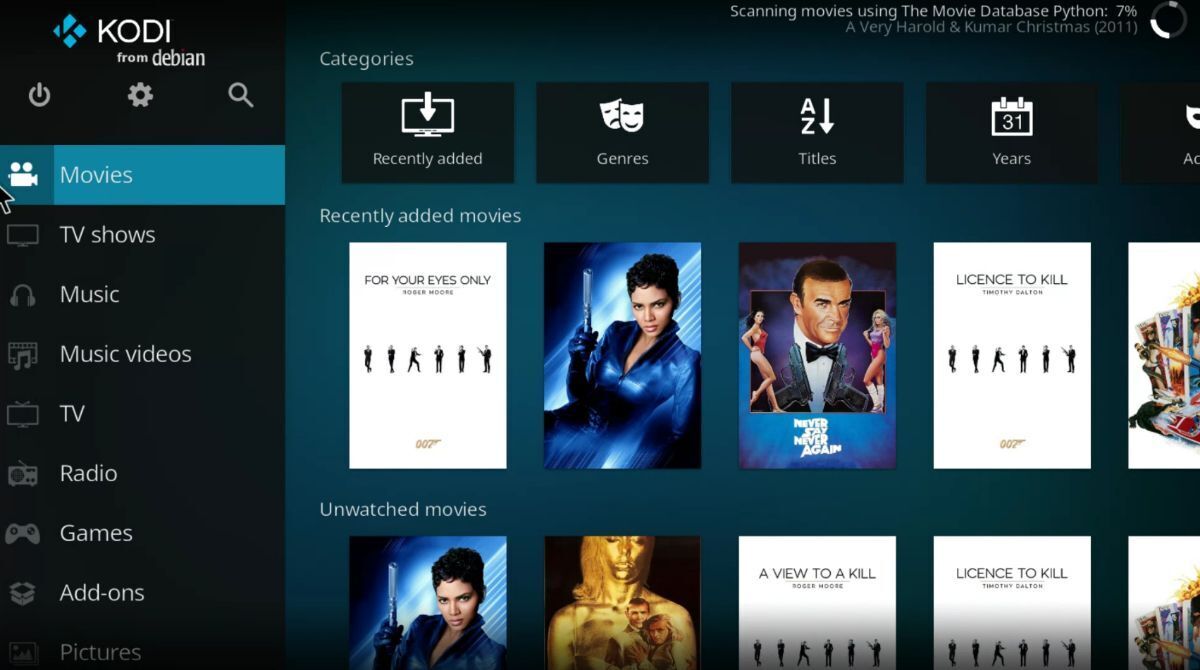
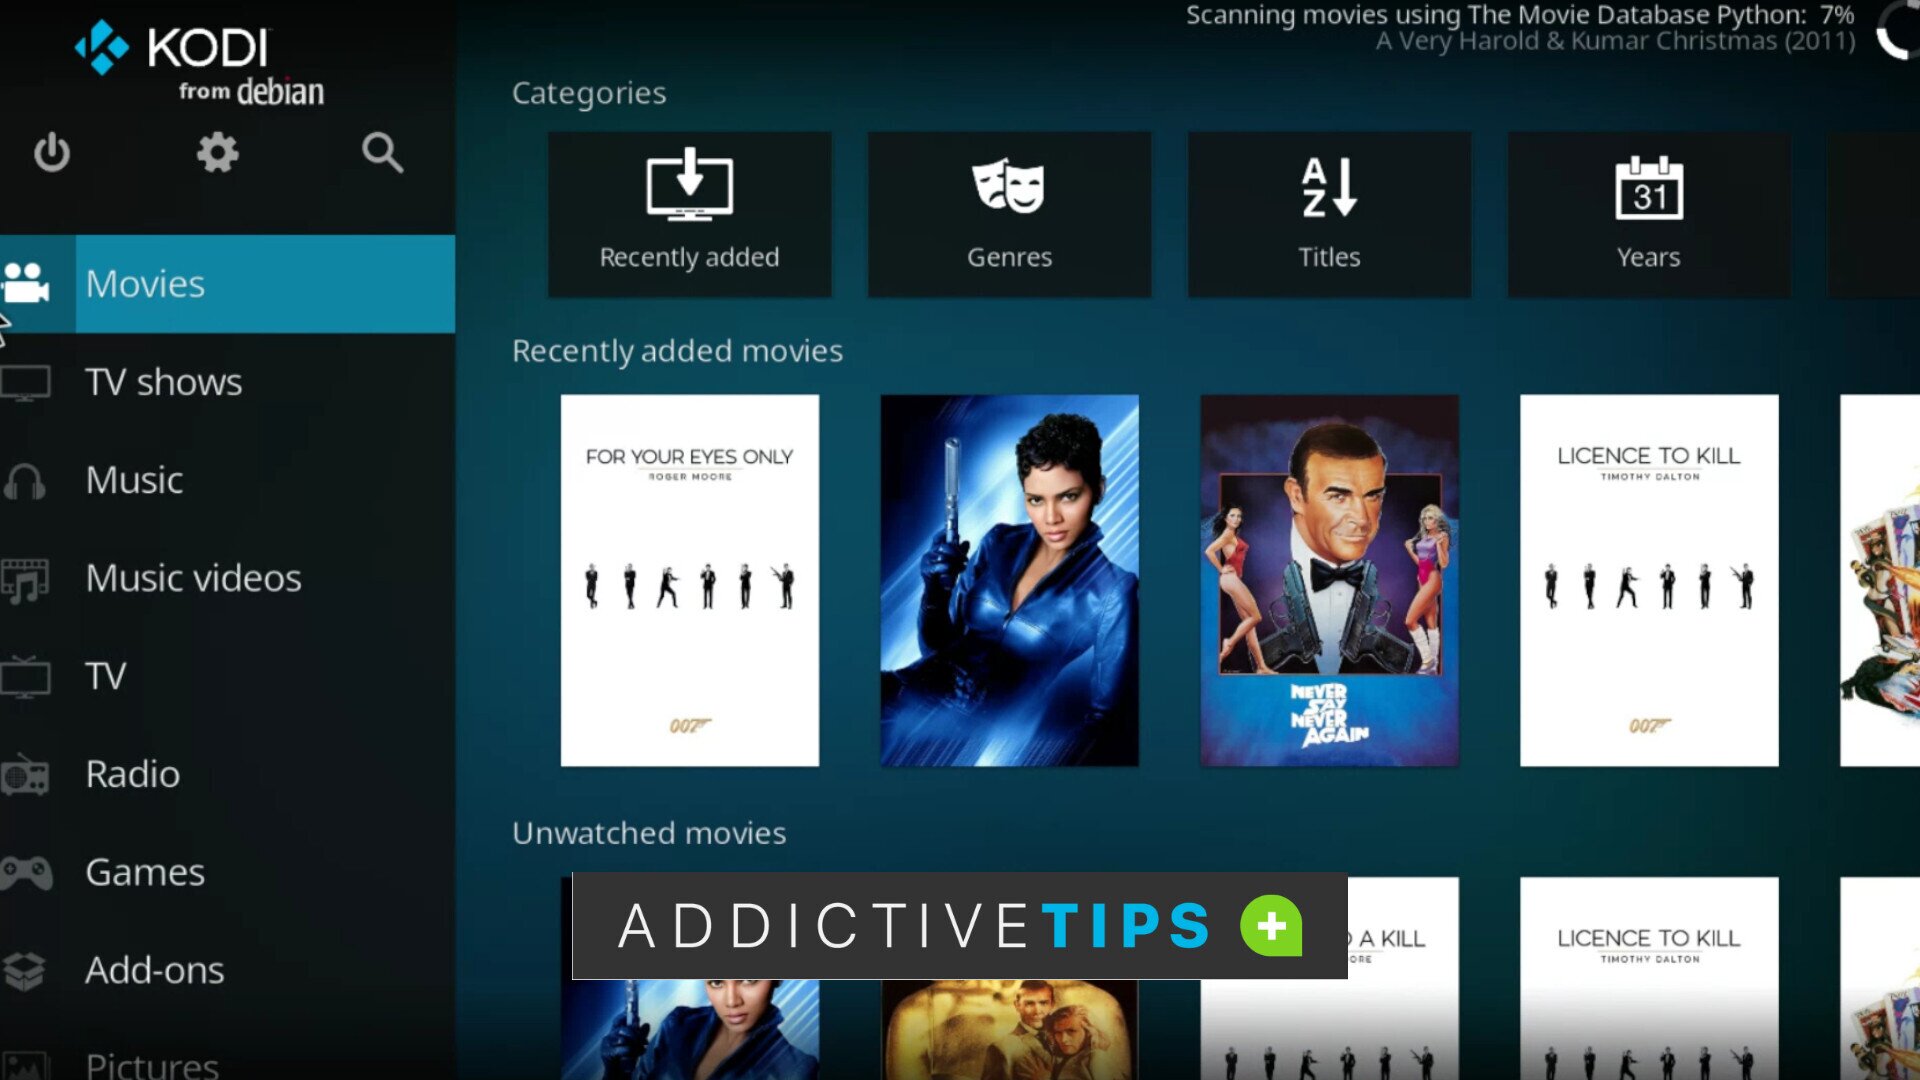
When your content is finished being scanned by Kodi, it is ready to watch. Enjoy your movies and TV shows on your Chromebook!
