LibreELEC – An Operating System Tailored for Kodi
LibreELEC is a minimal yet fully-functional operating system created for the sole purpose of running Kodi on “limited” hardware. Based on Linux and originally intended specifically for the Raspberry Pi, it has since been ported to other single-board computers.
Today we’ll introduce you to LibreELEC, what it is, where it’s coming from, what hardware it runs on. We’ll also introduce the Raspberry Pi as this is the platform we’ll use for our demonstration. We’ll then show you how to get LibreELEC and install it on a Raspberry Pi. Once we have it up and running, we’ll take you through a quick tour of its main features. And we’ll finish things up with some available alternatives.
![]()
For Added Security When Streaming Content, Use a VPN
To keep what you’re doing to yourself and avoid the scrutiny of overzealous Internet Service Providers, you should always use a VPN when streaming content. When ISPs suspect you’re violating their terms and conditions, they might react by throttling down your speed, sending you copyright infringement notices or even interrupting your service. A VPN protects your privacy by encrypting your data using strong algorithms that make it almost impossible to crack. And by using appropriately located servers, A VPN can also let you bypass geographic restrictions.
Choosing a VPN can be a daunting task due to the number of suppliers available. Important factors to consider when selecting one are a fast connection speed to avoid buffering, a no-logging policy to further protect your privacy, no usage restrictions to access any content at full speed and software that is available for your device.
The VPN We Recommend for Kodi: IPVanish
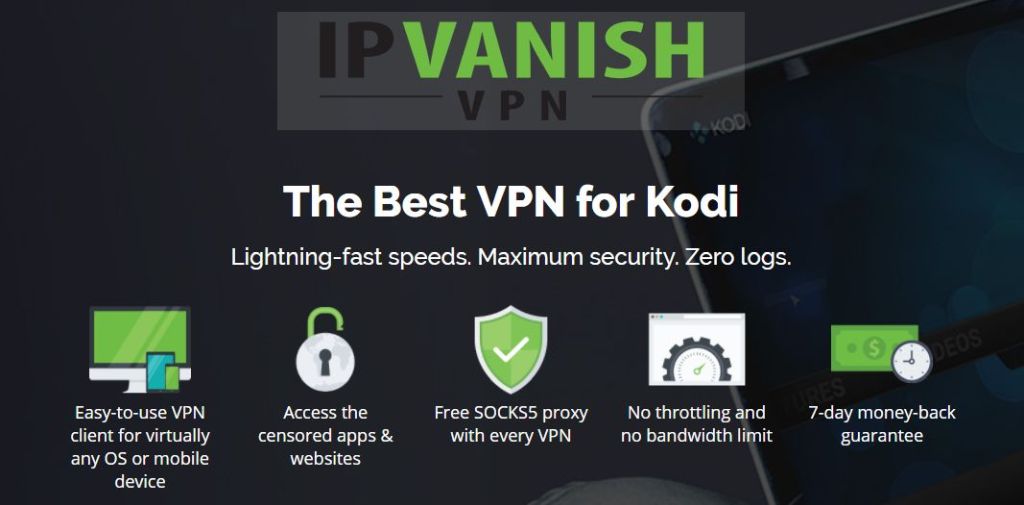
We’ve tested several VPN against our criteria and the one we recommend for Kodi users is IPVanish. With servers worldwide, no speed cap or throttling, unlimited bandwidth, unrestricted traffic, a strict no-logging policy and client software available for most platforms, IPVanish delivers impressive performance and value.
IPVanish offers a 7-day money back guarantee which means you have a week to test it risk-free. Please note that Addictive Tips readers can save a massive 60% here on the IPVanish annual plan, taking the monthly price down to only $4.87 per month.
What is LibreELEC?
LibreELEC, a short for “Libre Embedded Linux Entertainment Center“, is an operating system created to run on a handful of flash-based single-board computers. For those of you curious about the “Libre” part of the name, libre is French for free. Not free as in “no charge” but free as in “freedom”. LibreELEC is based on Linux although it is stripped of anything that is not necessary to run Kodi. The sole purpose of LibreELEC is to allow Kodi to run and make the most of the limited hardware. The Operating system includes Kodi and will actually boot right into it.
LibreELEC started in 2016 as a fork of OpenELEC, a similar operating system, when “creative differences” among the developers caused some of them to quit the project and start their own.
One of the best qualities if LibreELEC is how easy it is to install on your device. Great care was taken in developing an easy software installer that hides most of the complexity of the process. Using the LibreELEC USB-SD creator software will allow you to be up and running without any issue in no time.
What’s needed to Install LibreELEC?
Installing LibreELEC does not require much. First and foremost, you’ll need a compatible single-board computer. The available options as of this writing are:
- Raspberry Pi 0/1/2/3
- x86_64 devices with Intel, AMD and nVidia GPU’s
- WeTek Play 1 and 2, WeTek Hub
- Odroid C2
- Cubox iMX6 devices
Other than that, you’ll need a computer to install and run the USB-SD Creator software. The software will run on Windows, Mac OS or Linux so, almost any computer will do.
Since LibreELEC installs from an SD card or USB flash drive (as an option only on the Raspberry Pi), you’ll need one of these. How big should it be? It all depends on the number of Kodi add-ons you’re planning to install and the size of your Kodi library. AS a general rule 8 or 16 Gb should be sufficient.
The last thing you might need is an SD card reader for your computer. That is unless your computer has one built-in, of course. Also, if you decide to use a flash drive rather than an SD card, you won’t need that.
The Raspberry Pi in a Nutshell
We’ve decided to use the Raspberry Pi for this demonstration mainly because 1) we had one available, 2) it is probably the best platform for LibreELEC and 3) it is cheaper than most other single-board computers. If you don’t know what a Raspberry Pi is, let’s shed some light on the subject before we continue.
The Raspberry Pi is a cross between a computer like the laptop or desktop computer you might be using right now and a microcontroller board like you would find in so many smart devices.
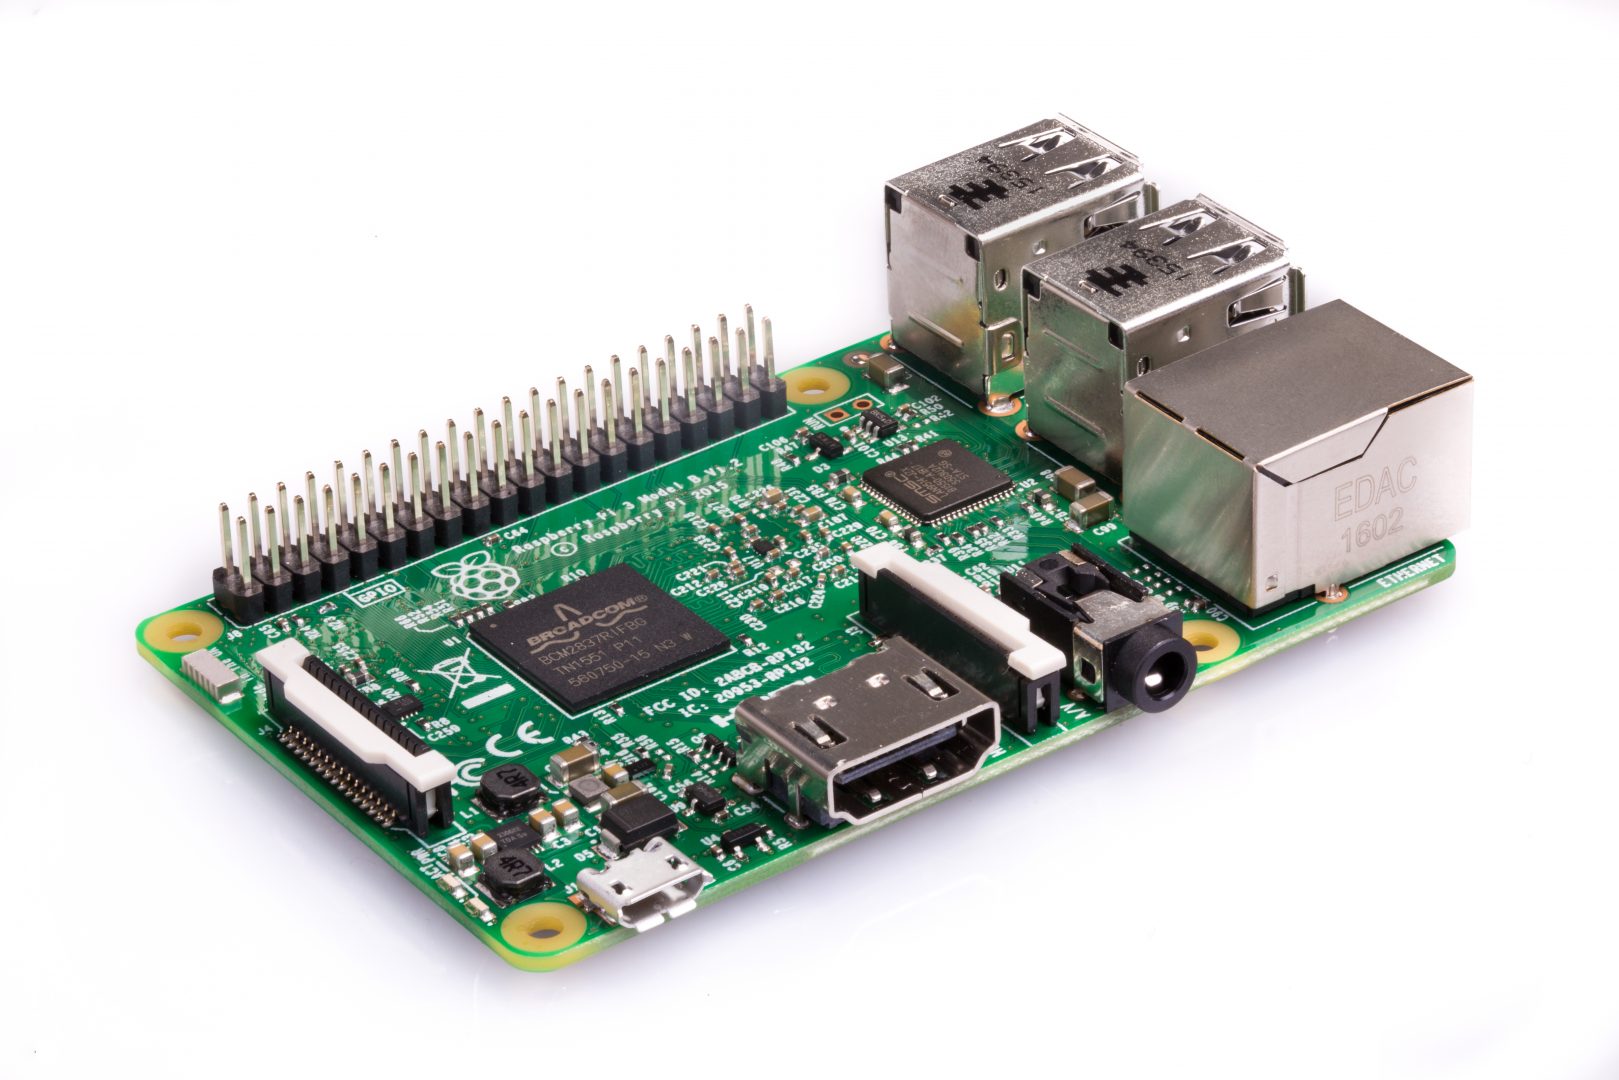
Developed in the UK by the Raspberry Pi Foundation (a non-profit organization) to teach basic computer science in schools and in developing countries, its feature set, adaptability, size and affordability (it sells for about 35 dollars) have made it immensely popular outside of its original intended audience with more than 11 million units sold worldwide since its original release in 2012.
The most current and prevalent model, the Raspberry Pi 3 model B, offers a full complement of features and interfacing capabilities. With a 1.2 GHz, 64-bit, quad-core ARM Cortex-A53 processor, a high-performance Broadcom VideoCore IV graphic processor, 1 GB of RAM, video, audio, and USB interfaces, it really is a powerful and versatile device. And it has all that’s needed in a TV-attached media player.
How to Install LibreELEC on the Raspberry Pi
The LibreELEC team really made it an easy task to get their operating system running on any supported device. It only requires a few simple steps. Follow our directions and we’ll get you started in no time at all.
Downloading and Installing the LibreELEC USB-SD Creator
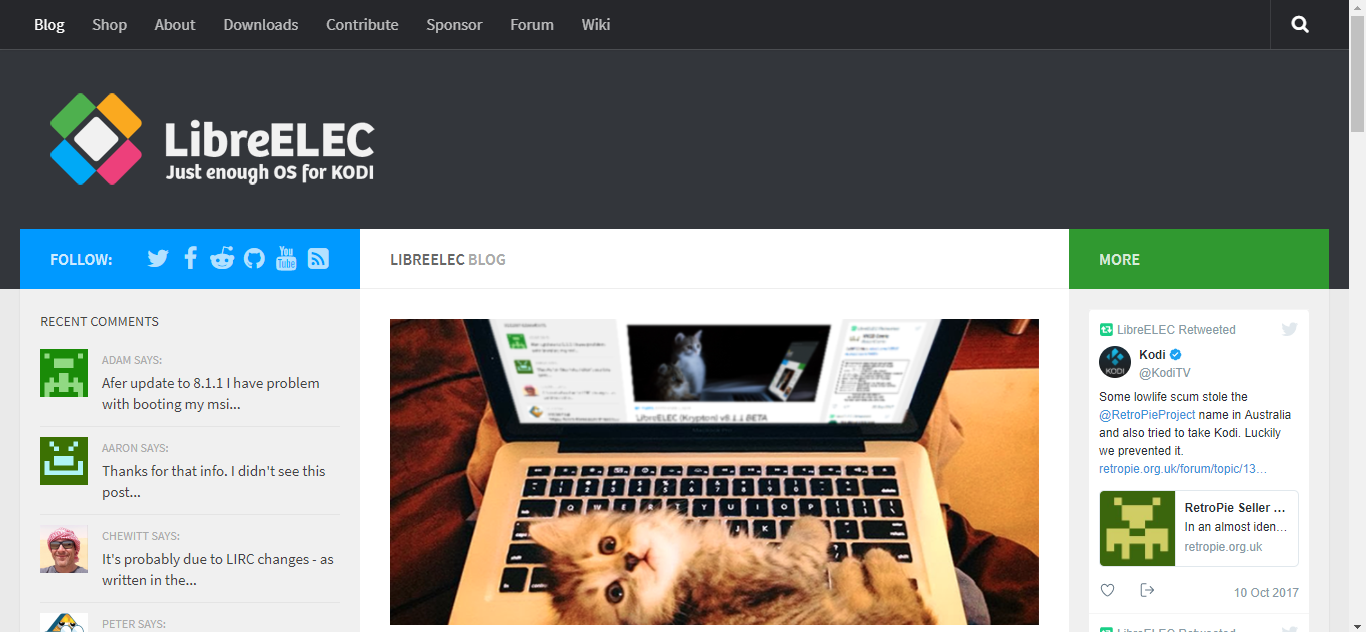
You first need to go to the LibreELEC website at https://libreelec.tv/.
Click Downloads from the top menu and then select your operating system from the proposed options.
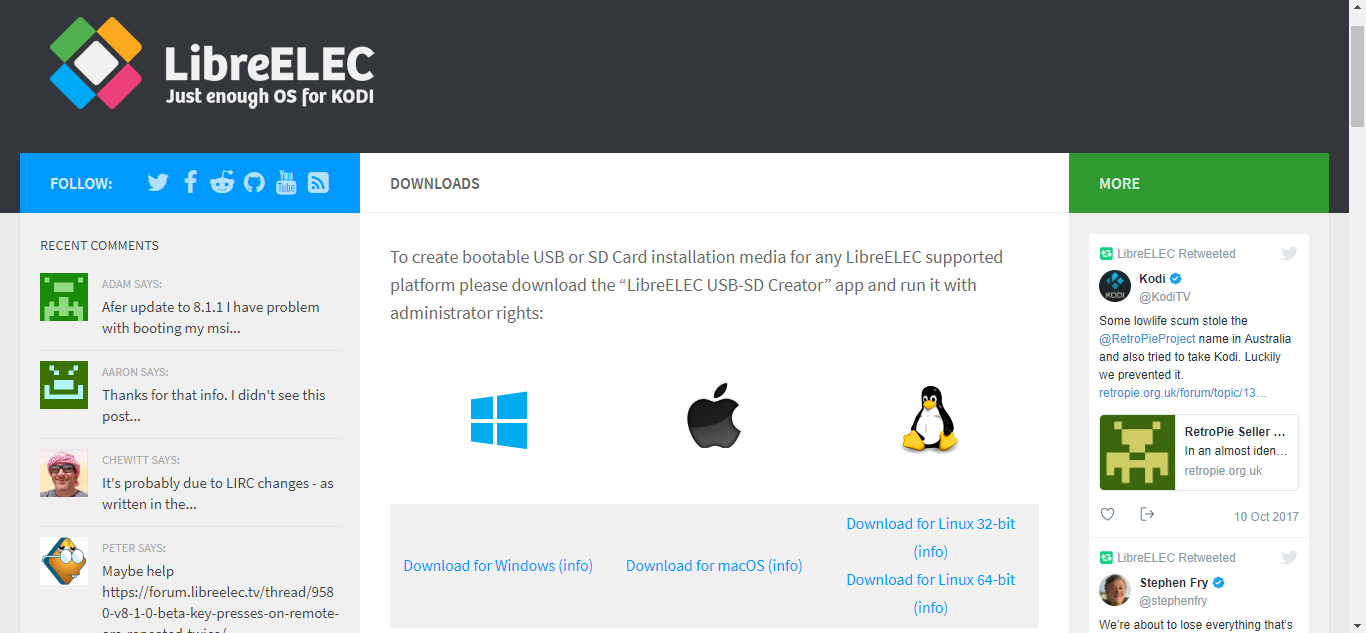
Once you click the appropriate link, the download will start automatically. Just save the file to a suitable location on your computer.
The LibreELEC USB-SD Creator requires no installation and it is ready to use right after the download is complete. Simply go to the download location and double-click it to start the Creator.
Creating a LibreELEC Image
Once you have the Creator installed, you’re ready to create the actual SD card for your installation.
Although hte raspberry Pi supports installation from both SD card and USD flash drives, we prefer to use an SD card. Booting the raspberry Pi from USB is slightly more complicated and our goal is to show you the easiest way of doing this.
The LibreELEC USB-SD Creator window is relatively simple to understand.
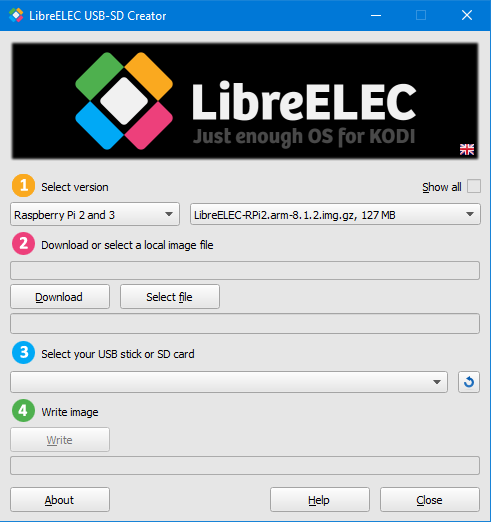
First, you must select the LibreELEC version you want to install. In the left box, select your hardware and, in the right box, select the LibreELEC version. We’re using a Raspberry Pi 3 and we want the latest stable version so we’ll leave the defaults.
Next, you need to click the Download button to start downloading the SD card image to your computer. You’ll be prompted to select a folder where to store the downloaded file. The download will take a few minutes, depending on your Internet access speed.
Once the download is complete, insert the SD card into your computer’s card reader, either built-in or external. The next step is to select the SD card in the Creator software. Click the drop-down list under 3 – Select your USB stick or SD card.
The last step is to click to click the Write button under step 4 – Write Image.
Close the Creator Software and remove the SD card from your computer. You’re now ready for the next steps.
Installing LibreELEC on the Raspberry Pi
The actual installation of LibreELEC on the Raspberry Pi could hardly be easier. You first need to insert SD card into the Raspberry Pi SD card slot. Then, after making sure the Raspberry Pi is correctly connected to a TV, a keyboard and mouse, and a wired network, start the Raspberry Pi by connecting its power adapter.
The Raspberry Pi will start and automatically read the OS and start the installation of LibreELEC. This initial boot and installation process could take up to 5 minutes. Be patient! Once the initial booting finishes, just follow the onscreen prompts to complete the configuration.
- The first prompt is just a welcome message. Click Next to continue
- The following prompt asks you to enter a hostname for your media player. You may choose any name or accept the LibreELEC default hostname then click Next.
- Next up is the remote access prompt. We suggest you accept the proposed settings and just click Next.
- The last prompt is a Thank You message. Just click Next.
That’s all there is to it! You now have a fully functional LibreELEC installation on your Raspberry Pi.
Installing LibreELEC on Other Devices
Installing LibreELEC on other types of hardware is not much different from installing it on the Raspberry Pi. You need to select the proper hardware in the Creator’s first step and follow specific instructions to boot your device from the SD card.
The exact steps required are beyond the scope of this article. Some like the Odroid C2 will require no intervention while others such as the We Tek devices will require holding the Reset button while applying power. For all the details about your specific device, a quick search on Google should let you quickly find the proper procedure.
A Quick Tour of LibreELEC
We’re assuming that you’re already familiar with Kodi so we’ll try to concentrate on the differences between the standard Kodi implementation and the one on LibreELEC. Once installed, LibreELEC will start Kodi upon bootup.
The Home Screen is identical to that of a standard Kodi installation and so is pretty much everything. One exception is under the Settings screen, accessed via the gear icon at the top left of the home screen. It has an additional entry for the LibreELEC settings. This is where you can select the wired or WiFi network or adjust any of the parameters you selected during the initial startup.
Other than this minor difference in the Settings screen, you’re really dealing with a regular version of Kodi. The Kodi version is dependent on the LibreELEC version you installed but the LibreELEC team is usually very quick to release a new version of the OS whenever there is a major Kodi release.
Installing Kodi Add-ons
Again, this is nothing but a standard Kodi installation. Adding add-ons is exactly the same as with any other Kodi installation. You have the choice of using the “official” Kodi repository or to manually add sources, install add-ons and repos from zip files and further install add-ons from the third-party repositories.
Also, any add-on installation procedure from an article here on Addictive Tips or anywhere else should work as-is. We can’t stress that enough: this is a standard Kodi installation over a simplified operating system to make the most of limited hardware without overly taxing it with unnecessary stuff.
The Pros and Cons of LibreELEC
Just like with anything else, there are things we like about LibreELEC and one thing we don’t like so much.
Pros
The main advantage of LibreELEC is that it is extremely easy to set up and configure. And contrary to some full Linux distributions, this installation is fool-proof and it’s almost impossible to do it wrong. And once installed, LibreELEC is very easy to use.
The fact that Kodi comes pre-installed with LibreELEC is also one of its strengths. Once you’ve installed the OS, you’re ready to go with nothing more to do.
Finally, LibreELEC is amazingly fast. With such a barebone operating system, there’s nothing to slow down the hardware and its full power is dedicated to your media playing experience.
Cons
The only drawback of LibreELEC is that it can’t be used as an operating system for anything else than Kodi. Even something as important as setting up a VPN can be a challenge on LibreELEC. Fortunately, the best VPN suppliers usually have specific instructions on how to configure their service on that platform.
Some LibreELEC Alternatives
There are primarily two alternatives to LibreELEC: OpenELEC and OSMC.
OpenELEC and LibreELEC were initially one and the same. They eventually went separate ways due to their developers having different views of the ultimate OS for Kodi. Nowadays, LibreELEC is more actively developed than OpenELEC and is usually updated more frequently. OpenELEC has recently appeared to be losing ground to its competitor even though it is probably just as good an option.
OSMC, the Open Source Media Center, is another similar open-source project that is focused on Kodi but offers a less limited version of Linux with more customization options. For instance, in addition to Kodi, you could run a Plex server or a web server on OSMC. Just as the other options, OSMC will boot right into Kodi but still offers many more OS services.
Conclusion
If you’re looking for a great media center experience on a Raspberry Pi or some other supported single-board computer, LibreELEC is possibly your best choice. It is super-easy to install and configure, it is free of any bloatware and it will run amazingly fast and make the best of all the available hardware resources.
And with the built-in standard Kodi installation, you’ll be on familiar ground and feel right at home. Furthermore, any add-on that runs on Kodi will run on LibreELEC. The whole Kodi world is at your fingertips.
Are you a Raspberry Pi or LibreELEC user? If not, are you using one of our alternatives? What do you like and dislike about LibreELEC? Please, share your comments below.
Don't miss this great deal
