How to install Arch-based XeroLinux
XeroLinux is an elegant, Arch-based Linux operating system that uses the KDE Plasma desktop. Unfortunately, it is a small project with only one maintainer. Still, if you love KDE and want to try out Arch Linux, XeroLinux is an excellent option. Here’s how to set up XeroLinux on your PC.

Downloading XeroLinux
To download XeroLinux, head over to the project’s website. Once on the website, scroll down to the “Download Now” button on the page and click on it with the mouse.
After selecting the “Download Now” button, a new tab will open on the XeroLinux SourceForge page. Then, it will download the latest XeroLinux ISO file. The file is 2.8 GB in size, so the download may take time to complete.
Creating the XeroLinux USB installer
Now that the XeroLinux ISO file is downloaded, it is time to create the USB installer. To do that, head over to Etcher.io to download the Etcher tool. This program is compatible with Linux, Mac, and Windows systems.
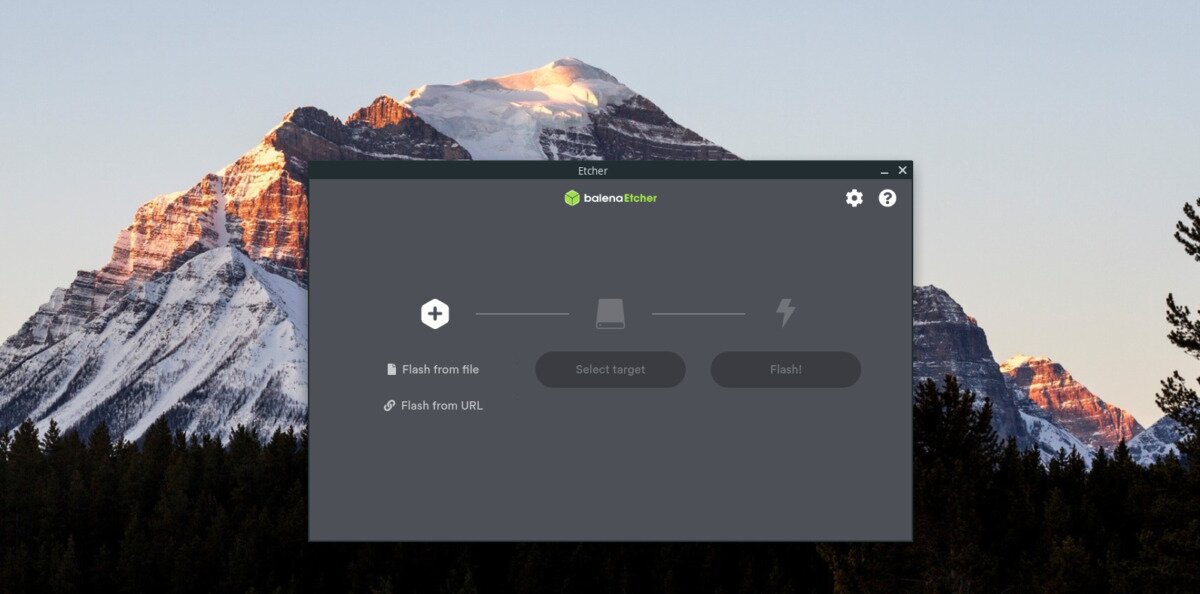
Once you’ve downloaded Etcher, open it up and follow the step-by-step instructions below to create your USB installer.
Step 1: Find the “Flash from file” button inside the Etcher app and click on it with the mouse. Then, use the pop-up window to browse for the XeroLinux ISO file.
Step 2: After selecting the XeroLinux ISO file, insert your USB flash drive into the USB port on your computer. Then, click the “Select target” button with the mouse. Finally, click on your USB drive in the “Select target” menu.
Step 3: Find the “Flash!” button and click on it with the mouse to start the flashing process. The Etcher flashing process will take some time, as XeroLinux is quite a large ISO.
You’ll have created a bootable XeroLinux USB installer when the flashing process is complete. Next, reboot your computer into the BIOS, and configure it to boot the USB to install XeroLinux.
Installing XeroLinux
To install XeroLinux, look for the “Start XeroLinux Installer” button inside the “XeroLinux Welcome” page. Click on it to start the installation tool. Then, follow the step-by-step instructions below.

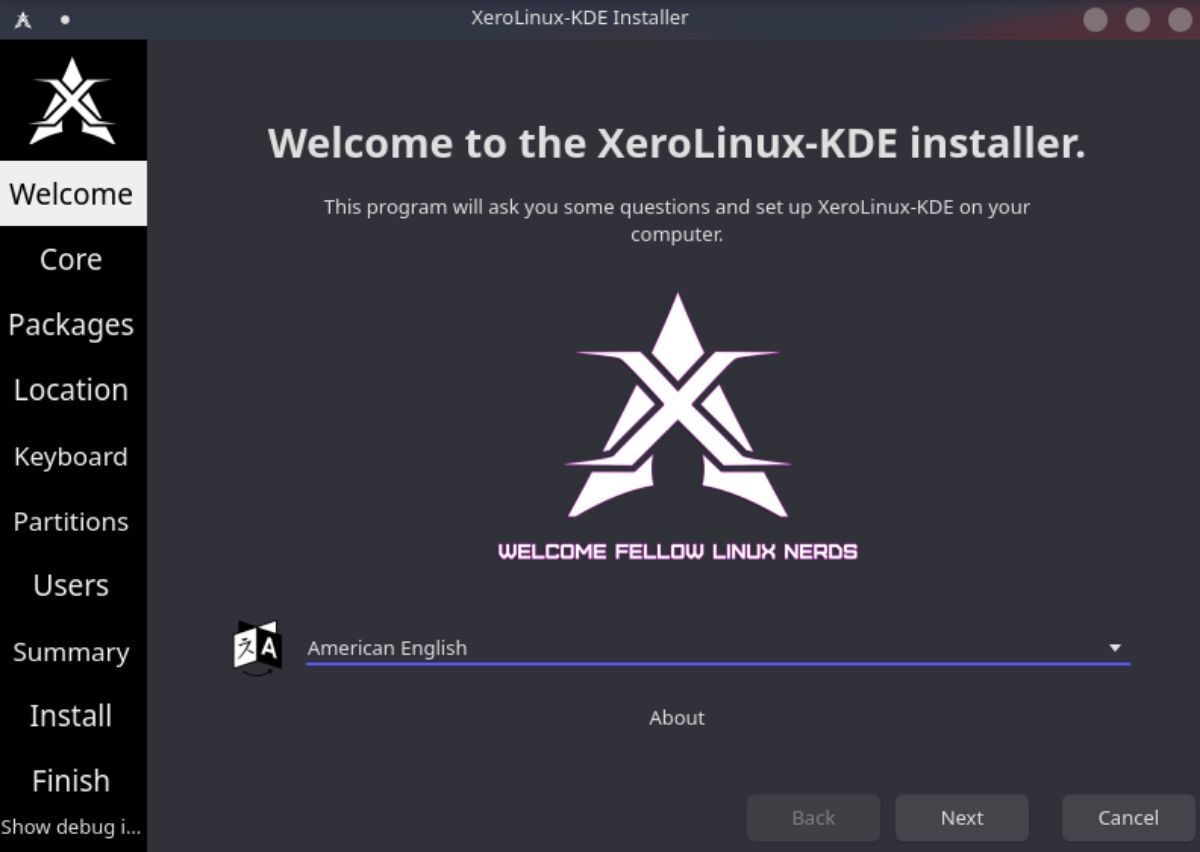
Step 1: After selecting the “Start XeroLinux Installer,” the first page you see is the welcome page/language selection page. Use the menu to choose your language, and click “Next” to continue.
Step 2: You will be asked to choose your core packages at this point in the installer. By default, “Stock Arch Kernel” is selected. However, feel free to check any other options, such as video drivers, print support, etc.
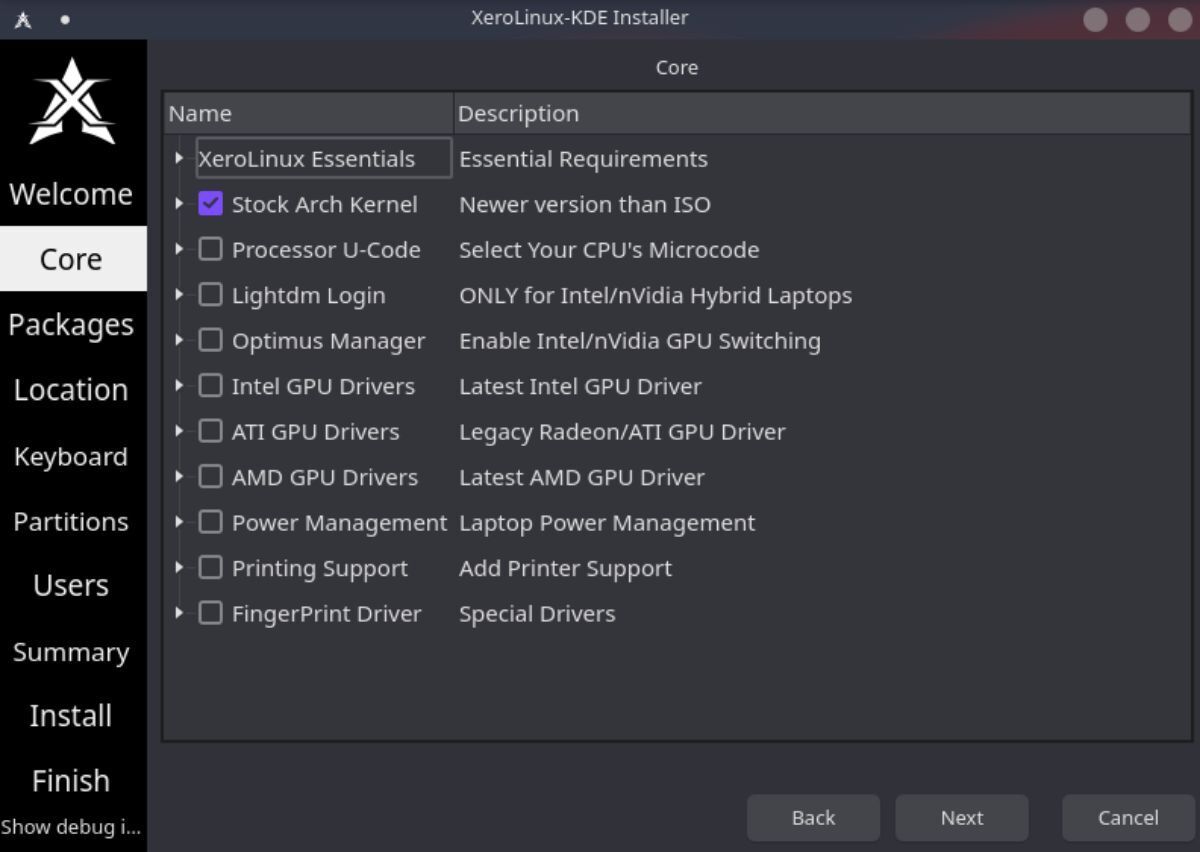
When done, click on the “Next” button to continue.
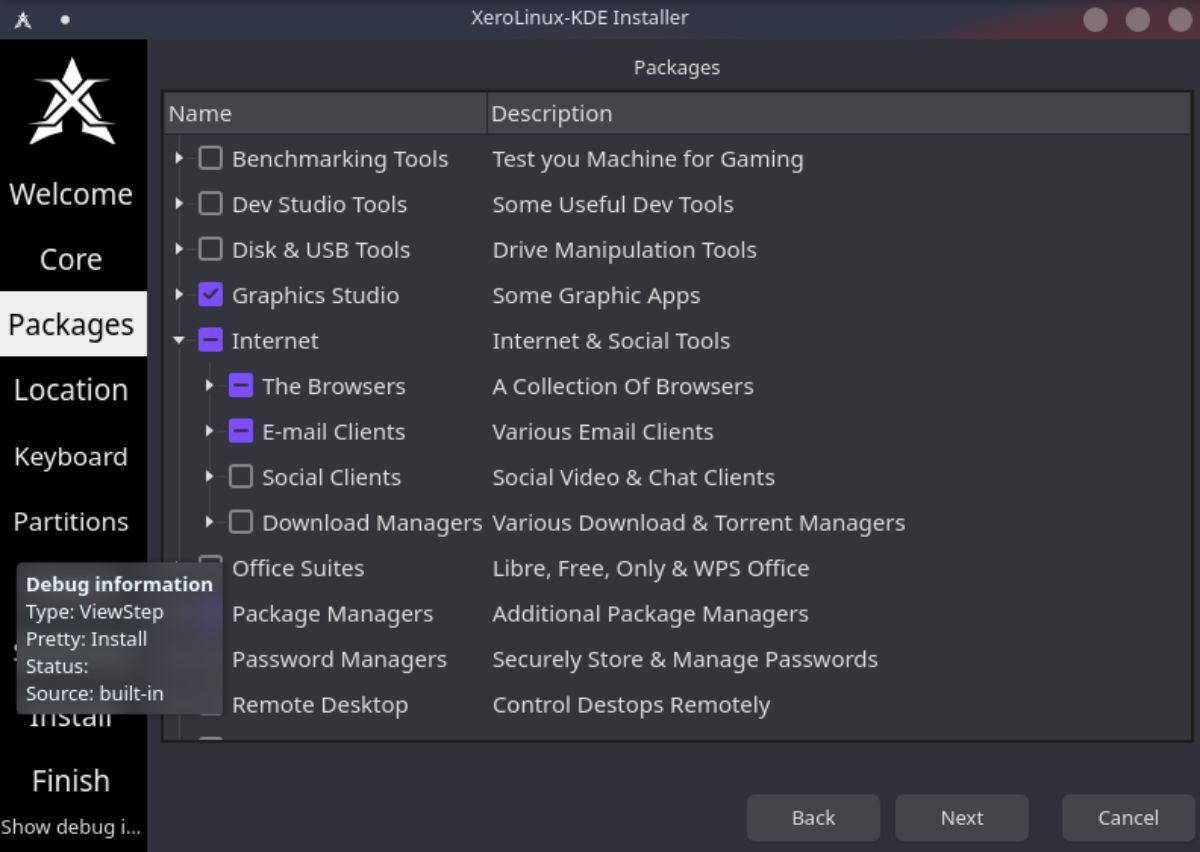
Step 3: After selecting your core packages, Xero will ask you to choose other additional packages for installation. There are many choices, including iOS/Android support, dev tools, graphics tools, internet tools, package managers, etc.
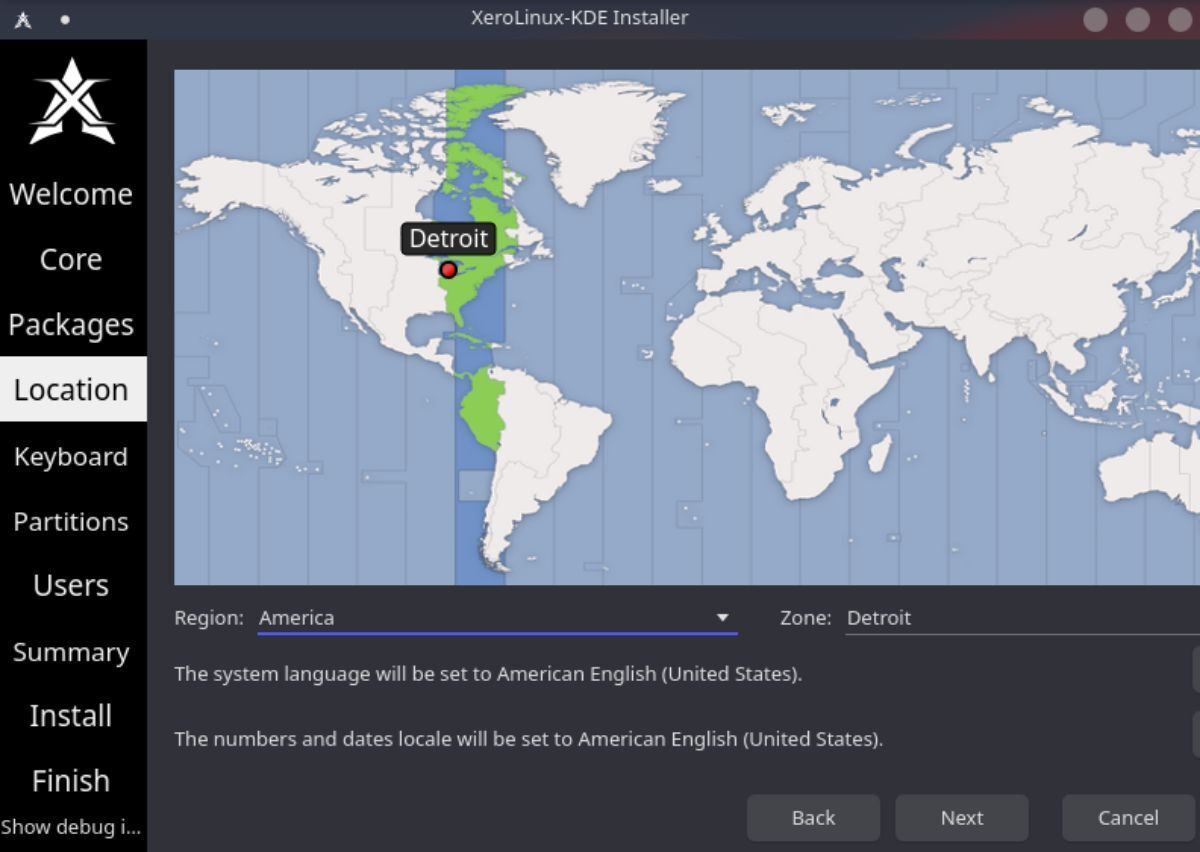
Step 4: With your packages selected, it is time to choose a timezone for XeroLinux. Using your mouse, click on the location of the global map in which you live. The XeroLinux installer will set up the correct timezone when selecting your location.
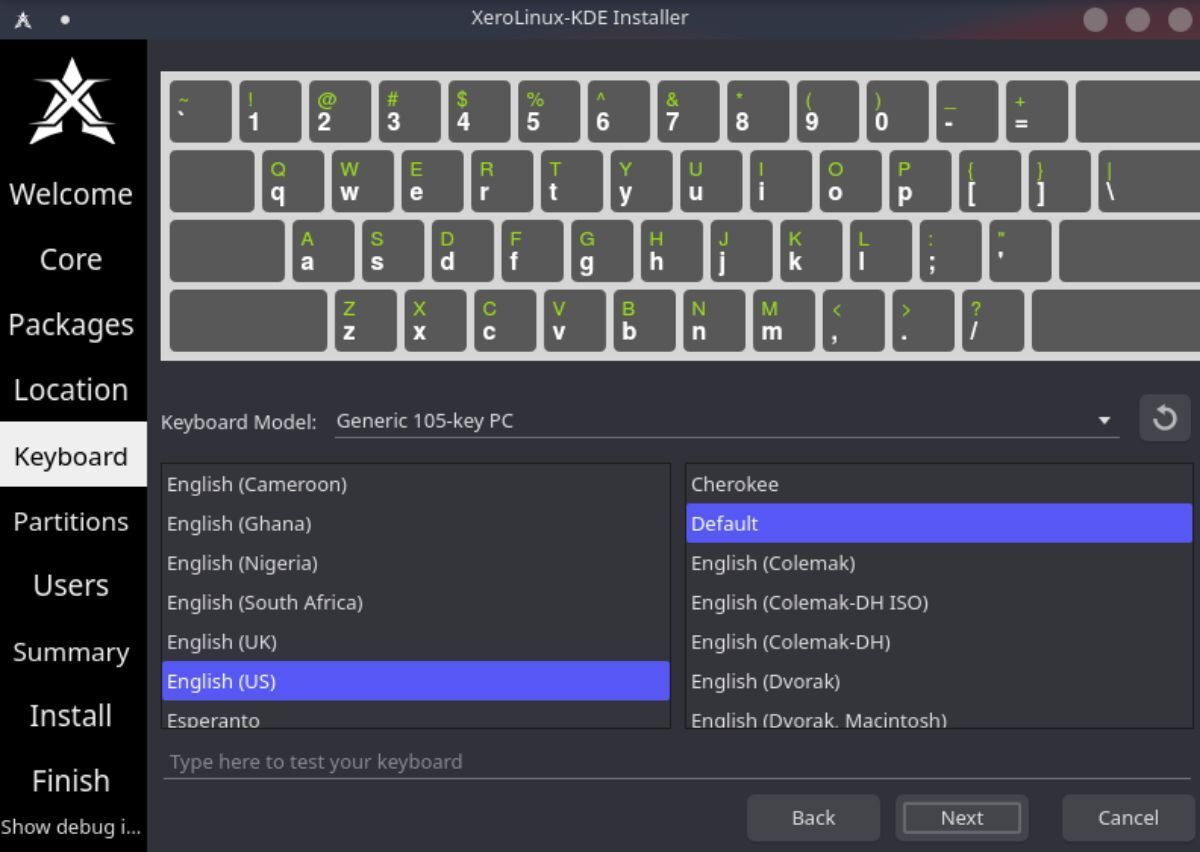
Step 5: Once the timezone is set, XeroLinux will ask you to choose a keyboard layout. By default, the installation tool will try to detect your keyboard. However, if the layout is incorrect, look through the list to select the correct one.
Step 6: You must now choose your installation type. Find the “Select storage device” menu, and select the drive you wish to install XeroLinux. Then, select “Erase disk” as the installation type.
Don’t want to use “Erase disk?” If you are an expert, feel free to choose “Manual” partitioning or any other available options in the XeroLinux installation tool.
Step 7: After choosing an installation type, XeroLinux will ask you to configure your user account, computer name, password, etc. Use the empty text boxes to fill out the information.
Note: check the “Log in automatically without asking for the password” if you wish for XeroLinux to log in without entering a password at the login screen.
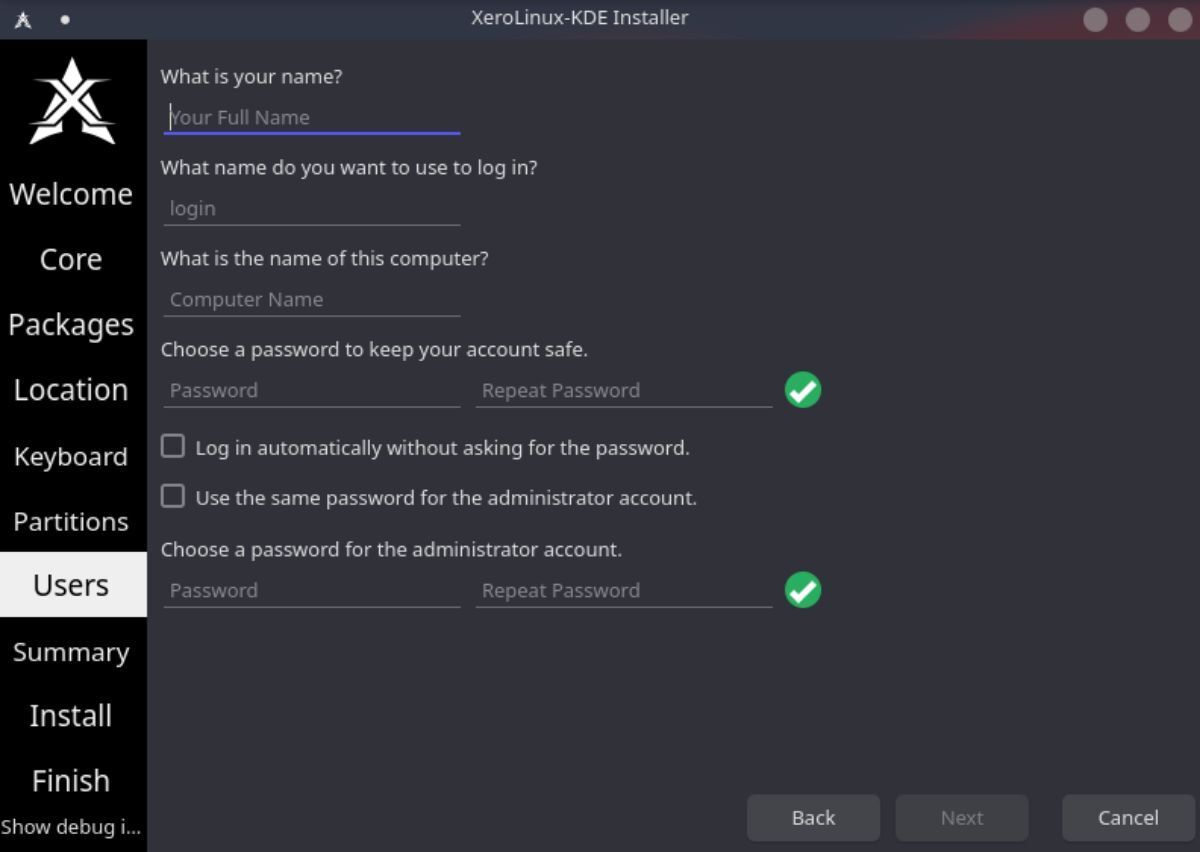
When all information is filled, find the “Next” button.
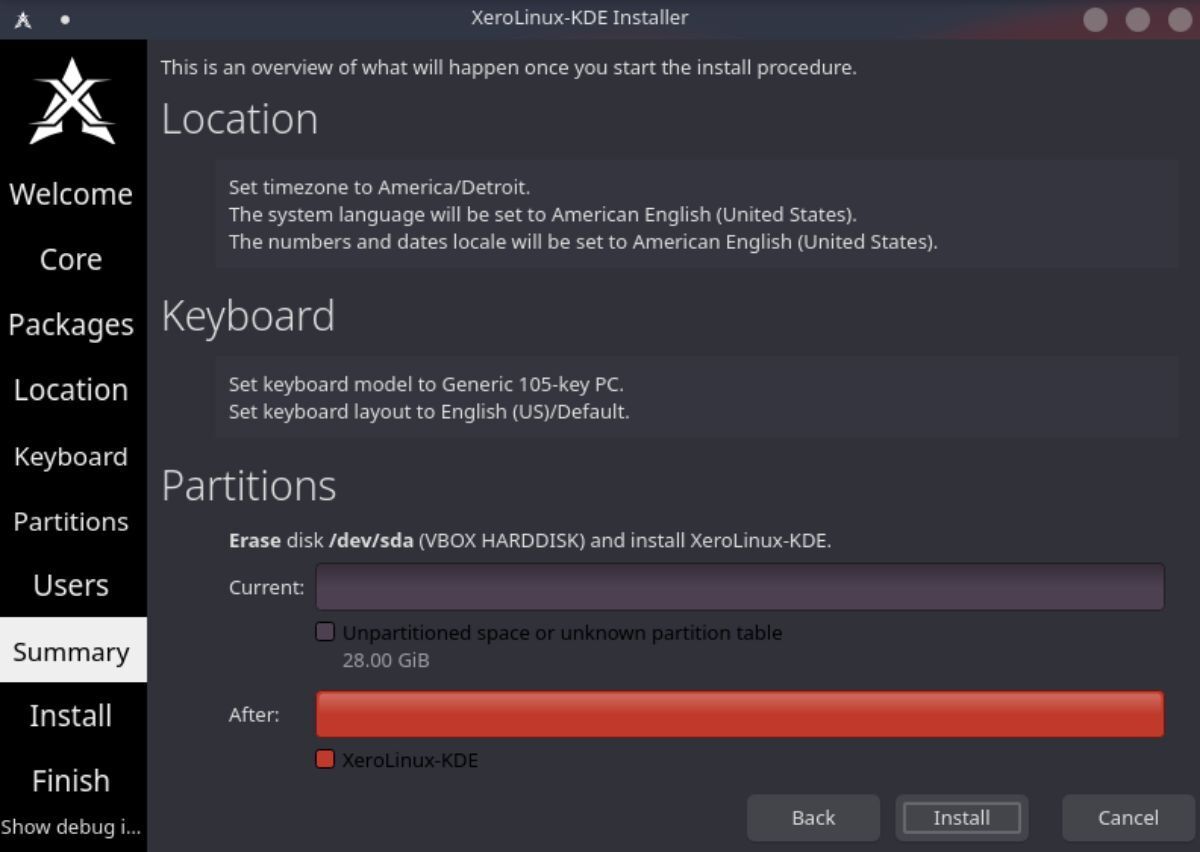
Step 8: On the next page, XeroLinux will summarize what it is about to do to your computer during the installation process. Take a look at the summary. Once you’ve read the summary, find the “Install” button and click on it with the mouse to start the installation.
Step 9: When the “Install” button is selected, XeroLinux will begin to install itself on your computer. This process will take some time to complete, as there is a lot to set up. When the setup process is finished, reboot your computer to use your new XeroLinux installation.
