How to use Archinstall on Linux
Archinstall is a guided tool included with the official Arch Linux ISO. Users can easily configure and install an Arch Linux desktop with little effort. Here’s how to use Archinstall to install Arch Linux on your PC.
Creating the Arch Linux live USB
You must create an official Arch Linux live USB to access the Archinstall tool. To create a new Arch Linux live USB, plug in a USB flash drive (at least 1 GB in size) and follow the step-by-step instructions below.
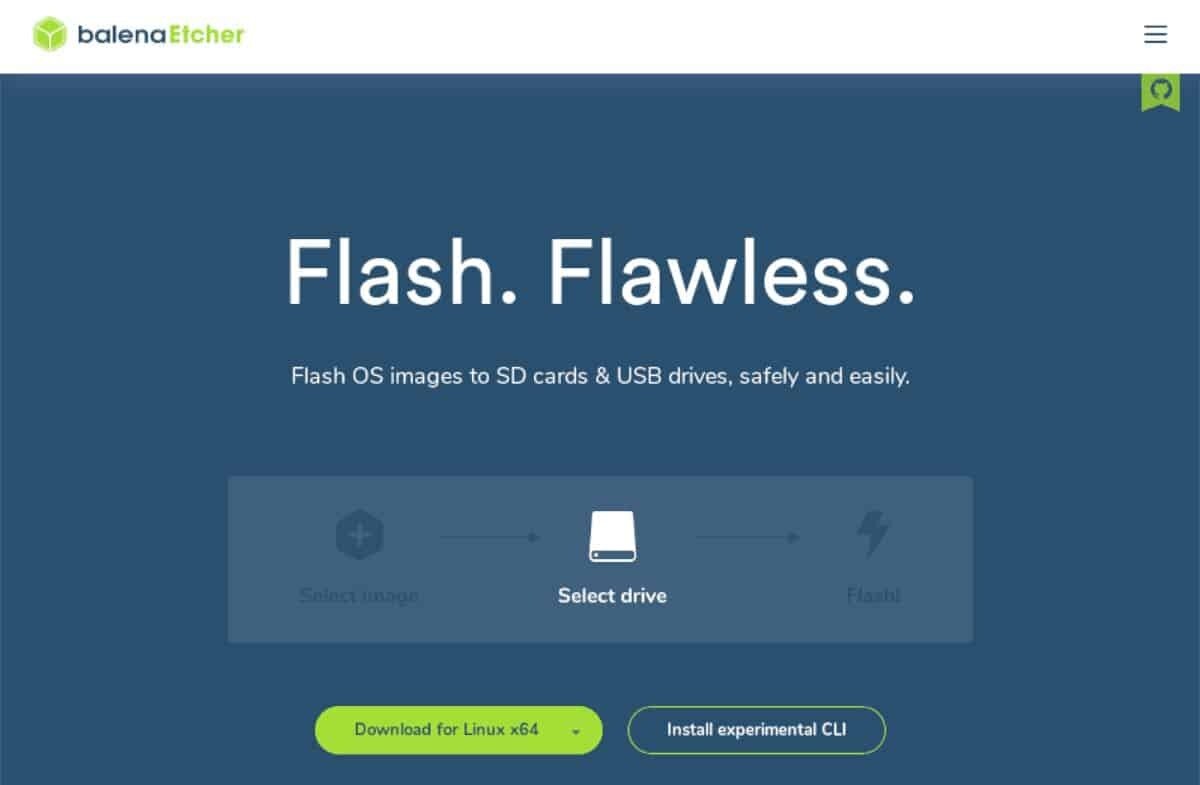
Step 1: Download the Etcher app to your computer (it works on Mac, Windows, and PC.) Then, install it and open it up.
Step 2: Head over to Archlinux.org, and download the latest ISO release of Arch Linux. After downloading it, find the “Flash from file” button inside Etcher and select it with the mouse.
Use the pop-up window to browse for the Arch Linux ISO file.
Step 3: Find the “Select target” button inside the Etcher app and click on it with the mouse. Browse your USB flash drive and select it as the target for Etcher.
Step 4: Find the “Flash!” button inside the Etcher app and click on it with the mouse to begin the flashing process.
When the flashing process is complete, please reboot your computer into its BIOS and configure it to boot from USB to access the Arch Linux live USB.
Installing Arch Linux with Archinstall
After loading the Arch Linux live USB, you must connect to the internet. If you use Ethernet, Arch will connect you automatically. However, if you use WiFi, you must follow the Arch Wiki and configure your connection.
After connecting to the internet, run the archinstall command in the Arch live USB console to start the Archinstall tool.
archinstall
Once the Archinstall tool runs, follow the step-by-step instructions below to install Arch Linux.
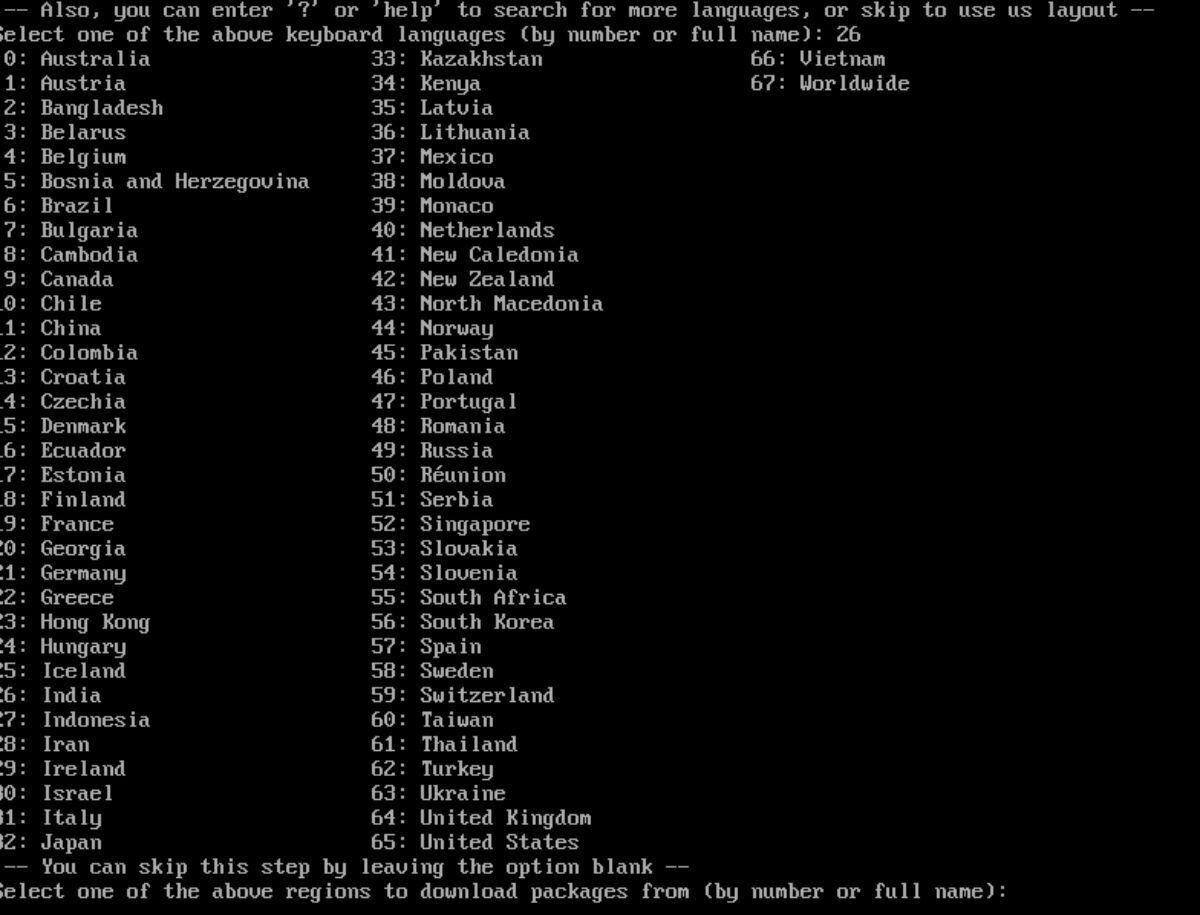
Step 1: The first thing you must do with Archinstall chooses a language. The languages available in Archinstall are listed 0-26. Input the number to select your language.
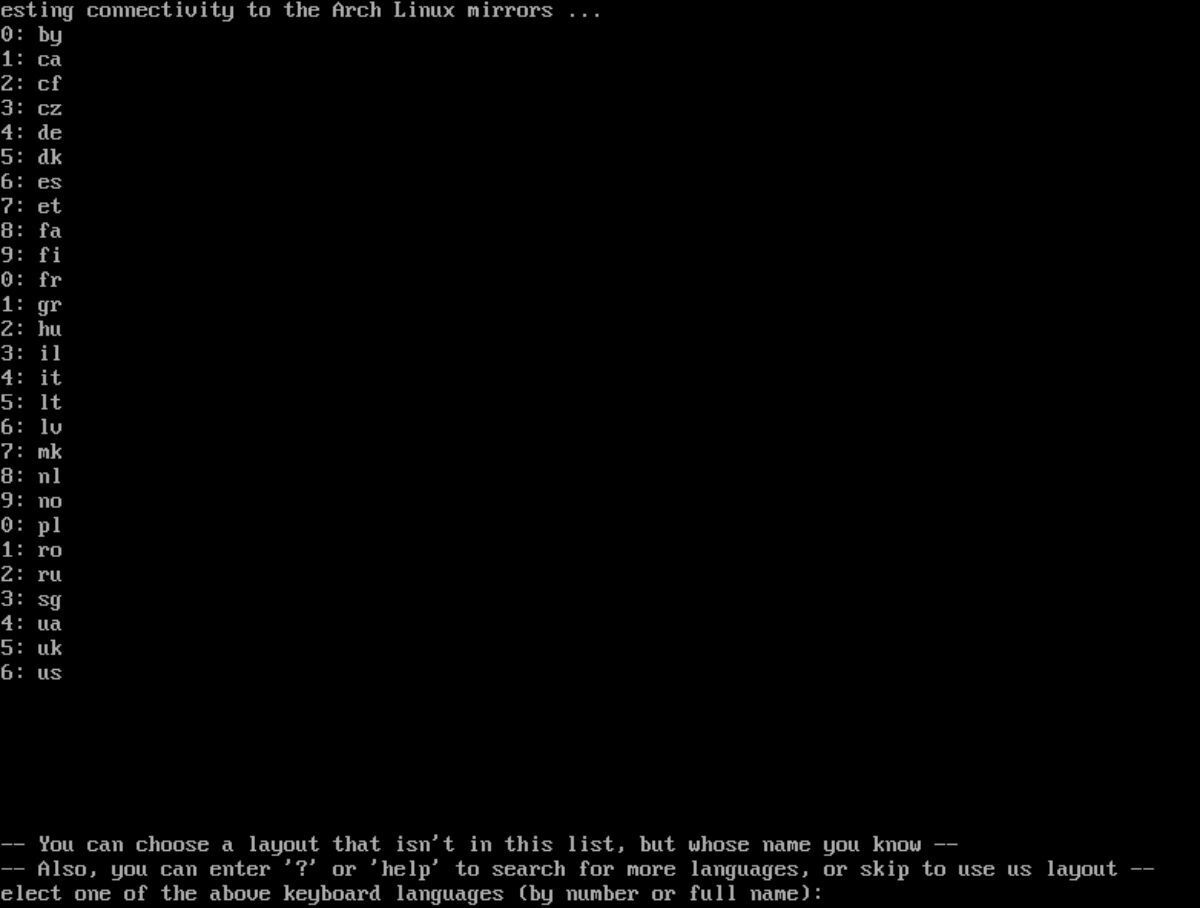
Press Enter to continue.
Step 2: You must now select a keyboard language. Keyboard languages in Arch Linux are also listed by number. Input the keyboard language you prefer by entering the correct number.
Press Enter to continue.
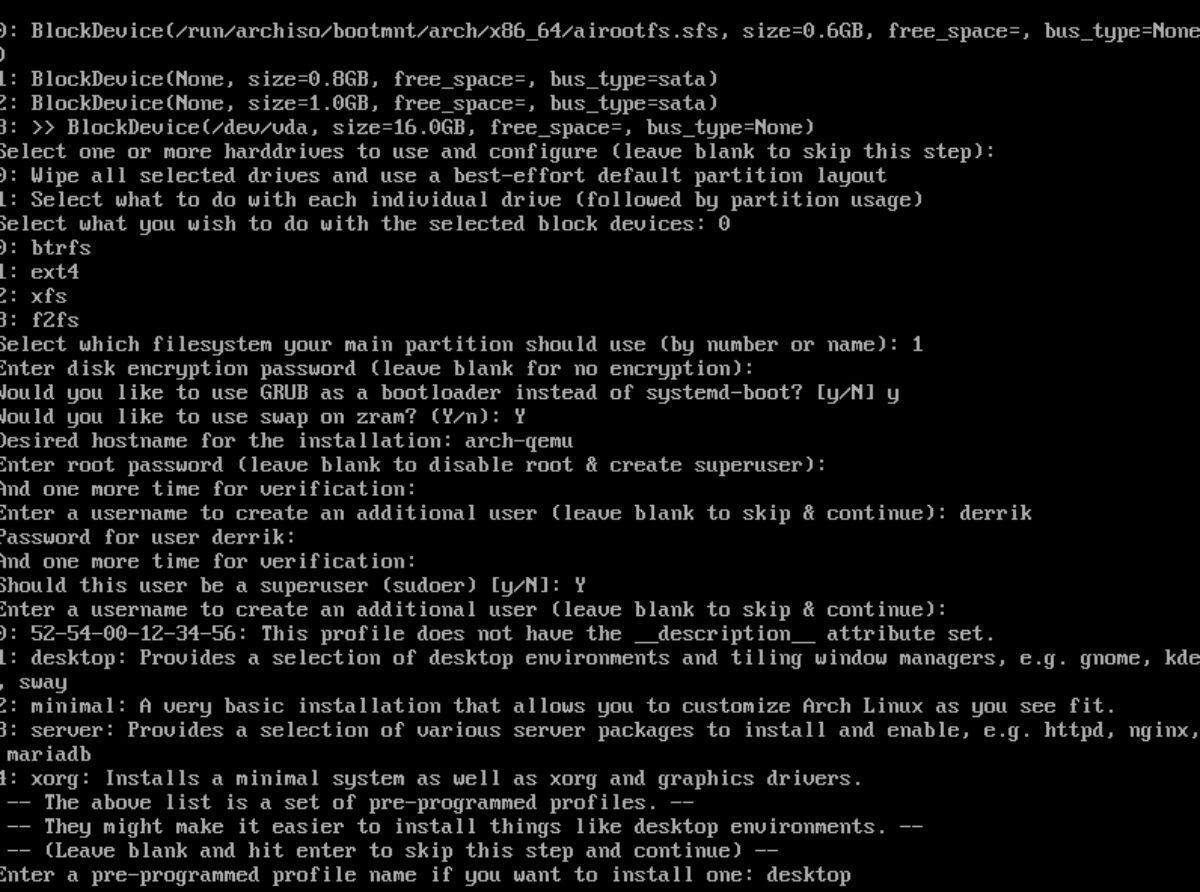
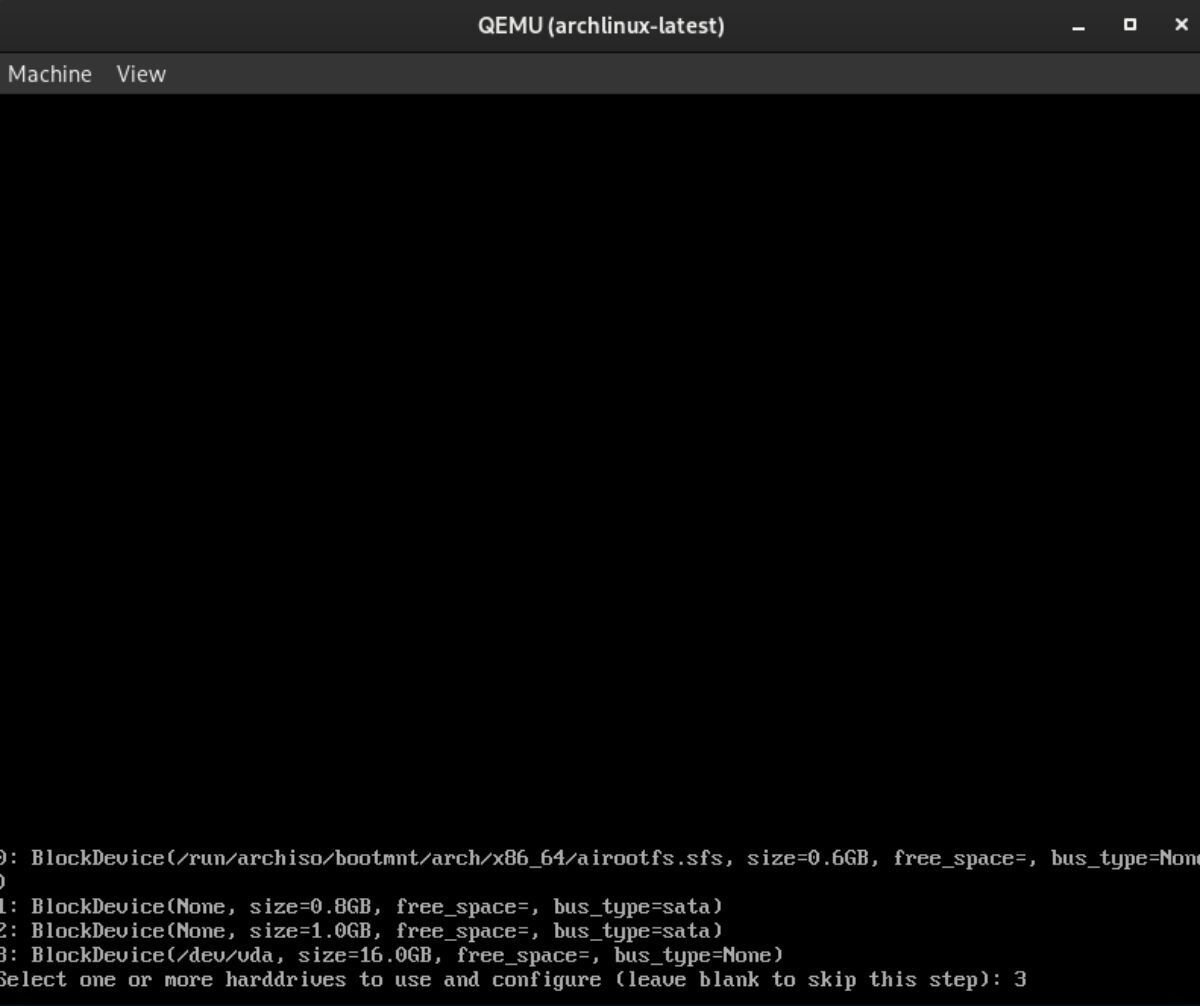
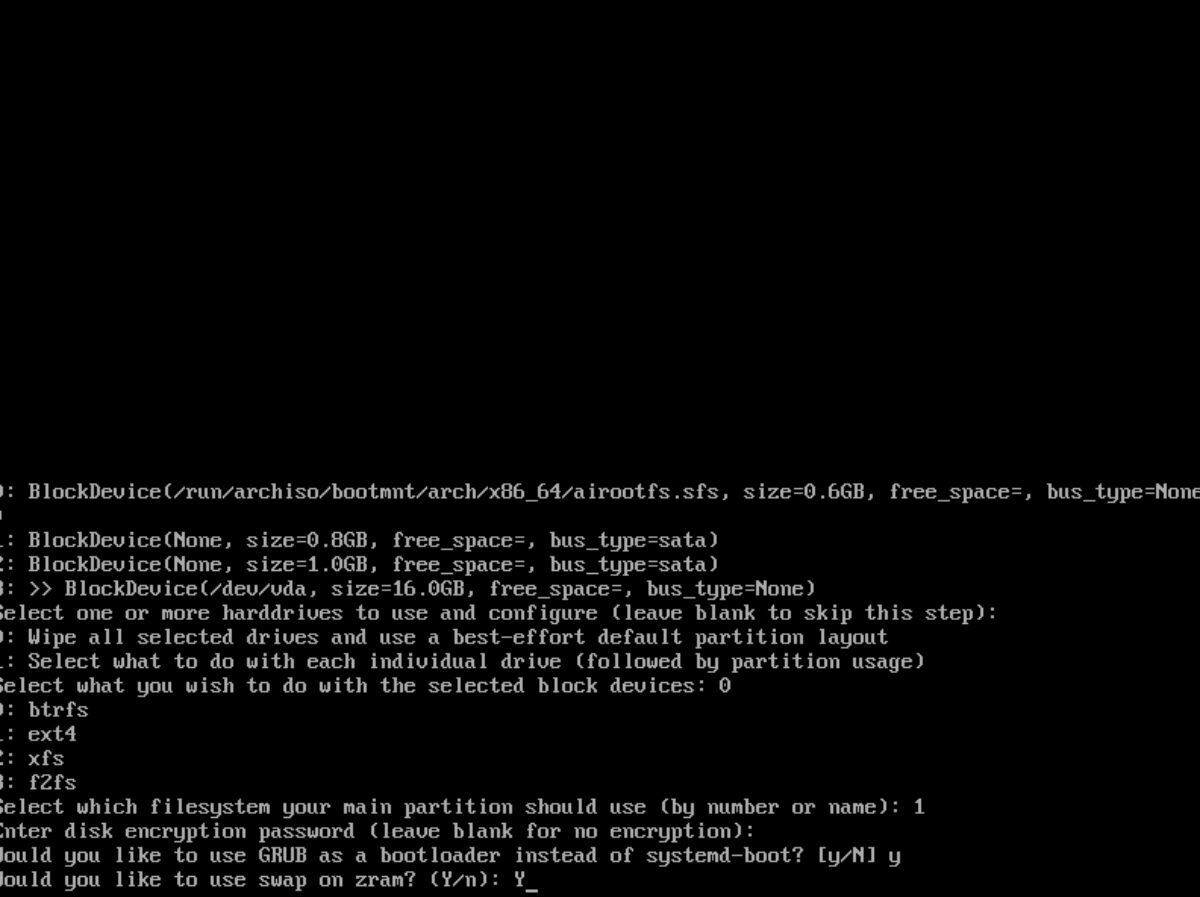
Step 3: You’ll now need to select a hard drive to configure in Arch Linux by entering a number, then press Enter to continue.
Once you press enter, your selected drive will have “>>” next to it. Leave the text box blank and press Enter a second time to confirm your choice.
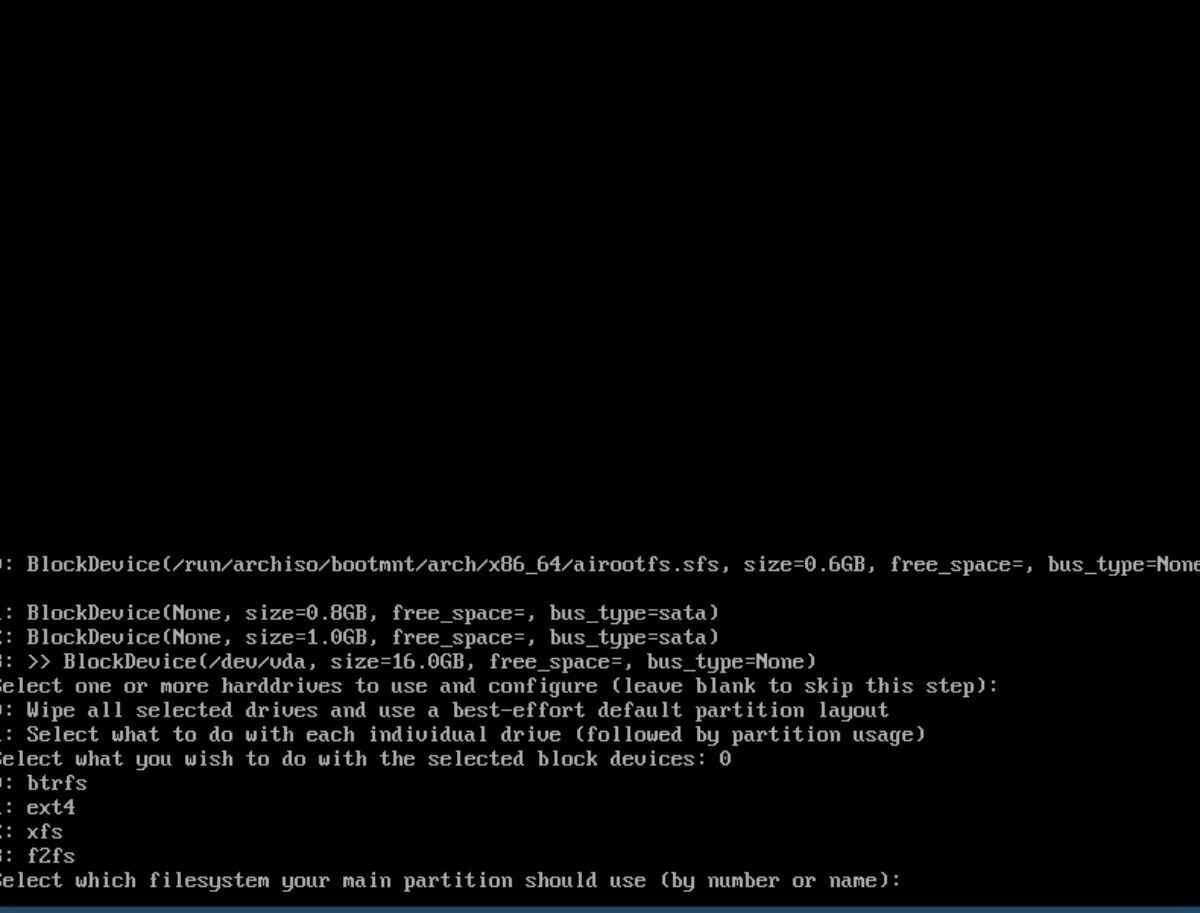
Step 4: You must now select a partition layout. For best results, select “Wipe all selected drives and use a best-effort default partition layout.” Selecting this option will automate the partitioning process.
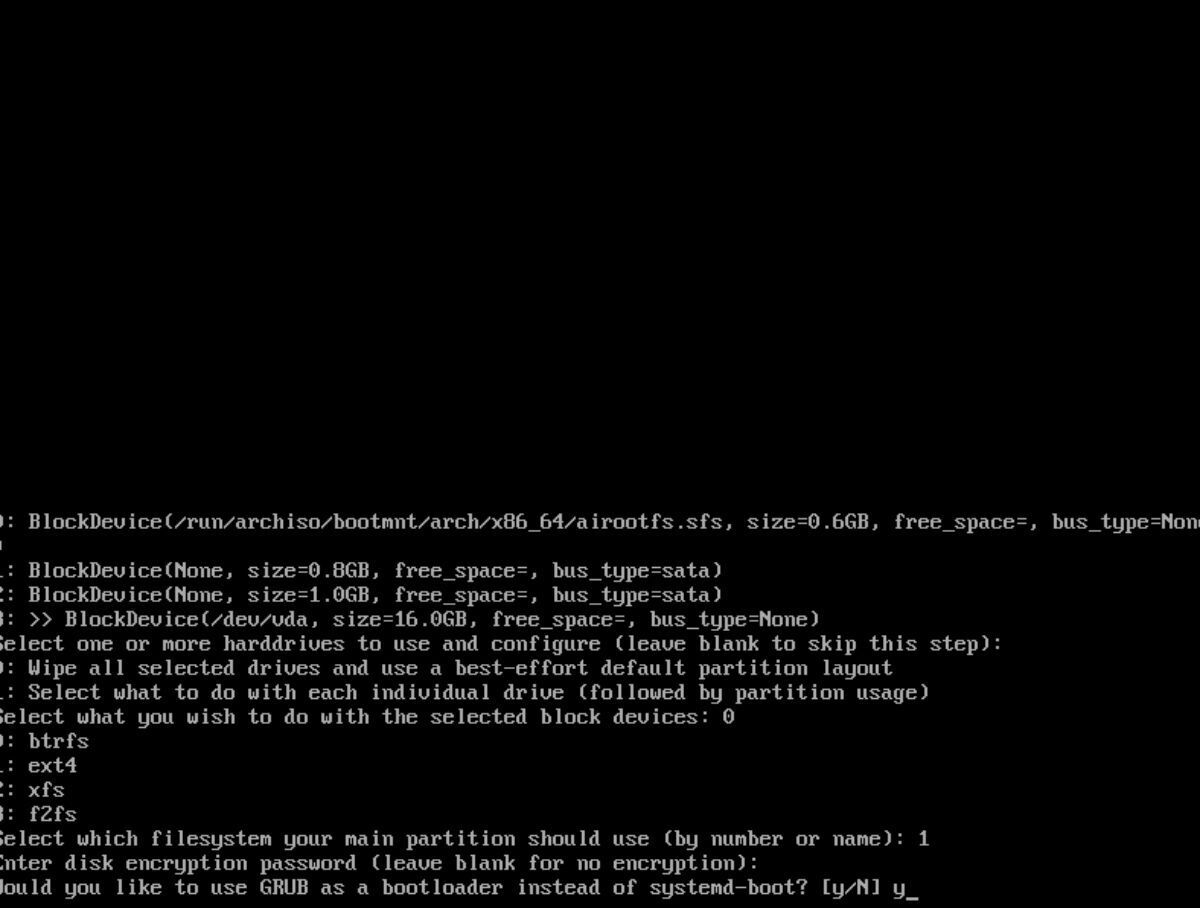
Step 5: Select your filesystem. By default, it is suggested you select “ext4,” however, if you have a filesystem preference, feel free to choose a different option.
After selecting a filesystem type, add a disk encryption option, leave it blank and press Enter to skip encryption.
Step 6: Archinstall will now ask you what bootloader to use. If you plan to dual-boot other Linux operating systems or wish for more excellent system compatibility, select “GRUB.” Otherwise, select “systemd-boot.”
Step 7: Archinstall will ask you if you wish to use “swap on zram.” Zram is an excellent feature and significantly improves swap on Arch Linux. Select “Y” and press Enter to confirm.
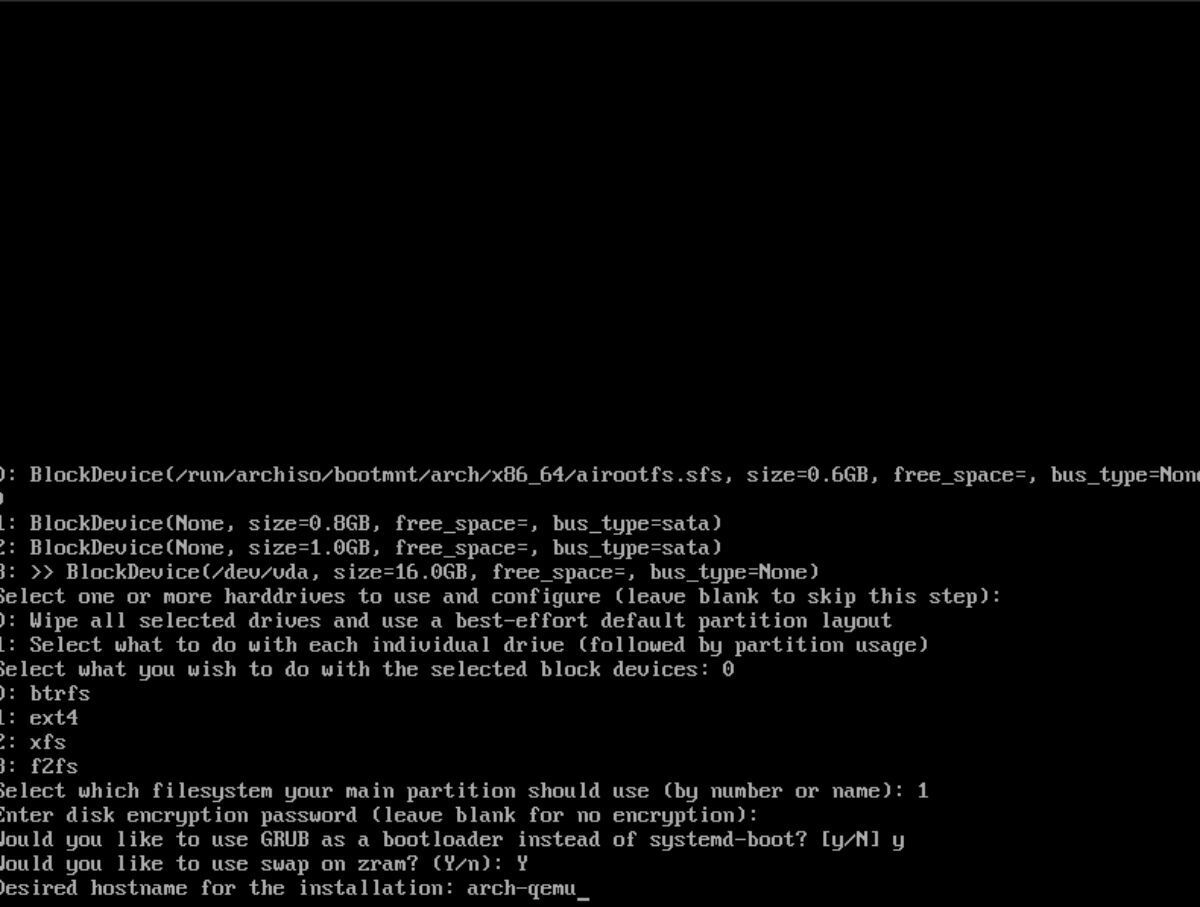
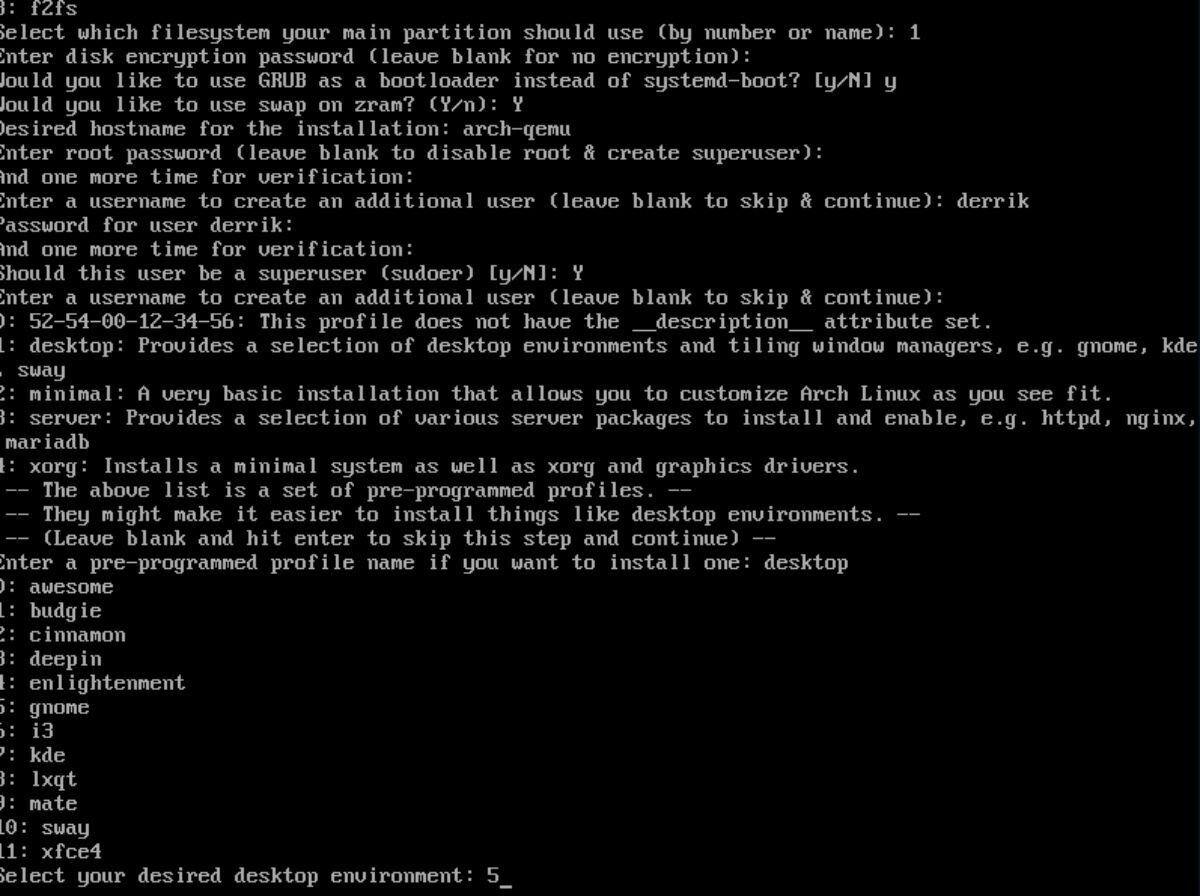
Step 8: Archinstall will ask you to enter your “desired hostname.” A hostname is what your computer’s name is on your local network. Enter a hostname in all lowercase characters and press Enter.
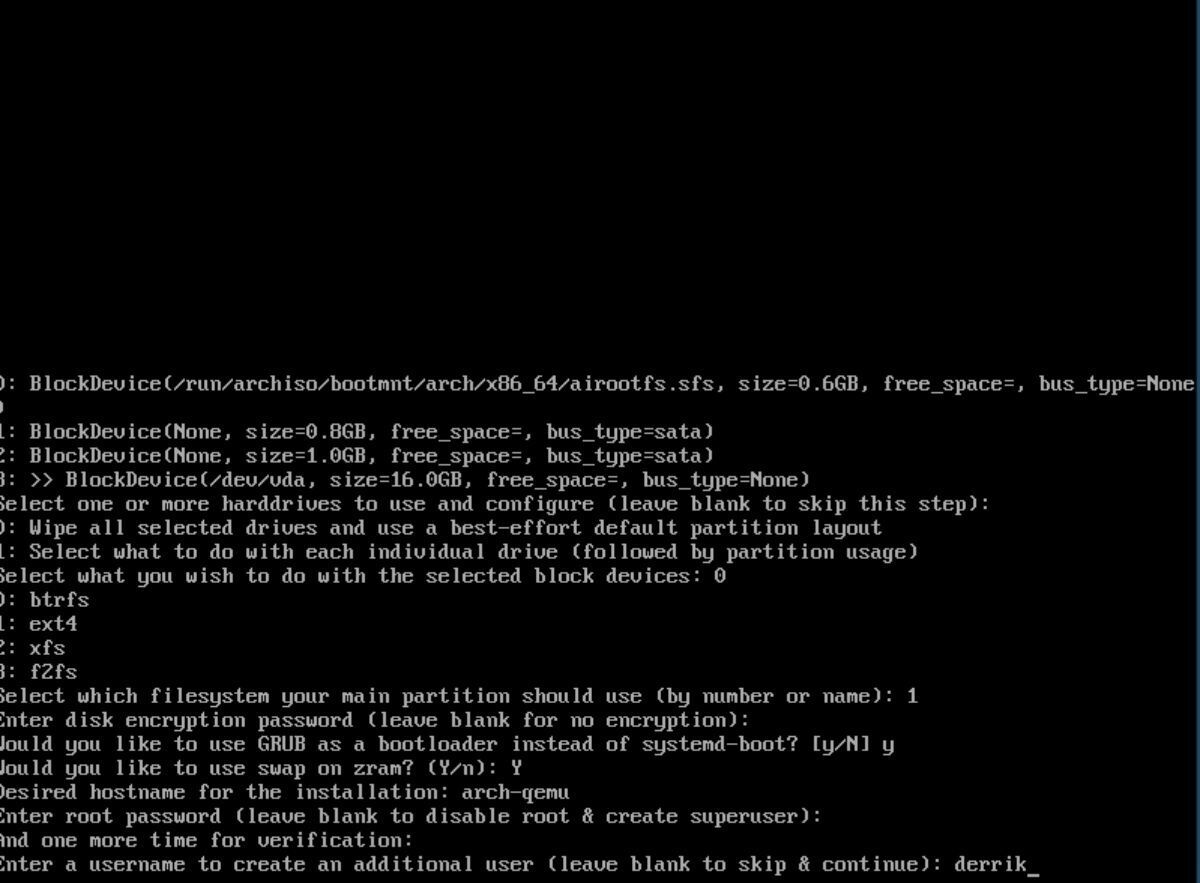
Step 9: Enter your Arch Linux system’s root password. A root password is critical for system administration. Ensure that your root password is memorable but secure.
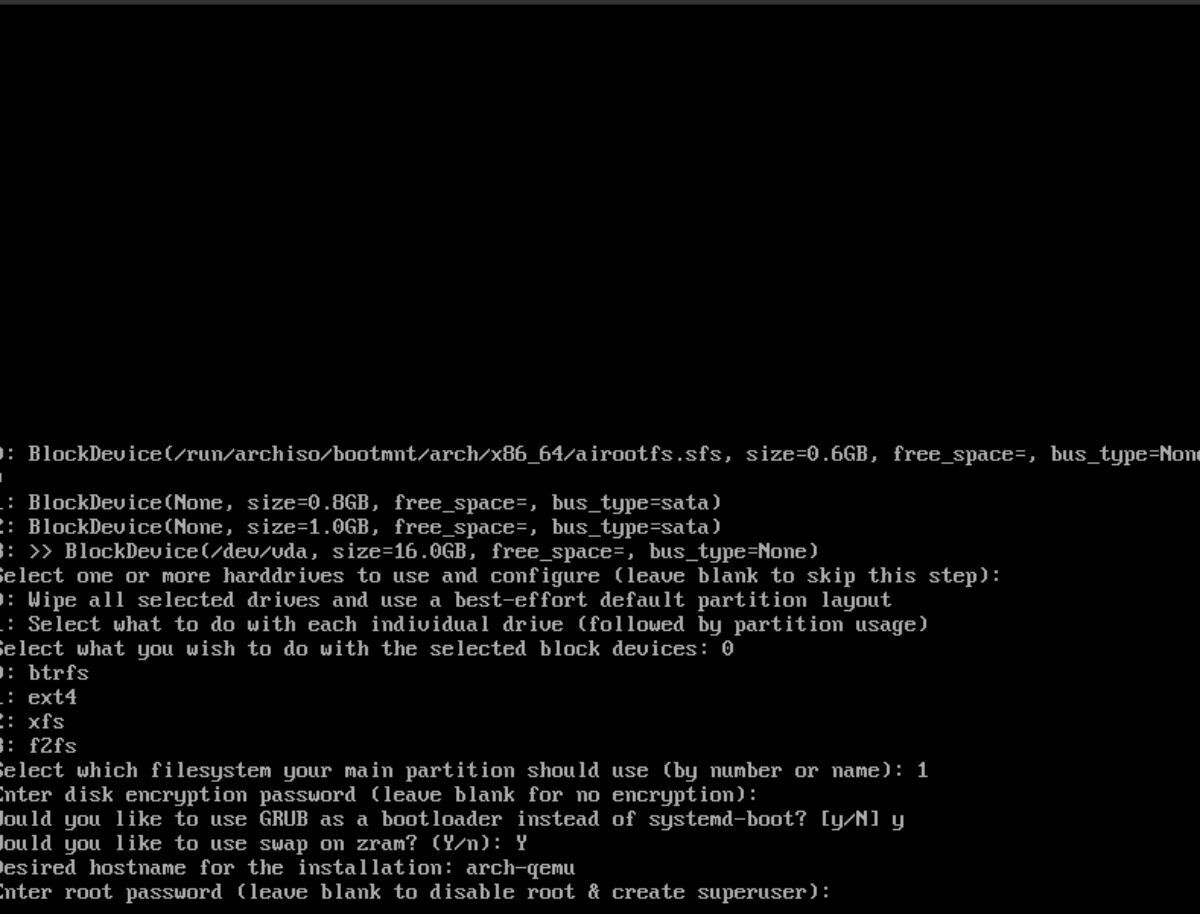
Press Enter to continue.
Step 10: You must create a new user account. Enter your desired username in all lower case characters. Then, press the Enter key to continue. After adding your new user account, write in your user account password and press the Enter key.
Step 11: After creating your new user, Archinstall will ask you if this new user should be a superuser (be able to use sudo). Press Y to confirm you wish your user to have superuser access.
Step 12: You must now enter a profile name. Write in “desktop” and press the Enter key in all lowercase characters. You’ll then need to select a desktop environment. Options are:
- AwesomeWM
- Budgie
- Cinnamon
- Deepin
- Enlightenment
- Gnome Shell
- i3
- KDE Plasma
- Mate
- Sway
- XFCE4
Enter your selection by inputting the number next to your desired desktop environment. Then, press the Enter key to confirm your choice.
Step 13: After selecting a desktop environment, you must choose your video drivers. Choices are Intel, AMD/ATI, Nvidia (open-source), Nvidia (proprietary), and VMware/Virtualbox (open-source.
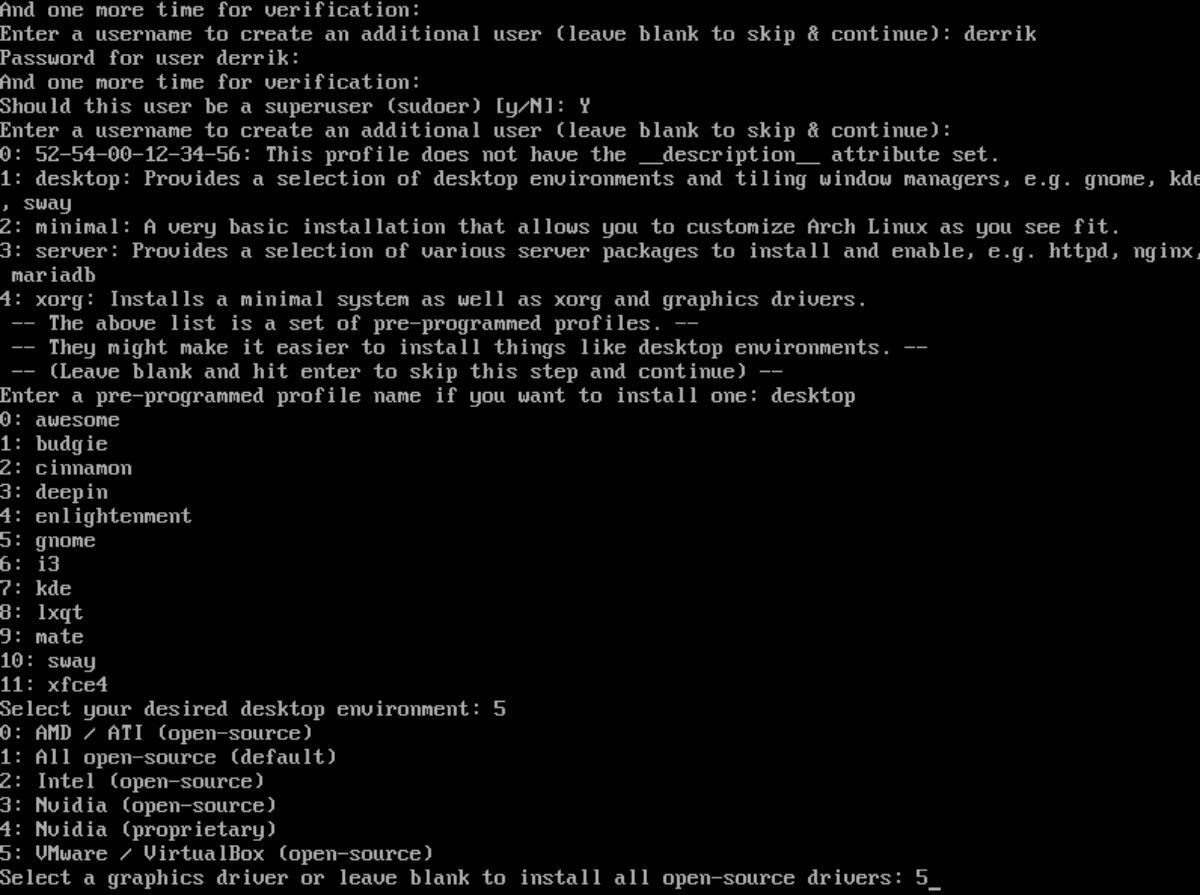
Enter your numbered choice, then press Enter to proceed.
Step 14: Once your video driver is selected, Archinstall asks what audio server to use. Leave it blank, otherwise input “1” for pulseaudio.
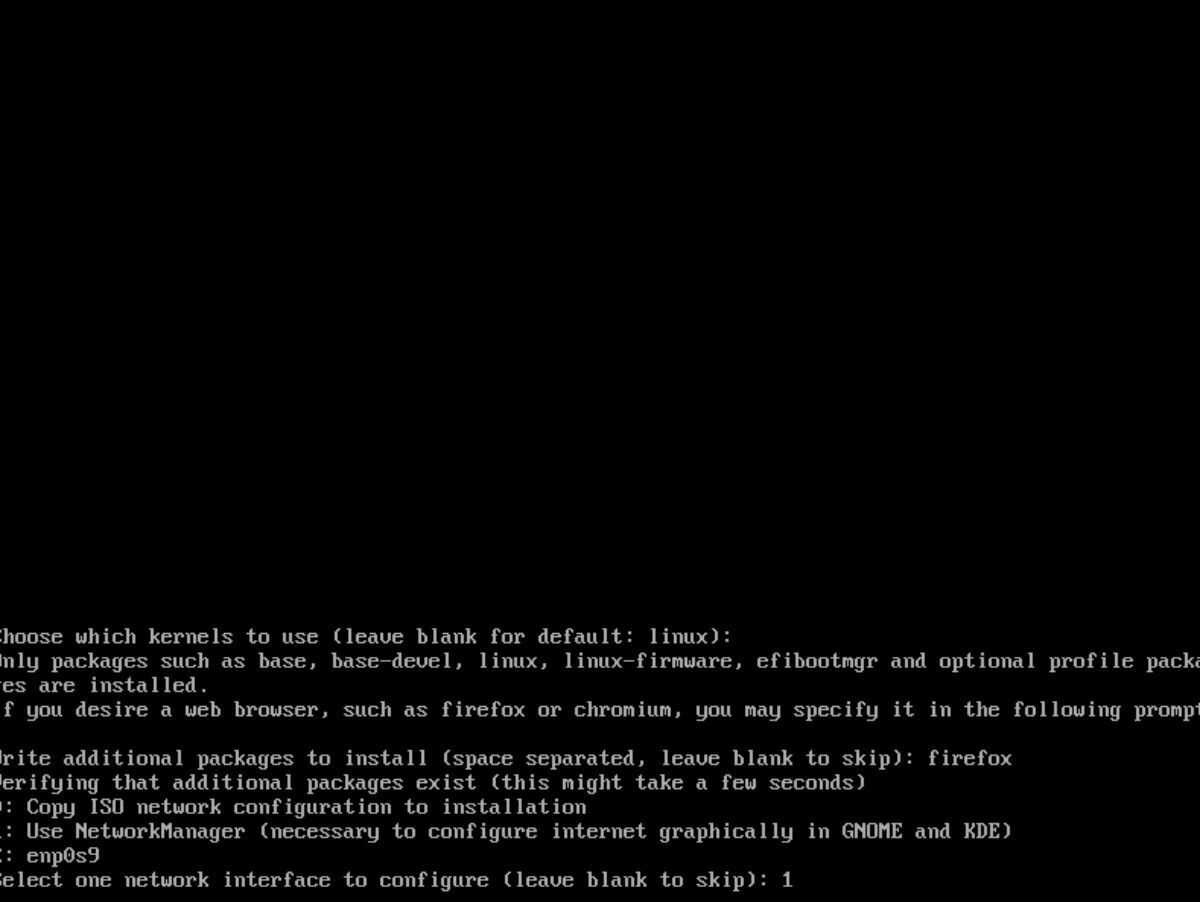
Step 15: Archinstall will ask you which Linux kernel to use. Leave this option blank. Otherwise, enter 2 for “linux-lts” or 3 for “linux-zen.”
Step 16: Archinstall will now ask you what additional packages to install. Enter “firefox” to install a default web browser. Feel free also to add other packages you wish to install. More information here.
Press enter to continue.
Step 17: Select “1” in the Network configuration step to set up NetworkManager on your Arch Linux system after installation.
Step 18: Enter a valid timezone for Arch Linux to use. Press Enter to confirm. Be sure to type “Y” when asked to set up automatic time synchronization.
With all options configured, Archinstall will set up your Arch Linux installation. This process may take a bit of time to complete. Reboot and set up your display manager to use Arch Linux when the process is done!