How to set up Cloudflare privacy-focused DNS on Linux
Cloudflare’s DNS system aims to provide users with the means to browse the internet without worrying about privacy violations. If you’re a Linux user who’s not happy with your ISP, or the big data companies tracking what you browse online, this DNS system is one to check out.
In this guide, we’ll go over how to set up the Cloudflare DNS system on Gnome Shell, KDE Plasma 5, and other mainstream GTK desktop environments. However, if you are a Windows 10 or Mac OS user, do not worry! It is also possible to set up Cloudflare on those platforms as well! For more information, click here!
Set up Cloudflare on Gnome
To set the Cloudflare DNS as your primary DNS server on the Gnome Desktop, you will need to access the Gnome network management tool. To access that, you must load the settings application. Press the Win button on the keyboard to bring up the Gnome Shell search box. Then, type in “settings” in the search box.
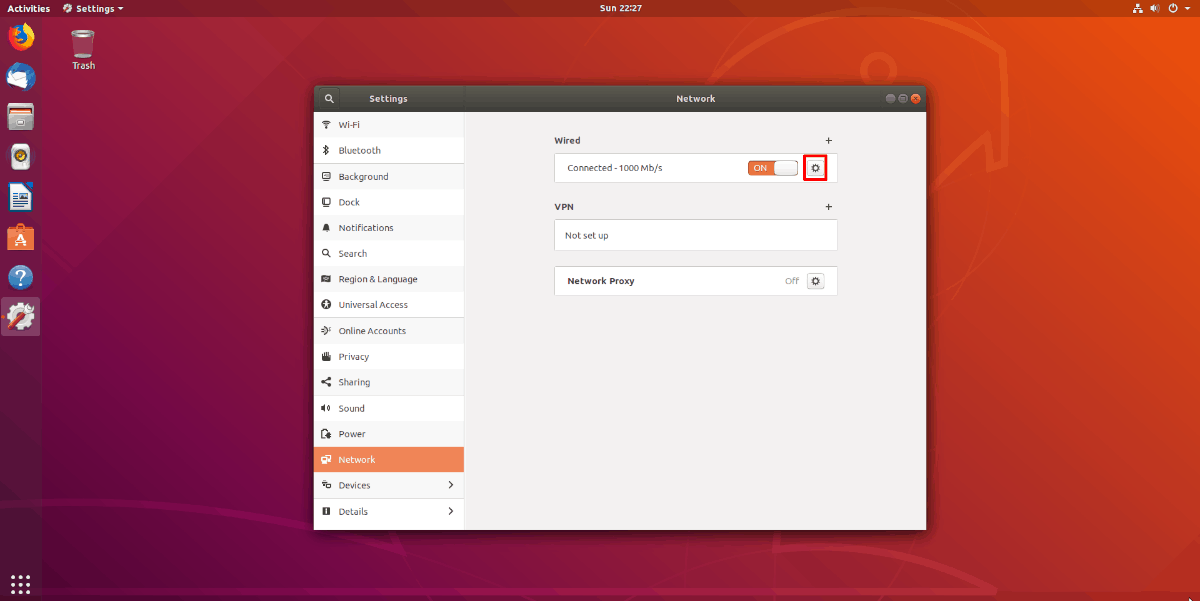
After searching for the Settings app, open it by clicking on it in the search results. Once inside of the Gnome Settings app, you will see a sidebar with many different options to choose from. Using the mouse, look for the “Network” option, and click on it with the mouse. This option will take you to Gnome’s network settings area.
In the “Network” area of the Settings app, you will see your network adapters. So, for example, if you use WiFi to connect to the internet, you will see a WiFi connection. If you use Ethernet, an Ethernet connection will appear. Click on the gear icon next to the connection currently in use on your Gnome system to access its settings.
Once you click on the gear icon, you will see all of the networking information for the connection. Out of the box, Gnome Shell uses your ISP’s default DNS. To change that to Cloudflare’s privacy DNS, find the “IPv4” tab, and click on it.
Inside of the “IPv4” tab, locate the “DNS” area, and switch “Automatic” to the “Off” position. Then, click on the text box below “DNS” with the mouse, and paste in the code below to enable Cloudflare for IPv4 on Gnome.
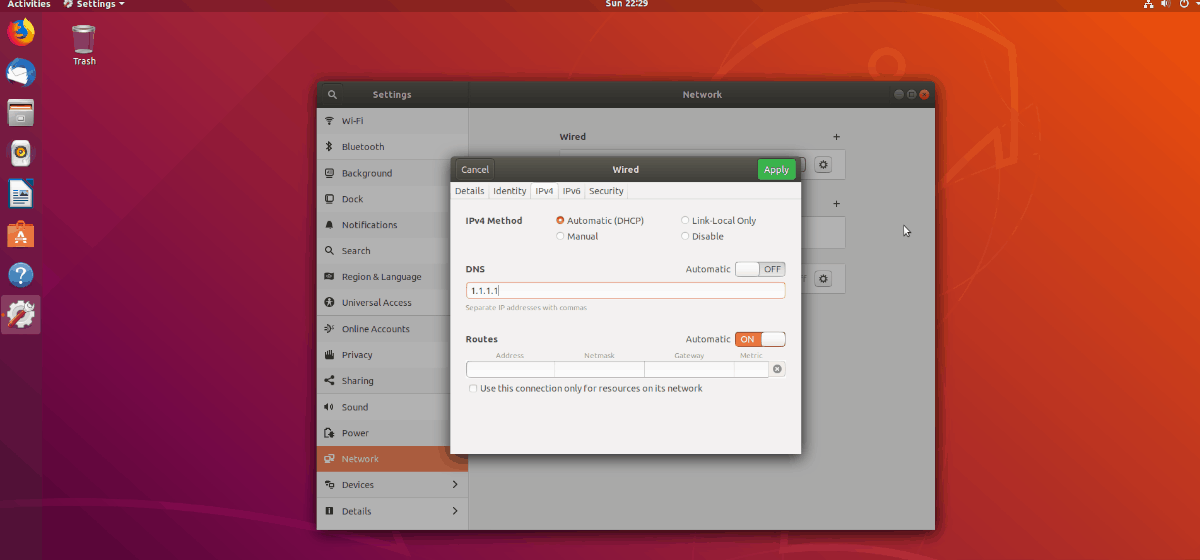
1.1.1.1,1.0.0.1
Select the “Apply” button to apply the changes. After that, locate the “IPv6” tab, and select it. Like before, set the “Automatic” switch to the off position, and click on the DNS box. Then, paste in the code below to enable IPv6 Cloudflare on Gnome.
2606:4700:4700::1111,2606:4700:4700::1001
Once again, click on “Apply” to apply the changes. Reboot your PC to start using the new DNS system.
Set up Cloudflare on KDE Plasma 5
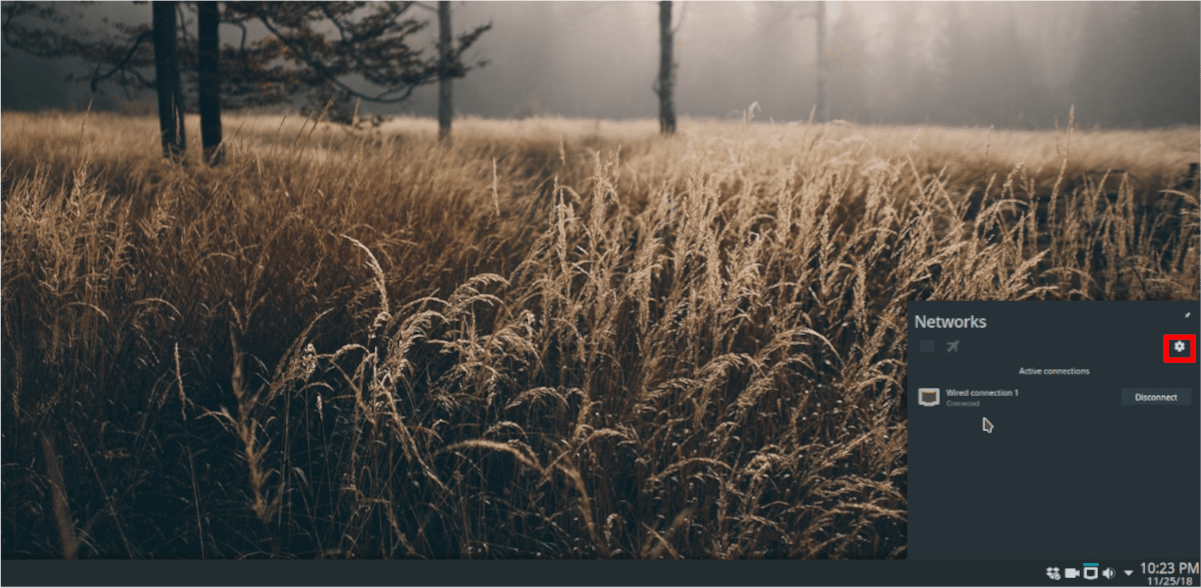
To set up the Cloudflare DNS system on KDE Plasma 5, you will need to access the KDE network manager applet. Look to the panel, and click on the networking icon. If you are using Ethernet, the networking icon is an ethernet jack. If you use WiFi, the icon will be a wireless icon.
After clicking on the networking icon, you will see a gear icon. Select it to access connection properties.
Inside the connection properties window, locate the default network connection, and select it with the mouse.
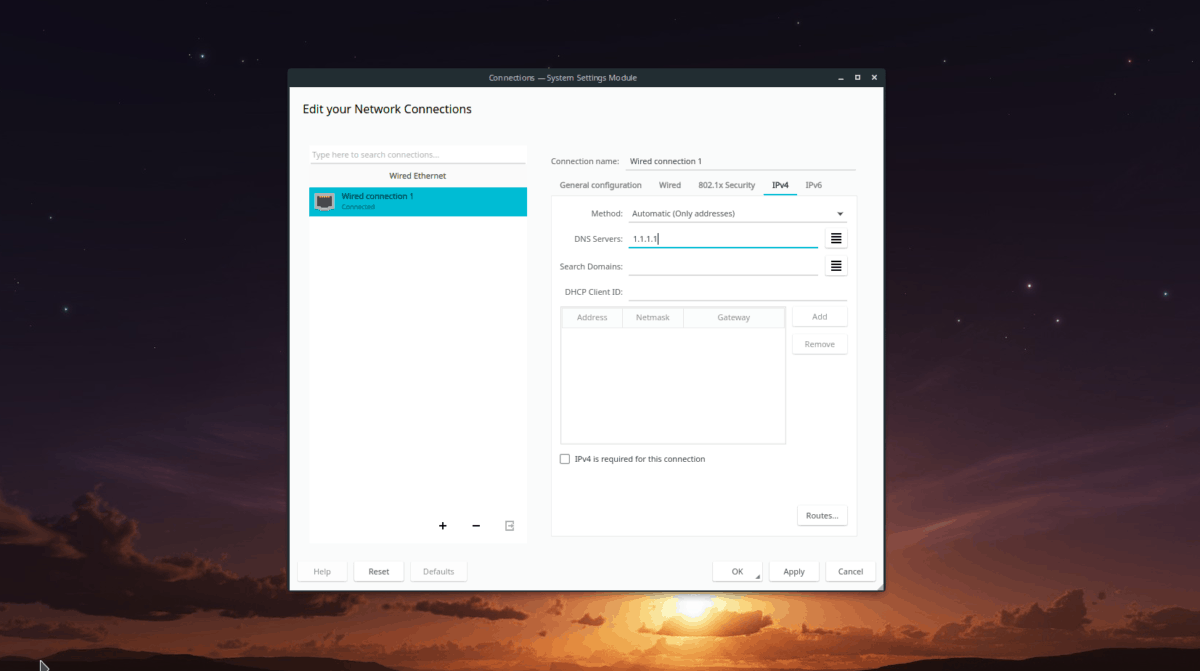
In the IPv4 area, locate the “Method” box, and change it to “Automatic (only addresses).” Then, find the “DNS Servers” box. In this box, write out the Cloudflare DNS IPv4 addresses.
1.1.1.1,1.0.0.1
After setting up the IPv4 addresses, click on the IPv6 tab, and find the “Method” box once again, and set it to “Automatic (only addresses).” Then, look for the “DNS Servers” box, and add in the IPv6 Cloudflare DNS server addresses to enable IPv6 support.
2606:4700:4700::1111,2606:4700:4700::1001
Once both IP addresses are filled out, click on the “Apply” button to apply the changes. Reboot your computer. Upon logging back in, you should be using Cloudflare DNS!
Other Linux GTK desktop environments
If you aren’t using Gnome Shell or KDE Plasma 5, you’re probably using another GTK-based desktop environment such as Mate, LXDE, XFCE4, or others. Here’s how to set up the Cloudflare DNS system on them.
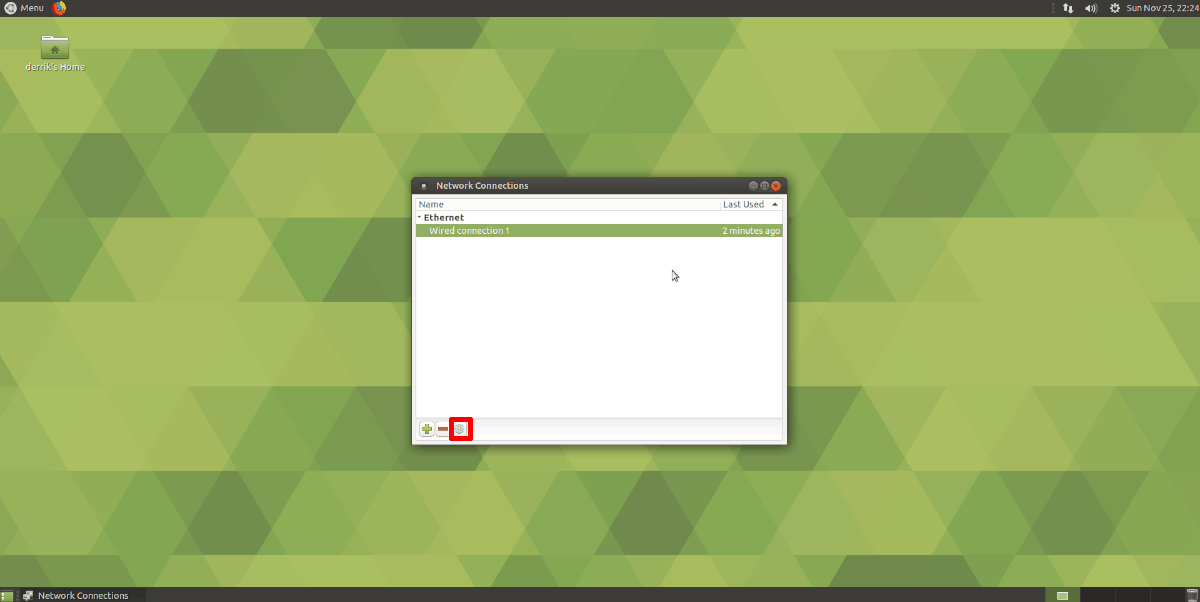
To start, click on the networking icon in your panel with the mouse and select the “Edit connections” button. After that, select the default network connection that you use.
Now that you’ve selected the default network connection select the gear icon with the mouse to access the settings area for the connection. Look for “IPv4 Settings” and click on it to go to the IPv4 settings area.
In the IPv4 settings area, locate the “Additional DNS servers” area, and fill out the Cloudflare IPv4 addresses. Click on the “Save” button to save the settings.
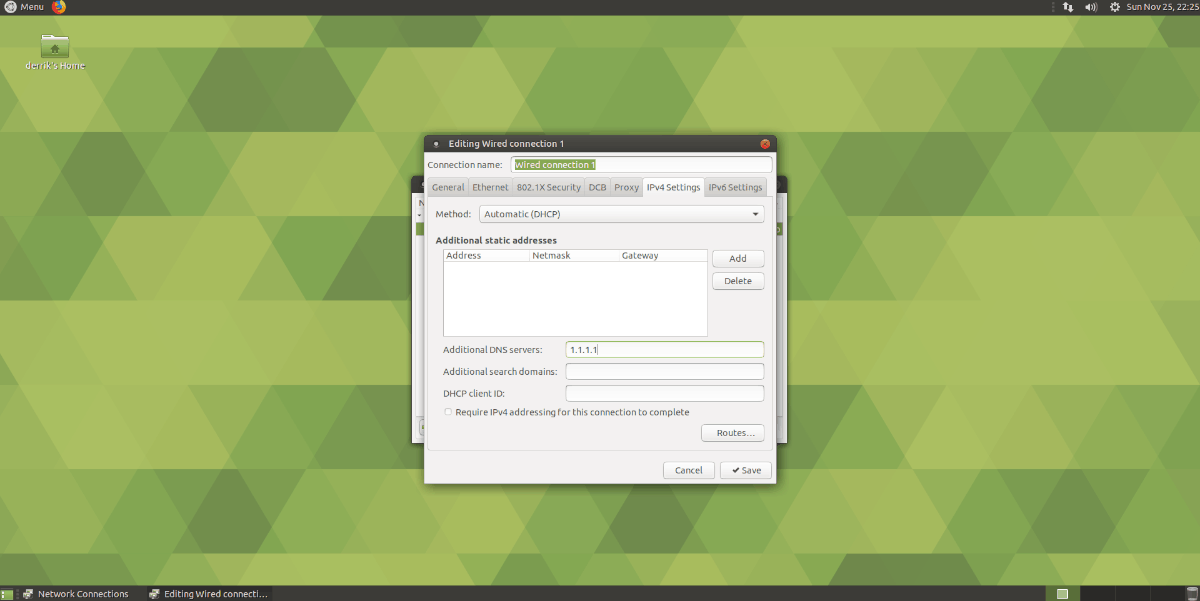
1.1.1.1,1.0.0.1
Next, locate the “IPv6 Settings” tab, and click on it. Then, click on the “Additional DNS servers” text box, and enter the official Cloudflare IPv6 addresses to enable IPv6 support.
2606:4700:4700::1111,2606:4700:4700::1001
After filling out the DNS addresses for IPv6, click “Save.” Then, reboot your PC. Upon logging back in, you will be using Cloudflare DNS!
