How to Make Facebook Private: 6 Easy Methods to Follow
You can make your Facebook private by taking advantage of the Settings & Privacy section. If you’ve never been stalked or targeted by people with malicious intent via Facebook, you may never understand why it’s important to tilt your Facebook towards an angle of total privacy.
While ‘total privacy’ is not attainable in the real sense given the online premise, there are still options you can toggle right there in Facebook’s myriad settings to achieve a sufficient level of privacy. These include controlling who sees your posts, who can contact you, and making your friends lists private, though if you’re also rethinking privacy on other platforms, you may want to delete Telegram account.
However, it’s worth considering that Facebook users access the platform from different operating systems; thus, the instructions you’ll find here are based on the web version of the website with a mobile view. However, you can replicate the steps on the iOS or Android Facebook app as they’re similar.
Without further ado, the following are what you need to change to make your Facebook private:
Change Your Default Post Sharing Settings
Sometimes, Facebook shares your post to the public, albeit there are options to share them to your circle on the last screen where you hit “Post.” However, modifying who sees your posts every time you want to post can be tiring, so your best bet is to default your preferred option.
To do this,
- On your Facebook screen, click the hamburger menu on the right side of the top menu
- Next, navigate to and expand the Settings & Privacy bar
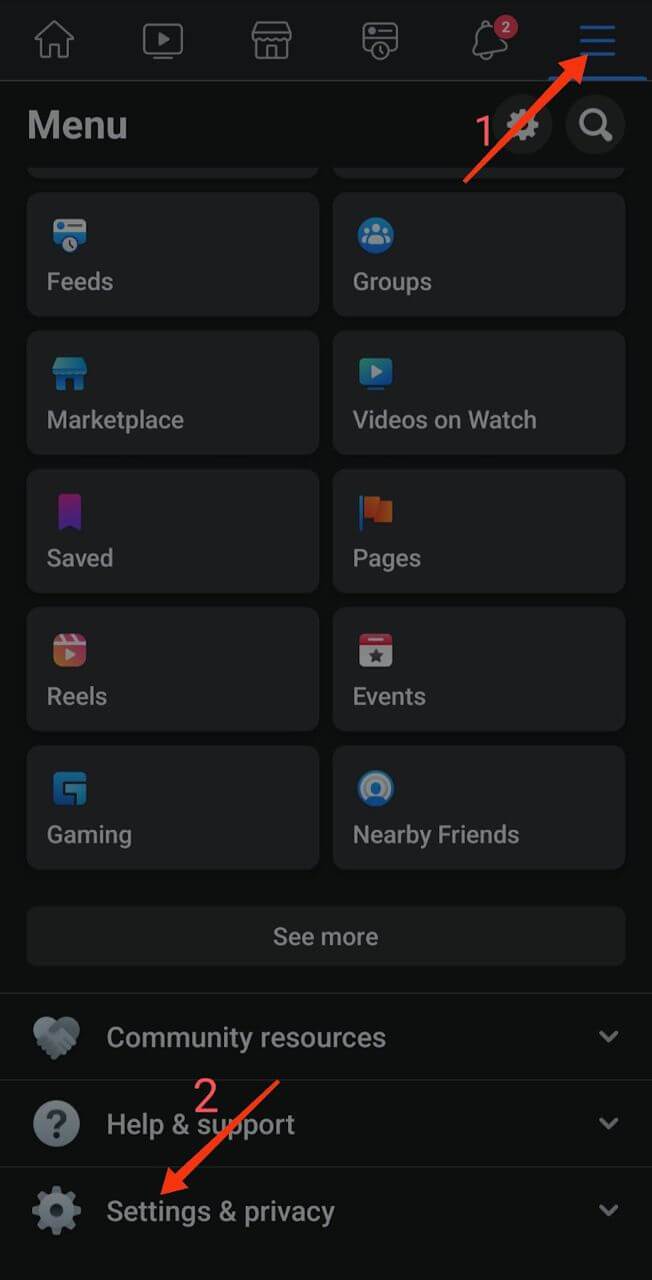
- Click Settings from the options therein
- On the Settings & Privacy screen, scroll down to the Audience and Visibility section
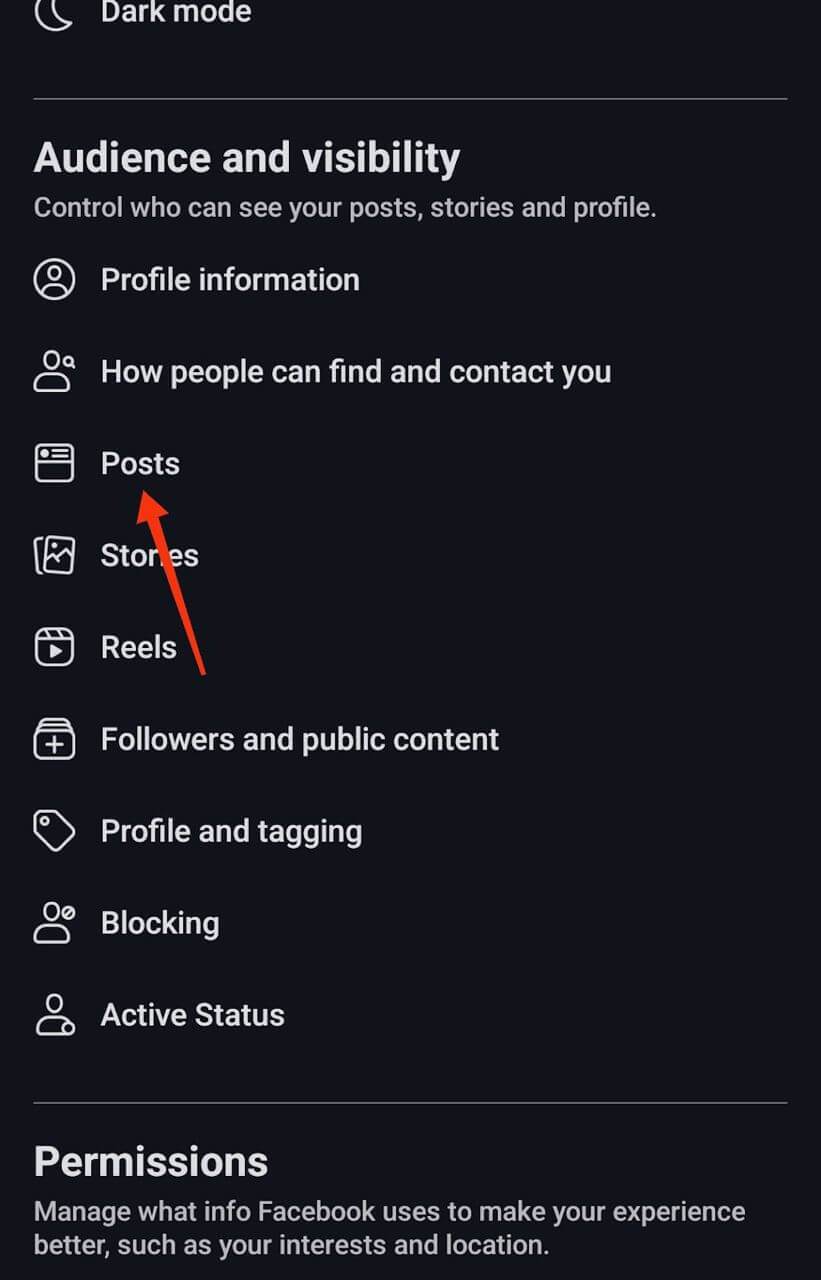
- Next, tap Posts and then Who Can See Your Future Posts
- Facebook will prompt you to make a post from here.
- On the post creation page, you can choose to share the post with yourself or your friends alone
- Whatever option you choose from here will be used as your default for future posts
Make Your Friends List Private
This is one aspect of your profile Facebook makes private by default. And it doesn’t help knowing people who are not on your list can figure out who you are by stringing together the people on your friends list.
Thankfully, you can change this by making your friends list only visible to you. To do this,
- Return to the Settings and Privacy screen in the settings
- Scroll down to the Audience and Visibility section and tap How People Can Find and Contact You
- Find and Select the Who Can See Your Friends Lists Option and select Only Me from the options that pop up next
Your friends list should be visible to just you from now on. However, if you’d like to make it visible to specific friends and leave others out, you can use the Friends Except… option to add them.
Change the Privacy Settings for Your Albums
If you’ve created photo albums on your Facebook profile to categorize those memories you cherish so much, it only makes sense to make them visible to select friends or just you. Thankfully, Facebook also gives you control over who sees your albums, so use the steps below:
- Click on your Facebook Profile
- Scroll down a little and tap Photos

- Once you’ve selected your album, tap the horizontal three-dots (…) in the top-right corner of the album screen
- Select the Edit option from the menu that pops up

- You can also use the Add Contributors toggle bar to assign the ability to add photos to the album to some of your friends
- For photos in Profile Pictures and Cover Photos album, you can change each photo’s privacy settings individually and not the entire album


Review Your Profile Privacy Settings
When last did you check your Facebook privacy settings, if you’ve ever gone through it all? You’d be surprised how exposed you are to the public, with some information such as your workplace and birthday available to the public’s full glare. If you’d like to conceal some of this personal information, follow the steps below:
- Go to the Settings & Privacy page
- Under the Audience and Visibility section, select Profile Information
- Review each of the information and ascertain the ones available to the public that you wouldn’t want to
- Use the Edit button in front of any information to change whom it’s visible to
Quick Tips: While some people might be comfortable with it, I personally don’t think it’s a good idea to make visible to the public information such as your birth year, mobile number, and email address. You might also want to be less descriptive with your address and vaguely add just your city or State.
Make Your Facebook Profile Invisible to Search Engines
Search engines such as Google can index your Facebook profile, making it possible for someone to view your profile via the search engine. To put a stop to this,
- Go to the Settings & Privacy page again
- Scroll down to the Audience and Visibility section and tap How People Can Find and Contact You
- On the next page, tap Do You Want Search Engines Outside Facebook to Link to Your Profile?
- Tap the toggle button next to Allow Search Engines Outside Facebook to Link to Your Profile to turn the option off
Your profile will stop appearing on search engines with this option disabled, making it impossible for people to search for you from there.
Modify Your Active Status
If you’re the type who only comes online to peep at a few posts on the pages they’re following and then leave, there’s no point making your active status known to your friends. The only caveat is that you’ll not be able to see other people’s active status, and this extends to Messenger.
A casual would hardly be bothered by this, so follow the steps below to change it right away:
- Again, go to the Settings & Privacy page
- Scroll down to the Audience and Visibility section and tap Active Status
- On the next page, use the toggle button next to Show When You’re Active to disable your active status
Final Notes
That’s pretty much everything you’ll need to have a little more control over your Facebook account, especially in the privacy department. If you ever need to reverse any of the changes, simply follow the steps again and re-enable any toggle bar disabled earlier.
