How to install Windows on Steam Deck
The Steam Deck is a remarkable device, packing substantial power into a compact package starting at $499. However, it operates on Valve’s Linux-based SteamOS. While SteamOS is an impressive achievement, it has its limitations, particularly with games incompatible with the Proton runtime or those requiring anti-cheat systems like Fortnite.
In this guide, we’ll walk you through the process of replacing SteamOS with Windows for enhanced compatibility with games and services that require Windows.
Prerequisites
Installing Windows on the Steam Deck requires a traditional keyboard and mouse, as the built-in mouse and keyboard functionality will not work out of the box. Ideally, you should connect your keyboard and mouse via USB to a USB-C dock to which the Steam Deck is connected.
In addition to the keyboard and mouse, two flash drives are necessary. The first flash drive will contain Windows 11, and the second flash drive will house the Windows drivers for the Steam Deck, provided by Valve. These must be downloaded in advance, as the networking adapter built into the Steam Deck likely will not function until the Windows drivers are installed.
Lastly, if possible, use a dock with built-in Ethernet, or connect a USB Ethernet adapter to your Steam Deck for network connectivity. Most modern Ethernet adapters support plug-and-play on Windows and should enable network access until the Steam Deck Windows drivers are fully configured.
How to download Steam Deck Windows Drivers
Valve provides all Windows Drivers for the Steam Deck on the official Steam Deck Windows Resources page. To access these drivers, visit the resource page. Alternatively, you can download each driver directly from the links provided in the list below.
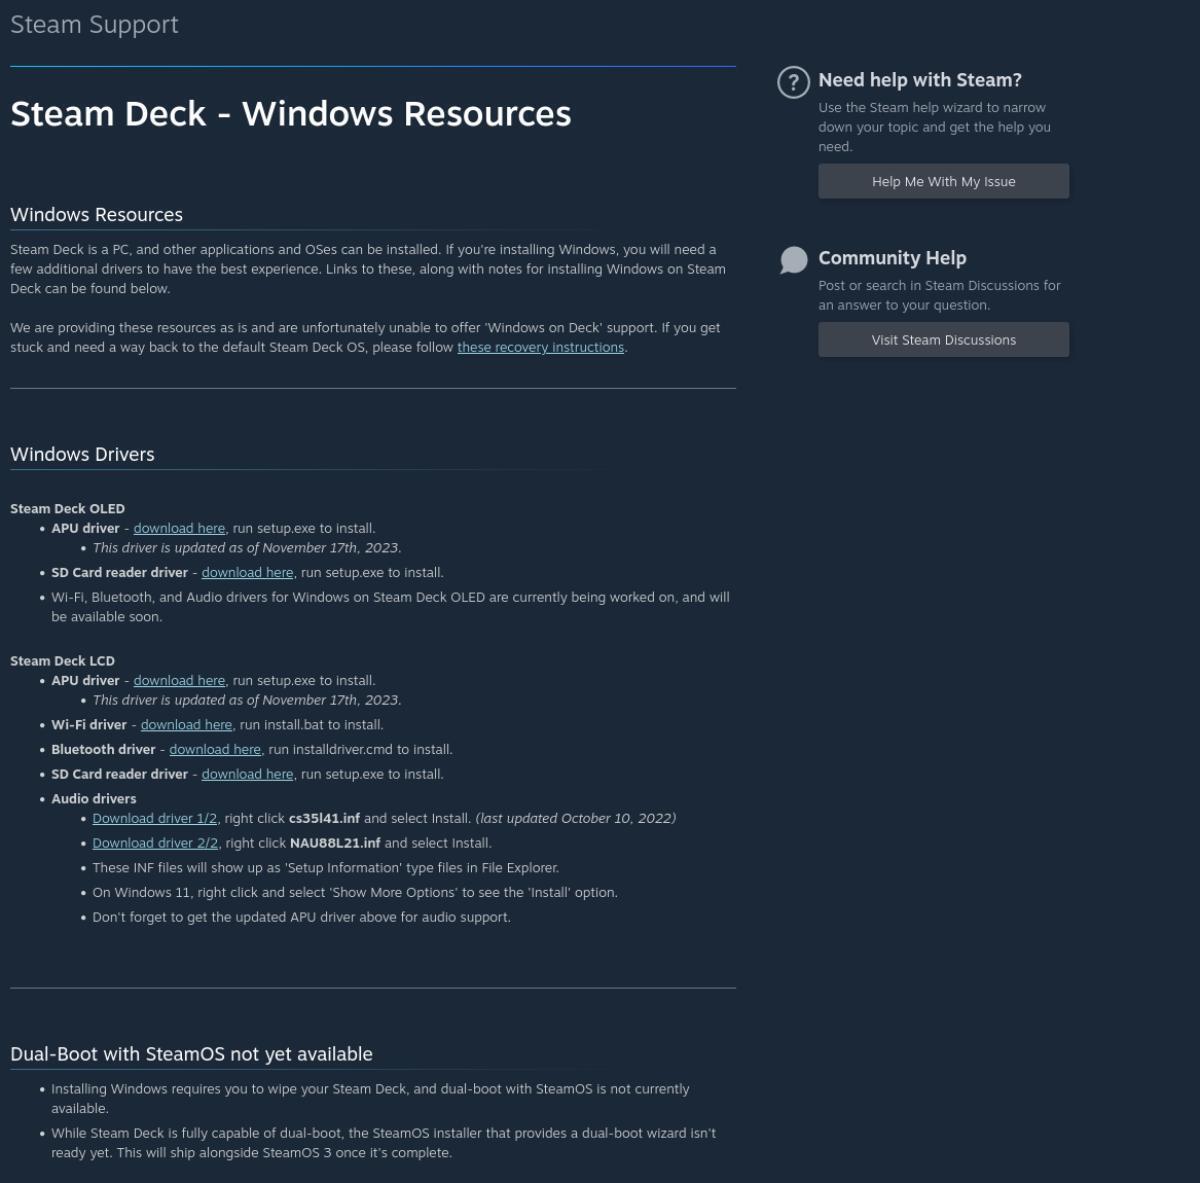
Steam Deck OLED specific
- The Steam Deck OLED APU driver can be downloaded here.
- The Steam Deck OLED SD Card reader driver is available here.
Steam Deck general drivers
- The Steam Deck (non-OLED) APU driver is available here.
- The Steam Deck’s WiFi networking driver is available here.
- The Steam Deck’s Bluetooth driver is available via this link.
- The Steam Deck has two audio driver files. Download both:
After downloading all the necessary Steam Deck Windows Drivers, place them on the second USB flash drive. This drive will be needed after completing the installation.
How to download Windows 11
There are several methods to download Windows 11. In this guide, we will use Microsoft’s Windows 11 USB Creation Tool, an easy-to-use tool that simplifies the process of creating a bootable Windows 11 USB for the Steam Deck.
To begin, visit the Windows 11 page on Microsoft.com and download the latest version of the Windows 11 Installation Assistant. Once downloaded, insert the first flash drive (the one without the drivers) and launch the Windows 11 Installation Assistant. Follow the on-screen prompts to create your bootable Windows 11 installation USB.
After the Windows 11 Installation Assistant completes its process, safely eject the USB flash drive from your Windows device and plug it into your Steam Deck. Next, power off the Steam Deck. With the device off, hold the Power button and the “-” button simultaneously until you hear a tone. Release the Power button but continue holding the “-” button until the Steam Deck bootloader appears.
In the Steam Deck bootloader, select the boot manager and choose your USB drive as the boot device.
How to install Windows 11 on Steam Deck
Once you’ve booted from your Windows 11 USB through the Steam Deck bootloader, connect your keyboard and mouse, and begin the Windows 11 installation by clicking the ‘Next’ button.
After clicking ‘Next’, you must enter a product key. If you have a Windows 11 product key, input it here. If not, click the ‘I don’t have a product key’ option, then proceed by clicking ‘Next’.
Next, you’ll reach the ‘Which type of installation do you want?’ screen. Choose ‘Custom: Install Windows only (advanced)’. Now, delete every partition visible under Windows for the Steam Deck drive, typically labeled ‘Drive 0’.
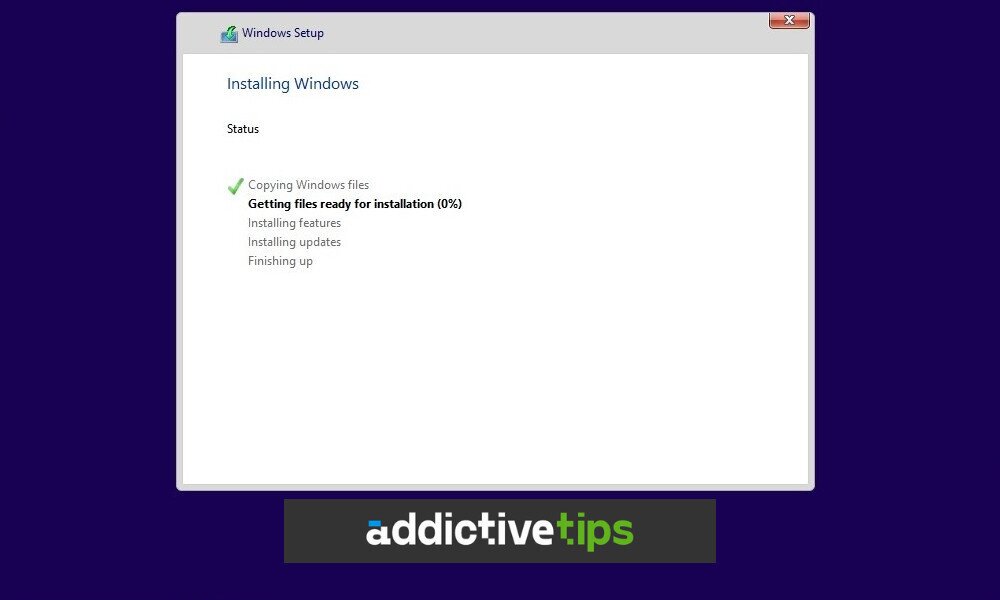
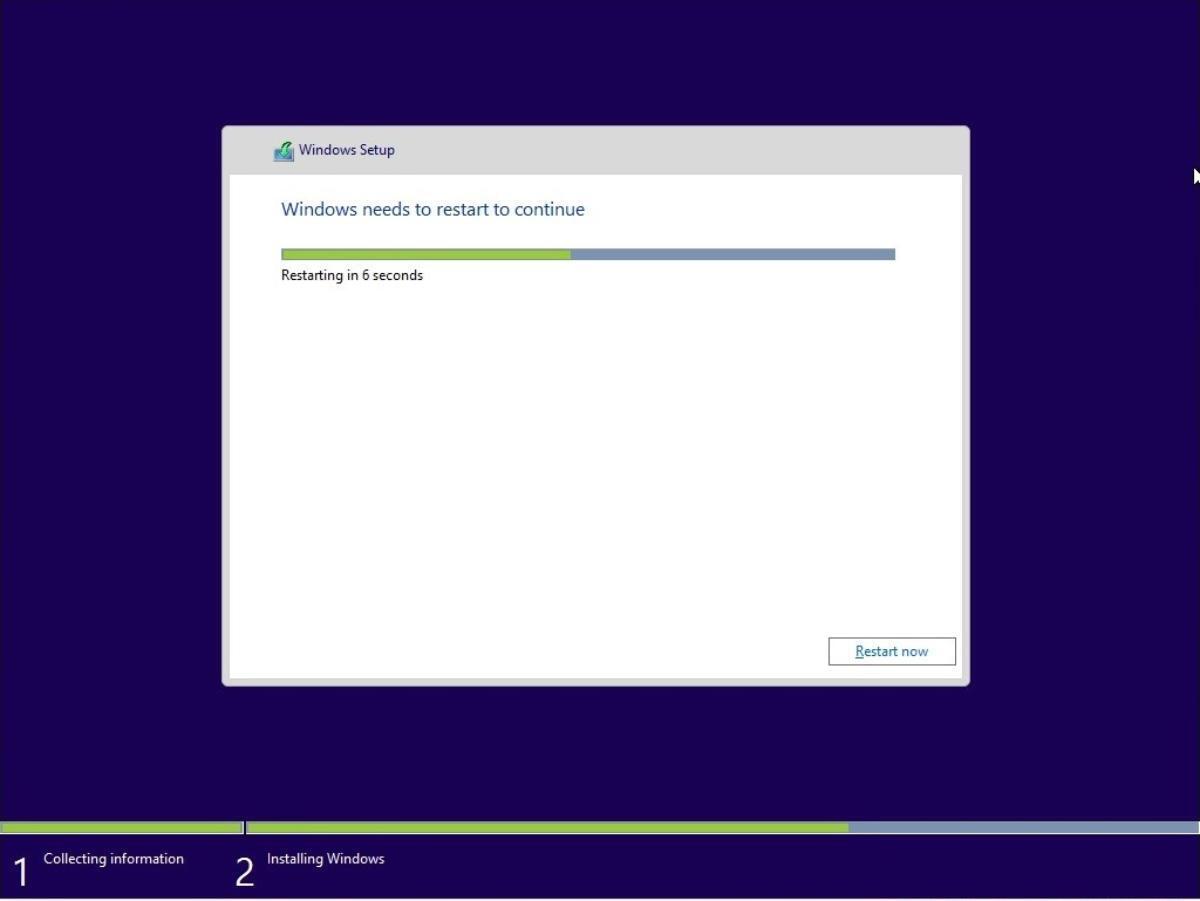
Once all partitions are deleted, you will see only free space. Select this free space and then click the ‘Next’ button. Windows will then automatically partition the space and begin the installation of Windows 11.
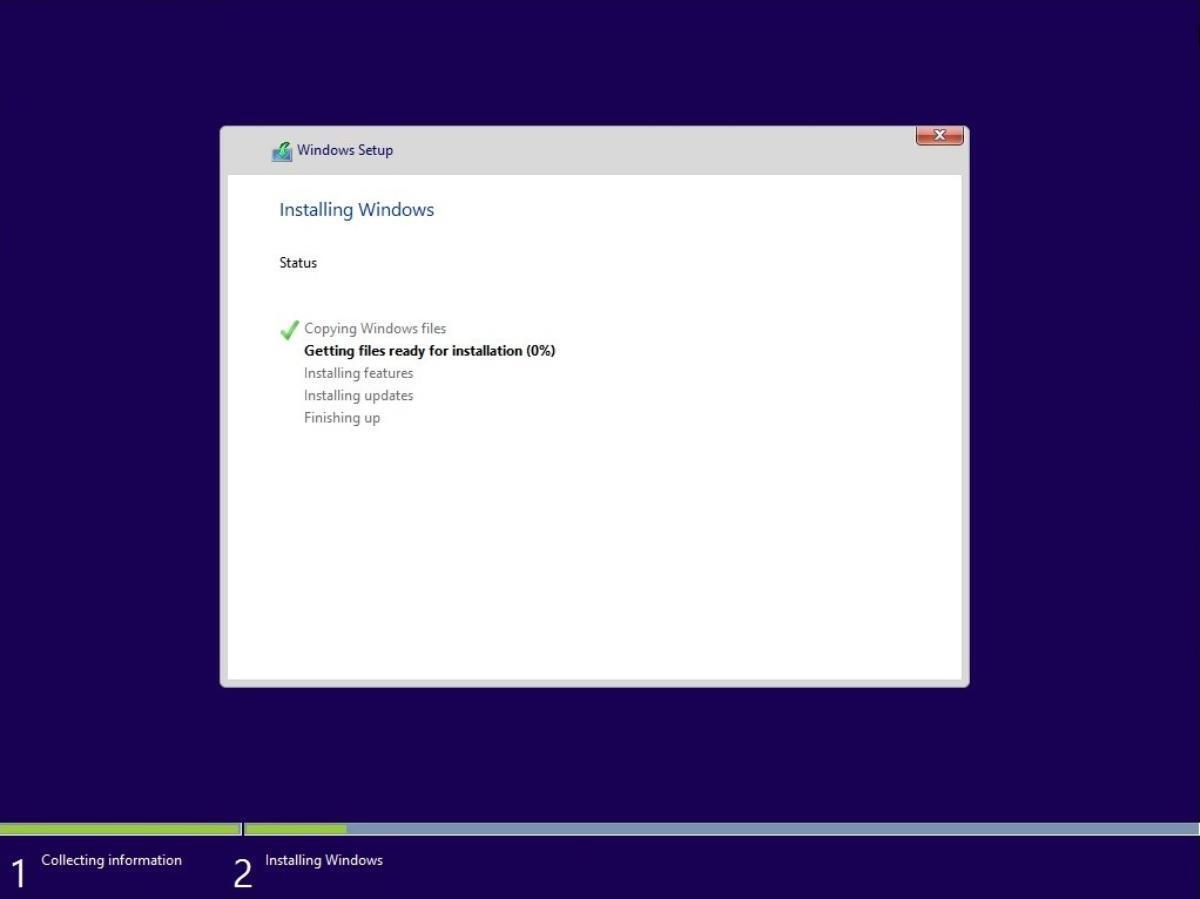
Relax and be patient during this process. The installation of Windows 11 on your Steam Deck will take several minutes to complete.
How to install the Steam Deck Windows Drivers
After Windows 11 finishes installing on your Steam Deck, use the flash drive containing the drivers to complete the setup. Follow these steps for each driver:
- APU Driver: Locate and double-click the setup.exe file to install the APU driver.
- SD Card Reader Driver: Find the setup.exe file for the SD card reader driver and run it.
- WiFi Driver: Execute the install.bat file to install the WiFi driver.
- Bluetooth Driver: Run the installdriver.cmd file to install the Bluetooth driver.
- Audio Drivers: For both the cs35l41.inf and NAU88L21.inf files, right-click on each file, select ‘Show More Options,’ and then choose ‘Install’ to install the audio drivers.
