How to install Windows Server 2022
Are you itching to try out Windows Server 2022 on your server hardware? Can’t figure out how to set it up? This guide will show you how to quickly download and install Windows Server 2022 on your system.
How to download Windows Server 2022
Like their desktop operating systems, Microsoft allows users to download an “evaluation” copy of Windows Server. So, you will not need to pay anything to get your hands on Server 2022. Here’s how to download it.
To download Windows Server 2022, you must head over to the Windows Server 2022 evaluation page. Once there, you should see a list of download links for each language. If you speak English (US), select the 64-bit edition ISO and download it.
Please note that Microsoft also supports VHD downloads. However, we will not be using virtualization for this guide. Instead, this tutorial is a bare-metal installation of Windows Server 2022.
Create a Windows Server 2022 installation USB
You’ll need to create a Windows Server 2022 installation USB to boot it up on your server. Head over to the official Rufus website, and download the latest Rufus EXE to your computer.
After downloading Rufus to your computer, open up Windows Explorer, select “Downloads,” and open up the Rufus app. Then, plug in your USB drive, select your Windows Server 2022 ISO image and select the “Start” button to create the USB installer.
How to set up Windows Server 2022
Windows Server has a GUI installer, so you can’t do a headless installation. As a result, you must plug in a keyboard, mouse, and monitor into your server. Once it is plugged in, follow the step-by-step instructions below to set up Windows Server 2022.
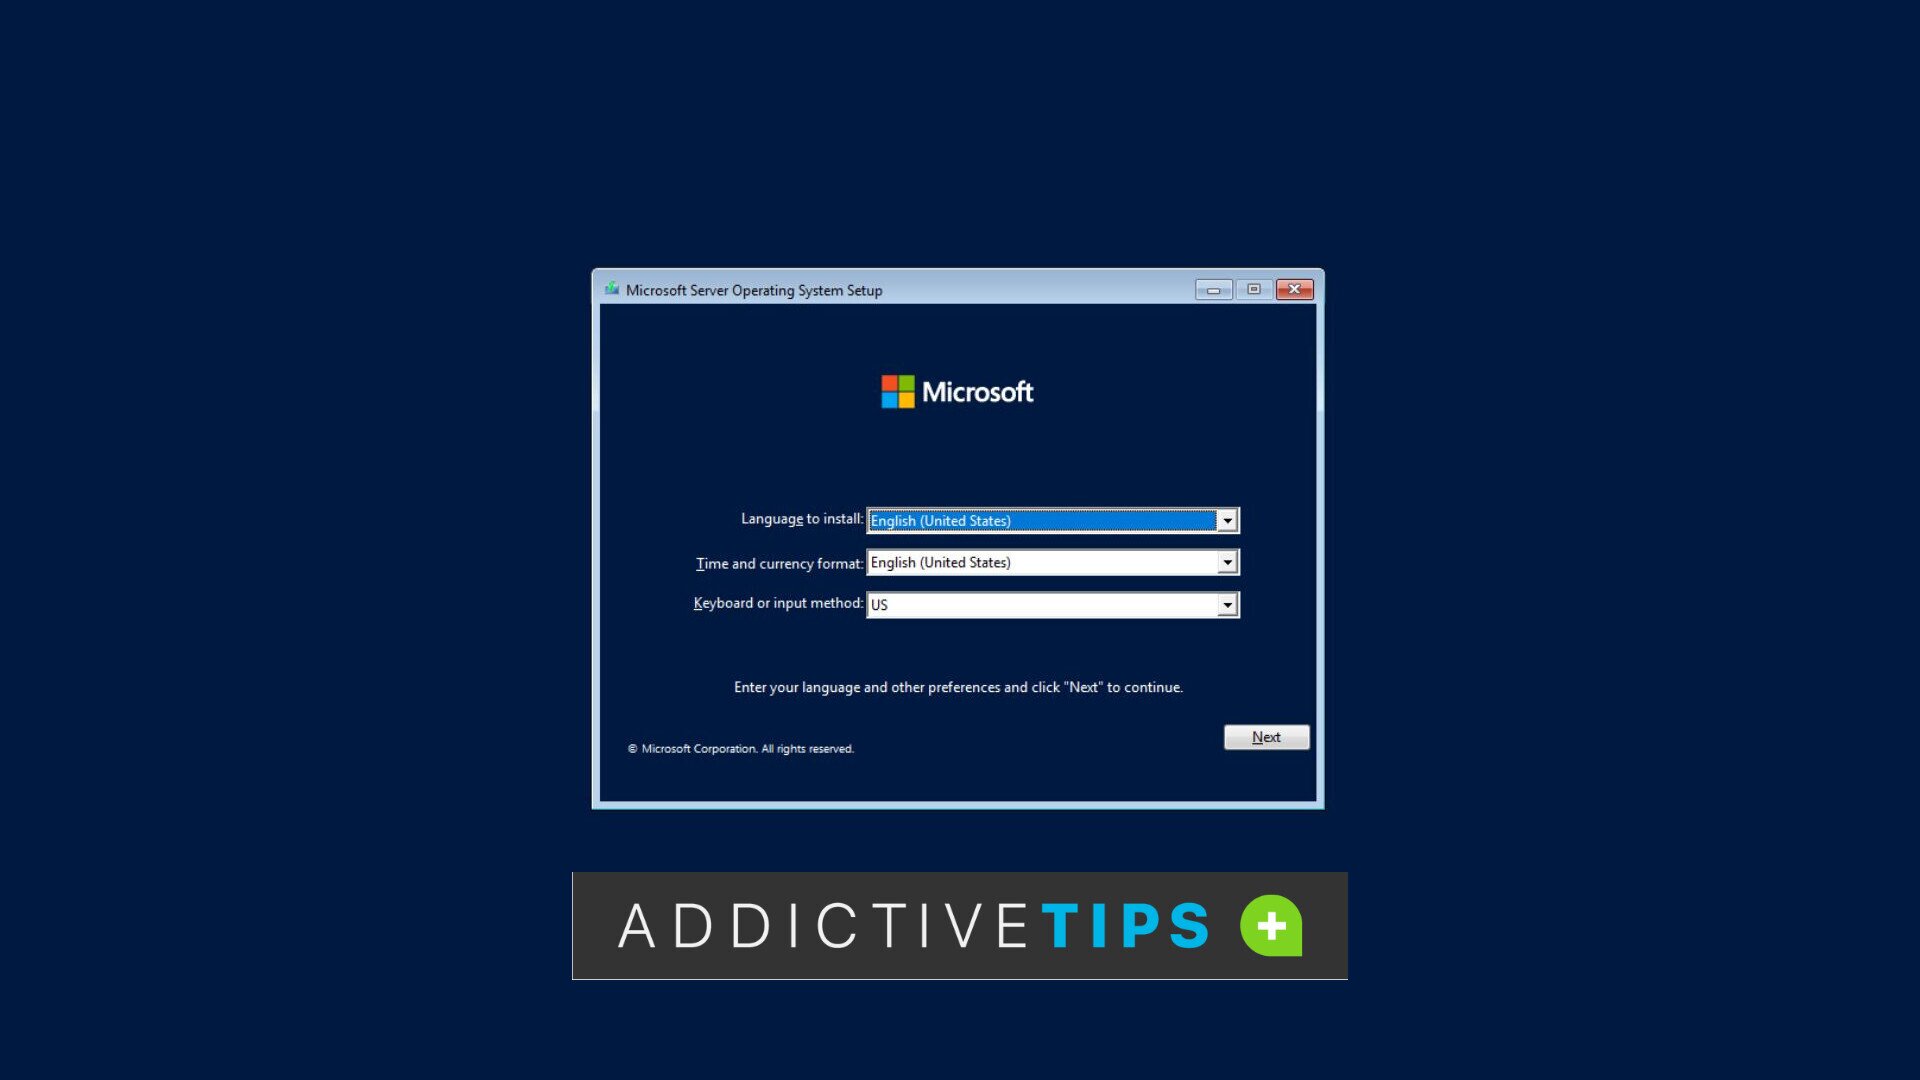
- When the Windows Server 2022 installer first boots up, you will see an installation window similar to Desktop Windows. First, select your language, time/currency format, and keyboard input method. Then, select the “Next” button to continue.

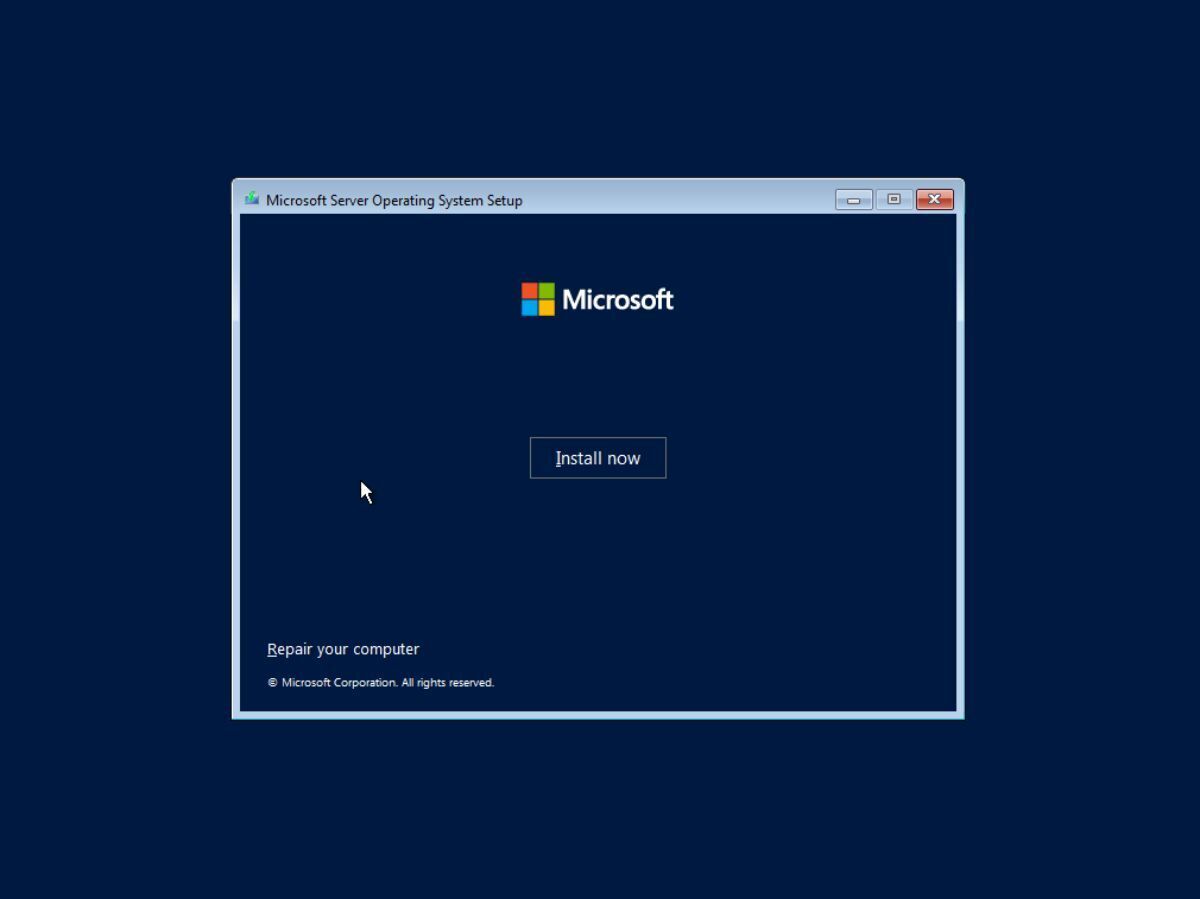
- After selecting the “Next” button, an “Install now” page will appear. Select the ‘Install now” button to start the Windows Server 2022 installation process.

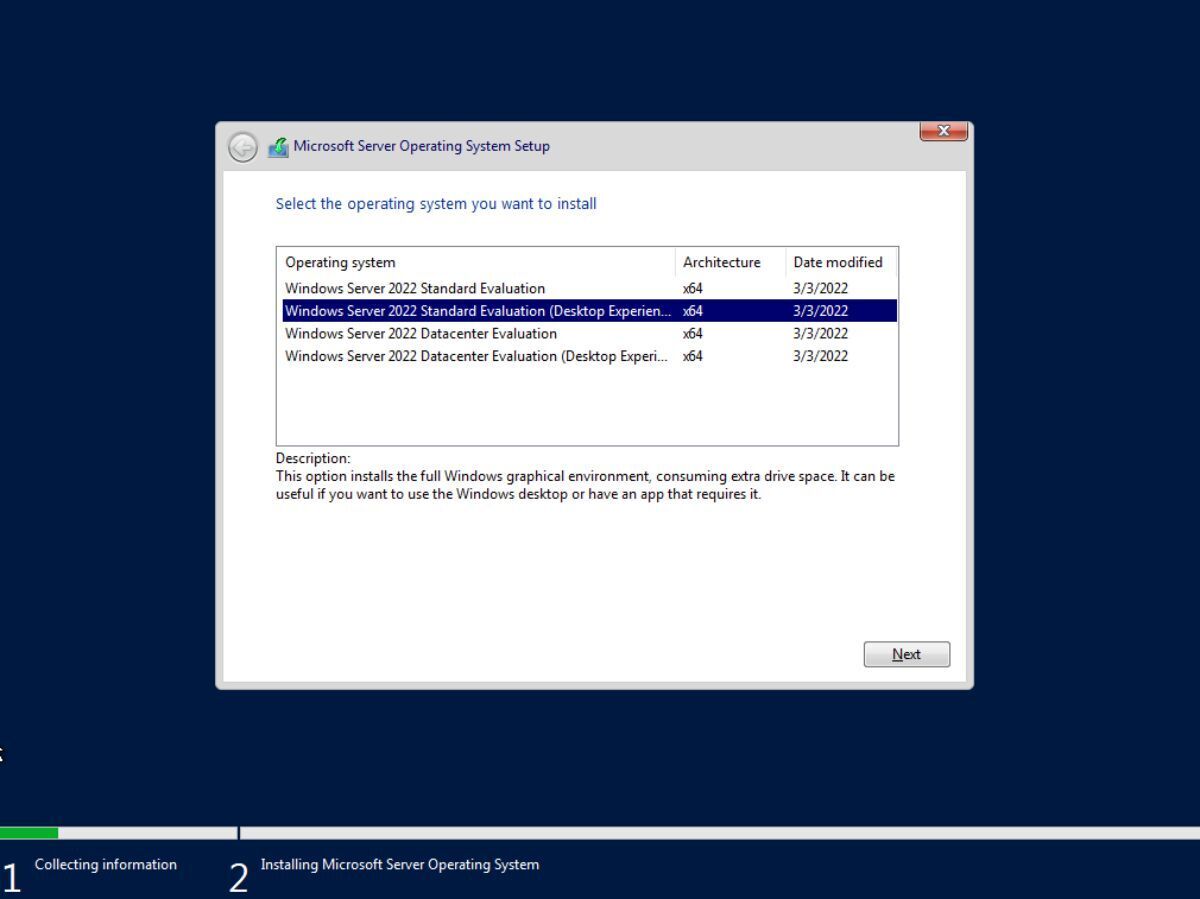
- When you select the “Install Now” button, you’ll be tasked with choosing your Windows Server 2022 edition. Select “Windows Server 2022 Standard Evaluation (Desktop Experience)” for your home server. However, if you’re an expert, feel free to choose another available option.

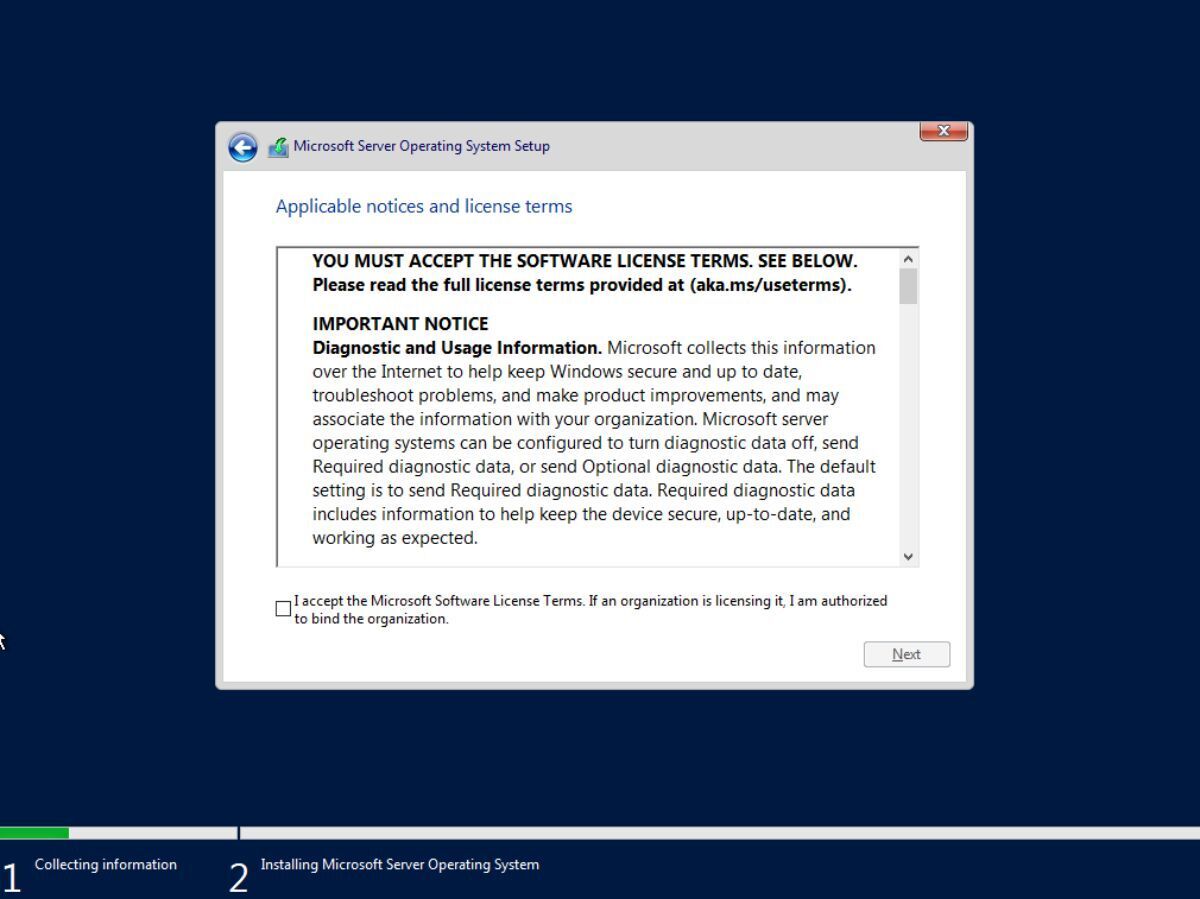
- After choosing your Windows Server 2022 edition, you’ll have to read the “Applicable notices and license terms.” Read the agreement. When done, select the box next to “I accept the Microsoft Software License Terms. If an organization is licensing it, I am authorized to bind the organization.” Select the “Next” button when done.

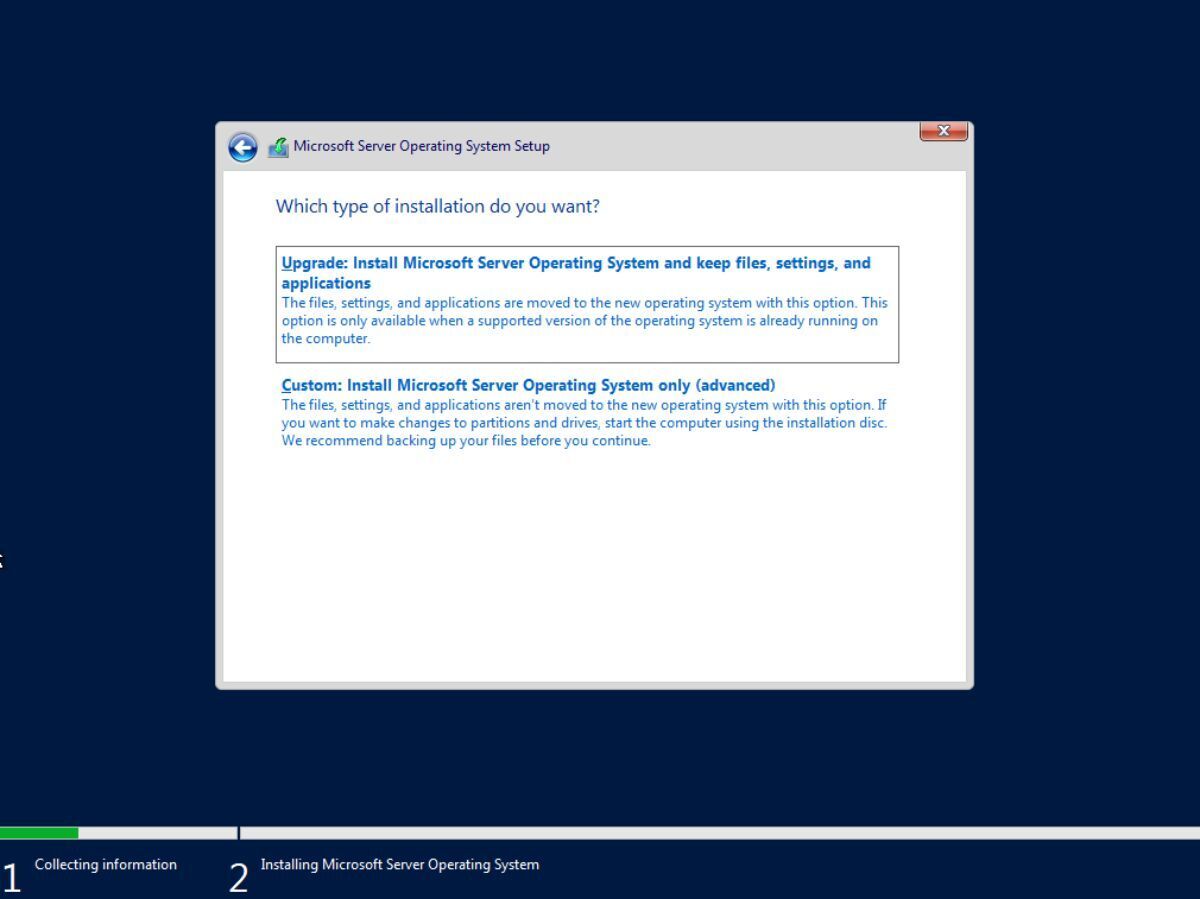
- Once you’ve agreed to the license terms, the installer will ask you, “Which type of installation do you want.” Select “Custom: Install Microsoft Server Operating System only (advanced) with the mouse.”

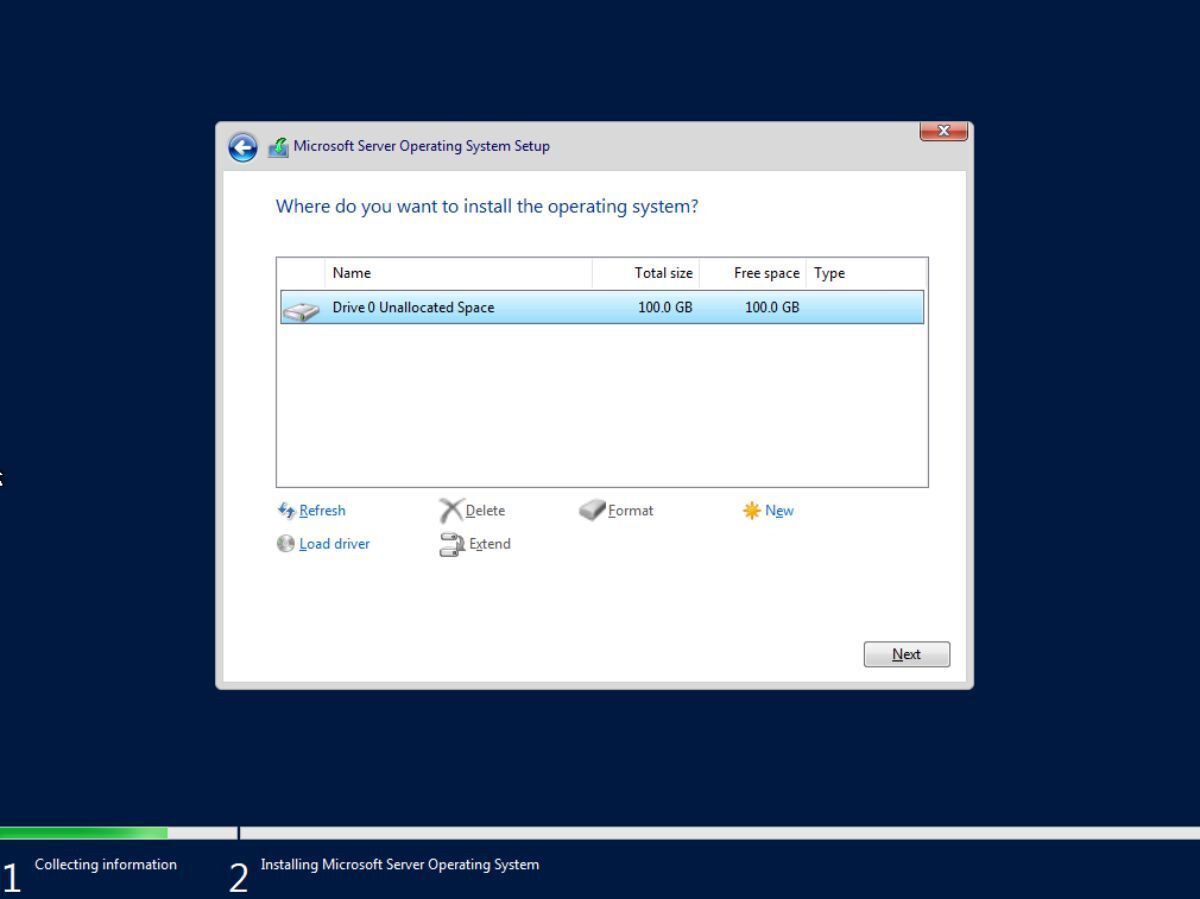
- Find the hard drive you plan to install Windows Server 2022 onto and select it with the mouse. Then, choose the “Next” button to continue. Selecting “Next,” the installer will automatically partition Windows Server 2022 for you.

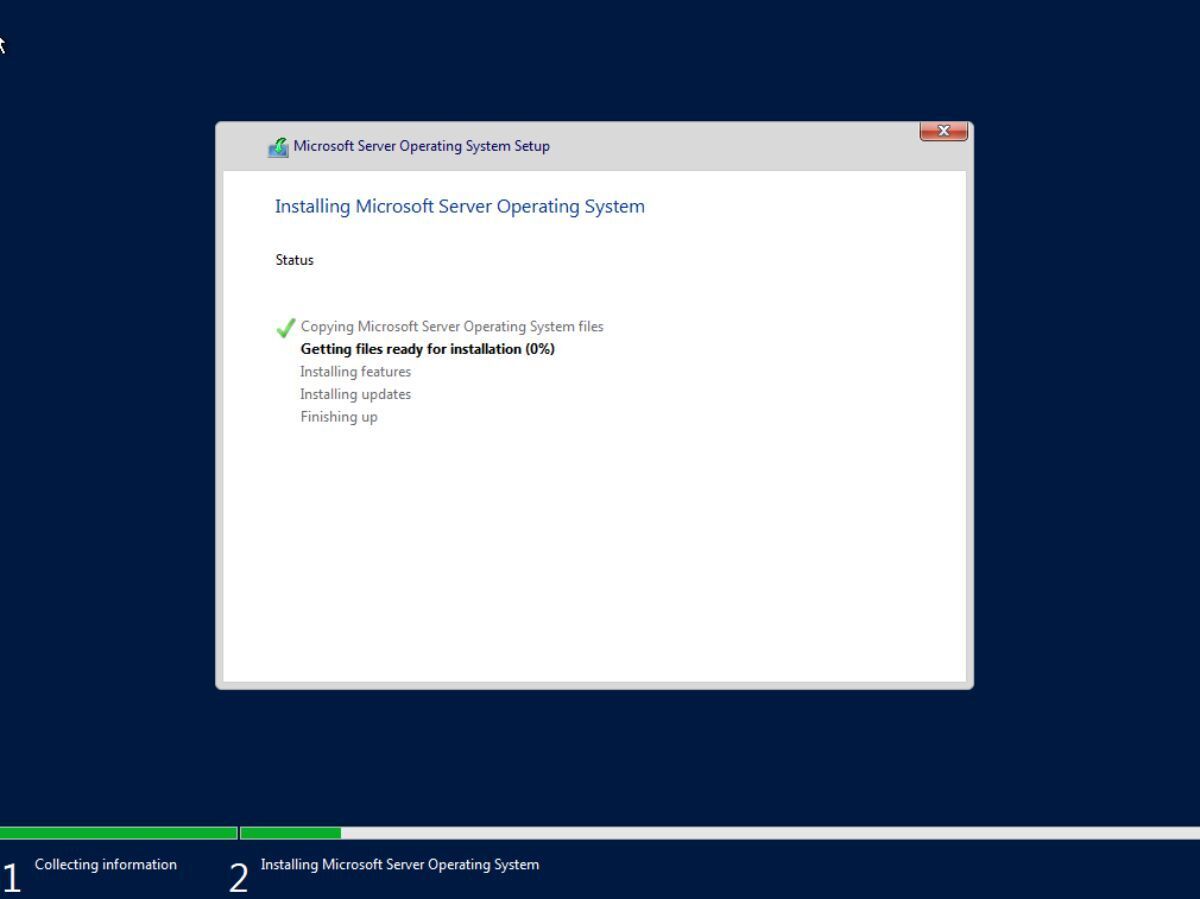
- Upon configuring your partitions, the Windows Server 2022 installer will begin copying operating system files, getting the files ready for installation, and installing the operating system. This process can take a bit of time, so be patient.

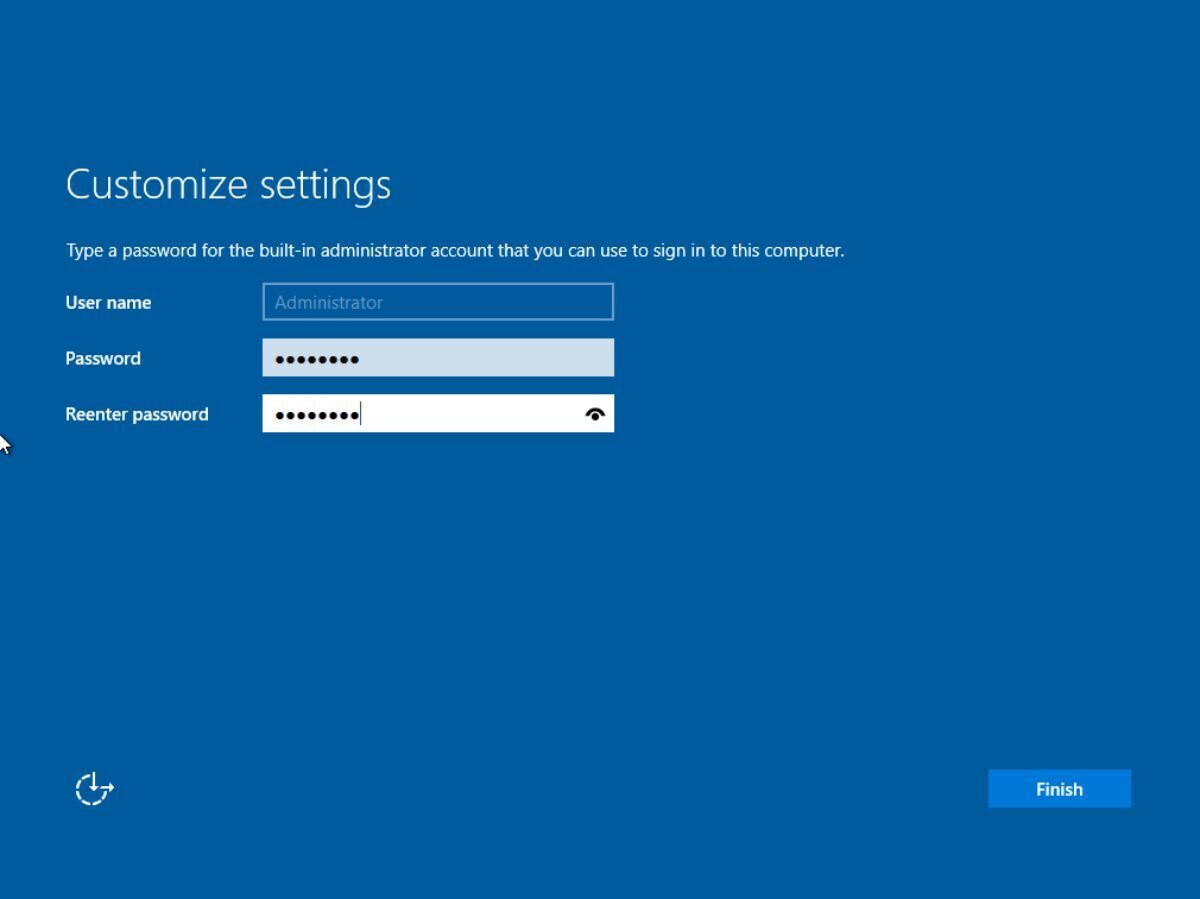
- Once the installation is complete, Windows Server 2022 will boot up. You’ll be asked to create an administrator account and select a password during this first boot-up.Windows Server will automatically select “Administrator” as your username. First, enter a memorable, secure password in the password box. Then, re-enter it in the box below. Select “Finish” when done.

- When you’ve selected the “Finish” button in the installer, Windows Server 2022 will load up the login screen. Press Ctrl + Alt + T on the keyboard to unlock the OS. Then, enter your admin password to log in.

How to configure Windows Server 2022
You must configure your Windows Server 2022 installation after logging in. To configure it, select the “Server Manager” app that appears upon login. Once you’ve chosen it, you’ll see “Welcome to server manager,” followed by “Configure this local server.”
Select “Configure this local server” with the mouse. You can then change your server settings in the “Properties” area and enable features like Remote Desktop, NIC Teaming, etc.
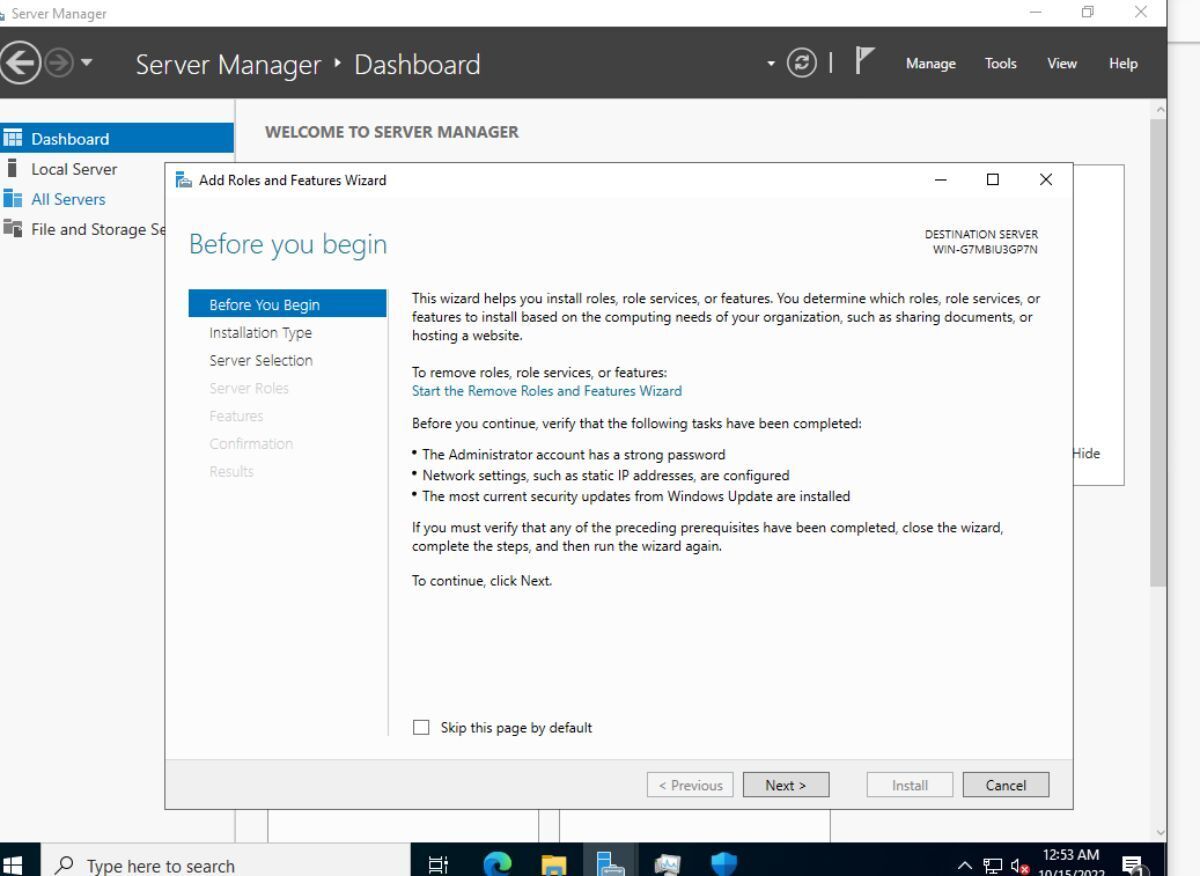
After configuring settings in the “Properties” area, click “Dashboard” to go back to the dashboard. Then, select “2 Add roles and features.” Once selected, follow the “roles and features” wizard to configure roles/features on your Windows server.
Steps 3-5
Steps 1-2 are critical for setting up a Windows home server. However, steps 3-5 can be ignored if you do not wish to add your server to a group, connect to cloud services, etc. Follow these steps if you are an expert. However, most users should feel free to ignore these steps.
