How To Undervolt A CPU To Increase PC Performance
All microprocessors, or Central Processing Units (CPUs) operate at a very specific voltage. However, given the colossal assembly line at which these processors roll out, some processor models are tested at voltages higher than they really need. There is a process called Dynamic Voltage Scaling, a power management technique where voltages of individual components inside a computer can be increased/decreased. You save power when the CPU consumes less of it. This also leads to your system not heating up as much meaning the fans will no have to work as hard. Here’s how to undervolt a CPU
Disclaimer: This process is straight forward and considered safe, but if you end up configuring the wrong thing, you could damage your PC. So do this exclusively at your own risk.
Note: This is laptop exclusive because extending battery life is not a concern for desktops. Even though the core methodology works for both PC and Android mobile, we will cover only PC, as Android needs to be rooted for this process. Lastly, this process requires patience, because there is a lot of testing involved.
Undervolting vs Overclocking
Undervolting is not the same as overclocking. Overclocking requires that we modify hardware to perform at greater levels than it was tested at. So, if you could make your CPU perform at the factory configuration by consuming less electricity, you will increase your battery life in two phases. Phase 1 is the actual electricity you save in operating the processor and phase 2 is the power you save when your fan does not have to turn on as frequently. This, in turn, can extend the life of the system as well. Here is how you can safely undervolt your CPU.
Pre-Requisites
To undervolt your CPU, your laptop should be fully charged before you get started. You will need to download Intel Extreme Tuning Utility (XTU) from the Intel site (link at the bottom). It is a simple tool that this will serve our introductory purposes today. There are more complicated tools out there that you can search for if you’re confident you can use them.
Make sure you take a system backup. In the off chance things do go South, you will need a backup in case restoration is needed.
Getting Started
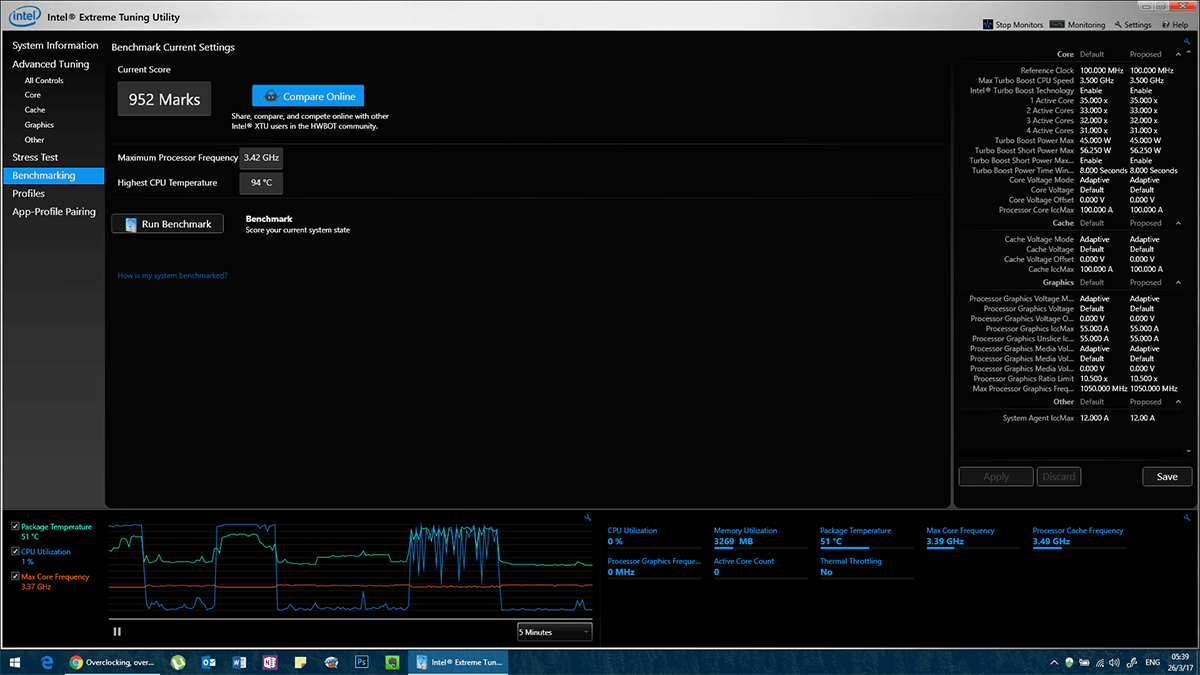
Upon launching XTU, you will be greeted with a splash screen with all the action items in a menu on the left. Go to Benchmarks and run a ‘Benchmark Test’ to see where your system’s performance stands right now. This will be very useful when you start tinkering with the voltage.

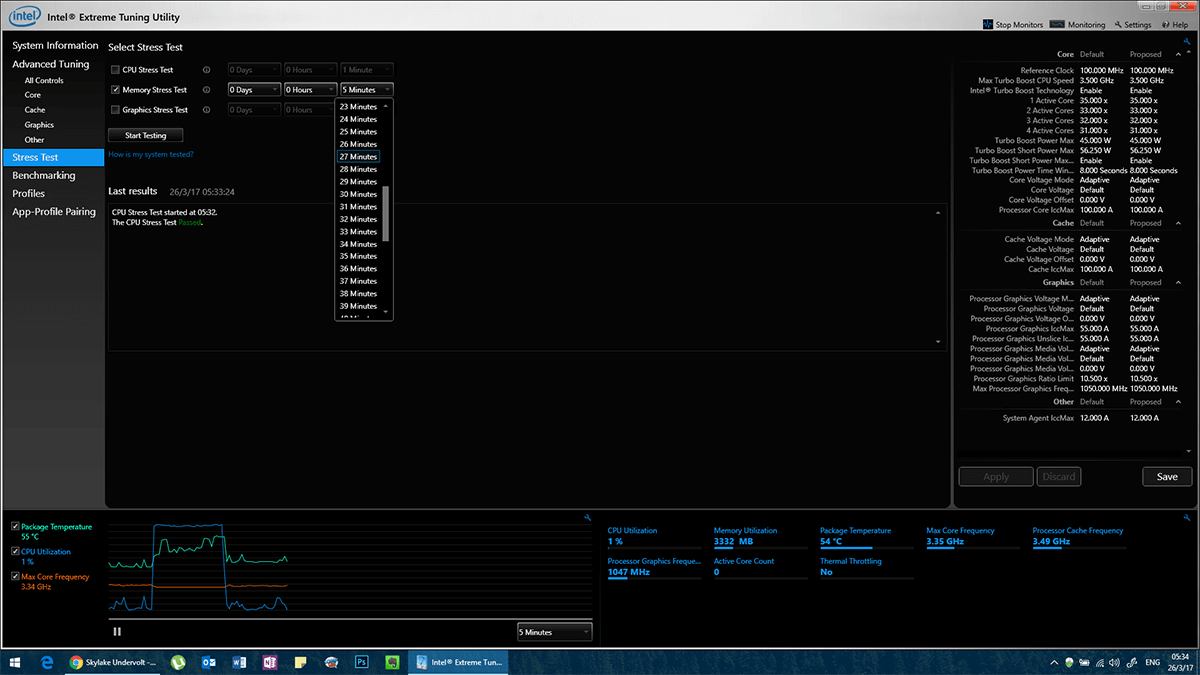
Additionally, run some stress tests on your system as well. The purpose of a stress test is to show how your hardware functions normally, so that when we do undervolt a CPU, we will know if its behaviour is normal.
Check ‘CPU Stress Test’ and select the amount of time you want to run the test for. Ideally you should let it run for at least 30 minutes. In this time your CPU will get hot and your fans will start running at full capacity. Once the test is complete you will have a very good reference to how your CPU normally behaves.

Undervolt
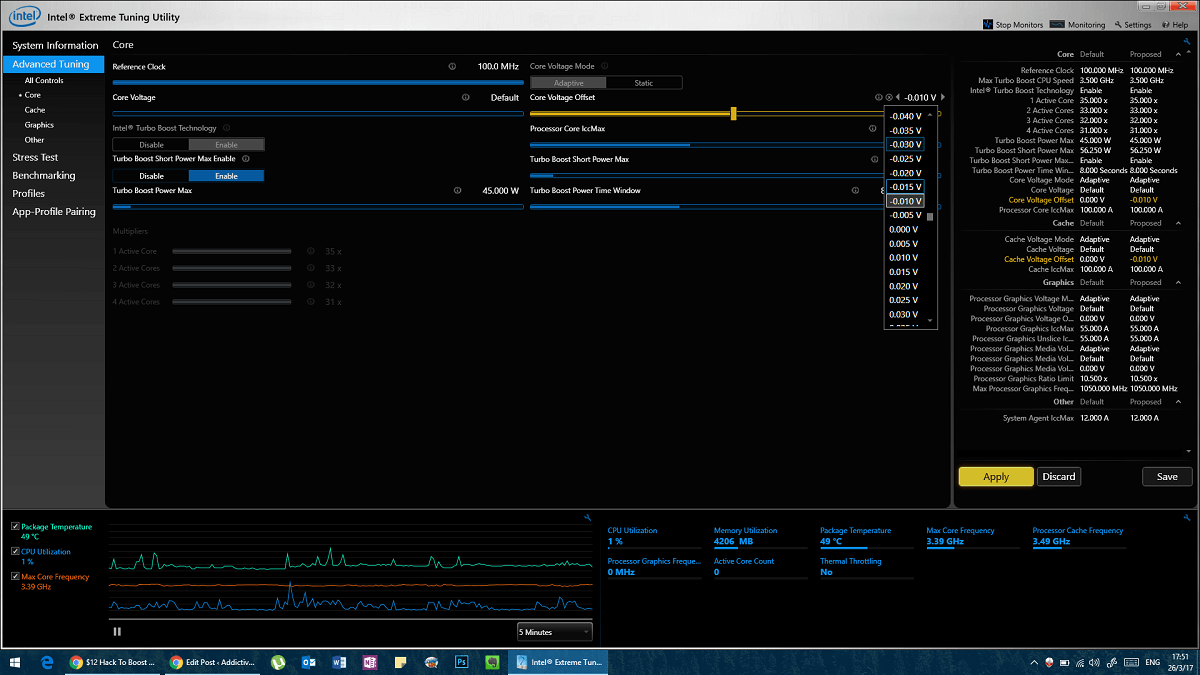
Under ‘Advanced Tuning’, go to ‘Core’.
Here, look at ‘Core Voltage Offset’. If your values are at default, they will all be in blue. Anytime you change any setting, it will turn yellow in color. Click the drop-down menu next to ‘Core Voltage Offset’, that says ‘0.000 V’. You will see a list of voltages at 0.005 v intervals. What you want to do is click on this voltage and scroll up to when you start seeing negative voltages. i.e. -0.005 V because we we are undervolting, not over. If we go in the positive, we are sending more volts to the processor, risking damage. Negative is where we are safe.
From this point forward, the process is trial and error. Set it to -0.010 V and click apply.

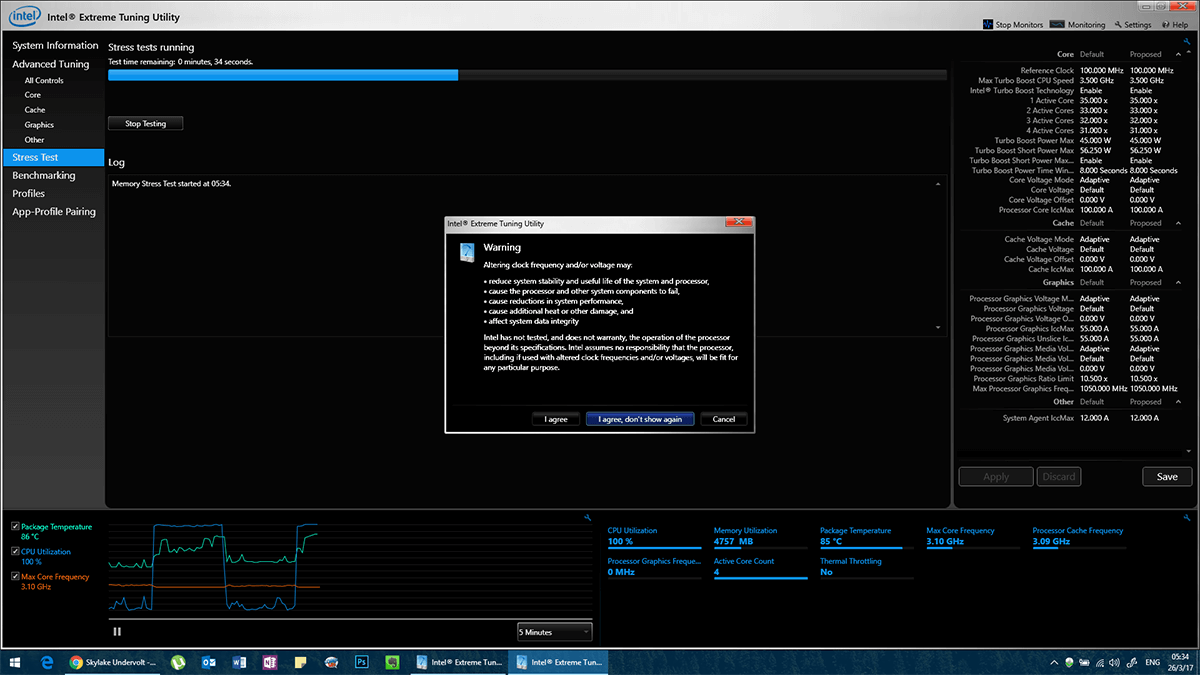
If you decrease this gradually (0.005 V – 0.010 V at a time) you will be able to restart without problems, but if you are abrupt (0.015V or greater) at a time, then you are opening yourself up to risk. After every voltage change, go to Stress Test and start a 30 minute stress test to see if the behaviour is consistent with your original test. The best indicator will be a blue screen of death. If you have undervolted it too much, the system will crash under heavy stress. Upon crashing, you should restart the system and revert the voltage to the last setting you successfully tested it on.
The purpose here is to maintain original performance while consuming less voltage, so as soon as performance drops, we know we’ve gone too far and we need to bring it back.
Now, keep doing this with successive 0.005 volts decreases. This will take a long time, but you will find your sweet spot and increase your hardware’s life considerably. Once you find the exact voltage that does not make your CPU crash for 30 minutes of stress testing. You should conduct one more stress test.
Final Test
Run a stress test for 4-5 hours (at least), ideally you should let it run overnight and check in the morning if everything is working fine (no crashes that is). In case it did crash, increase the voltage by 0.005 V and start over.
Alternatively, you can run a different stress/load testing tool for the longer test, but that test is critical as it is the final confirmation of an effective undervolt.

Gamers can yield the same results by benchmarking a game overnight.
There are other things that you can do to increase performance using the same or lower voltage. Try reapplying high quality thermal paste. That is an invasive process that requires removing large parts of your chassis and exposing the CPU. If you are confident in your hardware skills, or perhaps know someone who is, then you should couple the above process with reapplying thermal paste. Your system will run much cooler, and in turn will increase the life of associated parts as well.

The thing is…. I can’t see the core button below the Advanced Tuning. Why?
Your CPU is an older generation.