Install Abyss Web Server on Windows Server
In this guide, we will show you how to install and configure Abyss Web Server on Windows Server. Whether you are a web application developer or a system administrator, Abyss is an excellent option for hosting websites on Windows Server. Here’s how to get it up and running on your system.
How to Download Abyss Web Server on Windows Server
Before you can use Abyss Web Server on Windows Server, you need to download the installer. The installer is available on the official developer’s website. To obtain it, go to the Abyss Web Server download page.
Once you’re there, locate “Download Abyss Web Server X1 for Windows” and select it. When you click this link, the installation EXE will immediately begin downloading to your Windows Server through your web browser.
When the download is complete, open the Windows Explorer app. Within the app, select the “Downloads” folder with the mouse. Once you’ve accessed the “Downloads” folder, double-click on the installer EXE.
How to Install Abyss Web Server on Windows Server
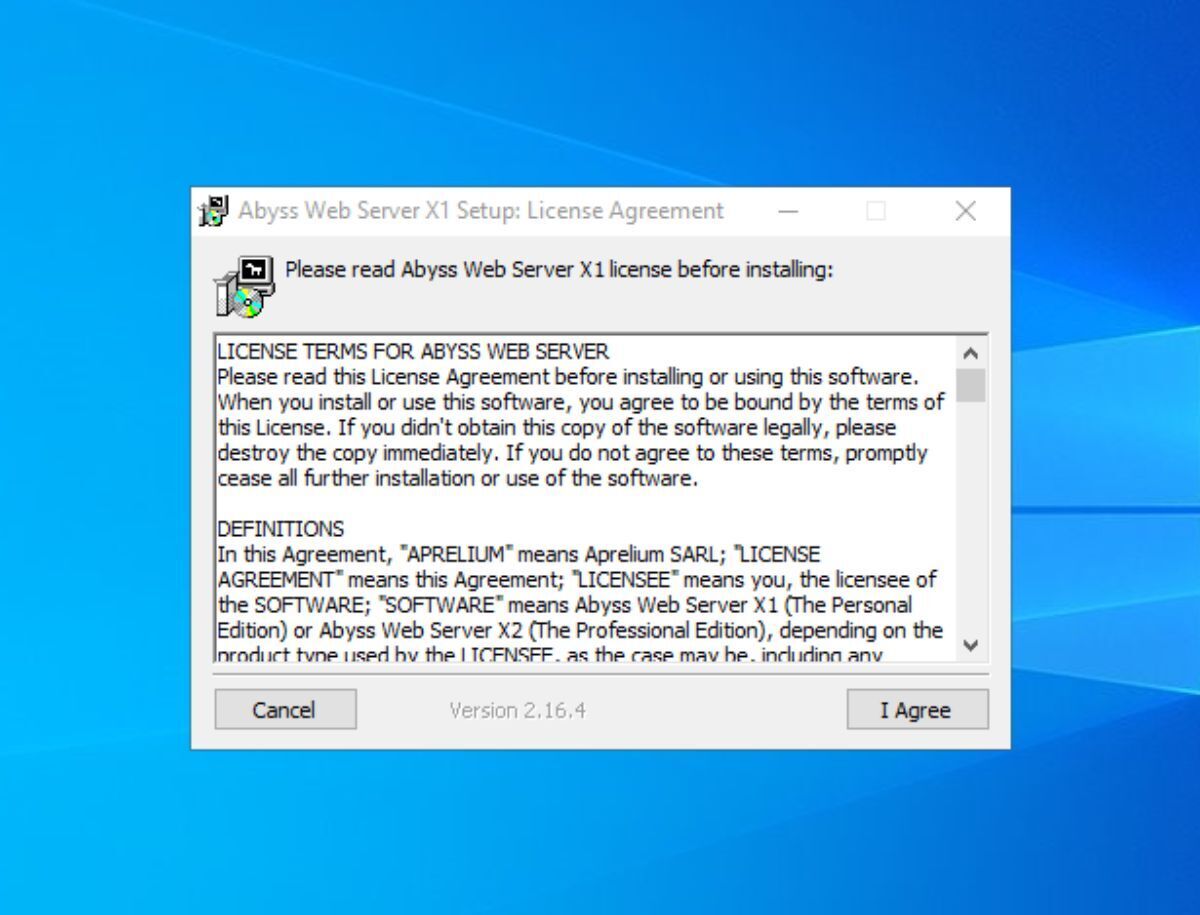
When you double-click on the Abyss installation EXE, you will see the license agreement. Read the agreement, and then click the “I Agree” button to proceed to the next page in the installer.
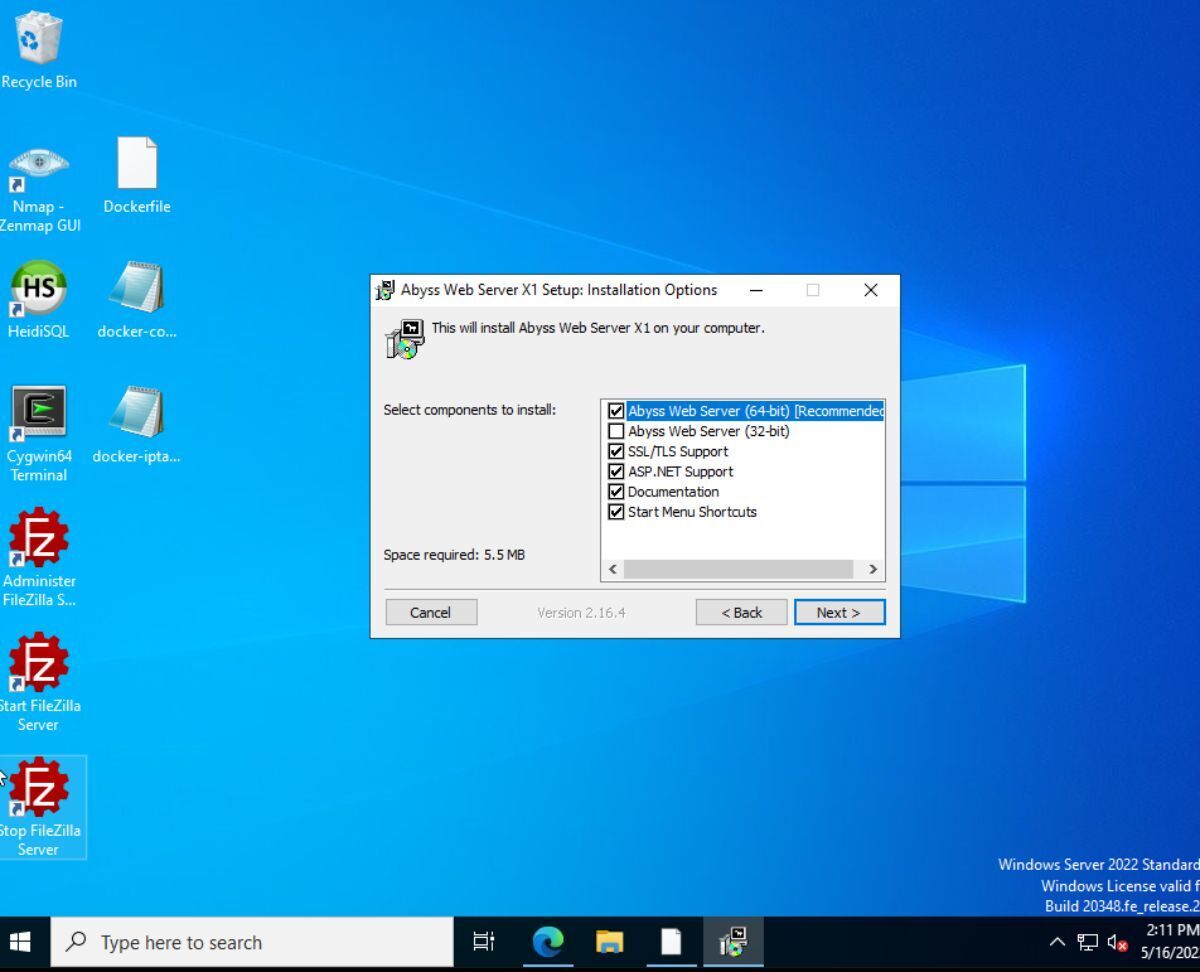
After agreeing to the license agreement, you will see the Abyss installation options. Many options are selected by default. However, if you want to modify anything about the installation, check or uncheck the desired boxes. When you’re done, click the “Next” button.
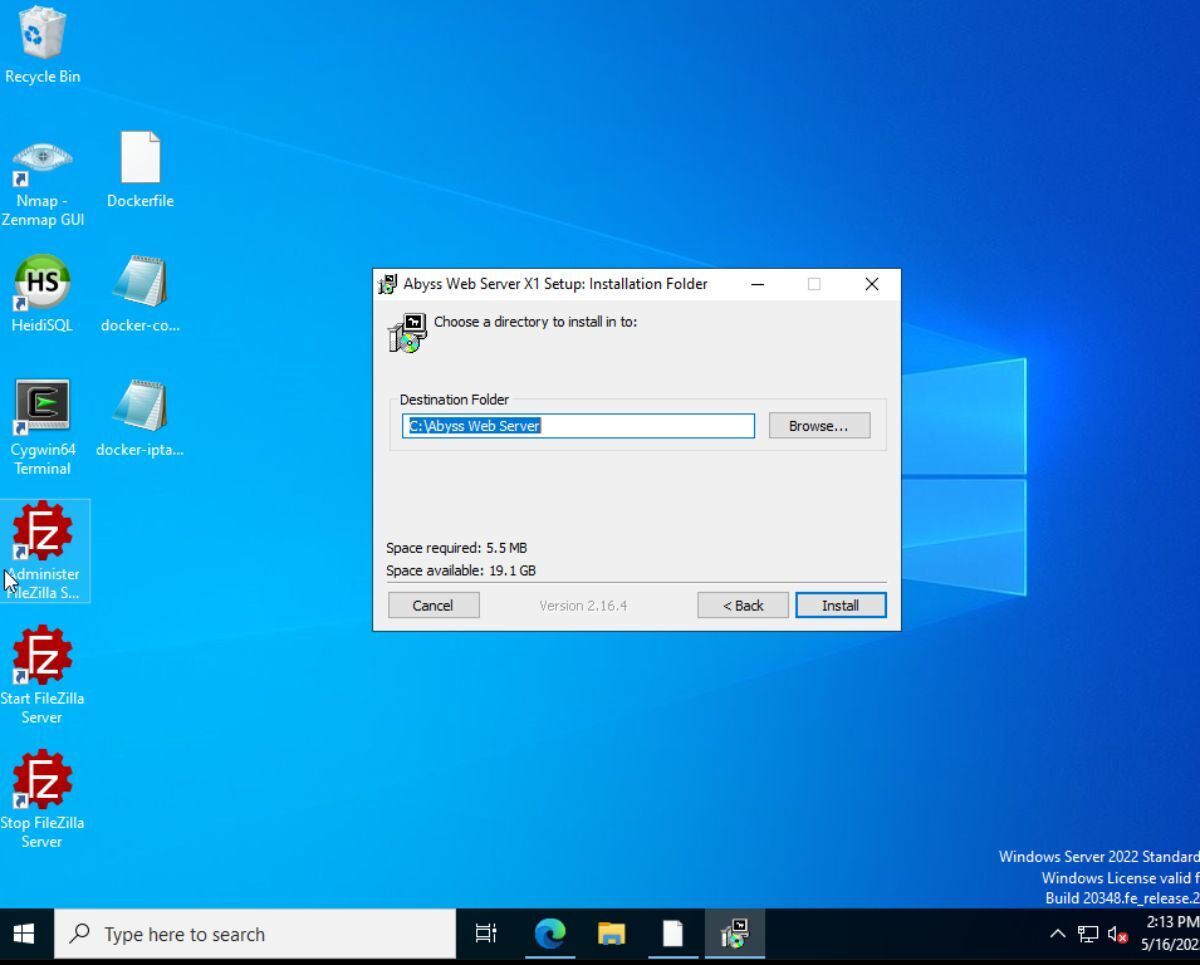
After clicking the “Next” button, you will be asked to choose where Abyss should be installed on Windows Server. By default, the folder is C:/. If you want Abyss to be installed in a different location on your server, click the “Browse” button to select a new location. Click the “Install” button when you are satisfied with the installation location.
Once the “Install” button is selected, the Abyss installer will set everything up on your Windows Server. It will then configure itself as a service on your Windows system and star it up. Click the “OK” button to close the installer.
You can access the Abyss Web Server by opening a browser on your network and entering the following URL:
http://ip-of-windows-server:9999
How to Configure Abyss Web Server on Windows Server
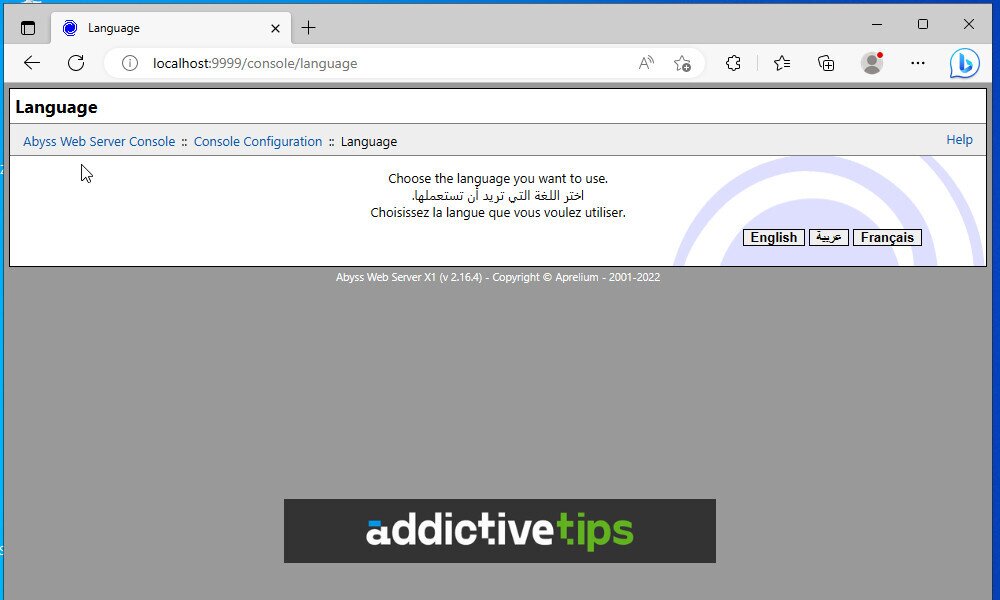
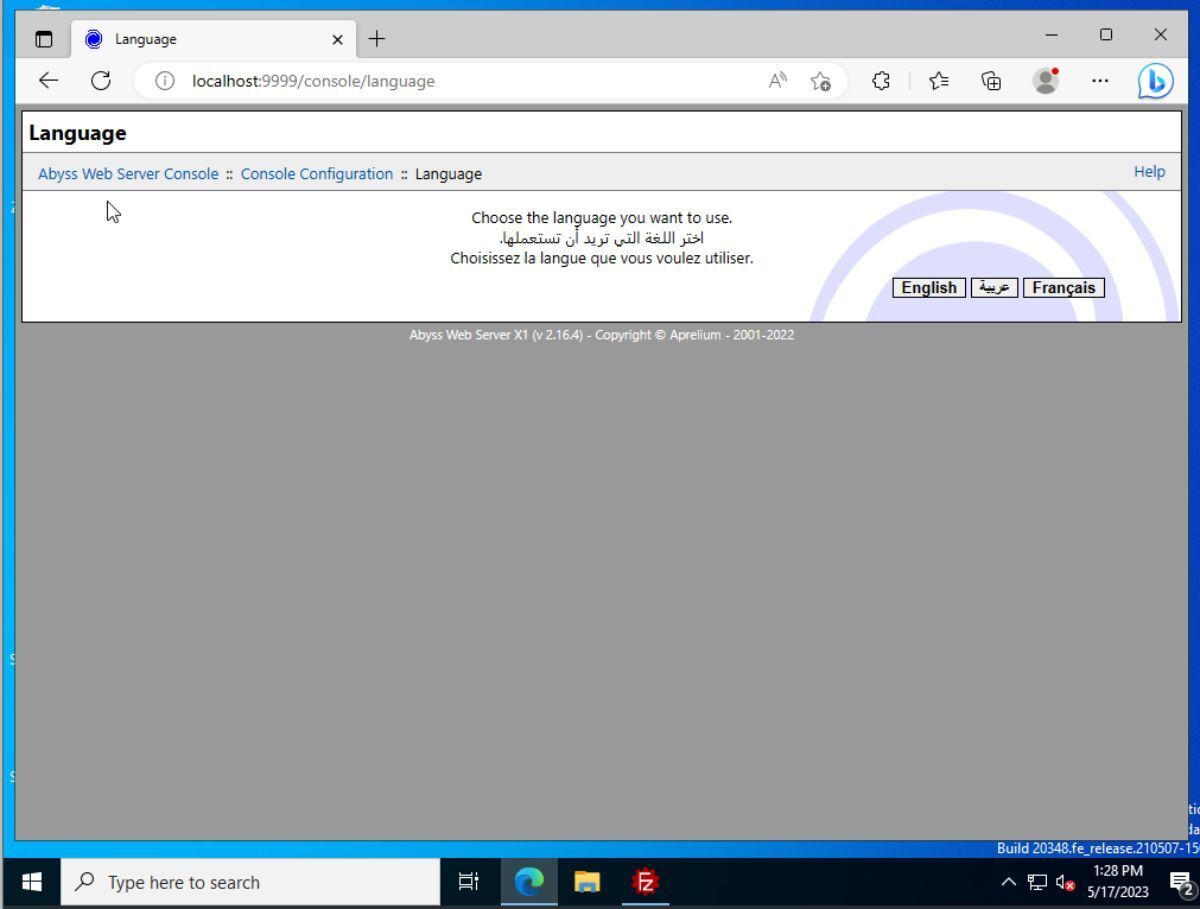
When you load the Abyss Web Server in a web browser, you will see the Abyss web console. You need to choose the language you want to use with it. Select your preferred language from the available options.
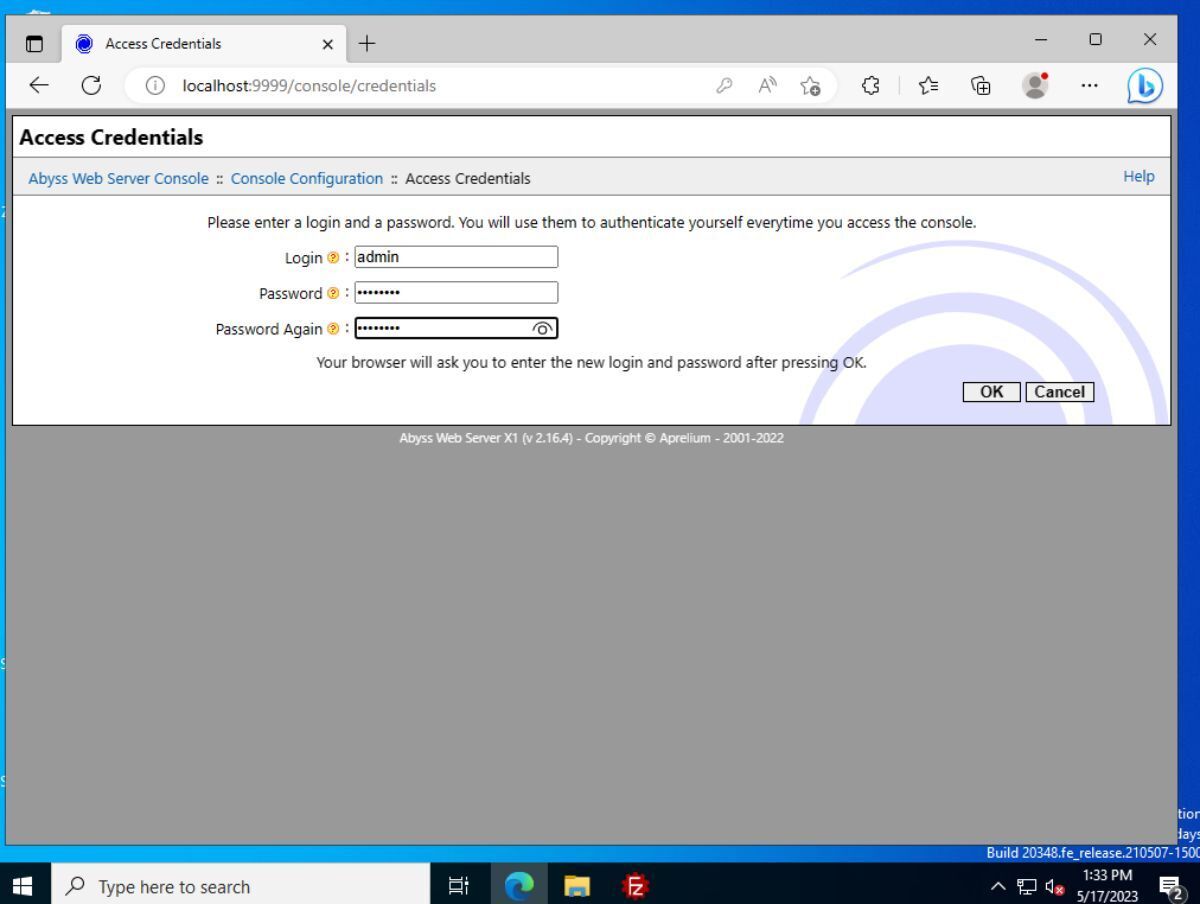
Once you have configured your language, Abyss will prompt you to enter a login and password. These credentials will be used to access the Abyss web server console. Make sure to choose a memorable password and user account so that you can log in at any time to administer your server.
Note: If you’re having trouble coming up with a secure password for your Abyss web server, try using the Bitwarden Password Generator. It is capable of generating passwords that are both strong and easy to remember.
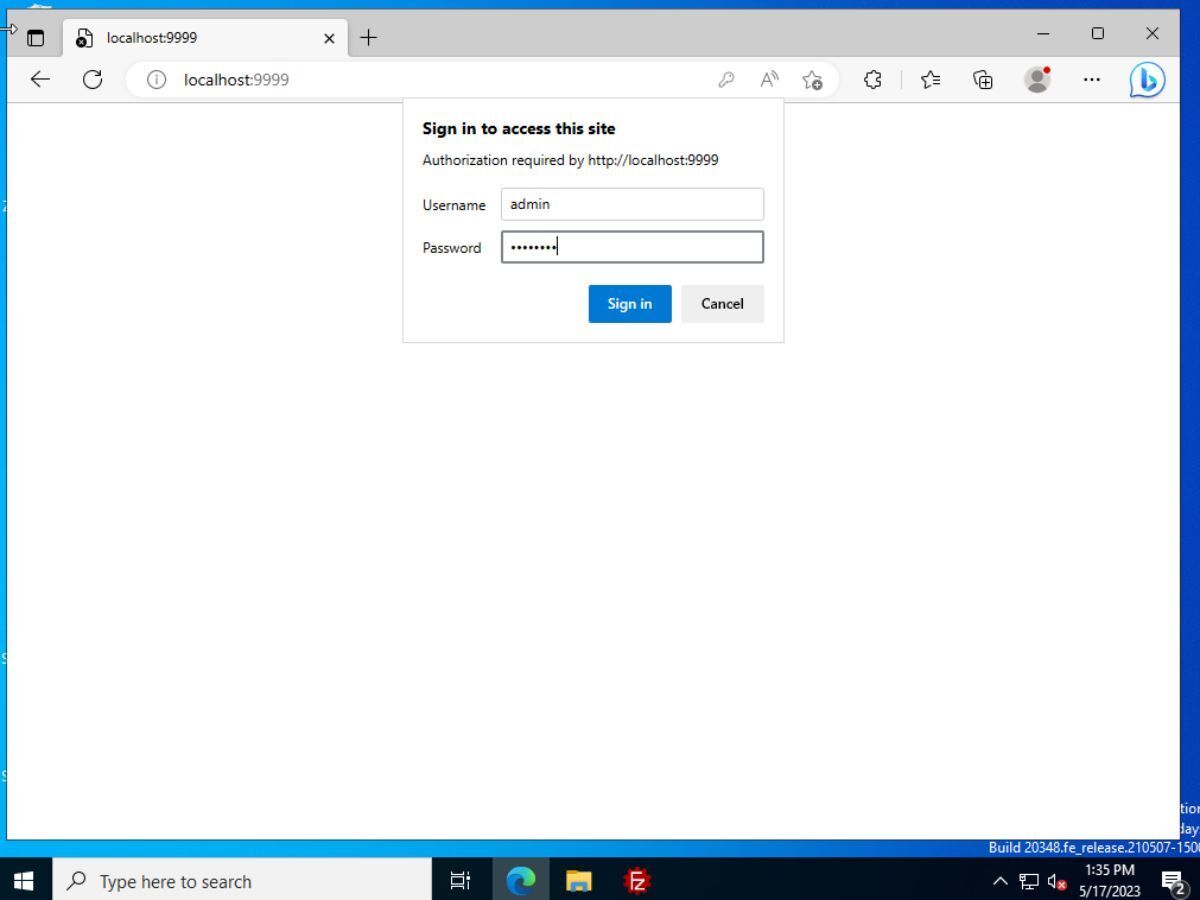
After configuring your login and password, the Abyss web server console will reload in your browser. It will then ask for a username and password. Enter your Abyss web server credentials and click the “Sign in” button.
Abyss Web Server Console
When you log into the Abyss Web Server Console, you will have several options available. In this section, we will explain these settings. Remember, to access these settings on Windows Server, Abyss Web Server must be running. If it is not, launch “Abyss Web Server X1” from the Windows Server Start menu.
Server Configuration
To configure your web server’s mime types, bandwidth limits, logging parameters, anti-hacking protection, and more, select the “Server Configuration” button.
SSL/TLS Certificates
To modify your web server’s SSL/TLS certificates, select the “SSL/TLS Certificates” option. After accessing the SSL/TLS Certificates area, you can upload your private keys and certificate store using the user interface.
To save your certificate settings, click the “OK” button.
Console Configuration
To configure the Abyss Web Server Console, go to “Console Configuration” in the menu. Once you’re in “Console Configuration,” you will be able to modify access credentials, language, IP address control, and port settings. To save your changes, click the “OK” button.
Server Statistics
To view the statistics of your Abyss web server, click the “Server Statistics” button in the console menu. When you select the “Server Statistics” button, Abyss will display information such as total uptime, uptime since the last restart, total hits, compressed hits, and more.
If you want to refresh these statistics, click the “Refresh” button. To return to the menu, click the “OK” button. To refresh the statistics, click the “Reset” button.
Server Activity
To see what your Abyss web server is currently doing, select the “Server Activity” button. When you select it, you will see a readout of the web server’s activities. To refresh the data, click “Refresh.” To return to the menu, click “OK”.
Help and Support
If you need help and support for Abyss Web Server on Windows Server, find the “Help and Support” button in the console and click on it. Upon selecting it, you will be able to access all the available help resources for Abyss Web Server users.
