How to set up and use the Windows 10 Quick Assist tool
Remote assistance is a common way to resolve computer issues when on-site help isn’t possible, or you don’t have someone nearby to fix a problem. Remote assistance tools have improved over time, but setting them up can still be tricky. In this article, we focus on the built-in Windows Quick Assist tool and how to use it effectively in 2025.
Windows Quick Assist Overview
Windows includes built-in remote support tools: Remote Desktop (on Pro/Enterprise editions) and **Quick Assist**. The latter is available in most modern Windows 10 and Windows 11 versions and is designed to let one user help another by seeing or controlling their desktop.
Quick Assist is intended for ad hoc support (e.g., helping a friend or family member), not long-term unattended access. It uses Microsoft’s cloud relay infrastructure, minimizing the need to open firewall ports. If Quick Assist doesn’t meet your needs, you can also get help in Windows through other built-in support options that provide additional ways to troubleshoot or contact Microsoft support.
- Generates short, time-limited security codes (usually valid for 10 minutes).
- The helper must sign in with a Microsoft or work/school account.
- Allows “view only” or “take full control” sessions.
- Offers annotation, restart, monitor switching, pause, and task manager options.
- Requires Microsoft Edge WebView2 to run correctly.
- Free and secure, but scams pretending to be “Microsoft support” have increased — only allow access from people you trust.
Set Up Quick Assist (Helper Side)
Here’s how to start a Quick Assist session if you’re providing help:
- Open the Start menu and search for Quick Assist.
- If not installed, get it from the Microsoft Store or via Settings → Apps → Optional Features.
- Select Assist another person or Give assistance.
- Sign in with your Microsoft account.
- Copy the security code that appears and send it to the other person.
- Note: The code expires in about 10 minutes.

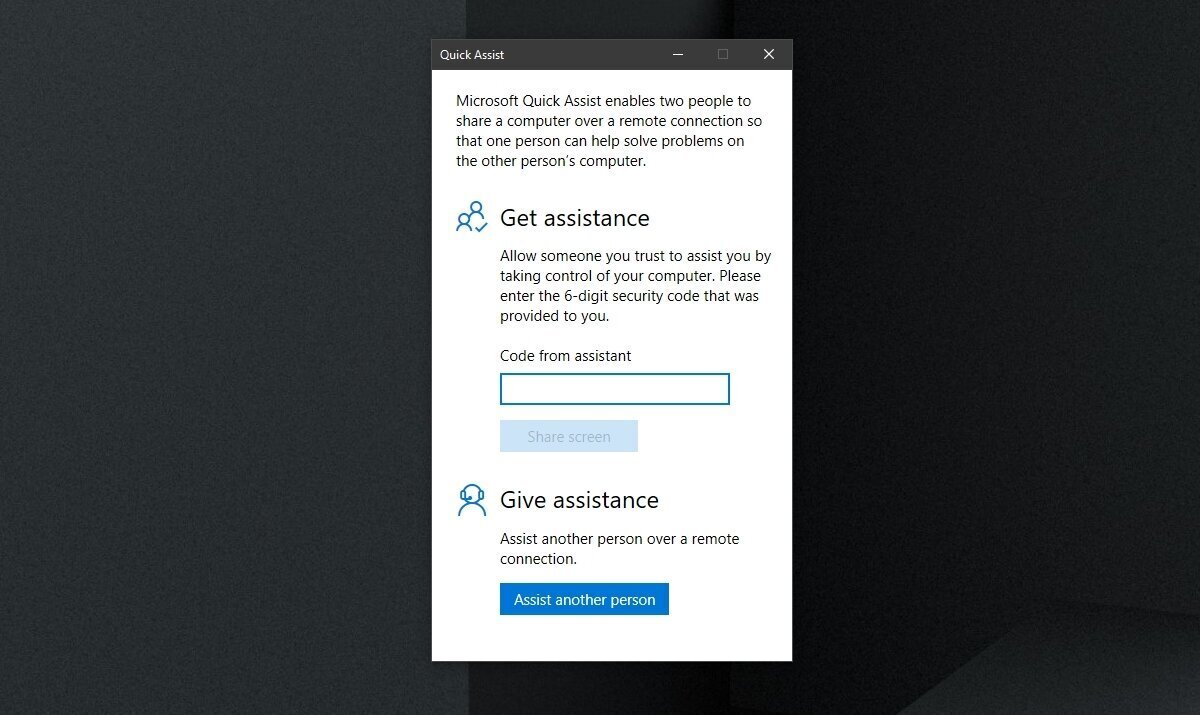
Connect via Quick Assist (Receiver Side)
If you’re receiving help, follow these steps to connect:
- Open the Start Menu and search for Quick Assist.
- Enter the security code provided by your helper.
- Click Share screen.
- Allow access when prompted.

Start and Use the Quick Assist Session
Once the connection is approved, the helper can either view or take control of the other user’s PC. To begin:
- Choose View screen or Take full control.
- The receiver must confirm access before control begins.
- A live window will appear showing the remote desktop.
- Use the top toolbar for annotations, switching monitors, restarting, or ending the session.

Quick Assist Controls & Tools
Quick Assist includes several controls for more efficient remote troubleshooting:
- Switch between multiple monitors.
- Annotate the screen (draw or highlight areas).
- Toggle text or voice instructions.
- Restart the remote computer.
- Open Task Manager remotely.
- Pause or end the session safely.

Troubleshooting Common Quick Assist Issues
- Quick Assist won’t open: Update or reinstall via the Microsoft Store. Ensure the Edge WebView2 runtime is installed.
- App missing from Windows: Add Quick Assist through “Optional Features” in Settings.
- Code expired or invalid: Generate a new one — each code lasts about 10 minutes.
- Quick Assist not launching on Windows Server or RDS: It’s not fully supported in multi-user environments.
- Possible scam attempt: Never share your screen with unverified “support” callers claiming to be from Microsoft.
Conclusion
Quick Assist remains one of the easiest ways to offer or receive help remotely in Windows 10 and Windows 11. It’s fast to set up, doesn’t require extra configuration, and leverages Microsoft’s secure infrastructure. However, be cautious about who you share access with — Quick Assist gives complete control of your system during a session. Always end the session when done and close the app afterward.
What’s New in This Update
Last updated: October 7, 2025
- Updated for 2025 with the latest Microsoft Store version of Quick Assist (v2.0.36.0).
- Added compatibility notes for both Windows 10 and Windows 11.
- Included new troubleshooting guidance for WebView2 runtime issues.
- Expanded details about Microsoft account sign-in and permissions.
- Refreshed scam and safety warning section based on current reports.
- Improved SEO structure, formatting, and updated screenshots.
