How To Set Up An Email Signature, Mobile & Personal Computer
As soon as humans discovered writing, they invented signatures. The purpose being the identification of the author and possibly a return address. This tradition carried over to emails as well — and today, knowing how to set up email signature styles that work across platforms is a genuinely useful skill. With the passage of time, those signatures have grown to have a real purpose. An email signature can convey additional information in terms of job title, a phone number, social media profile links, and even a personal website. Here’s how to set up email signature configurations on your iPhone, Android Phone, Windows PC, and macOS.
WHAT TO INCLUDE IN A PROFESSIONAL EMAIL SIGNATURE
Before diving into the setup steps for each platform, it helps to know what actually belongs in a well-crafted signature. A good email signature gives the recipient everything they need to identify and reach you — without overwhelming them.
Core elements to include:
- Full name
- Job title
- Company name
- Primary email address
- Phone number
- Website URL
- One or two professional social links (LinkedIn is the most universally appropriate)
Optional elements worth considering:
- Company logo or a professional headshot
- Physical address (especially useful for businesses with a storefront or for legal/compliance reasons)
- A meeting-booking link (e.g., Calendly) if you frequently schedule calls
A couple of restraint guidelines:
- Keep it concise — a signature that runs longer than four or five lines starts to feel like a second email body. Stick to what the recipient actually needs.
- Avoid stacking a row of social media icons for every platform you use. One or two relevant links are far more effective than six icons that go unclicked.
- Oversized images and heavy HTML can cause your email to render badly or trigger spam filters, so keep any graphics small and well-tested.
HOW TO SET UP EMAIL SIGNATURE IN GMAIL
Gmail is the most popular email service that hides its signature settings pretty well. If you have set a certain signature on your web account, you might have to set another one on your Android or iOS apps. Here’s how to set up email signature options across all three Gmail surfaces.
Web
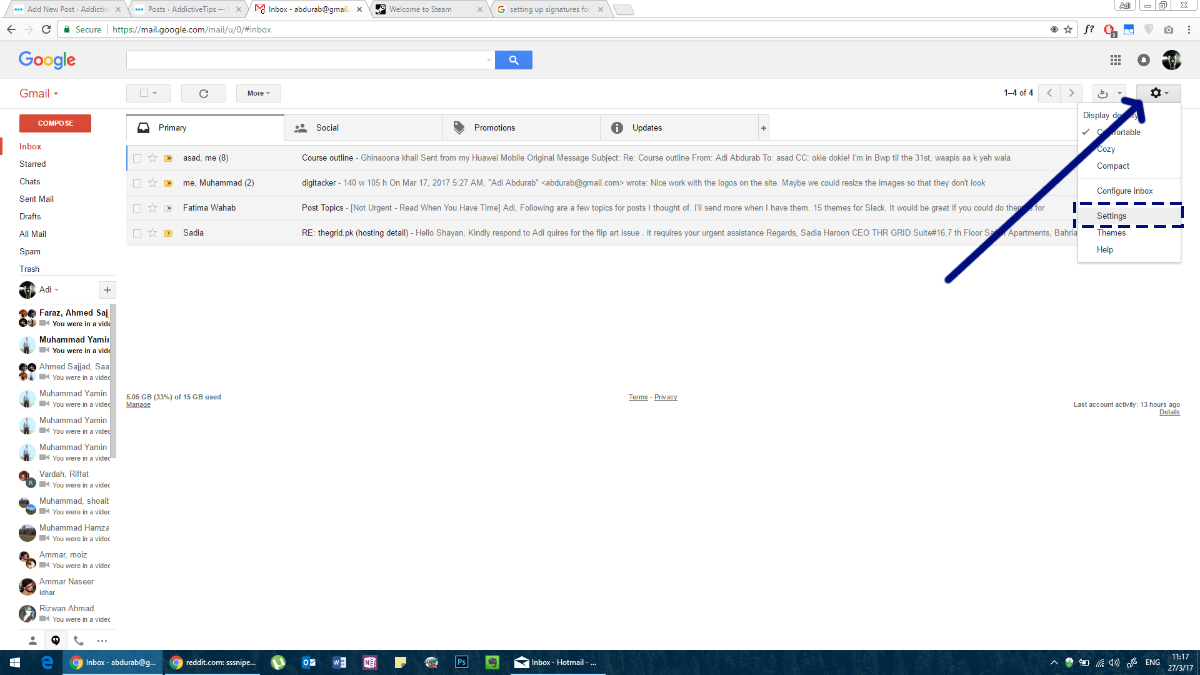
When you log in to your Gmail account, you will be greeted with your inbox. Here, if you look to the top-right, you will see a cog wheel icon. Click on it and from the drop-down menu select ‘Settings’ menu.
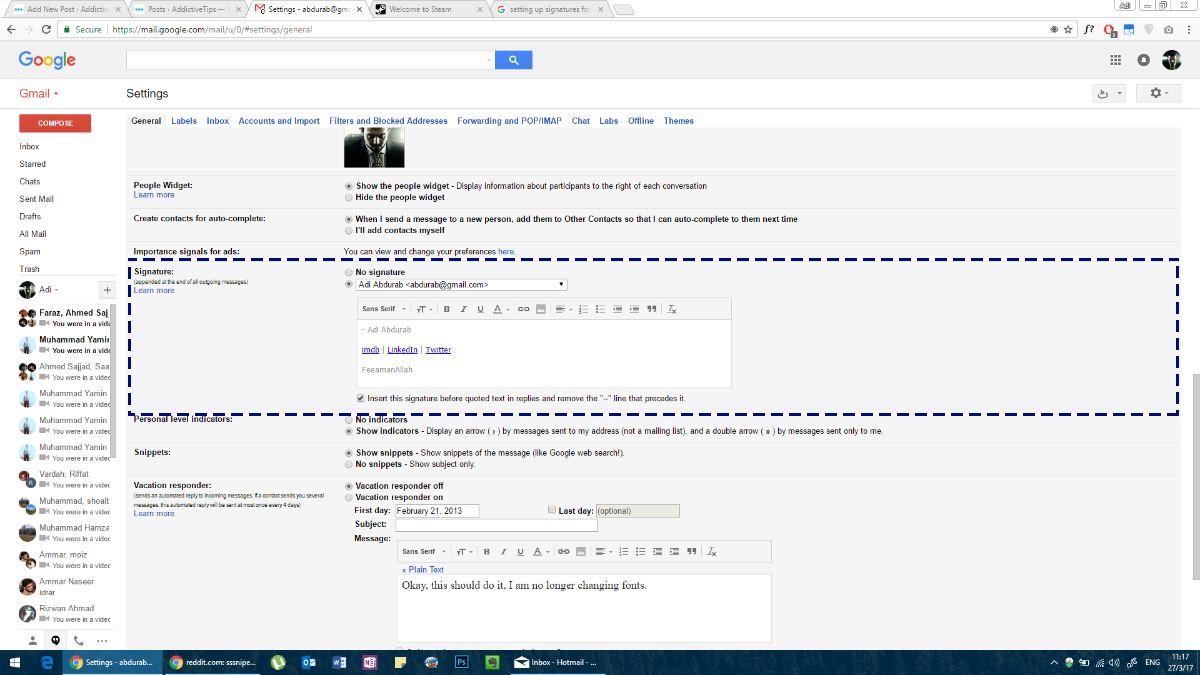
Go to the ‘General’ tab. Scroll down and you will see a section for ‘Signature’. You can choose not to have one altogether, or you can choose to assign one as you see fit. Gmail lets you add links to your signature and supports rich text which means you can use different colors and text styles in your signature. We highly recommend you stick to one font and one color though.
Managing Multiple Gmail Signatures
Gmail on the web supports more than just a single signature, and it gives you meaningful control over how they’re used. Here’s what you can do beyond the basic setup:
Create multiple signatures: In Settings > General > Signature, click ‘Create new’ to add additional signatures. You can give each one a name to tell them apart — for example, “Work formal,” “Work brief,” or “Personal.”
Set different defaults for new emails vs. replies/forwards: Under each signature in the settings panel, you will see two dropdown menus — one labeled ‘For new emails use’ and one labeled ‘For replies/forwards use.’ You can assign a different signature to each, which is handy if you want a full signature on outgoing emails but a shorter one on replies.
Insert a different signature while composing: When you are composing a message, click the pen icon at the bottom of the compose window (it may appear in the formatting toolbar or under the three-dot ‘More options’ menu). This lets you swap to any of your saved signatures on the fly without changing your default.
Edit or delete an existing signature: Return to Settings > General > Signature, select the signature by name, make your changes directly in the editor, and click ‘Save Changes’ at the bottom of the page. To delete a signature, select it and click the trash icon next to its name.
Assign signatures to different send-from addresses: If you have added extra addresses via ‘Send mail as’ (Settings > Accounts and Import), Gmail lets you set a default signature for each sending address separately. When you switch the ‘From’ field in a compose window, Gmail will automatically switch to the signature assigned to that address. You can learn more about Gmail’s signature options in Google’s official Gmail signature support documentation.
Character limit: Gmail signatures can be up to 10,000 characters. Images embedded in your signature count toward this limit, so if you include a logo or headshot, keep the file size modest.
Gmail for Android
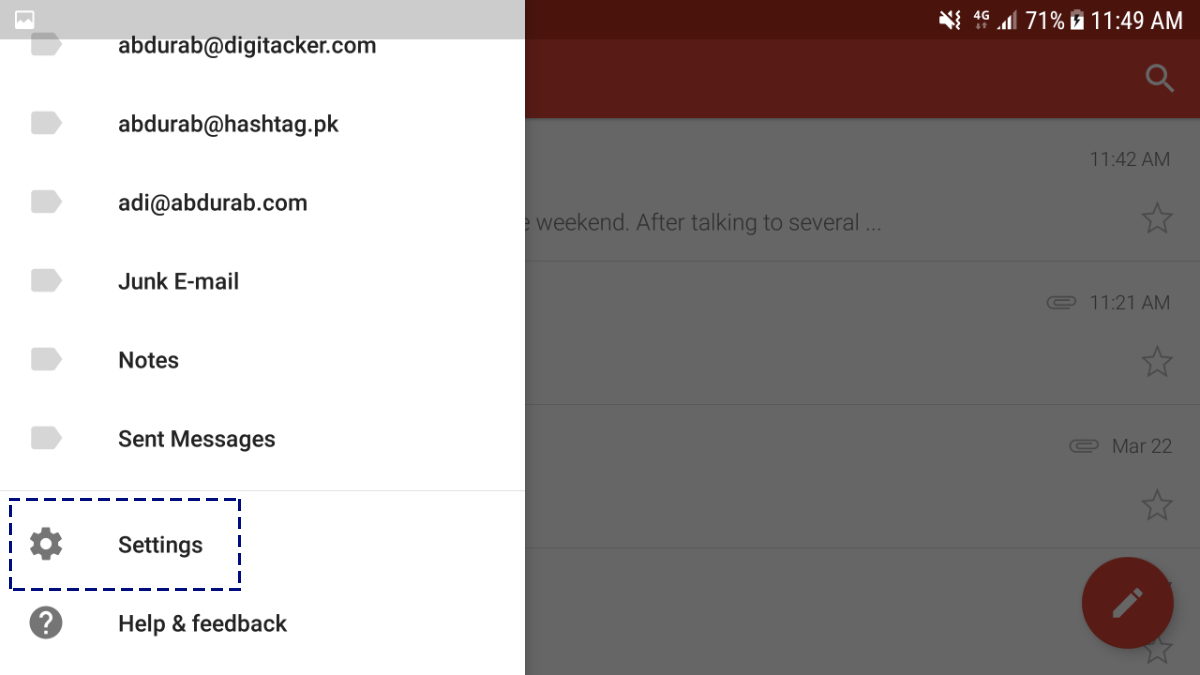
To set up email signature settings in the Gmail app on Android, you follow more or less the same steps as you did for the web. Open the Gmail app on your Android phone. Tap the hamburger icon to open the navigation drawer. Here, scroll to the end and tap ‘Settings’.
Tap on your email address and you will be taken to a menu for further configuration.
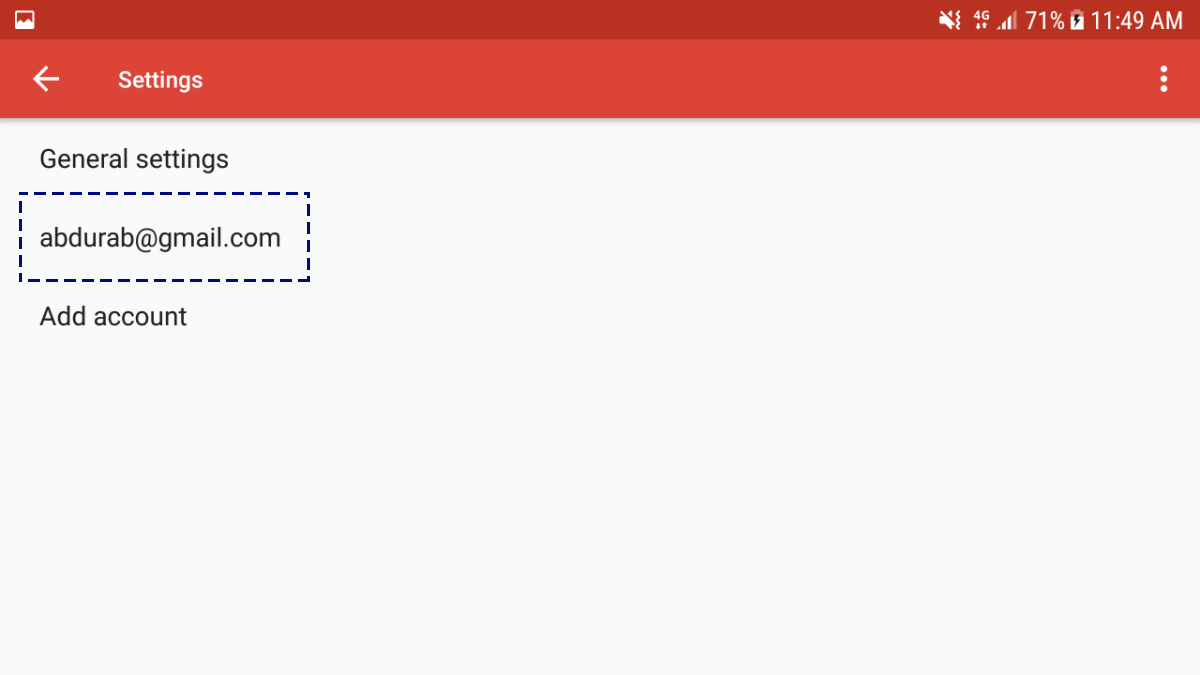
Scroll to the bottom of this page to see ‘Signature’. This signature can only be text though, you cannot add hyperlinks or images to it.

Gmail for iOS
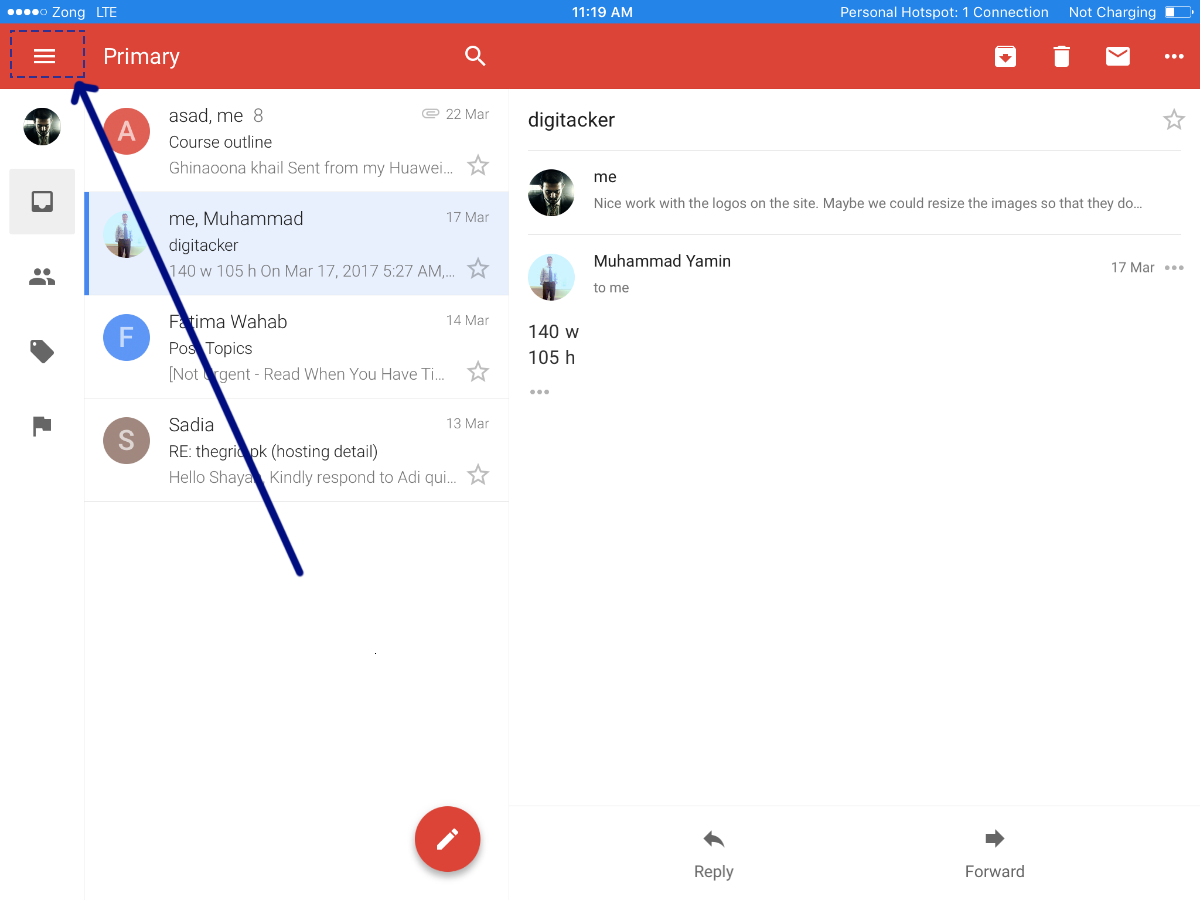
Configuring an email signature on the iOS Gmail app is almost identical to the Android app. Tap on the hamburger icon in the upper left corner.
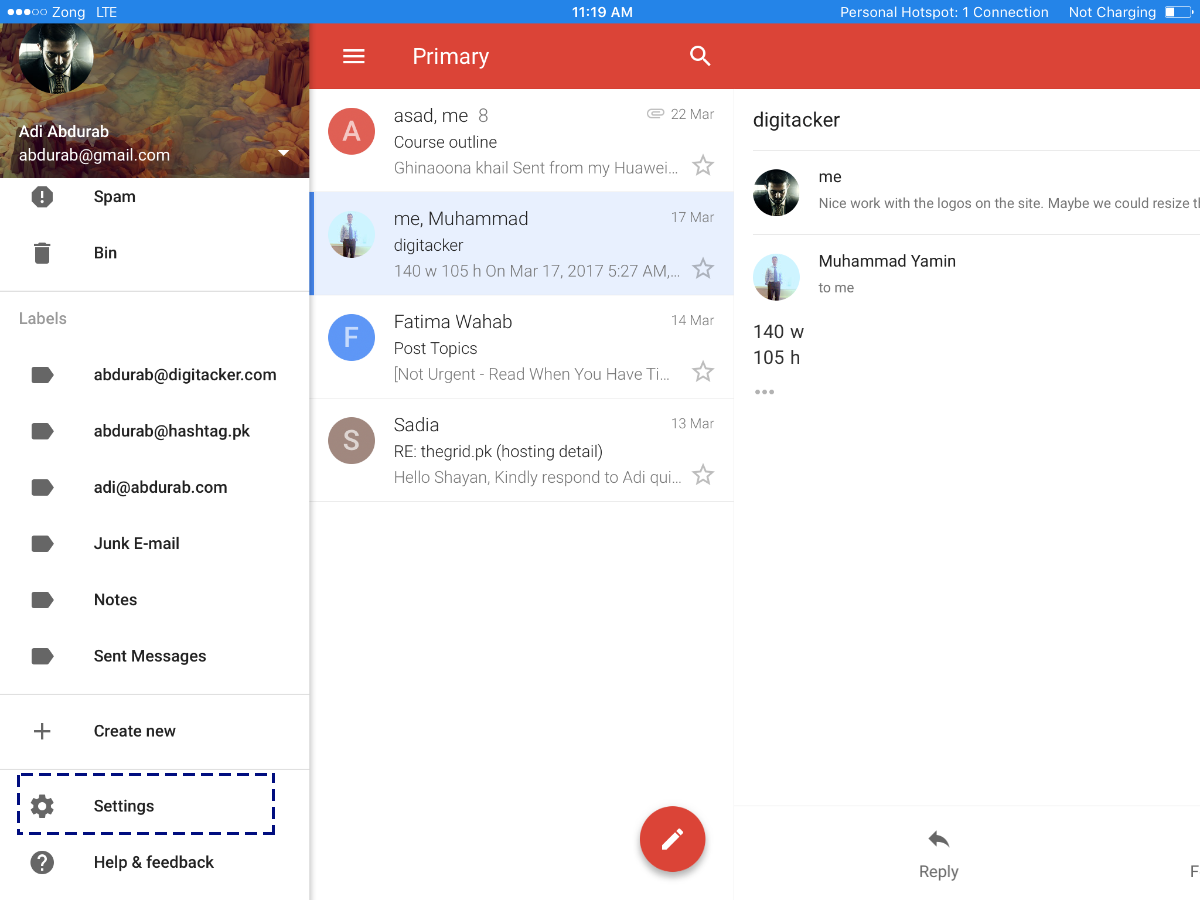
Scroll all the way down to ‘Settings’ and tap it.
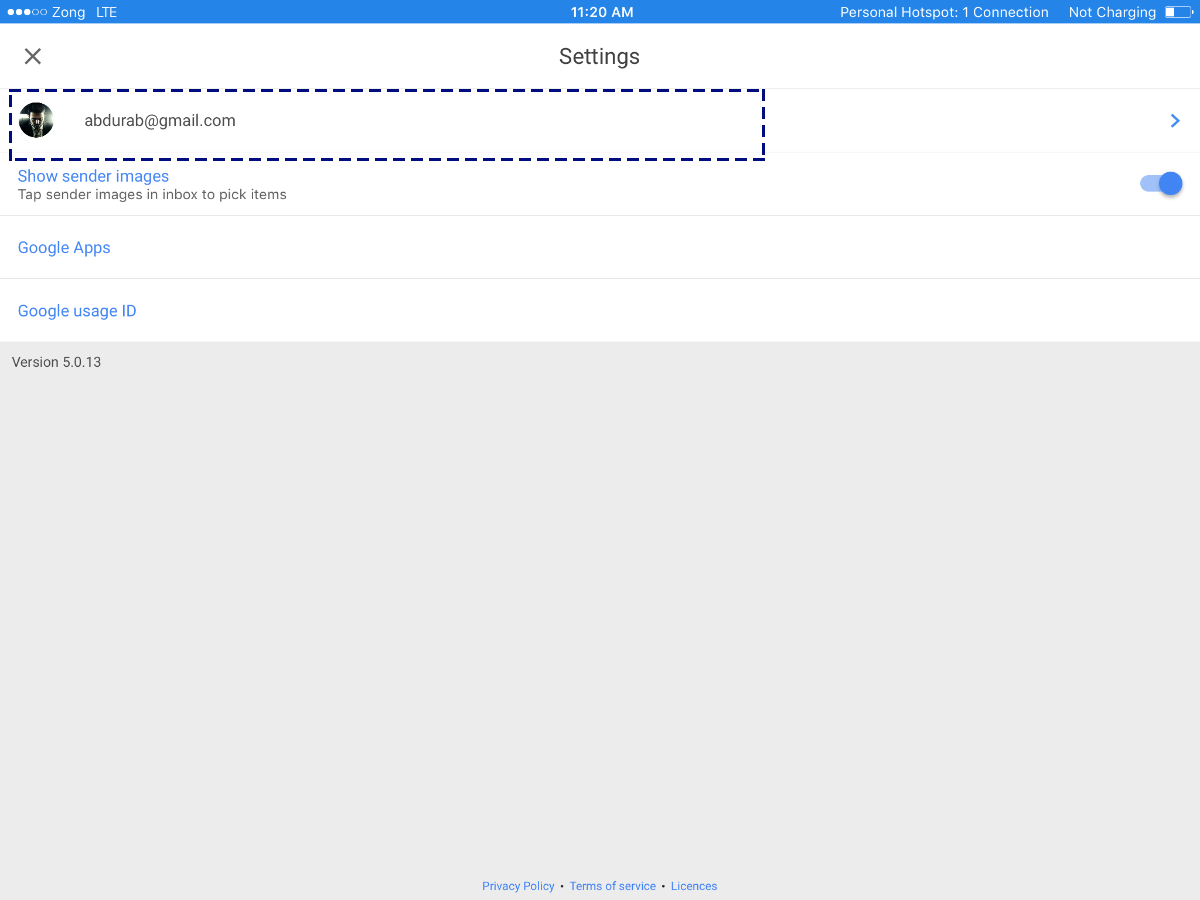
In this window, tap on your email address.
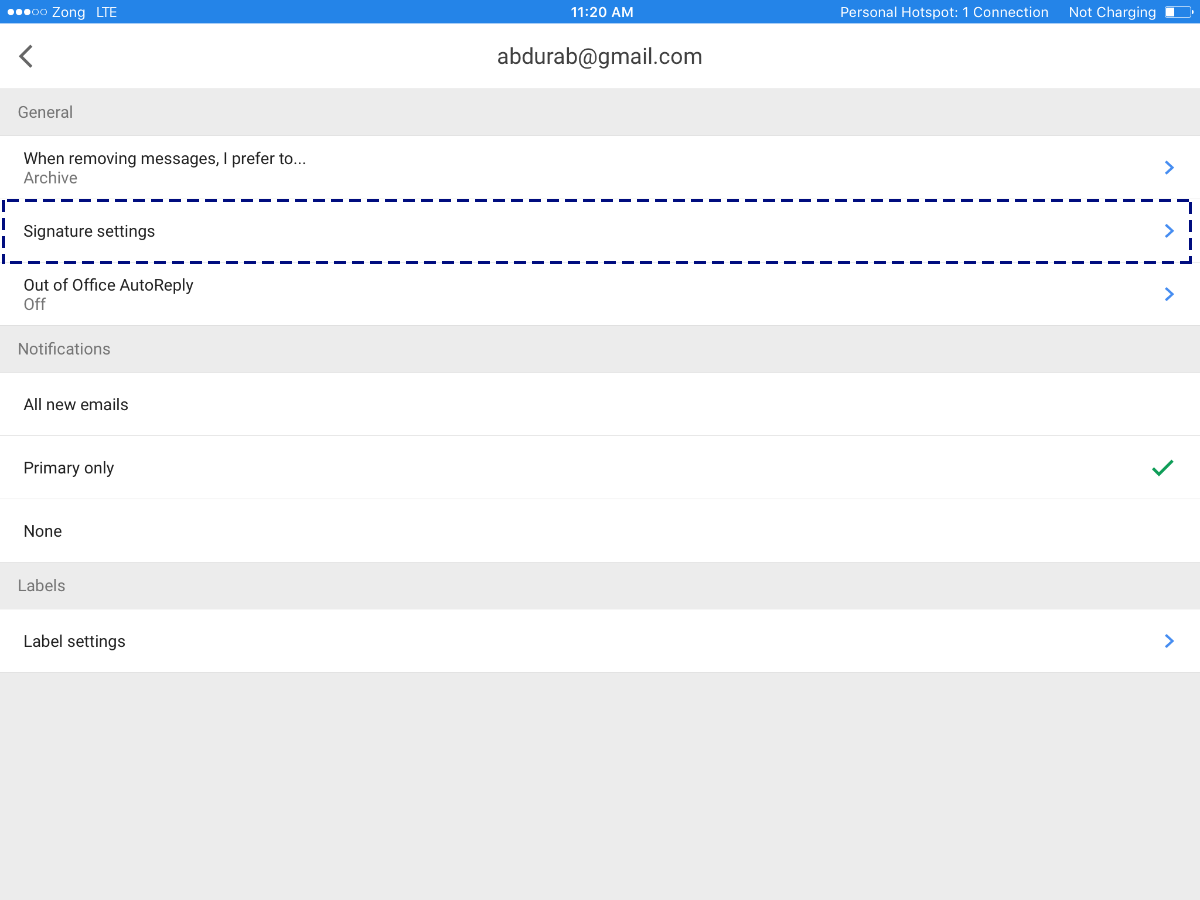
Tap ‘Signature Settings’. Add a signature here, save it and you’re done. Again, you will not be able to include hyperlinks or images. If those are important to you, we recommend going with some other email client.
HOW TO SET UP EMAIL SIGNATURE IN MAIL FOR WINDOWS
Microsoft has shifted away from the legacy Mail app as its primary Windows email experience. If you are on a current Windows 10 or Windows 11 system, you are most likely running new Outlook for Windows (or will be prompted to switch to it). The legacy Mail app steps below still work on older systems, but they are no longer the main path most Windows users will see.
New Outlook for Windows (Current)
New Outlook for Windows uses the same settings structure as Outlook on the web, so the steps are nearly identical between the two. Knowing how to set up email signature options here is straightforward once you locate the right settings panel.
Open new Outlook for Windows. Click the Settings gear icon in the upper-right corner. In the Settings panel, go to Accounts, then select Signatures. Click New signature, give it a name, and compose your signature in the editor — you can use rich text, add links, and insert an image. When you are done, use the dropdowns under ‘Select default signatures’ to assign it to New messages and to Replies/forwards separately. Click Save.
To insert a different signature while composing, open a new message, go to the Insert tab in the compose toolbar, and click Signature to pick from any of your saved signatures.
Outlook on the Web (Current)
If you use Outlook through a browser at outlook.live.com or outlook.office.com, the path is the same as new Outlook for Windows. Click the Settings gear icon, navigate to Mail > Compose and reply, and you will find the signature editor there. Create or edit your signature, then set your defaults for new messages and for replies/forwards using the dropdown menus provided. Click Save when finished.
Legacy Mail App for Windows (Older Systems)
Note: These steps apply to the legacy Mail app included with Windows 8 and Windows 10 on older configurations. If you are on a current Windows 11 system with new Outlook, use the steps above instead.
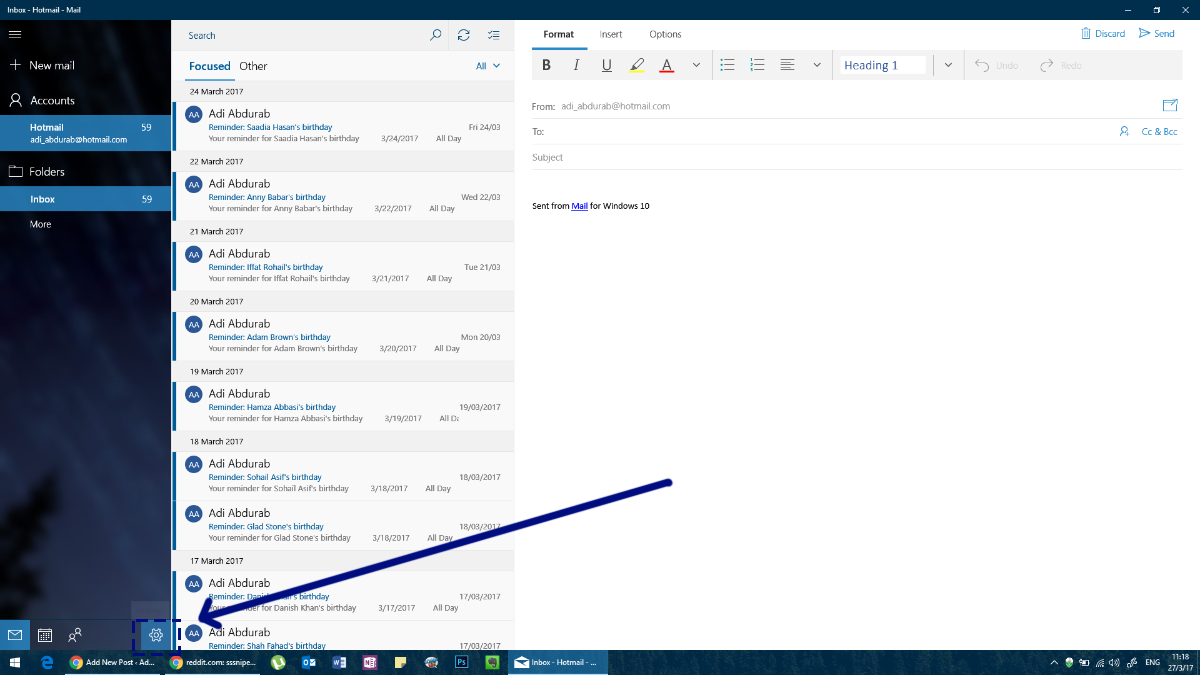
Mail for Windows is Windows 8 and above’s native email client. Despite its minimalist and seemingly simple design, it is a capable and versatile app. In order to set your signatures, open your Mail app and look at the bottom of the left menu; you will see a settings icon (a cog). Click on that.
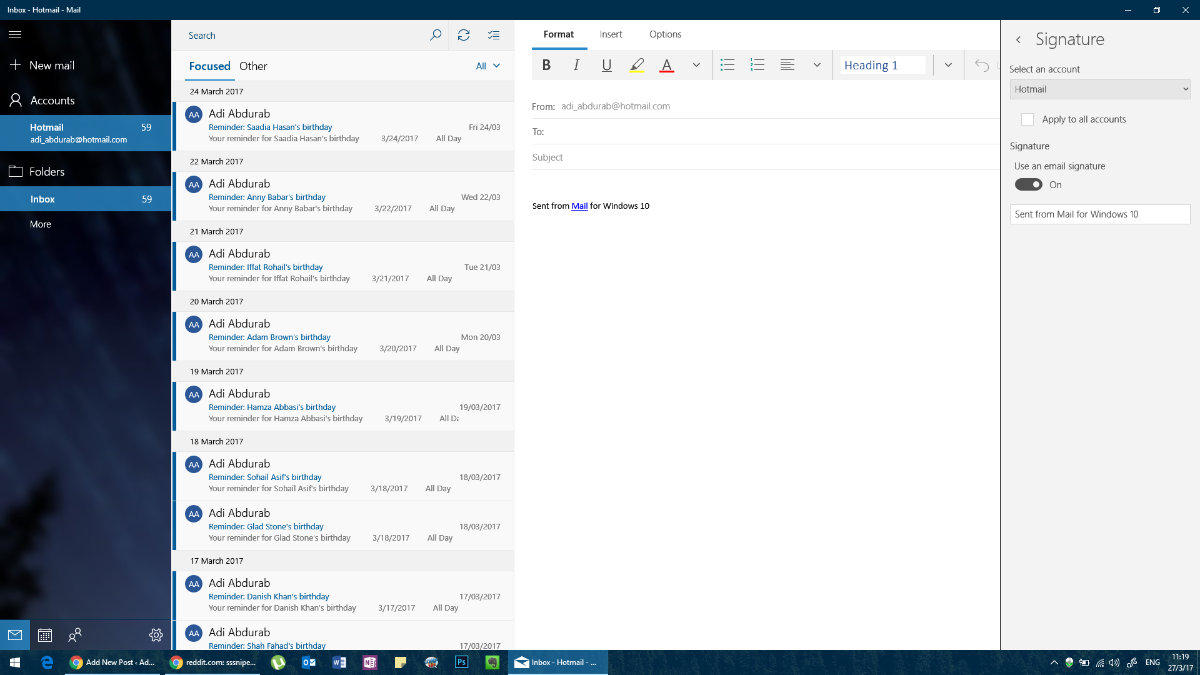
On the right side of the screen, a settings panel will open. Click on Signature in this panel.
Now you select the account for which you want to assign a signature (or even multiple accounts, if you want). You can have hyperlinks in the signatures here, but you can’t add images or select fonts.
MICROSOFT OUTLOOK
Outlook may very well be a genre-defining email client. It is the go-to platform for professional communication. When you need to know how to set up email signature options in Outlook, you’ll find the process flexible and feature-rich. The signature in MS Outlook can be as complex as you want — there are no limits on what you can do on this platform, but again, don’t add too much color or use different fonts.
Microsoft currently offers three main Outlook experiences: classic Outlook desktop, new Outlook for Windows, and Outlook on the web. Each has its own path to signature settings, covered separately below.
Classic Outlook Desktop
Note: The File > Options path below applies to the classic Outlook desktop app only. If you are using new Outlook for Windows or Outlook on the web, skip to the relevant section below.
To set up email signature settings in classic Outlook, go to File > Options.
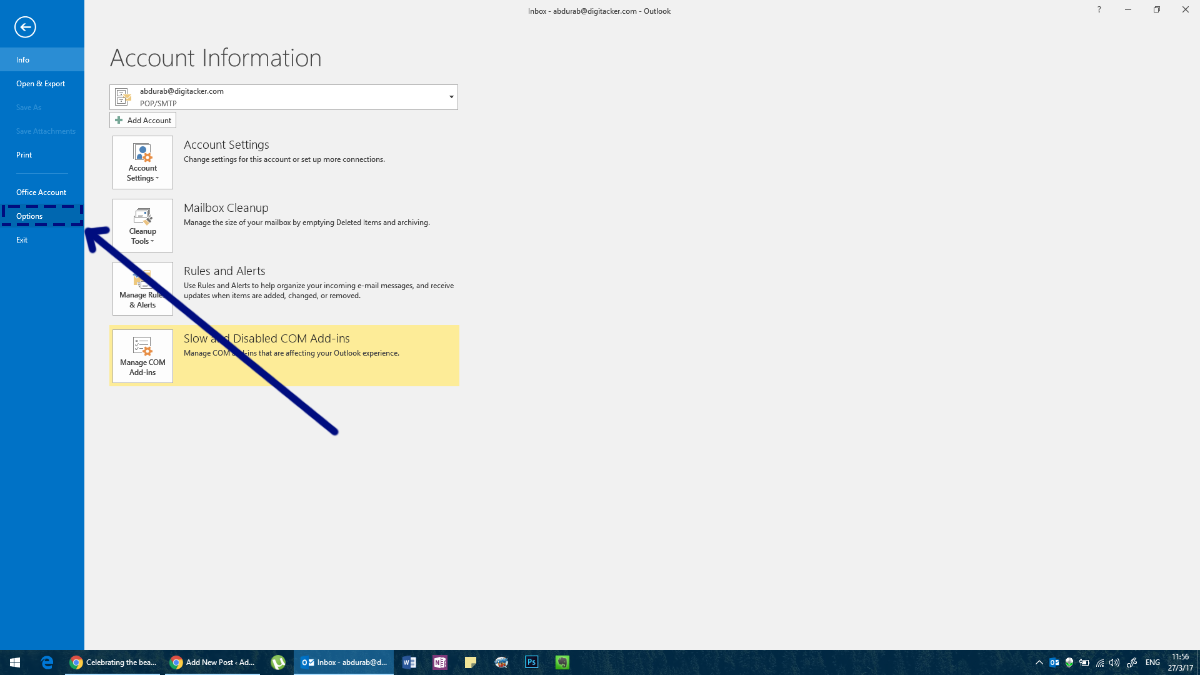
This will open the Options window for Outlook where you can modify everything about MS Outlook and add a signature.
On this window, go to the Mail tab and click the ‘Signature’ button on the ‘Create or modify signatures for messages’ field.
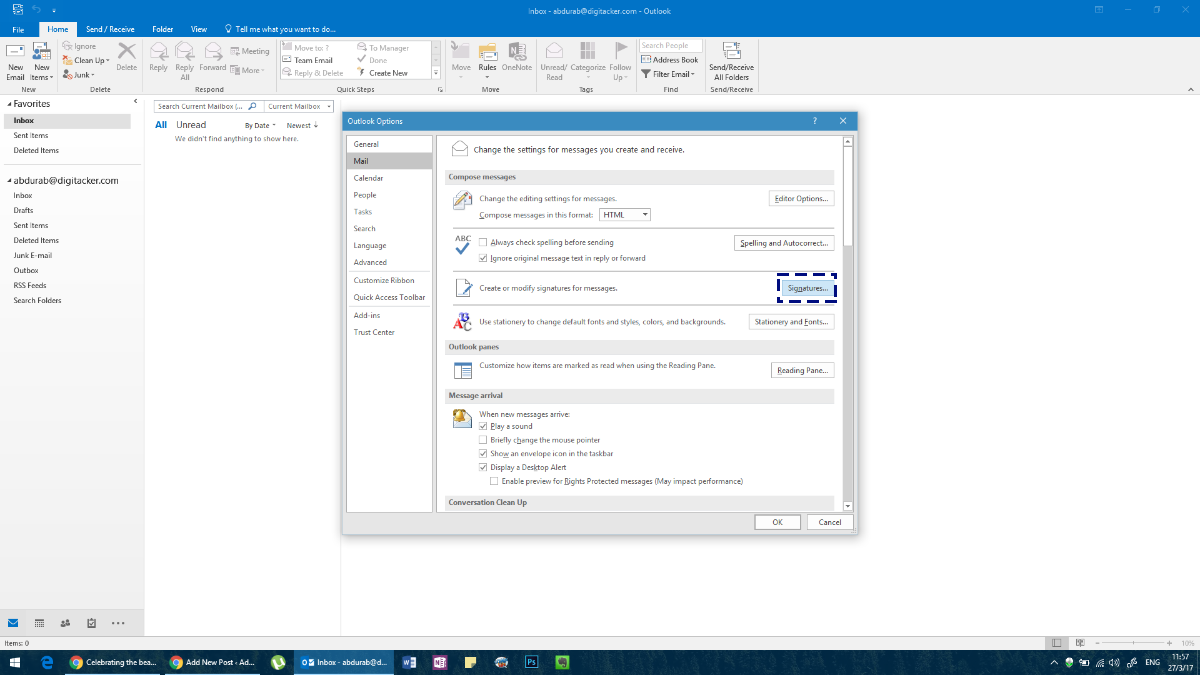
Create your signature. You can set up a different signature for each account you’ve added to Outlook.
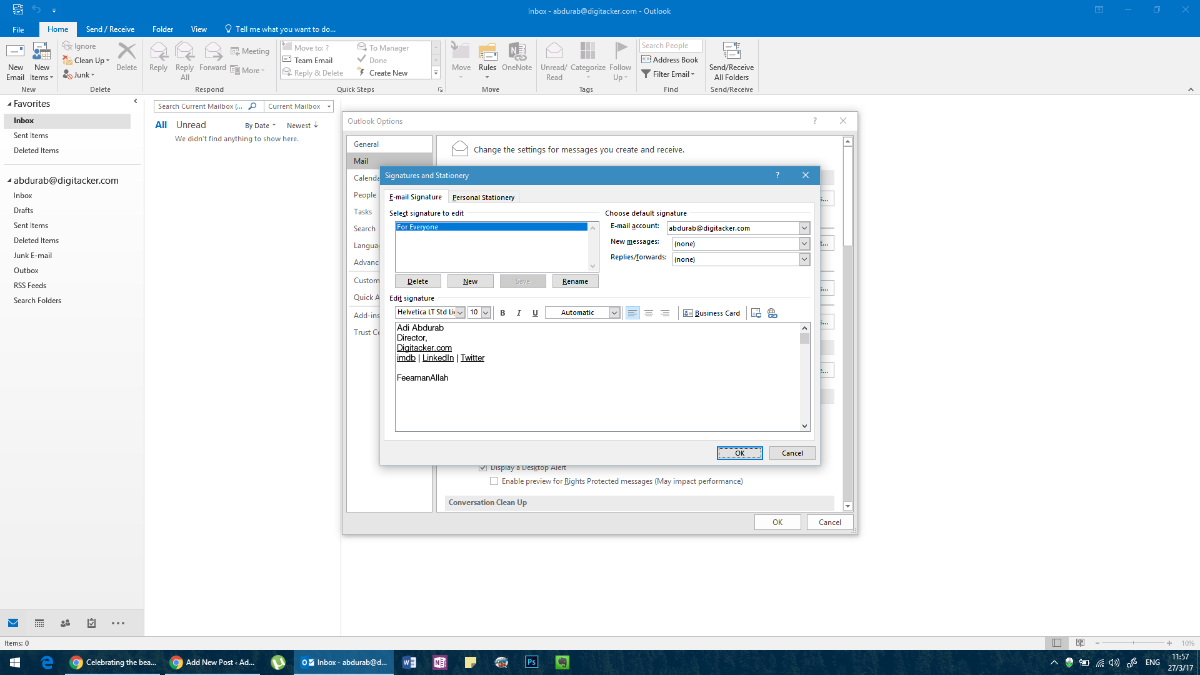
Here you can add any text in any font, in any color; supplemented with any image or even certain widgets and that ought to get you on your merry way. However, unlike other apps/clients.
Alternatively, you can access the same menu by composing a ‘New Mail’ in MS Outlook and then click on ‘Signature’ and then ‘Signatures’ from the drop down menu.

When you have selected your signature, make sure you choose a default signature for different types of communications, otherwise it will not accompany your messages. Add a signature for ‘New Messages’ and one for ‘Replies/Forwards’ (if you want separate messages for each that is).
Creating multiple signatures in classic Outlook: In the Signatures and Stationery window, click New to create additional signatures. Name each one clearly so you can tell them apart. Under ‘Choose default signature,’ use the ‘New messages’ and ‘Replies/forwards’ dropdowns to assign a default for each. You can also switch signatures on the fly while composing — click the Signature button in the compose ribbon and select from your saved signatures.
New Outlook for Windows
New Outlook for Windows (the modern replacement for the legacy Mail app and classic Outlook on Windows 11) uses a settings panel rather than the classic Options window. If you need to know how to set up email signature preferences here, the process is quick and intuitive.
Click the Settings gear icon in the upper-right corner of new Outlook. Go to Accounts > Signatures. Click New signature, give it a name, and build your signature in the rich-text editor. You can add text formatting, links, and images. Once created, use the ‘Select default signatures’ dropdowns to assign it separately to New messages and Replies/forwards. Hit Save.
To create more than one signature, repeat the process — click New signature again and name it differently. To switch signatures while composing, open a new message, select the Insert tab, and click Signature to choose from your saved options.
Outlook on the Web
Outlook on the web (outlook.live.com for personal accounts, outlook.office.com for work or school accounts) shares the same signature interface as new Outlook for Windows.
Click the Settings gear icon, then navigate to Mail > Compose and reply. Here you will find the signature editor. Type or paste your signature into the text box, use the formatting toolbar to style it, and give it a name. Set your defaults using the ‘New messages’ and ‘Replies/forwards’ dropdowns. Click Save.
To add a second signature, scroll up in the Compose and reply panel and click New signature. To insert a non-default signature while composing in the browser, click the Signature icon (pen on a line) in the compose toolbar at the bottom of the message window and select the signature you want.
MOZILLA THUNDERBIRD
Mozilla Thunderbird is a powerful open-source email client. Given its community driven nature, there are a few wrinkles to iron out (such as an absence of adhering to a client’s folder structure). However, people who like this platform can make it work for them through some customization. One such customization lets you set up email signature text directly within the account settings.
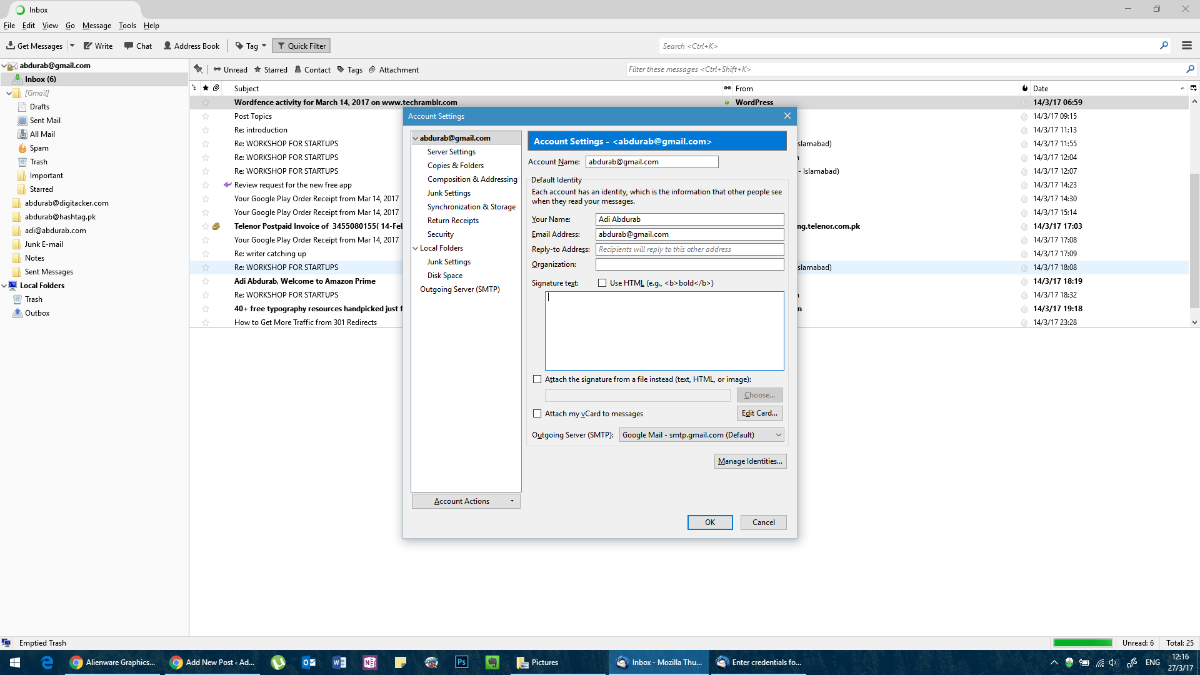
It is fairly straight forward. In the menu bar click on ‘Tools’. In case you don’t see a menu bar, click on ‘alt’ and the menu bar will appear.
In tools, click on ‘Account Settings’ and select your e-mail ID. You will automatically be taken to a screen to add your signatures. Much like Outlook, you can add virtually anything you want here. However, you will either have to compose it elsewhere and copy it and paste it here. If you know HTML just a bit you can use HTML tags to customize the look of your signature. Alternatively, you can import a completely developed HTML document.
HOW TO SET UP EMAIL SIGNATURE ON iOS
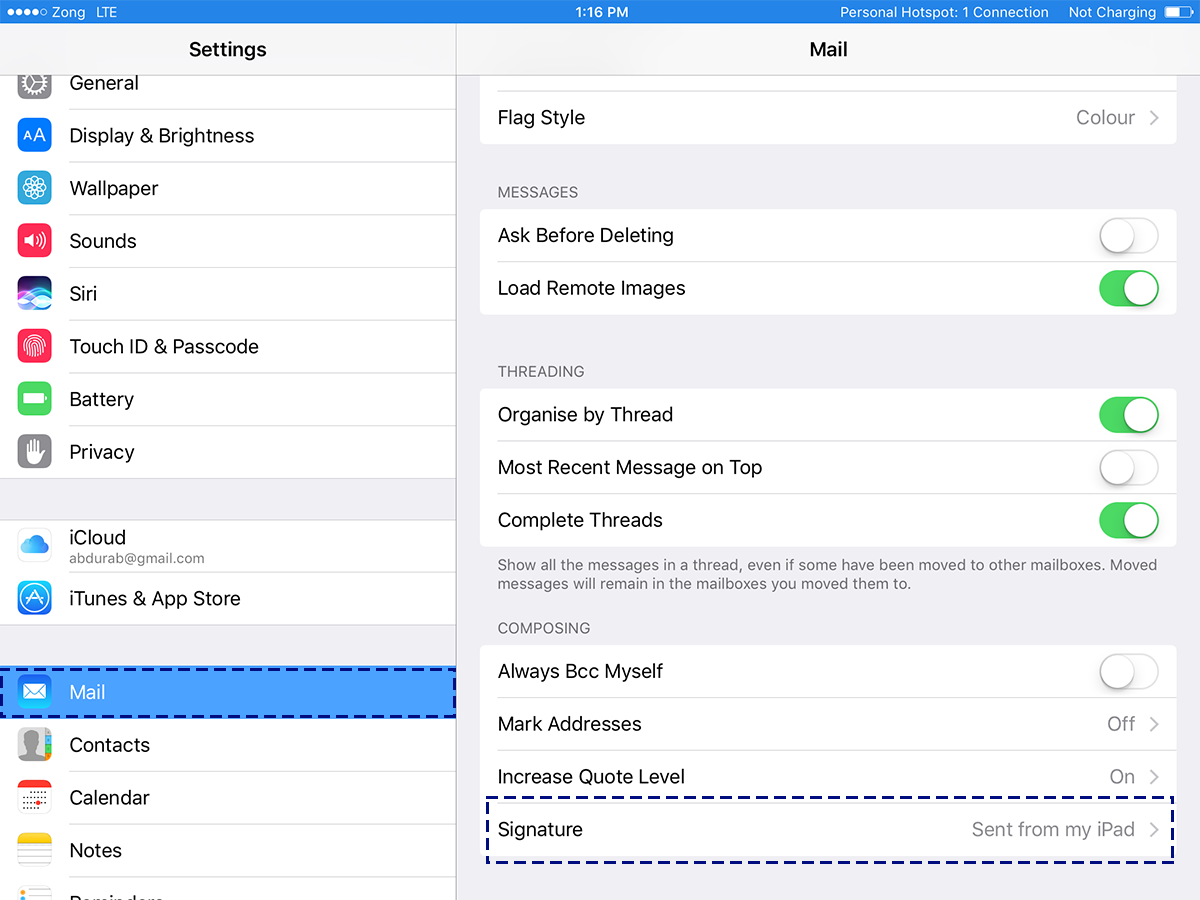
iOS’ native mail app is quite powerful, even comparable to the macOS version and much better than any web-based solutions out for the platform. To set up email signature settings in Mail for iOS, go to the Settings app and tap Mail.
Scroll to the bottom of the page, and you will find a space to modify/update your default signature. Again, no hyperlinks supported.
HOW TO SET UP EMAIL SIGNATURE ON MacOS
The macOS default Mail app is a powerful e-mail client. It is not as versatile as MS Outlook, but it still packs quite a punch. The signature on the default Mail for macOS is very customizable, much like in MS Outlook.
To set up email signature options on the Mail app, go to its preferences. On the Preferences window, select the ‘Signatures’ tab. Click the plus button and compose a signature in the right pane. You can name your signature so that it’s easier to distinguish from other signatures you might add.

Did we miss an email client? Let us know in the comments and we’ll add it to the list.

I work for multiple companies so for me a better signature choice with Gmail on the web is “canned responses”.