Minecraft Villages: Important Things You Should Know
If you’re still getting the hang of the Minecraft world, one of the first things you’ll notice is how the developers designed Minecraft villages to be an integral part of the game. Villages generate naturally in specific Overworld biomes and are not guaranteed to appear within any fixed distance of your spawn point — some worlds place one nearby, while others require a longer journey. To speed up your search, you can use the /locate structure village command in-game or plug your world seed into a seed-based village finder tool.
Read on below for more helpful info about Minecraft villages.
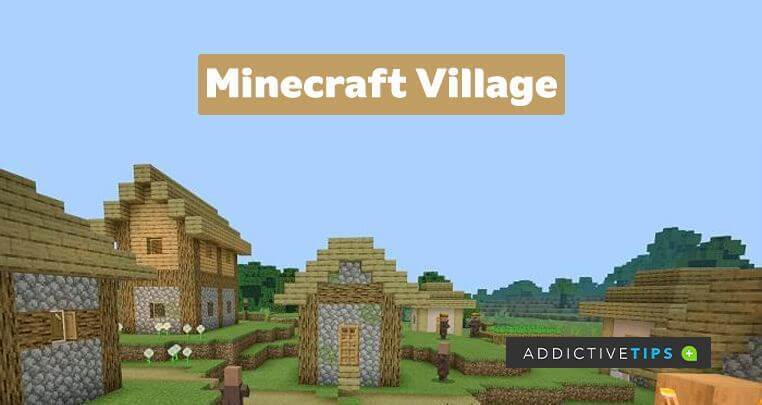
Minecraft Villages Explained
A village in Minecraft is typically made up of small groups of landscapes and buildings, outside of which you’ll find villagers in their droves. You can find these villages in various biomes, and each has distinct features and materials that you can use to tell it apart from others.
There are five main village styles in Minecraft, each tied to a specific biome:
- Desert Villages: You can find this type of village in an arid area, especially one laced with cacti, sand, and dead bushes
- Plains Village: A typical plains village in Minecraft is characterized by grassy areas with lakes, wildlife, canes, and streams scattered around the location
- Snowy Village: If you ever find yourself in a cold biome, there’s the likelihood that you’ve entered a snowy village. Buildings and structures in a snowy village are usually covered in snow and ice
- Savanna Village: If you find yourself in any area with abundant acacia trees and greenish-brown grass, you’re in a savanna village
- Taiga Village: Large trees such as spruce can be found in this village. Thus, if you spot them in a large group, chances are you’re in a taiga village
It’s worth noting that meadow biomes can also generate villages, but they use plains-style buildings rather than a unique meadow design — so you won’t encounter a distinct “meadow village” style. Meadow is a standard biome in current versions of Minecraft and requires no special update to access.
How to Find Minecraft Villages
Minecraft villages only generate when new chunks are loaded for the first time, which means they are spread across the world rather than clustered near spawn. The biomes most likely to contain villages are desert, plains, meadow, savanna, taiga, and snowy plains, with some edition-specific variants appearing in Bedrock Edition.
Here are the most reliable ways to track one down:
- Explore the right biomes: Head toward the biome types listed above. Villages will not generate in jungles, oceans, or most other biomes, so focusing your exploration saves a lot of time
- Use the /locate command: If cheats are enabled, type /locate structure village in Java Edition (or /locate village in Bedrock) and Minecraft will return the coordinates of the nearest village
- Check your world seed: Every Minecraft world is generated from a seed number. If you know your seed (found in world settings or by typing /seed), you can look it up online to map out village locations before you explore
- Use a seed map tool: Sites like the official Minecraft Wiki and Chunkbase let you enter your seed and edition to display an interactive map of village coordinates. This is the fastest method for pinpointing multiple Minecraft villages at once
Keep in mind that a predicted village location from a seed tool can occasionally fail to generate in-game if the surrounding terrain conflicts with the village structure. This is relatively rare but worth knowing before you travel a long distance.
Notable Things About Minecraft Villages
Before going about expanding your village and rising to stardom amongst its inhabitants, there are a few things you should note about Minecraft villages, which are as follows:
- Villages vary in size, meaning there’ll be a significant difference in the number of buildings and inhabitants you find. More villagers indicate that there are more people to trade and interact with
- Villages could spawn on the border of two different biomes. However, any of such villages would only keep the features of one biome, voiding the possibility of a hybrid village
- You can literally move inhabitants of one village to another. This you can do by conveying the villagers in a boat, and, thankfully, you can use the boat on both land and sea
- You can expand a village by erecting new buildings and ensuring that the villagers breed. You can make the latter happen by providing a villager with 12 carrots, 3 loaves of bread, and 12 beetroots
- There are villages with a sole inhabitant. Albeit rare, all you’ll ever find in this type of village is one job site, a house, and a single villager
- Beds are essential: Villagers need unclaimed beds to sleep and to trigger breeding. If you want to grow a village’s population, make sure there are enough beds to support new arrivals before expecting villagers to reproduce
- Job site blocks determine professions: Each villager profession is tied to a specific workstation — for example, a lectern creates a librarian and a smoker creates a butcher. Placing the right job site blocks in your village is key if your goal is unlocking useful trades
- The bell marks the gathering site: Every village has a bell, which acts as its central meeting point. Ringing it causes nearby villagers to scatter indoors — useful for warning them about incoming threats
- Iron golems protect the village: Villages naturally spawn iron golems that patrol and defend against hostile mobs. The number of golems scales with the village population, and you can also build your own if extra protection is needed
- Cats spawn automatically: One cat generates for every four beds claimed by villagers. Cats help keep phantoms and creepers at bay, making them a quiet but valuable part of village life
- Villages come with useful resources: Most Minecraft villages include working farms, dirt paths connecting buildings, and certain structures that contain loot chests. These chests can hold items like iron ingots, emeralds, food, and occasionally rarer gear — making early-game looting very worthwhile
Abandoned Minecraft Villages, Raids, and Dangers
Not every village you find will be a welcoming place, and even a healthy village can become dangerous quickly. Here is what to watch out for:
Abandoned villages (sometimes called zombie villages) are a rare variant where the village has no normal population. You can identify one by the cobwebs draped across buildings, damaged and incomplete structures, and the presence of zombie villagers instead of regular ones.
Abandoned Minecraft villages generate in the same biomes as normal villages but lack the bells, cats, and iron golems of a functioning settlement. The zombie villagers inside can be cured using a weakness potion and a golden apple, which is one of the most rewarding things you can do in an early playthrough since cured villagers offer heavily discounted trades.
Raids are triggered when a player with the Bad Omen status effect enters a village boundary. Bad Omen is applied after killing a raid captain — the illager carrying a banner — so be aware of this before walking back into a populated village after a skirmish.
A raid sends multiple waves of illagers, including pillagers, vindicators, ravagers, and evokers, into the village. Surviving all waves earns you the Hero of the Village effect, which gives you significant trade discounts.
Zombie sieges can also occur at night regardless of Bad Omen. During a siege, a large group of zombies spawns inside the village and attempts to attack villagers. Lighting up your village well and ensuring villagers are indoors at night are the most effective ways to reduce casualties.
Final Notes
There you have it, some of the cool things about villages in Minecraft. You’d be surprised how much there’s still left to explore in these villages, but you’ll get the hang of it as you invest more playtime into the game. To make your village even more organized and visually appealing, consider using Minecraft color codes to customize signs for houses, trade stalls, or pathways. If you’re looking for ways to play Minecraft at school or work, check out our guide on Minecraft unblocked at school to stay connected and keep building wherever you are.
