Everything to Know About Windows Startup Folder
The Windows operating system has a Startup Folder which has shortcuts to the programs that run whenever your laptop or PC boots up. Accessing this folder lets you control which applications and programs are launched when you turn your computer on, so you can choose what is ready to use right when you log in. Examples include antivirus software, apps, and other tools you might want ready to go.
This guide will cover how to access the Windows Startup Folder for Windows 10 and 11, with logical steps and instructions to make everything easy for you.
About Windows 10 Startup Folder
For anyone still using Windows 10, here is some background and instructions to help you access the Startup Folder.
Windows 10 can automatically run apps at startup, and some of these, like Windows Defender, are stock apps that the OS automatically adds to the startup items list.
Other apps, however, you can choose to add or remove. Some have a ‘Run at startup’ option in their settings which makes it easy to add them to the startup items list. Apps that do not have this option must be added to the startup item list manually, which we will cover in a minute.
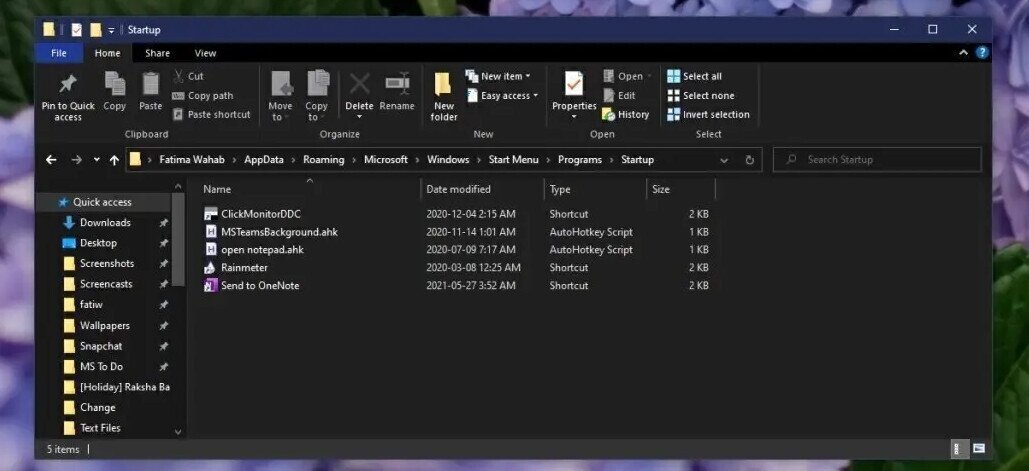
The Startup folder is a system folder that contains apps, files, and scripts that will open when Windows 10 boots to the desktop. It should not be confused with the Start Menu folder which is for storing Start Menu apps/tiles.
There are two types of Startup folders; a user specific folder, and a Startup folder for all users. The user specific folder will contain all items that a specific user wants to run at startup, whereas the Startup folder for all users will contain items that will run at startup for all users that log on to the system. One folder is set to an individual’s preference; the other folder is for everyone.
How to Access the Windows 10 Startup Folder
The trick to adding an item to the Startup folder is knowing where it is. To find the user specific Startup folder, follow these steps:
- Tap the Win+R keyboard shortcut to open the Run box.
- In the Run box,enter %AppData% andtap the Enter key.
- In the folder that opens, go to Microsoft>Windows>Start Menu>Programs>Startup.
Alternatively, you can paste this in the File Explorer location bar but replace ‘Username’ with your username:
C:\Users\Username\AppData\Roaming\Microsoft\Windows\Start Menu\Programs\Startup
To find the Startup folder for all users, follow these steps:
- Open File Explorer.
- Go to the View tab.
- Enable Hidden items to show hidden files and folders.
- Open theC drive.
- Go to: ProgramData>Microsoft>Windows>Start Menu>Programs>StartUp
Alternatively, paste this in the location bar in File Explorer and tap Enter:
C:\ProgramData\Microsoft\Windows\Start Menu\Programs\StartUp
Adding Apps to the Windows 10 Startup folder
Adding apps to the Startup folder is simple. You can follow the same process for both types of Startup folders, however, to access the Startup folder for all users, you will need admin rights before adding an item.
- Right-click the app, file, or folder that you want to add to the Startup folder.
- Select Send to>Desktop (Create shortcut).
- Open the Startup folder.
- Cut (Ctrl+X) the desktop shortcut for the app and paste (Ctrl+V) it into the Startup folder.
Note: Windows 10 will generally block scripts from running at startup but all other file types, including AutoHotkey scripts will work. If you want the app to run with admin rights at startup, you will need to modify the shortcut.
Removing Apps from the Windows 10 Startup folder
To remove an app, file, or folder from the Startup folder, simply open it and delete the item.
How to Access the Windows 11 Startup Folder
Windows 11 has a new UI, a new Start Menu, and various other changes in design, though it still works similarly to Windows 10 in many ways. Windows 11 still has a Start Menu, and you’re able to run apps or open files at boot, though they often have to be added to the Startup folder.
Just like Windows 10, Windows 11 has two Startup folders. One is a public or all users Startup folder. The items added to this folder will open for all users that are configured on the system.
The second Startup folder is specific to an individual user. Each user configured on a Windows 11 system will have their own Startup folder and the items added to it will open at boot only for them.
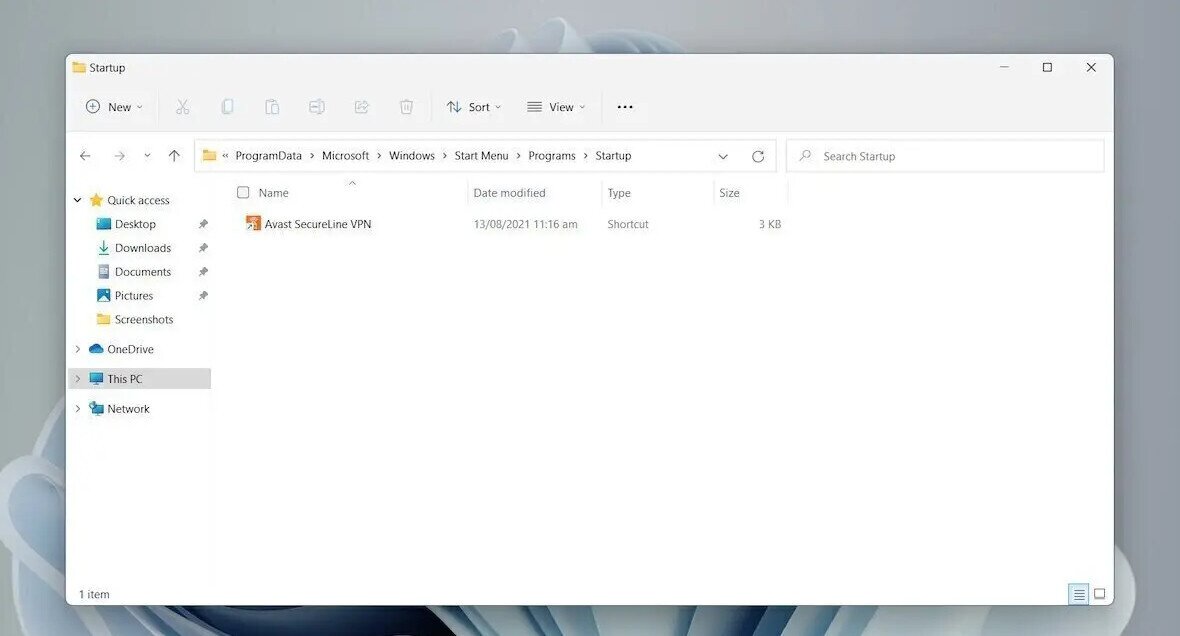
Windows 11 Startup Folder for All Users
The Windows 11 Startup folder for all users is located at the address below:
C>ProgramData>Microsoft>Windows>Start Menu>Programs>StartUp
The ProgramData folder is a hidden folder so make sure you’ve enabled show hidden files on Windows 11 before you go looking for it.
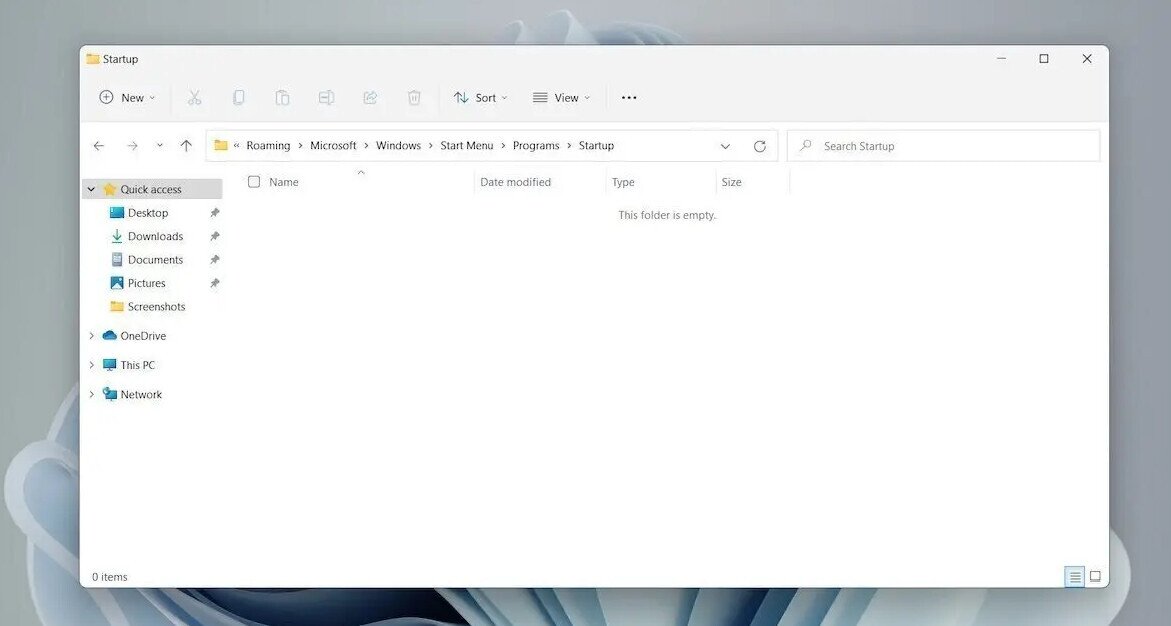
Windows 11 Startup Folder for a Specific User
To access the Windows 11 Startup folder for the current user, follow these steps:
- Tap the Win+R keyboard shortcut to open the Run box.
- In the Run box, enter %AppData% and tap the Enter key.
- In the folder that opens, go to: Microsoft>Windows>Start Menu>Programs>Startup
Or, you can use this path but replace ‘Username’ with your username:
C:\Users\Username\AppData\Roaming\Microsoft\Windows\Start Menu\Programs\Startup
How to Add an App to the Windows 11 Startup folder
Adding an app, script, or file to the Startup folder is easy once you have the folder open. Use this method only if the app doesn’t have an option to run at startup built-in.
- Create a shortcut to the app’s EXE.
- Open the Startup folder.
- Paste the shortcut to the app in this folder.
- The next time you boot the system, the app will open automatically.
Managing Startup Items
It’s convenient to have your important apps open automatically, and adding apps and files to the Startup folder is easy. That said, you should always try to keep the number of items in the Startup folder small.
Too many items will cause your system to take longer to get started. Windows 11 does not prioritize the items by startup impact. You may end up waiting several minutes before your system is done booting.
Frequently Asked Questions
Can you access the Windows 11 Startup Folder from Task Manager?
Yes! It’s very easy. Here’s how:
- Press Ctrl + Alt+ Delete at the same time to bring up Task Manager.
- A Task Manager window will pop up. On the left side are several icons. Hover over them until you see Startup Apps and click it.
- From there, you can enable or disableany of the default startup apps on the list.
Are there third-party tools or apps to help manage the Windows Startup Folder?
Yes! One popular tool is Microsoft Autoruns, which is an in-depth startup utility for Windows. There are other options too, but Autoruns is a Microsoft product, making it ideally suited to the task. Just be sure to download it from a reputable source. Also, you can do a lot just from Task Manager, so you may not need anything more advanced.
How do I tell which Startup programs are slowing down my computer?
It’s pretty easy to find the sluggish startup culprits. Here’s how:
- Press Ctrl + Alt + Delete to open Task Manager.
- Hover over the icons on the left of the Task Manager window until you find Startup Apps, and then click on it.
- Look at all of the enabled apps and see which ones are particularly resource intensive. If you find unnecessary ones, disable them.
What types of programs should I have enabled to auto-start?
Anything that you use often or that is integral to Windows running smoothly and safely should be enabled at auto-start. Some examples include:
- Antivirus and security software.
- Syncing tools, such as for OneDrive or other cloud storage solutions.
- Any services or programs that keep your hardware performing optimally.
- Apps you consistently use.
- System management tools.
