How to set up Syncthing on a Chromebook
Syncthing is a decentralized syncing application for Linux, MacOS, and Windows. However, did you know you can also use it on Chrome OS? In this guide, we’ll go over how to set up Syncthing on your Chrome device.
Before we begin
You must have other devices set up with Syncthing to transfer files to your Chromebook with the Syncthing GTK app. To set up a Linux device with Syncthing, follow our Syncthing setup guide. If you’re on Windows or Mac OS, check the official Syncthing website for further instructions.
Enable Linux support on Chrome OS
Before you can set up the Syncthing app on your Chromebook, you must set up Linux support. To set up Linux support, start by selecting the clock icon in the Chrome OS dash.
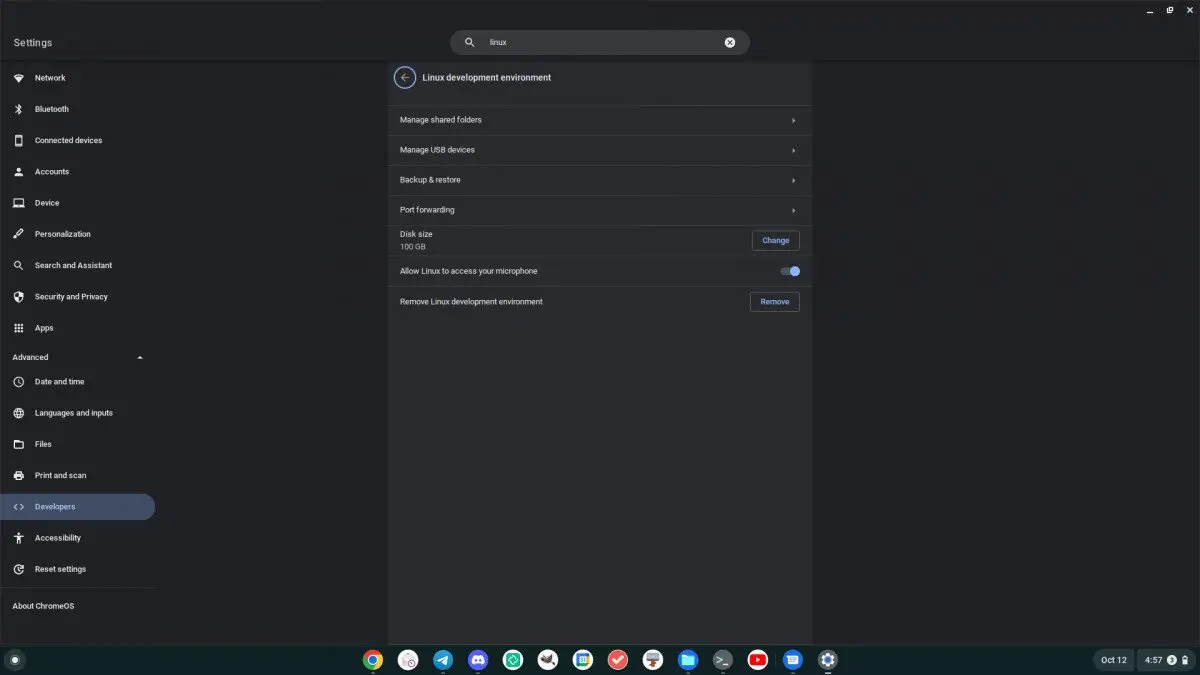
After selecting the clock, click on the gear icon. Upon clicking on the gear icon, you’ll load up the Chrome OS settings area. Then, find the “Advanced” section, and click on the arrow next to it.
Inside of the “Advanced” section, look for the “Developers” area. Inside the developer area, find the “Linux development environment” area. Click on the “Turn on” button to download the Linux container system and the terminal app on your Chromebook.
Once the downloading is complete, Chrome OS will launch a terminal window. In this terminal window, select the “penguin” button to load up the Linux terminal interface on your Chromebook.
In the terminal window, you’ll need to run the apt update command to check for software updates. This process will not take long to complete.
sudo apt update
After running the update command, the terminal will show you if any packages are ready to upgrade. You can then run the apt upgrade command to install all pending upgrades that are available.
sudo apt upgrade
Now that your software is up to date, you have Linux support enabled on your Chrome OS device.
How to install Syncthing on Chrome OS
To install Syncthing on Chrome OS, start by launching the terminal app. Then, select “penguin” to access the terminal interface. Inside the terminal interface, use the apt install command to set up the “syncthing” package.
sudo apt install syncthing-gtk
How to install a more up-to-date version of Syncthing
The Syncthing package which comes included with Debian (which is what the Chrome OS container uses) isn’t very up-to-date. If you wish to have a more up-to-date version of the app, you can install the Flatpak release.
To start, install the “flatpak” package using the apt install command. The “flatpak” package handles the runtime environment for Flatpak apps.
sudo apt install flatpak
With the Flatpak runtime set up on your Chromebook, you can install the latest version of Syncthing using the following commands.
flatpak --user remote-add --if-not-exists flathub https://flathub.org/repo/flathub.flatpakrepo
flatpak install flathub me.kozec.syncthingtk
How to enable port forwarding
Syncthing is a syncing tool, and it interacts easily with other devices on the network. However, since you’re running Syncthing in a container, securely isolated from Chrome OS, you need to forward the Syncthing port from the Linux container to Chrome OS. If it is not forwarded, you won’t be able to use Syncthing correctly.
To enable port forwarding, do the following. First, click on the clock. After selecting the clock, locate the gear icon, and select it with the mouse. Then, find the “Developers” settings.
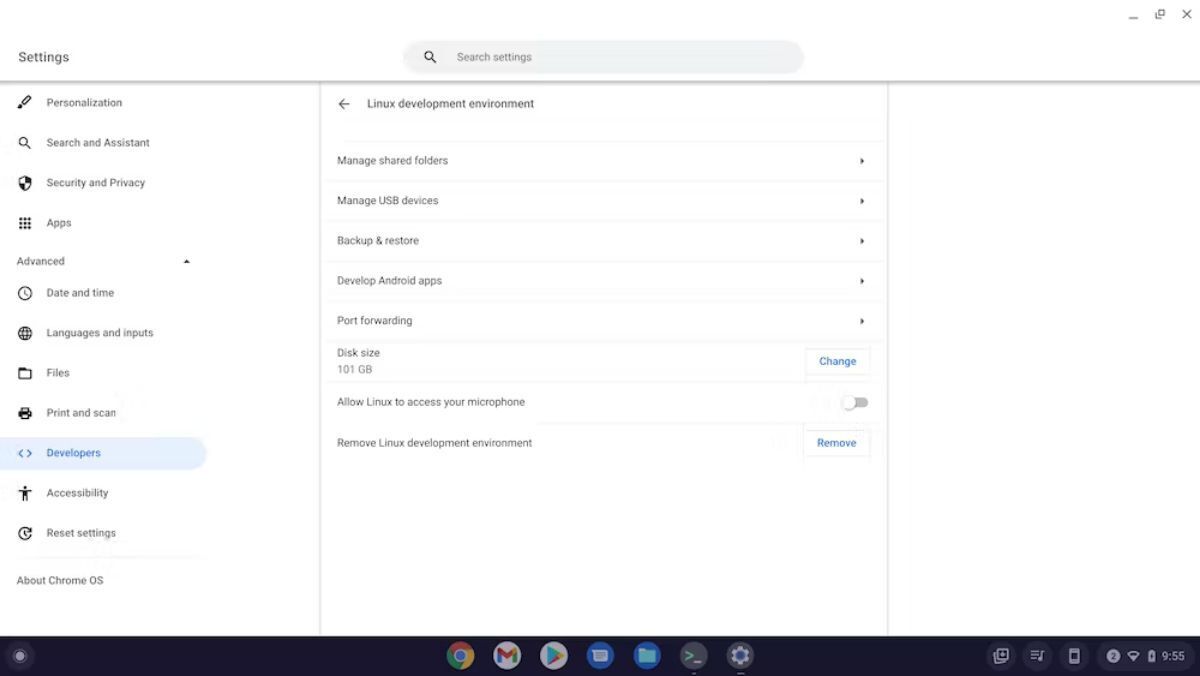
Inside the “Developers” settings area, find “Linux development environment,” and select it. Then, look through the Linux development environment for the “Port forwarding” section. Finally, click on the “Port forwarding” section, to access the Chrome OS Linux port forwarding area.
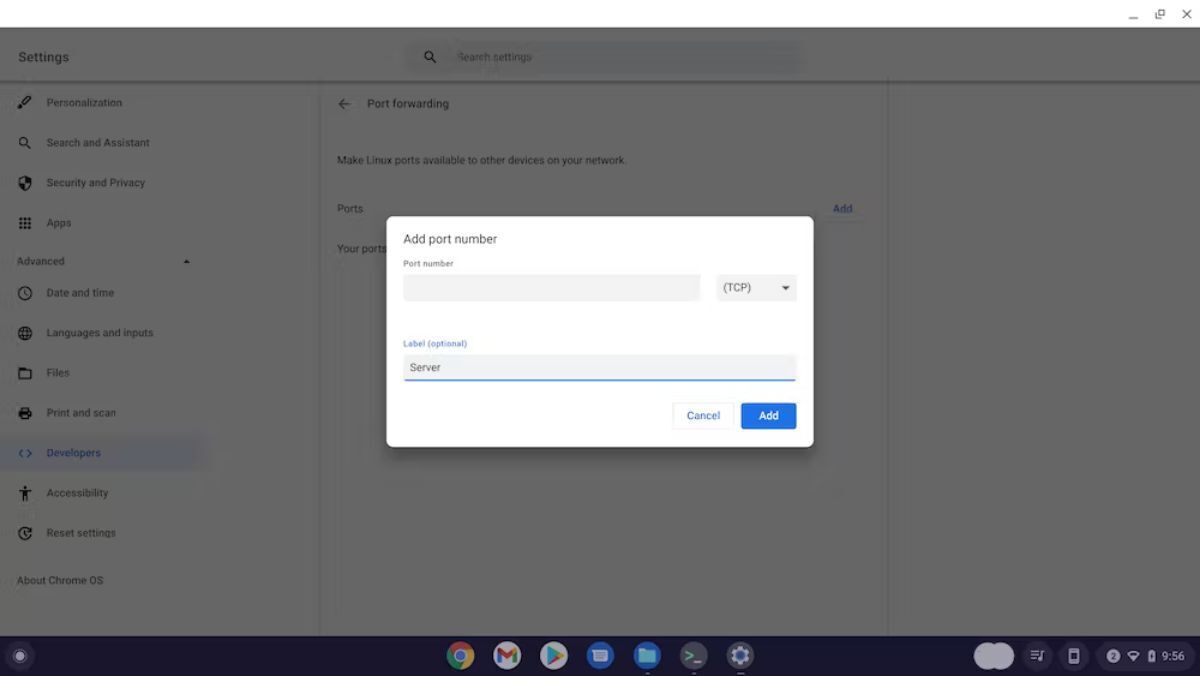
Inside of the port forwarding area, find the “Add” button and click on it with the mouse. When you select the “Add” button, a pop-up menu will appear. In this pop-up menu, enter port 8384 (TCP). After you’ve entered the port, enter “Syncthing” in the “Label menu.” Finally, click on the “Add” button to add the Syncthing port forwarding to your Chromebook.
Changing network settings
By default, the Syncthing app only listens to “localhost.” This is a problem, and if it isn’t changed, you won’t be able to access Syncthing via the web interface in Chrome (if you choose). To change the interface, open up the Chrome OS terminal app.
Note: you must launch the Syncthing app once before entering the terminal command below. Launch the Syncthing GTK app via “Linux apps” in the Chrome OS menu, allow it to start, then close it.
Once the Chrome OS terminal app is open, find the “penguin” button, and click on it to launch the terminal interface. Then, run the following sed command.
sed -i ‘s/127.0.0.1:8384/0.0.0.0:8384/g’ ~/.config/syncthing/config.xml
When the command is run, close the terminal.
How to set up Syncthing on Chrome OS
To set up Syncthing, do the following. First, open up the app. Once it is open, it will start up the Syncthing daemon in the background. It’ll also create a “Default Folder.” This folder is in /home/CHROME_LINUX_USERNAME/Sync.
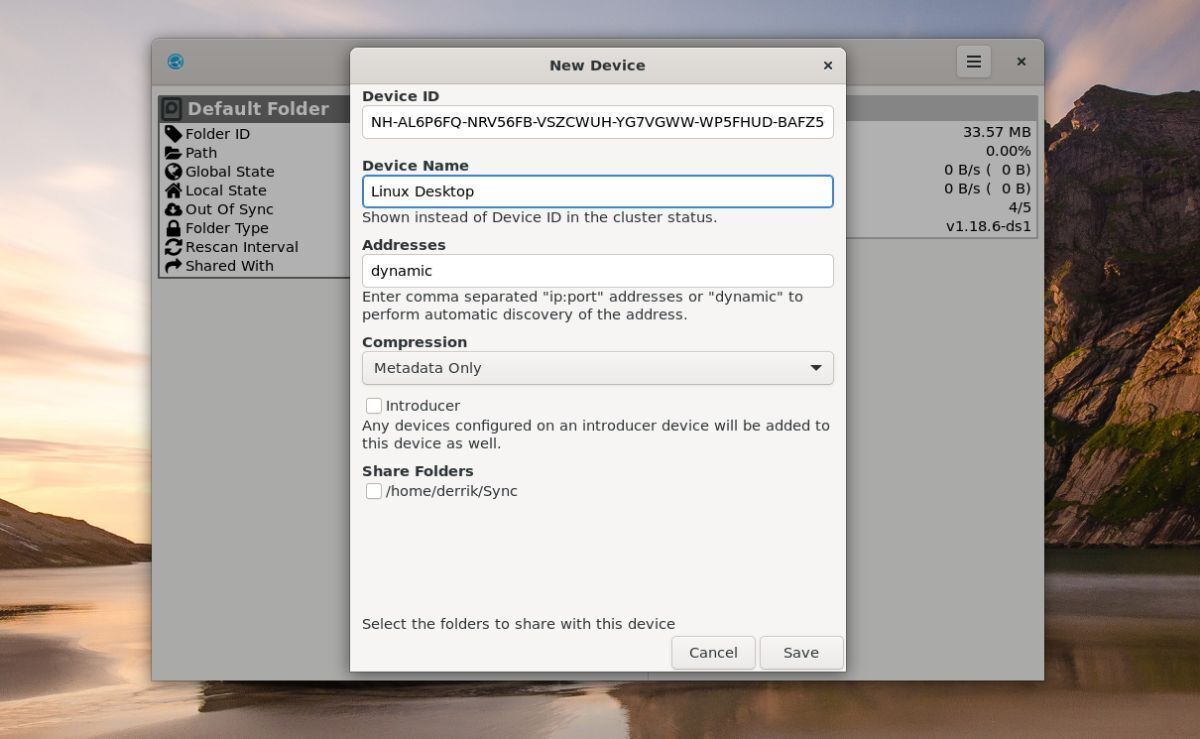
Open up the Chrome OS Files app, and select “Linux files.” After loading up the “Linux files” area, add files you’d like to sync to it. Then, click on the Syncthing icon to access the Syncthing menu, and click on the “Add Device” button.
After clicking on the “Add Device” button, a pop-up menu will appear. Once you’ve selected the t”Add Device” menu, paste the Syncthing ID you wish to sync with your Chromebook via Syncthing. Click the “Save” button to add the device.
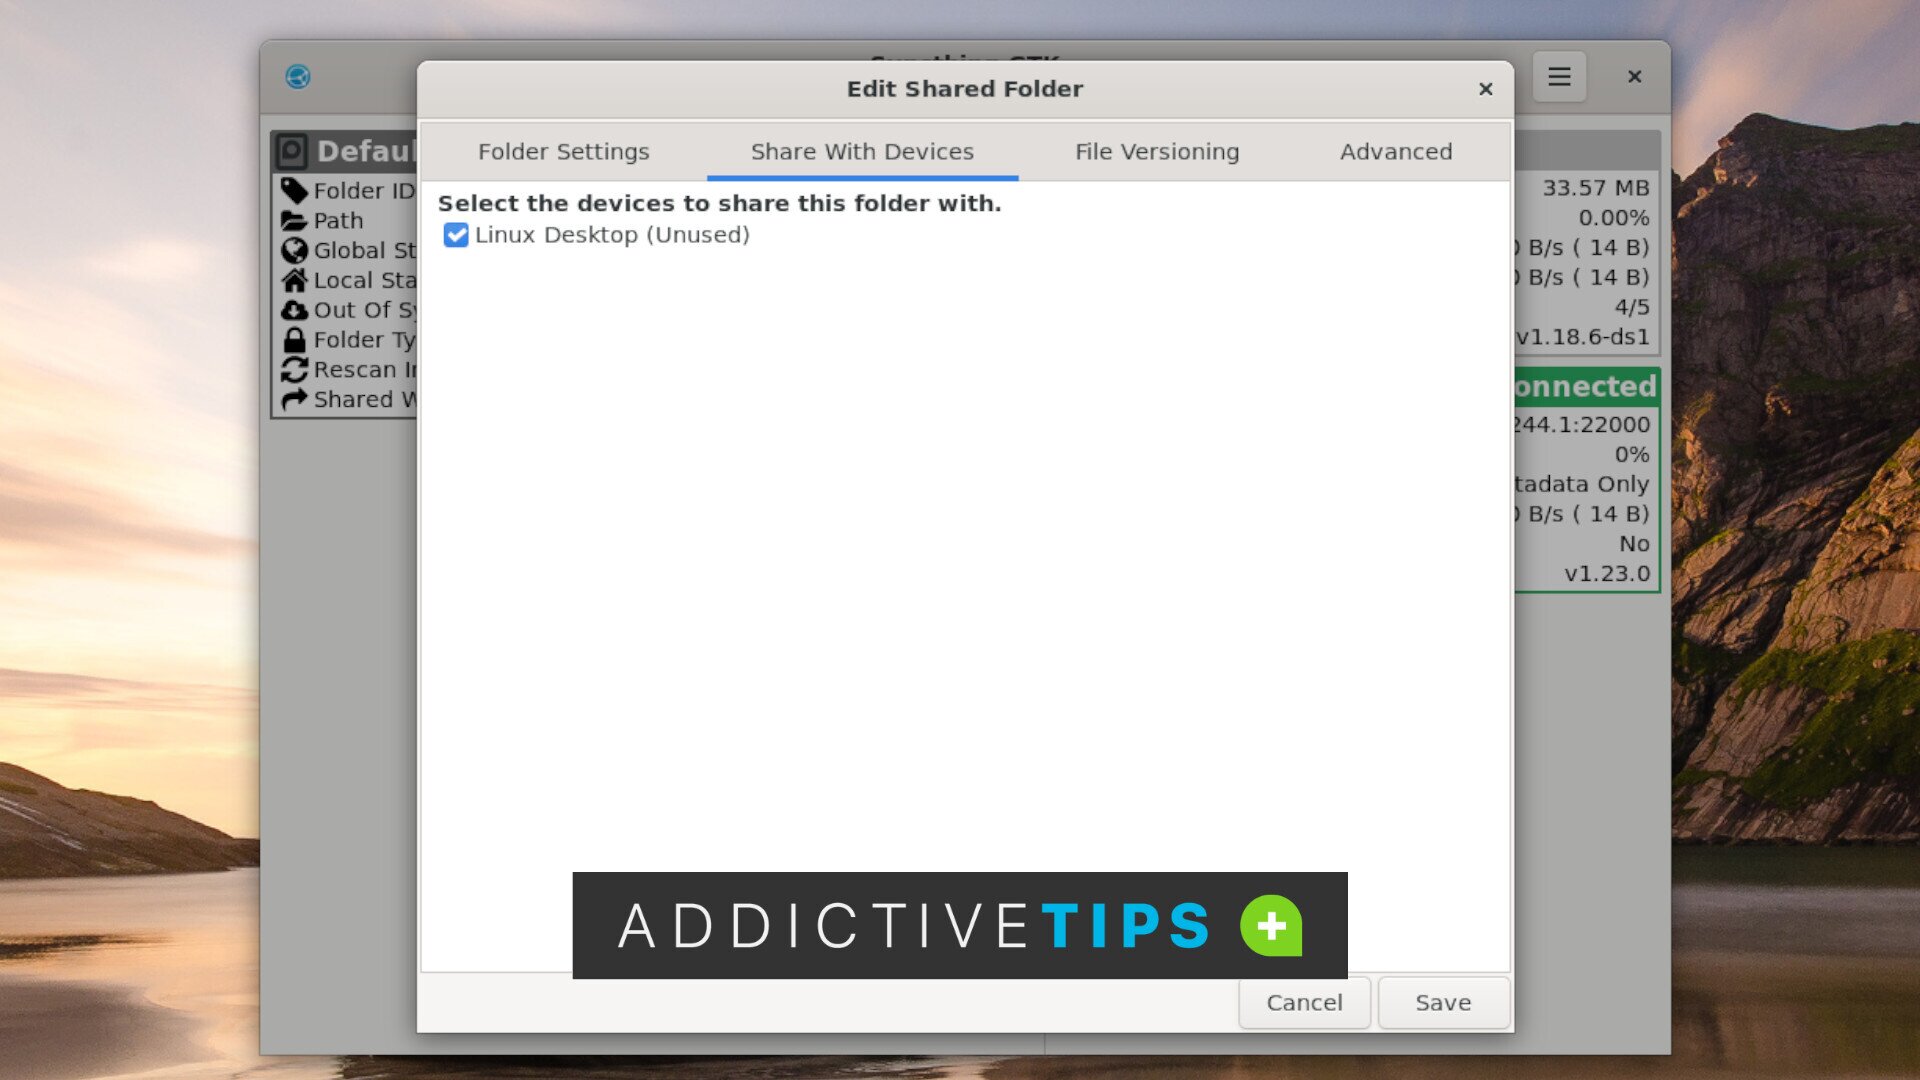
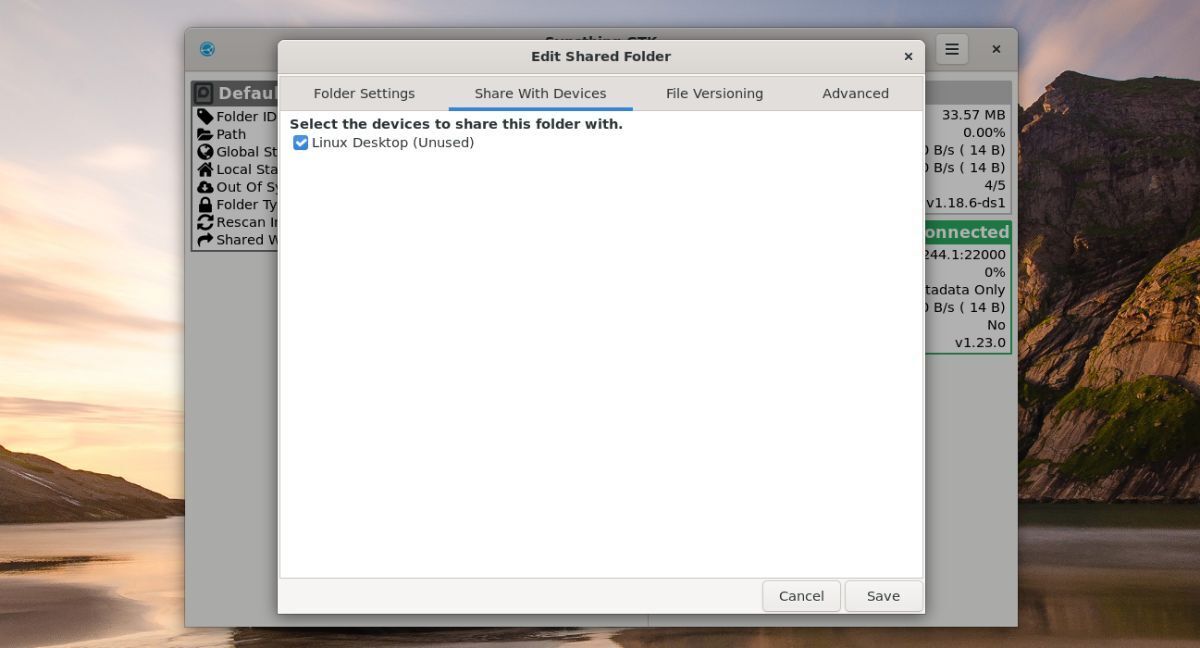
When you’ve added the device in Syncthing on your Chromebook, return to the other computer and confirm you wish to add the device. Then, on Chrome OS in Syncthing, right-click on “Default Folder” and select the “Edit” button. Upon clicking on the “Edit” button, select the “Share With Devices” tab, and add your devices to your Chromebook’s “Default Folder.” Click “Save” when done.
Note: you must confirm on the device you add to the Chromebook’s “Default Folder” that you wish to add it. Check Syncthing, and add it.
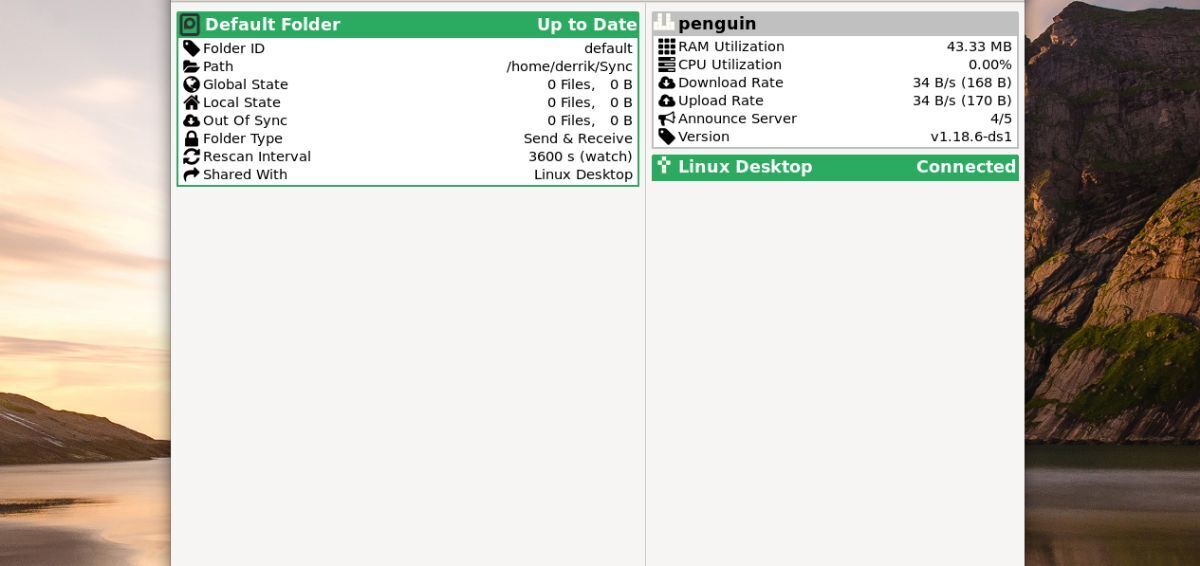
Now that all devices are added to the Chromebook Syncthing folder, everything should start syncing. Enjoy your decentralized file sync system!
