Retrospect Kodi Add-on: How to Install and Watch European TV Content on Kodi
Most of the TV shows and movies we talk about here on Addictive Tips are from the US. After all, the big channels like HBO, NBC, and ESPN are what people watch a lot of the time. But there are so many more TV channels out there from countries around the world, showing a mix of original programming and English shows which have been subtitled or dubbed into other languages.
If you want to watch some of these international TV channels on your computer, then you should check out the Retrospect add-on for Kodi. This add-on for the Kodi media centre software allows you to stream content from a variety of European countries whose shows you don’t usually see, including The Netherlands, Sweden, and Norway.
The Retrospect add-on was originally called XMBC Online TV, so if you’ve been wondering what happened to that add-on, it’s been updated with a new name. Read on for information about how to install and use the Retrospect add-on, and for more suggestions for Kodi add-ons that you can use to watch international TV.
Get a VPN Before Using Kodi Add-ons
Before we get into the details of how to install the Retrospect add-on, there’s an important issue we need to cover first. Although the Kodi software itself is open source and legal to use, the add-ons for the software are created by third-party developers and fall into a legal grey area. When you download or stream copyrighted material over an unsecured connection, you could be liable for a fine from the copyright holder or even prosecution from law enforcement. And no one wants that! If you’re going to use add-ons for Kodi for streaming content, then you need to protect yourself from legal issues.
The best way to keep yourself safe when streaming, or when using the internet generally, is to use a VPN. A Virtual Private Network is a piece of software which runs on your computer and encrypts all of the traffic that you send out, so that no one can see what sites you’re visiting or what materials you are downloading. Even your ISP won’t know what you’re downloading or viewing, as all they can see is the amount of data you use, not what the contents of that data is. That means that if copyright holders or law enforcement suspect you are downloading illegally, they can force your ISP to turn over their records of your internet use, but your records will show only encrypted traffic which cannot be viewed by others.
But how do you pick a VPN? There are loads of VPN providers offering all sorts of deals. We think that there are a few main factors that you ought to keep in mind when choosing a VPN:
- The company’s logging policy. Some VPN providers keep logs of your online activity, which is essentially a record of everywhere you go and everything you download from the internet. That’s pretty much the opposite of the kind of privacy that we’re trying to install here! You want to find a VPN provider which does not keep any logs of your usage, so there’s no record of your online activity anywhere.
- The VPN’s connection speed. Using a VPN will always slow down your connection a little bit, as the traffic must travel via an extra server in order to be encrypted. But a good VPN will not make a noticeable difference to your browsing, while a bad VPN can slow your internet to a crawl. When you’re streaming video it’s particularly important to have a fast and reliable VPN connection.
- The types of traffic which the company allows. There are many types of traffic that you might want to send over your internet connection: loading web pages, watching video, downloading from torrents, or using VoIP applications like Skype. Some VPNs will restrict what kind of traffic they allow. For instance, it’s common to forbid using torrents or other P2P downloads over a VPN connection. If you want to use these kinds of traffic in safety, you need to make sure that your VPN provider supports them.
Our Recommended VPN is IPVanish
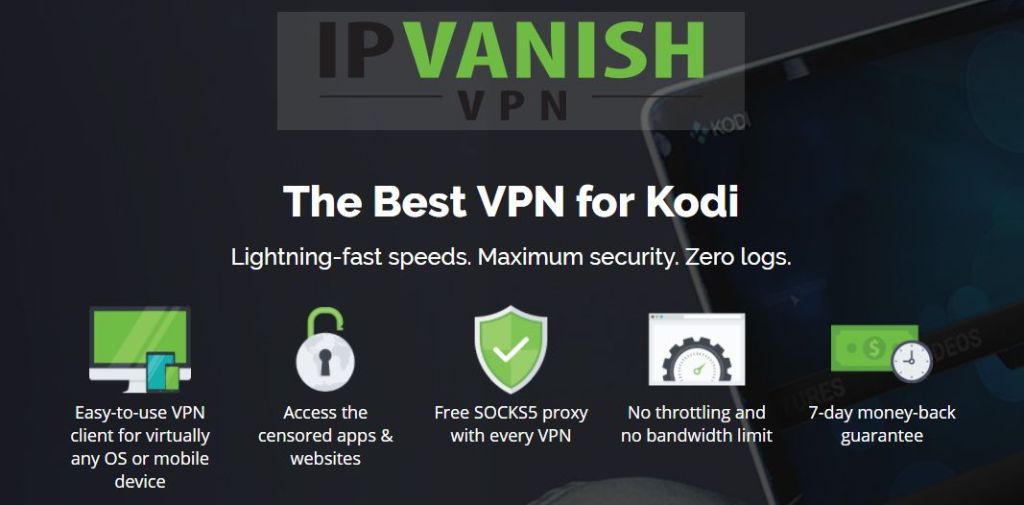
With all these factors taken into consideration, the VPN provider that we recommend for use with Kodi is IPVanish. This service allows you to use any type of traffic without restrictions, and it has no bandwidth cap so you’ll never have to worry about going over your data allowance. Most importantly, the company has a strict no-logging policy so it will always keep your information private and secure.
IPVanish offers more than 850 servers in over 60 countries, so there’s always a server available when and where you need one. It also has lightning-fast connection speed, so you won’t be waiting around while videos buffer. For your security, the traffic is encrypted with strong 256-bit encryption for both L2TP and OpenVPN.
Plus, IPVanish has software which can be run on a PC, Mac, Android or iOS system, and it allows up to five simultaneous connections. That means that you can encrypt the traffic from all of your devices and even use them to download securely and simultaneously. Extra features like a kill switch to prevent you from accidentally downloading over an unsecure connection and the option to cycle your IP address after a set number of minutes give you even greater security.
IPVanish offers a 7-day money back guarantee which means you have a week to test it risk-free. Please note that Addictive Tips readers can save a massive 60% here on the IPVanish annual plan, taking the monthly price down to only $4.87/mo.
How to Install the Retrospect Add-on on Kodi
There are two parts to this installation process: adding the repository and then installing the add-on. We’ll walk you through each part below.
From the Rieter Repository (currently unavailable)
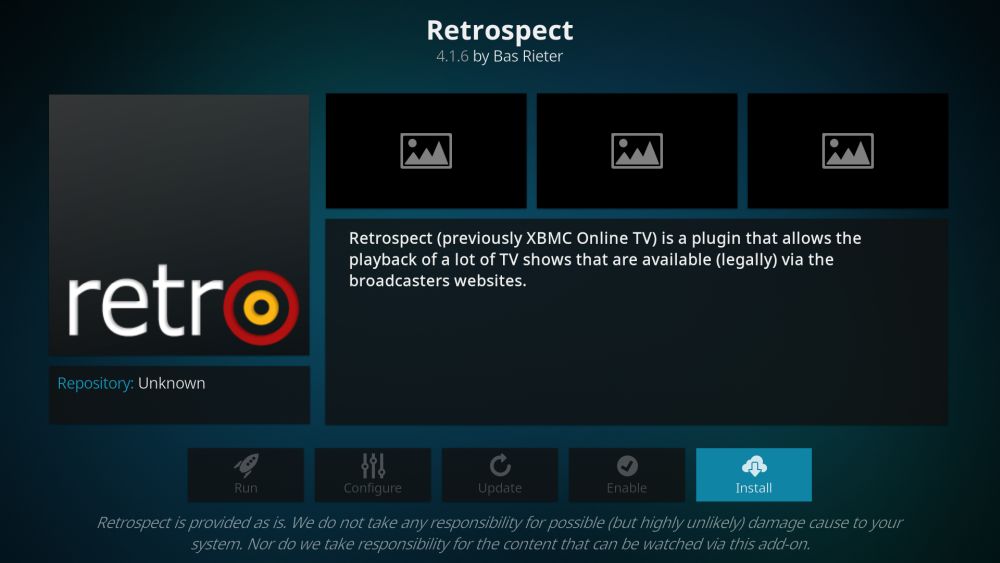
PLEASE NOTE: At the time of writing the Rieter repo is empty. The developer has made it clear that the situation may be remedied in time. We have no idea when the Rieter repo will be back fully, but we’ll provide this install guide for when it will. For those looking for an alternative, see the SuperRepo install guide, after this section.
The first step to installing the Retrospect add-on is to add the repository which hosts it. A repository is a location where all of the data required for the add-on is stored, so we must add this location to our Kodi system in order to install the add-on.
- Start on the Kodi home screen
- Go to SYSTEM then to File manager
- Choose Add source
- A box labelled Add Files source will appear. Click on <None>
- Write the following address into the text box: https://www.rieter.net/install. Make sure that you type the address exactly correctly, including the https://, or it will not work
- Add the bottom of the box, write a name for the repository. We’ll call it Rieter
- Click on OK
- Wait for a second until you see a notification that the source has been added
- Now we install the repository itself. To do this, go back to your Kodi home screen
- Go to SYSTEM and then to Settings
- Click on Add-ons
- Click on Install from zip
- Look through the list for Retrospect Installation and click on that
- Find a zip file called net.rieter.xot.repository-x.x.x.zip. The x’s represent the version number and will change over time
- Click on the zip file and the repository will be installed
- Wait for a moment and you’ll see a notification that the repository has been added to your system
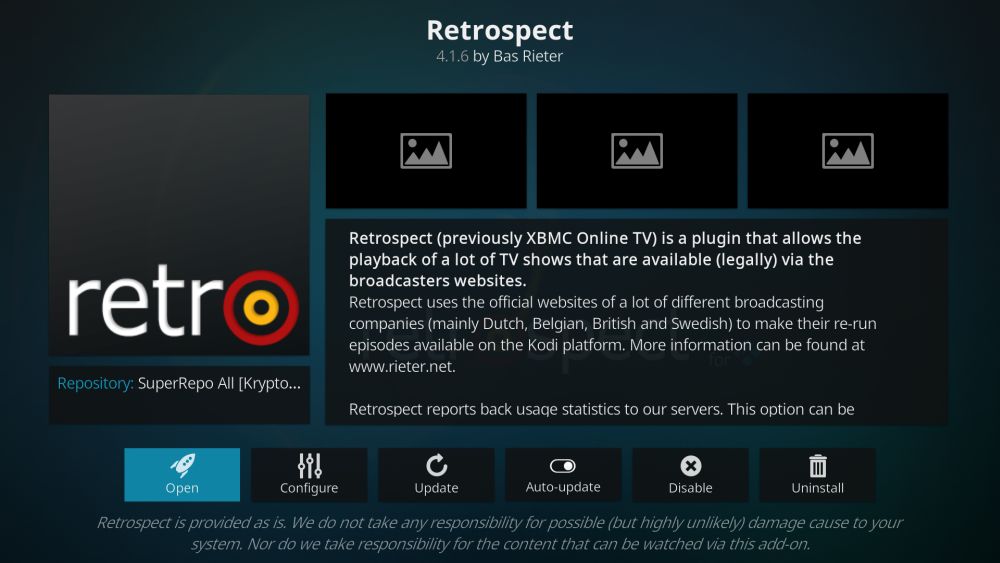
With the repository added to your Kodi installation, you can go ahead and install the Retrospect add-on itself. To do this, just follow these steps:
- Start on the Kodi home screen
- Go to SYSTEM and then to Settings
- Go to Add-ons
- Select Install from repository
- Find the folder called Retrospect (formerly XMBC Online TV) Add-ons and click on it
- Select Video add-ons
- Find an option that says Retrospect (Including all channel updates) and select it
- This will take you to a page describing the add-on. Choose Install from the menu on the left
- Wait a second and you’ll see a notification once the installation is complete
- That’s it. You’re ready to watch!
From the SuperRepo Repository (works like a charm)
First you’ll need to install SuperRepo on your computer. A detailed guide is available here.
- Go to Add-ons
- Select Install from repository
- Open up the SuperRepo[all], find Video-addons
- Scroll down to Retrospect (formerly XMBC Online TV), click on it
- This will take you to a page describing the add-on. Choose Install from the menu
- Wait to install dependencies, and the notification once the installation is complete.
- You’re good to go.
Using the Retrospect add-on for Kodi
To start watching TV with Retrospect:
- Start on the Kodi home screen
- Go to VIDEOS and then to Add-ons
- Find Retrospect and click on it
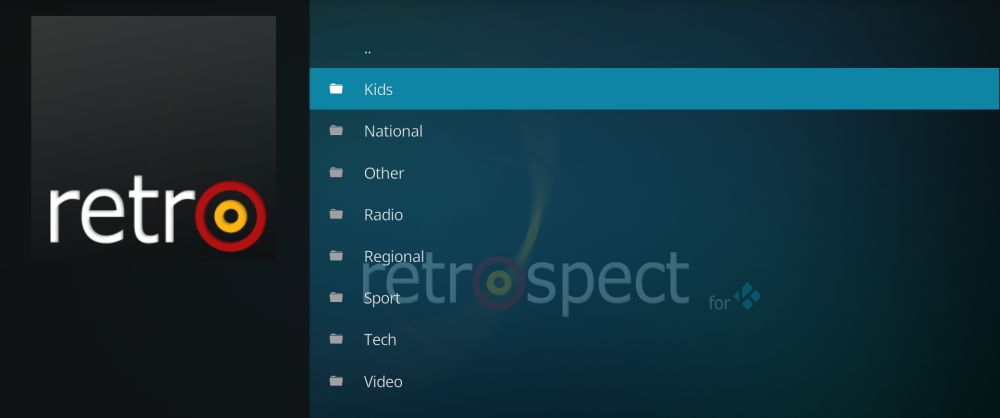
- You’ll find a number of sections: Kids, National, Other, Radio, Regional, Sport, Tech, and Video
- Choose a section, and you’ll see a list of channels in different languages. For example, you might see:
- Nickelodeon: the TV channel for kids, in English
- Nickelodeon (Norge): the same channel but dubbed in Norwegian
- Nickelodeon (Sverige): the same channel but dubbed in Swedish
- Select the channel you want, then choose a TV show from the list to watch
- You’ll see a list of episodes of that show. Click on the name of the episode to open the stream
- Sit back and enjoy your show
You’ll find that this add-on has a wide range of European channels, including local and national channels. It also has many US shows which have been dubbed or subbed into other languages, so it’s great for international viewers. Plus, if you’re an English speaker who is learning a second language, then watching your favourite shows in your new language is a great way to learn!
Some of the countries’ TV channels covered by Retrospect include:
- The Netherlands
- Belgium
- Sweden
- Norway
- Lithuania
- Latvia
An issue with this add-on is that many of the channels listed often do not work all the time. If you see a ° symbol next to the name of the channel, that means that the channel is currently offline and will not stream. This is because there are relatively few people who are watching and streaming these channels.
Also, you’ll find that most channels are in standard or low quality. Occasionally you’ll find a high definition channel; these can be identified by the green HD symbol next to the channel name.
How to Show Only Channels in Your Language
One problem with the Retrospect add-on is that you cannot sort channels in the menu by language. By default, all channels are included in the same lists, so you will see options for, say, Norwegian or Swedish language channels even if you do not speak these languages, which can be confusing.
But there is a way to fix this! With the method below, you can change your settings to display only channels in your selected languages, while hiding channels in the language you don’t speak:
- Navigate back to the Add-ons screen and hover over the Retrospect entry in the list, and then right click and press c. This will bring up the context menu for the add-on.
- Select Add-on settings from this menu, then choose Configure from the menu on the left.
- Select Channels at the top of the settings box.
- You’ll see an option called Channel Language. Use this option to select your language and check that the channels listed are enabled.
- Now select each language which you do not speak, and change the option for each one to Disabled.
- Press the OK button at the bottom once you’re done.
Other Add-ons for International TV Watchers
If you love to watch TV from countries other than the US, then there are even more Kodi add-ons which can help you find this content. We recommend that you check out the following add-ons for great international viewing:
- iPlayer WWW add-on for Kodi, for watching the British TV channels from the BBC
- UK Turk Playlists add-on for Kodi, which includes options for watching Turkish TV and movies
- Kodi Live TV add-on for Kodi, which has content in Italian, French, German, Spanish, Portuguese, Russian, Turkish, Romanian, Greek, and Polish
- Made in Canada IPTV add-on for Kodi, which hosts Canadian channels in both English and French as well as content from the US and UK
Don't miss this great deal
