How To Add Items To The Fstab File In Linux
Unlike the Windows operating system, hard drives not associated with the system don’t mount automatically. This forces users to have to open the file manager, and manually mount each drive and partition each time their PC starts up. This is very annoying but you can add items to the fstab file in Linux and fix it.
SPOILER ALERT: Scroll down and watch the video tutorial at the end of this article.
Backup File System Tab File
Modifying the file system tab file is very dangerous. If you don’t know what you’re doing, or one letter is out of place, disaster can strike. That’s why it’s important to make a complete backup BEFORE doing anything within this guide. We also suggest uploading this backup to your Dropbox or Google Drive etc as a fail safe, in case you can’t access the file when you need it (for some reason).
To backup the file, open a terminal window and make a new folder:
mkdir /home/username/system-backups
Then, gain a root shell. This is done with the sudo -s command.
sudo -s
With root, enter the /etc/ directory, and run:
cd /etc/
cp fstab /home/username/system-backups
Then, rename the fstab file as a .bak, with:
mv fstab fstab.bak
Restoring The Fstab backup
Download the backup of the Fstab.bak file from your cloud storage and place it in the system-backups folder, or (if the file is still there), use the cd command and go to /home/username/system-backups folder.
cd ~/system-backups
Gain root to make entering root commands easier, with sudo -s, then do:
mv fstab.bak /etc/
Delete the broken Fstab file in /etc/ with:
cd /etc/

rm fstab
Restore the backup, with:
mv fstab.bak fstab
Understanding What Fstab Does
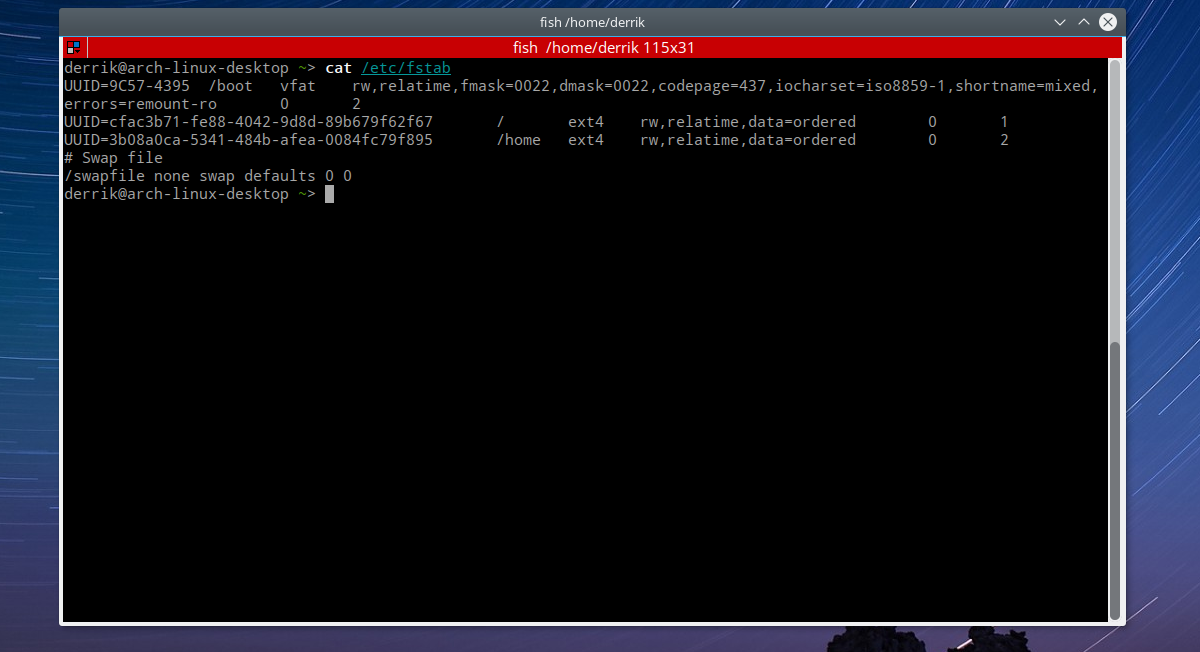
Fstab stands for “file system tab”. It tells the operating system exactly what partitions on the system should be used for, where they should mount, if they should be cleaned at startup, what the file system format is, and everything file system related. During an installation on Linux, this file is usually generated automatically, and normal users will most likely never interact with it.
That said, if you’re looking to set up special, custom mounts for individual drives on your Linux PC, the Fstab is the best way to do it. Users that avoid tinkering with this file often have to deal with the pain of manually mounting hard drives in the terminal/file manager every time their PC boots.
Add Items To Fstab
Adding items to the file system tab is an easy, but nerve wracking process. This is because any miss-step may cause a breakage. As a result, we’ll be going over two ways of adding drives. We’ll go over both the UUID method, and the block device method.
Block Device Method
The block device is the simplest method for specifying partitions in the file system tab, but it’s also the least safe. This is because the user is specifying the block device of a hard drive on the system. Contrary to what some newbie Linux users think, block devices do not always stay the same. A block device can change, depending on what SATA port it is plugged into, and any change in hard drive order on a PC can seriously break things.
If you’re constantly changing around hard drives on your motherboard (for whatever reason), DO NOT use this method.
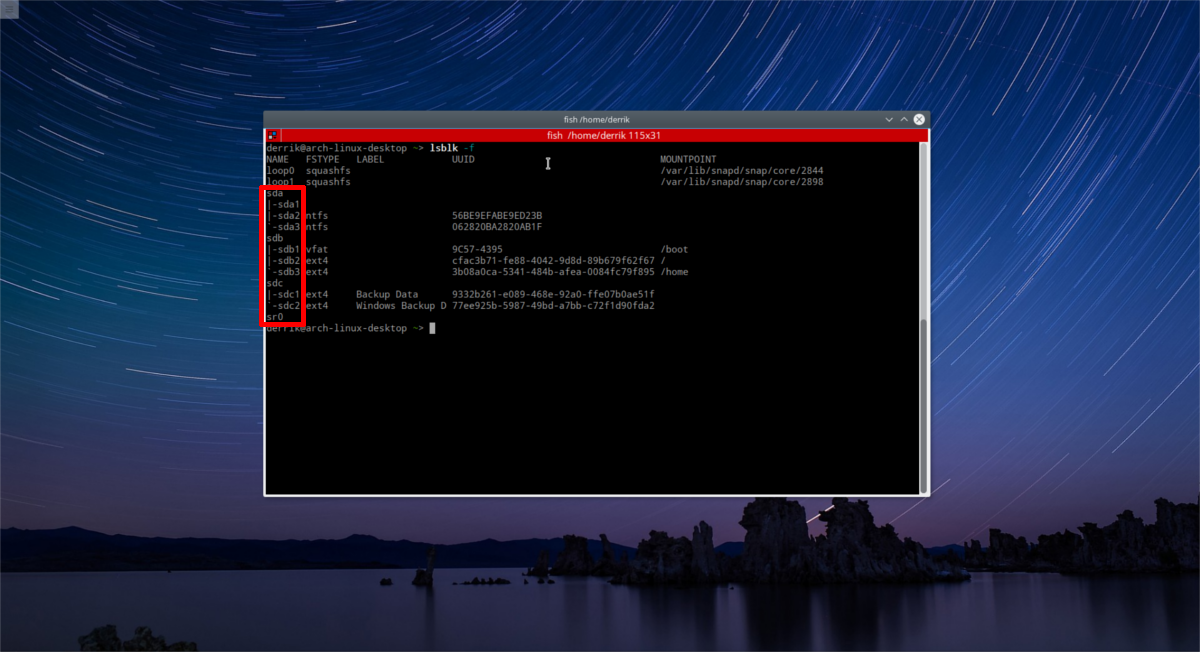
Step 1: Open a terminal, and run the lsblk -f command. This reveals information about all block devices on your PC. Seek out the exact partition and take note of the label.

For example, to add the first partition of my third hard drive, I would need:
/dev/sdc ,<- SDC, in this case stands for the entire hard drive.
/dev/sdc1 <- stands for partition 1 on /dev/sdc.
Step 2: in the terminal, make a folder on your file system where you’d like to mount the partition. In this example, we’ll mount the partition in ~/.
mkdir ~/Storage
Step 3: Gain root with sudo -s, and then enter: nano /etc/fstab to edit the file system tab.
In the configuration file, users need to specify everything about where the drive mounts. Here’s an example:
/dev/sdc1 /home/username/Storage ext4 defaults 0 3
Think of this like a sentence, or a formula. Here’s how it works. First, specify the block device partition:
/dev/sdc1
Next, tell the system what the file system type is (lsblk should tell you this information):
ext4
Third, tell the system what options and attributes this mount should have. In my case, I have “defaults”. Want more complex stuff? Look into your Linux distribution’s manual or wiki under “fstab”.
defaults
Fourth, specify the dump and fsck order. As almost nobody uses the “dump” feature, place a 0 and then hit the space bar. Then, specify the order in which this mount should be cleaned. What does this mean? At startup, the FSCK checking tool clears all errors on hard drives to prevent problems. In the file system tab, the order goes: 1 (root), 2 (home), then everything else.
Given that this is the third thing the system will mount, enter a 3. The result is:
0 3
This gives us our mount line: /dev/sdc1 /home/username/Storage ext4 defaults 0 3
When you’ve written this line in Fstab, move the cursor above it and press “enter” to create a space. Press # to write a comment. For example:

# This is my 1 TB hard drive which mounts to /home/username/Storage

/dev/sdc1 /home/username/Storage ext4 defaults 0 3
When finished, press CTRL + O to save. Reboot the system. When you log back in, your hard drive will be mounted correctly.
UUID Method
Mounting partitions in fstab is much safer with the UUID method. This is because unless manually changed, a UUID stays the same (unlike block device labels). Here’s how to mount a partition UUID style.
Note: the instructions for this method are identical (minus one step) to the Block Device Method. Go back to that section of the article if you get lost.
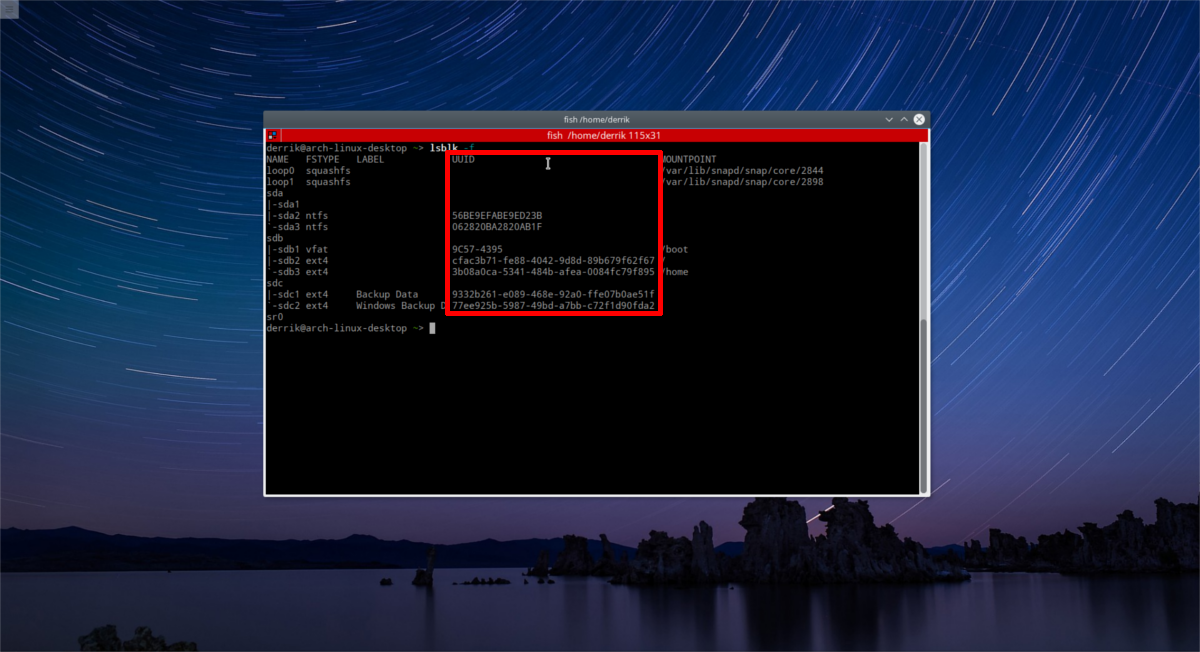
Step 1: in a terminal, use lsblk -f

The -f switch shows more information than just lsblk on it’s own (such as file system formats and etc). Look for UUID. Follow the block device ID to the hard drive partition you wish to mount, and copy the UUID number next to it.
Step 2: gain root in a terminal, with sudo -s and open the fstab file:
sudo -s
nano /etc/fstab
Step 3: write out your mount line. For example, a UUID mount line should look similar to this:
# This is my 1 TB hard drive which mounts to /home/username/Storage

UUID=9332b261-e089-468e-92a0-ffe07b0ae51f  /home/username/Storage ext4 defaults 0 3
When done, save the fstab file with CTRL + O, then reboot your PC.
Conclusion
Though editing the file system tab on Linux may seem scary, it’s very much worth it, as it makes lets you mount different hard drive partitions automatically. A few tools on Linux exist to make this process much simpler, but there’s a drawback: by using an automatic tool users don’t learn anything. By learning everything there is to know about fstab, it’ll be easy to fix problems down the road when they arise.


From `man fstab`:
“`
The root filesystem should be specified with a fs_passno of 1. Other filesystems should have a fs_passno of 2.
“`
Using 3 is wrong.