How To Back Up Your Linux Installation
For new Linux users, it can be a bit daunting to back up your Linux installation. Many articles go over setting up complicated command-line based systems, persuade users to purchase expensive cloud storage, or outright tell users to just get more hard drive space. There is an easier way: Gnome Disk Utility.
SPOILER ALERT: Scroll down and watch the video tutorial at the end of this article.
Gnome disks is a part of the Gnome desktop environment. With this tool, users can create raw backup images of hard drives, individual partitions, USB devices, and even SD cards. Additionally, it is possible to test hard drives with a S.M.A.R.T. test. This is great because it’ll let you know when a drive is about to fail. It also displays temperature readouts too. This information is good and makes it so users are more likely to want to backup their data. You can use it to back up your Linux installation without jumping through hoops.
Installing Gnome Disks
Gnome Disks is probably already installed if Gnome is on your Linux desktop, as it is one of the most used hard drive monitoring and backup tools for Linux. If not, installing it is pretty easy. Open the Gnome Software store, search for “Disk Utility”, and install it. Alternatively, install it with a command inside a terminal window:
Arch Linux
sudo pacman -S gnome-disk-utility
Ubuntu
sudo apt install gnome-disk-utility
Debian
sudo apt-install gnome-disk-utility
Fedora
sudo dnf install gnome-disk-utility
OpenSUSE
sudo zypper install gnome-disk-utility
If your Linux distribution is not listed here, do not worry. Gnome is very, very popular. Think of the way that you normally install software to your favorite Linux distribution, and search for “gnome-disk-utility”. This can be done via the command line and the package manager, or via an app store that your operating system comes with.
Backing Up Hard Drives
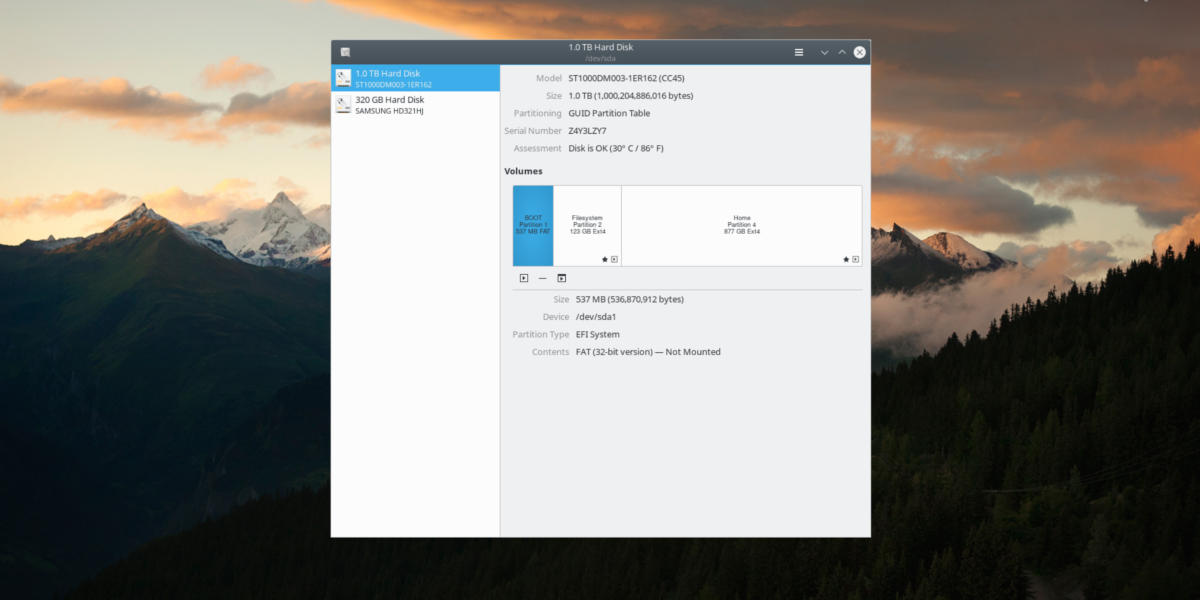
Open the disk utilit by searching through your applications for “disks”. When it’s open, notice that there is a list of all connected data devices. To manage individual hard drives, select one from the list. Keep in mind that Gnome disks will allow the user to work with all kinds of data storage devices. This means if you have data to back up, but it’s not a PC hard drive, this method works too. Gnome disks is excellent for backing up all sorts of devices.
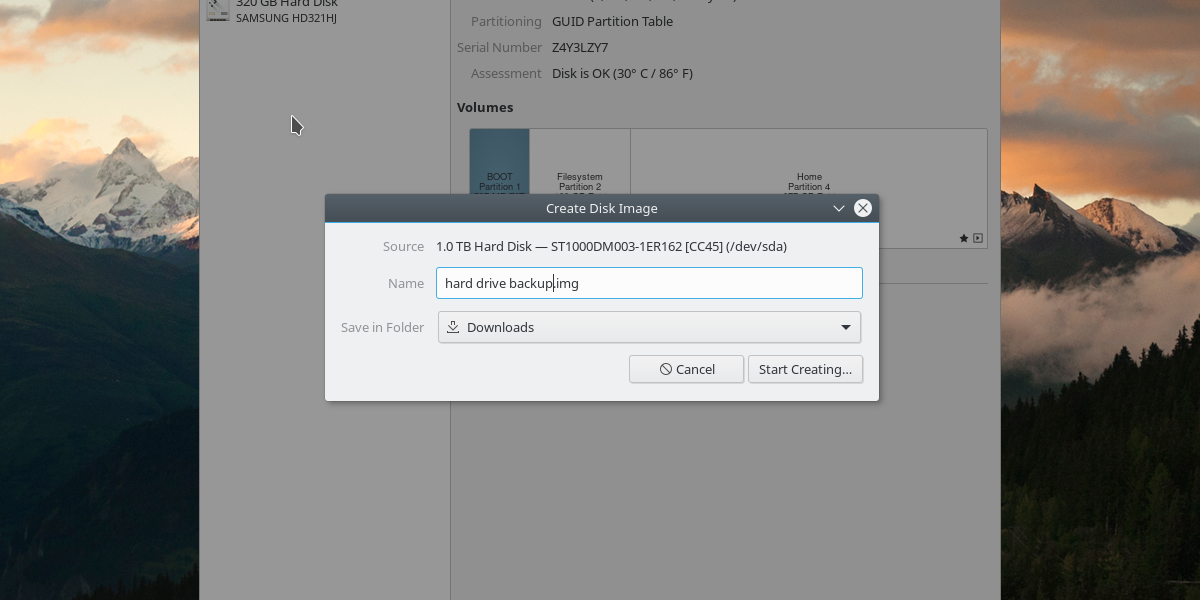
With the hard drive you want to back up selected, find the “hamburger” menu (the menu next to the minimize/maximize window controls) and click on it. Find the option that says “create disk image” and click it. This tells Gnome Disk Utility to make a raw .IMG file of the entire hard drive. This includes Bootloaders, partitions, data, and everything else. It’s essentially a snapshot of your computer.
Be sure to connect a second hard drive to save this file, as the disk image will be very large and will not save if there isn’t enough space. When the disk image file has saved, Gnome disks will start backing up the hard drive. This will take some time. Be patient.
Backing Up Partitions
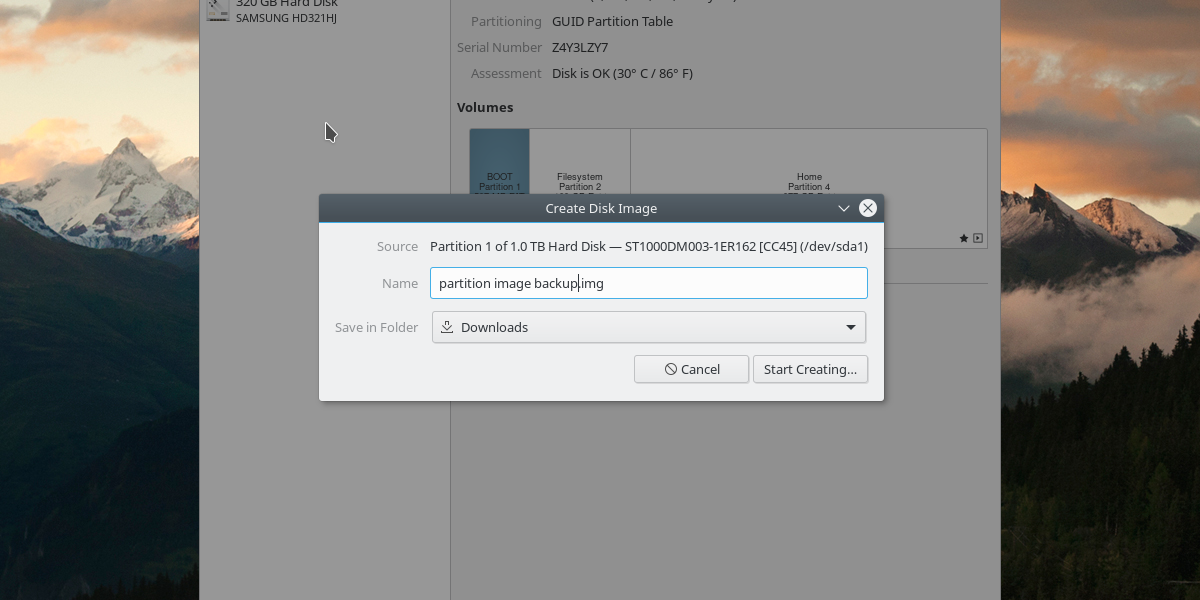
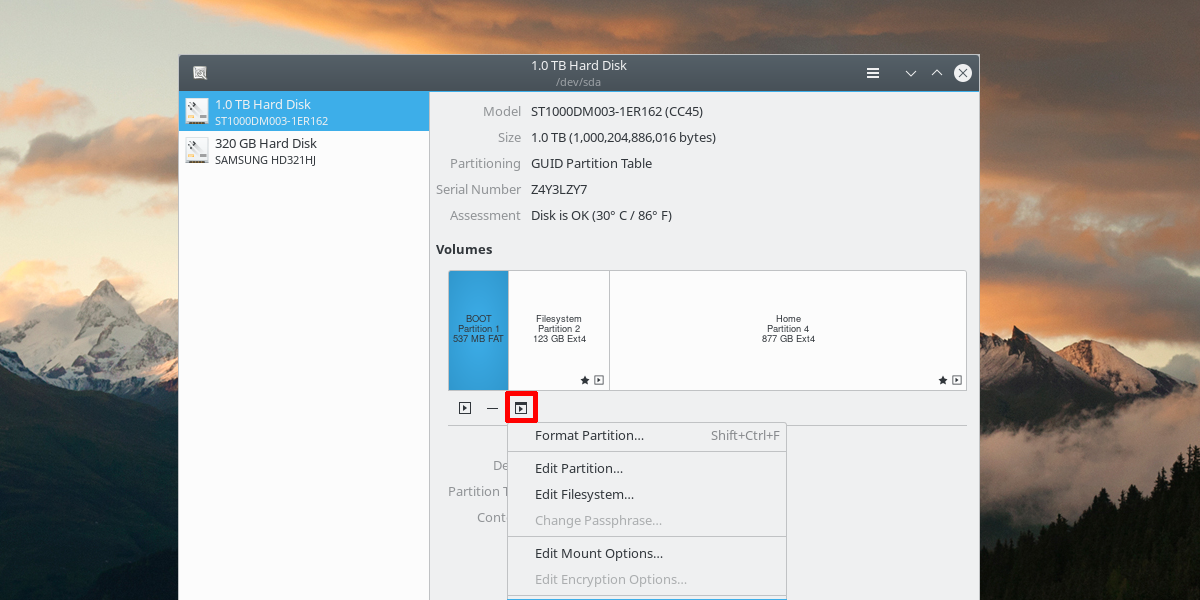
The Gnome Disk Utility tool allows users to get real deep when it comes to backing up their data. The utility can back up your Linux installation and make raw disk image backups of individual partitions. First, find the hard drive where you want to back up the data in the list and click it. Then, click the individual partition to back up in the graphical overview of the hard drive.
Highlight a partition, and then click on the “additional partition options” button. From here, click the option in the menu that says “Create Partition Image”. This will prompt the user to find a place to save the individual partition image.
Note: though partitions are often smaller than backing up an entire hard drive to a disk image, it’s still a good idea to connect an external hard drive, or USB flash drive to save the disk image for safe keeping.
With the partition image saved, Gnome Disk Utility starts backing up.
Restoring Hard Drives
To restore a hard drive image, open Gnome Disks and select the hard drive from the list. Click the hamburger menu, and select the option to “Restore Disk Image”. Navigate to where the hard drive image was saved during the backup process, and select it to start the restoration process. Much like backing up, restoring it will take a bit of time.
Restoring Partitions
In Gnome Disks, find and select the hard drive that you want to restore data from in the list. Then click the “additional partition options” button. Inside this menu, select “Restore Partition” button. This will open a menu, asking to load the partition disk image. Open it to start the restoration process.
Conclusion
There are many ways to backup a Linux installation. There are file-system snapshots, live-disk suites like Clonezilla, and even cloud storage solutions. All of these are great, but tedious, and not nearly as convenient as just making a direct backup of a partition or hard drive with the Gnome Disk tool. Hopefully, with the help of this tutorial, you’ll have realized just how easy it is to back up your Linux installation.

This info above doesn’t tell you that must be run as root or sudo and must dismount drive first, so doesn’t seem like you can do it for your not drive unless you not from something else.
A disk image tool is not a back up tool, though: correct me if I am wrong, but if you delete something today after doing your disk image, you won’t be able to restore it in two days’ time if you do a “backup” tomorrow… because the image saved tomorrow will be rewritten over the disk image that had that file instead (assuming you don’t have infinite space).
It’s at this point just better to open as root your file manager, and copy / in another disk, if you want to do it locally. And if you do it often, just merge the two folders and skip the same files. You may find yourself with more files that you want, because they go increasingly adding up, but at least nothing goes lost.
It is a backup tool. You’re creating an entire disk image and cloning a drive, or partition. The best part of this is that everything, including keeping files. And I realize it is tedious, but you really only need one image.
I often make images of my drives, and then save them off on a large hard drive. That way, if something goes wrong, I just delete everything on my hard drive, and restore the image. Everything is back to normal.
I realize this solution isn’t the be-all-end-all of backing up on Linux, but it’s very easy, and operates a lot like a popular Linux-based backup tool: Clonezilla. If you’re looking for another backup solution on Linux, I’ll be sure to cover some other solutions in the future!
Thank you for the feedback, Luca!
It is a backup tool, it backs up the hard drive creating an image.
i have 4 linux laptops backed up onto a 4 tb drive.
i also used clonezilla but gnome disk utility is much easier and reliable
rsync -xav / /another_mountpoint