How to check the weather in Gnome Shell
In recent updates to Gnome Shell, they’ve added a built-in weather tracker, known as Gnome Weather. This tracker allows users to quickly check the temperature and weather conditions directly from the notification center or the useful Gnome Weather program. This new tracker needs to access your location to display weather so if you want to check the weather in Gnome Shell, you need to enable location data for it.
Enable location
The Gnome desktop cannot automatically detect the location of the user to tell the weather. Instead, if you’d like to check the forecast for your current from the comfort of Gnome Shell, you must configure it manually. Follow the step-by-step instructions below to set up the weather checker.
Step 1: Minimize all open programs on the Gnome Shell desktop. Then, find the date/time bar on the Gnome panel and click it with the mouse to reveal the notification tray.
Step 2: After revealing the notification tray in the Gnome panel, look to the bottom right section of it for “Weather.”
Step 3: In the “Weather” area in the Gnome notification tray, select the button that says “Select a location” with the mouse. Selecting it will open up the Gnome weather application on the desktop.
Step 4: Inside of the Gnome Weather application on the desktop, you won’t see anything because there isn’t a location set. You must set one. To do this, click on the “Places” search box.
Step 5: In the “Places” search box, write in the name of the city you live in. If you live in a small town, you may find that it does not show up in Gnome Weather. Do not worry! Type in the closest big city to your location.
For example, if you live in Pontiac, Michigan, USA, but it does not show up, you may want to type in Detroit, Michigan, USA instead, as it is nearby.

After successfully finding a location near you, Gnome Weather will display the forecast in the app on the desktop. Additionally, if you close the app, you will be able to check the weather by clicking on the date/time panel area.
Automatic location
Gnome Weather has a feature that can automatically detect your location. If you’re having trouble searching for a weather location near you, click “Places” and check the “Automatic location” button. It’ll do its best to find the closest location to determine the weather forecast.
Alternative – Open Weather extension
The Gnome Shell built-in weather feature wasn’t always a thing. For a long time, Gnome didn’t give users the ability to tell the current temperature for their area simply by checking the notification area. Instead, users needed to install the Open Weather extension.
With the Open Weather extension, you are able to see a fully detailed forecast of your area right in the Gnome Shell panel. You can also see daily high temps, lows, wind speed, and so much more. It really is an impressive piece of software packed into a humble Gnome Shell extension!
To start out the installation of OpenWeather, your web browser must have the Gnome Shell integrations. Go to the Gnome extension website and allow the plugin. After that, read the message on the page to install it. Alternatively, follow our in-depth guide on how to enable extension support on Firefox, Chromium, and Google Chrome browsers.
After enabling Gnome extensions support in your browser, go to the Open Weather extension page, and click the “off” slider to “on” to install the extension. From there, it should instantly pop up on the Gnome panel.
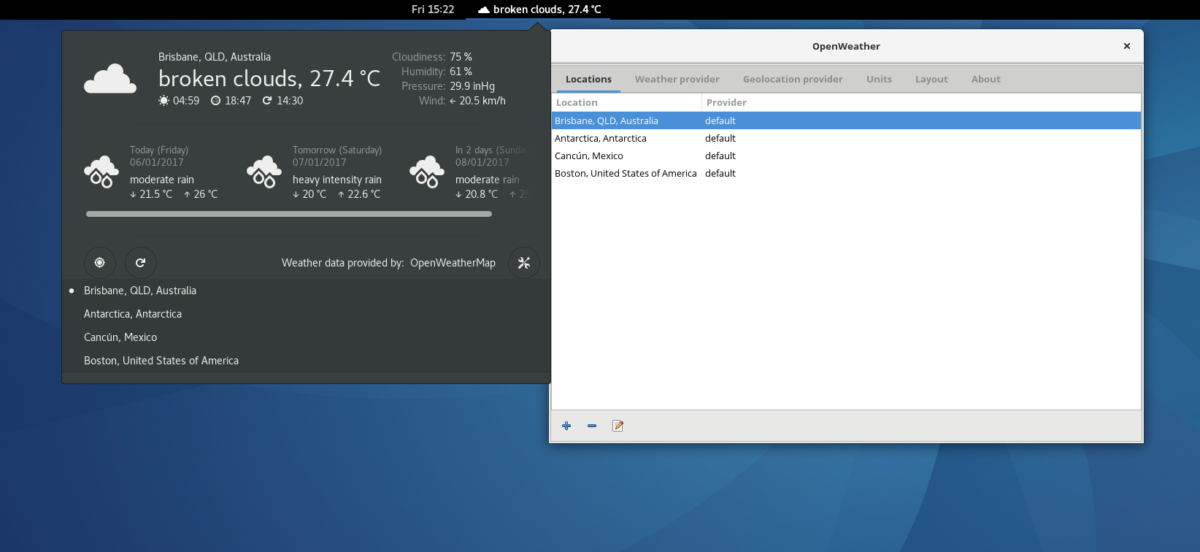
From there, click on the extension to configure it for the location you live in.
Alternative – Terminal weather checker
If you’re a Gnome Shell user and you’re not a fan of checking the weather through the built-in weather checker feature, the Gnome Weather application, or any of the extensions we’ve covered, you’ll be happy to know that you can do it in the Linux terminal via wttr.in.
The wttr.in web page details a 3-day forecast directly in the terminal via the Curl application. To view it on your system, open up a terminal window by pressing Ctrl + Alt + T or Ctrl + Shift + T on the keyboard. Then, follow the instructions below to learn how to install the Curl program.
Ubuntu
sudo apt install curl
Debian
sudo apt-get install curl
Arch Linux
sudo pacman -S curl
Fedora
sudo dnf install curl
OpenSUSE
sudo zypper install curl
Generic Linux
Curl is available on virtually every Linux operating system out there. To install the Curl application, check your package manager for “curl” and install it the way you typically install software on the system.
After loading up the Curl application, you can check the 3-day forecast for your area by running the command below.

curl wttr.in
