How to use the new Gnome Shell remote desktop feature
Gnome 42 has a fantastic new feature that allows Linux users to share their desktop with Microsoft’s Remote Desktop Protocol remotely. In this guide, we’ll show you how you can use this great new feature.
Upgrading to Gnome 42
Gnome Shell now can host a remote desktop session as quickly as Windows or Mac. However, you’ll need to upgrade to Gnome 42 to enjoy this feature. Here’s how you can upgrade.
Ubuntu
If you’re on Ubuntu, you’ll be able to quickly get your hands on the new Gnome 42 by upgrading your system to Ubuntu 22.04 LTS. For more information on how you can upgrade your Ubuntu PC to 22.04 LTS, please follow our upgrade guide.
Debian
Sadly, Gnome 42 isn’t in the stable version of Debian 11, and it won’t be for quite a long time. So, if you wish to try out Gnome 42, consider installing the new Ubuntu instead. Or, switching to Debian Sid.
Arch Linux
Gnome 42 has been out for a while, so if you’re on Arch Linux, you’re already using it. However, if you aren’t, now is an excellent time to install the latest Arch Linux software updates to try out Gnome 42.
Fedora
Fedora 36 comes with Gnome 42. If you’re not using 42 yet, you’ll need to upgrade to Fedora 36. You can upgrade to Fedora 36 by following our upgrade guide.
OpenSUSE
If you’re on OpenSUSE, you’ll be able to use Gnome 42, but only if you switch to OpenSUSE Tumbleweed. This is because OpenSUSE LEAP does not ship the latest Gnome.
Enabling the new feature
Enabling the new Gnome Remote Desktop feature is done in the settings area. Start by pressing the Win button on the keyboard to turn it on. Pressing this button will open up the Gnome “Activities” area.
Inside the Gnome “Activities” area, type in “Settings” and open up the “Settings” app. Once it is open, find the left-hand sidebar and click on the “Sharing” button to access the sharing area in Gnome.
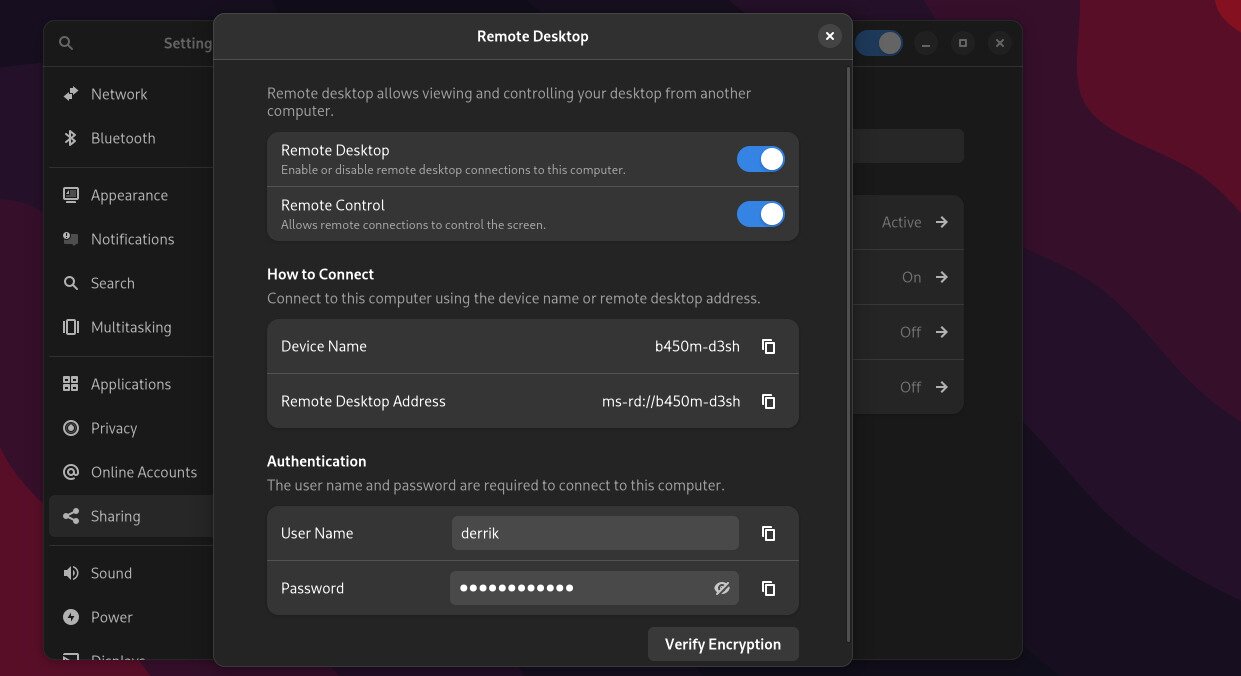
Inside the “Sharing” area of Gnome, find the “Remote Desktop” option, and click on it with the mouse. A pop-up window will appear when selecting the “Remote Desktop” option. This pop-up window has all Gnome Remote Desktop settings.
In the Remote Desktop window, click the slider next to “Remote Desktop.” Then, once “Remote Desktop” is enabled, click on the slider next to “Remote Control.” Turning on the “Remote Control” setting will enable remote connections to the Gnome desktop over RDP.
Once the Remote Desktop and Remote Control features are enabled, your Gnome desktop will be open for remote connections via the RDP protocol.
Connecting to your Gnome desktop from any PC
Now that Remote Desktop is set up on the Gnome desktop, it is time to connect. Connecting to your Gnome desktop remotely requires a client that supports Microsoft’s Remote Desktop Protocol.
On Linux, users can use Gnome Connections. On Windows and Mac OS, the Microsoft RDP client is preferred. Here’s how to set up a connection to Gnome over RDP.
Linux
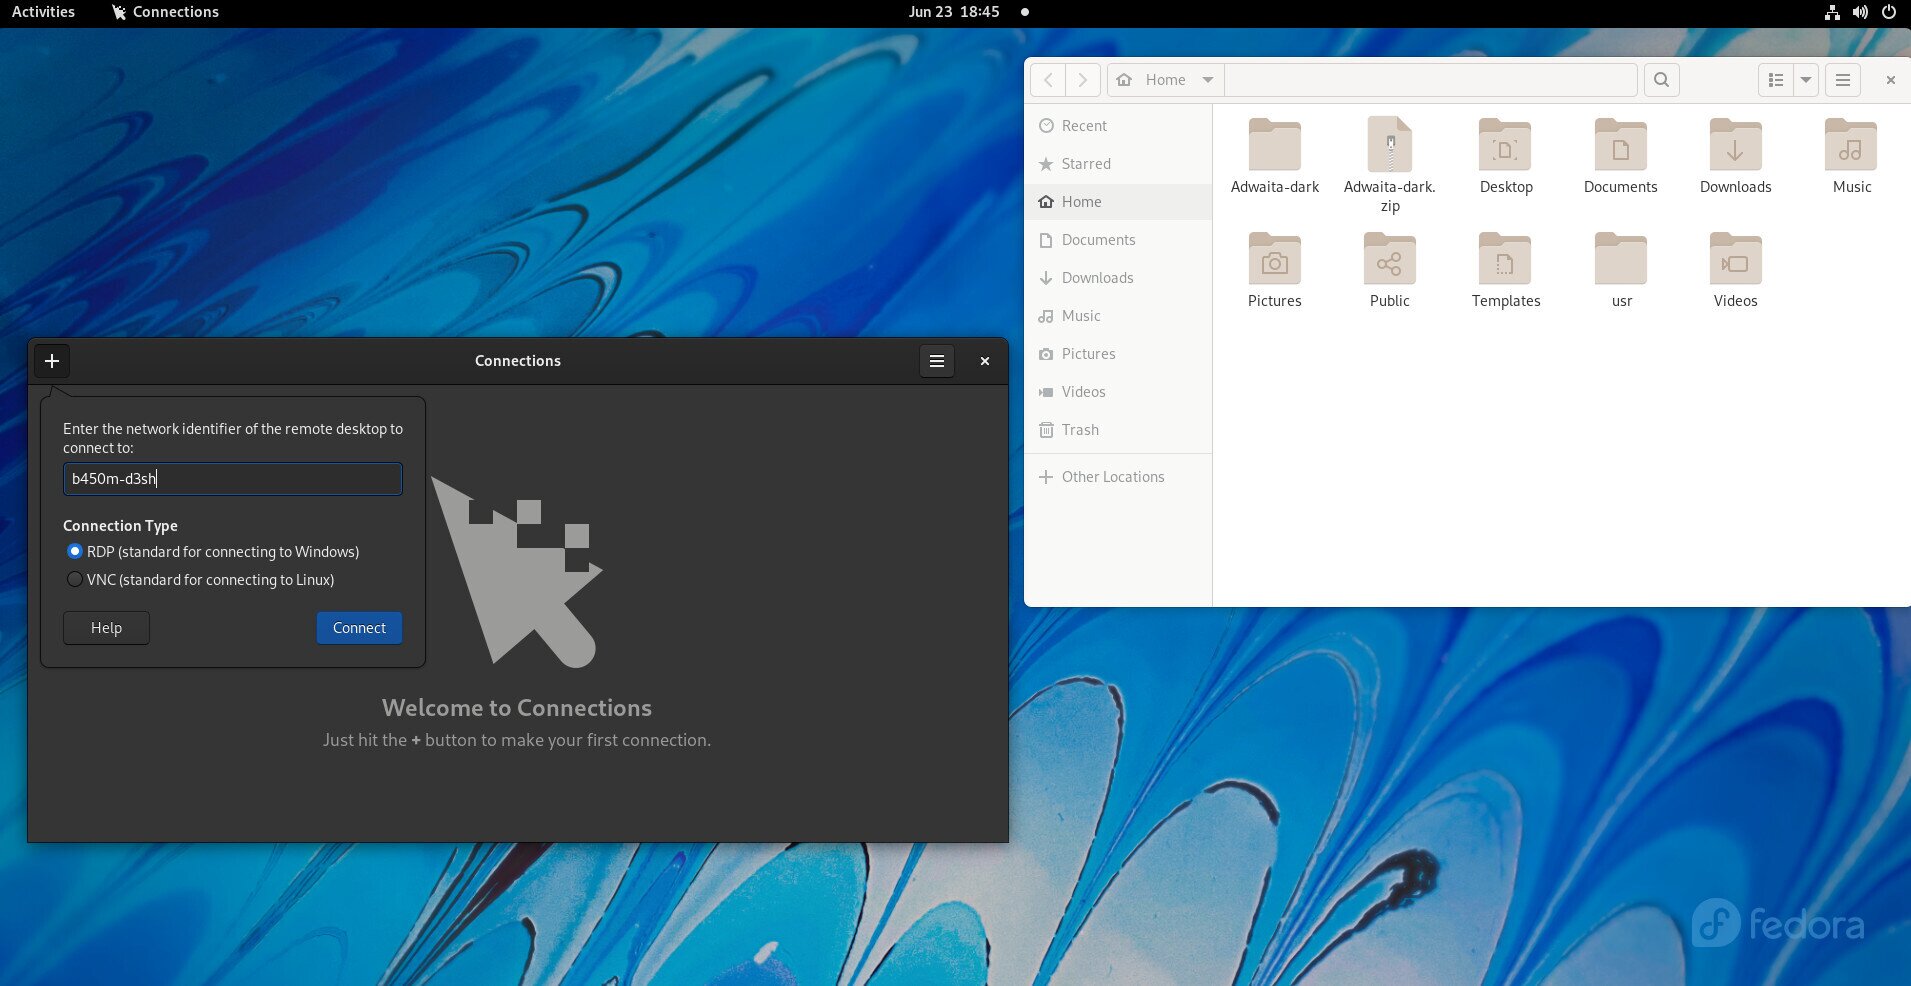
The “Connections” (AKA Gnome Connections) app should be pre-installed on most Linux operating systems. However, you will need to install it manually if it is not. Here’s how to set up the app.
First, open up a terminal window on the Linux desktop by pressing Ctrl + Alt + T on the keyboard. Or, search for “Terminal” in the app menu and launch it that way. Once the terminal window is open, install Gnome connections with the instructions below.
Ubuntu
To install Gnome Connections on Ubuntu, use the apt install command.
sudo apt install gnome-connections
Debian
To set up Gnome Connections in Debian, install the Flatpak runtime and enter the commands below.
flatpak remote-add --if-not-exists flathub https://flathub.org/repo/flathub.flatpakrepo

flatpak install flathub org.gnome.Connections
Arch Linux
To install Gnome Connections on Arch Linux, run the following pacman -S command.
sudo pacman -S gnome-connections
Fedora
On Fedora, you can install Gnome Connections with the following dnf install command.
sudo dnf install gnome-connections
OpenSUSE
To install Gnome Connections on OpenSUSE Linux, set up the Flatpak runtime and enter the two commands below.
flatpak remote-add --if-not-exists flathub https://flathub.org/repo/flathub.flatpakrepo

flatpak install flathub org.gnome.Connections
Windows
Windows comes pre-installed with an RDP client. If you do not know how to use it, follow the official Microsoft guide on RDP.
MacOS
Microsoft has an RDP client for Linux. If you want to install it, follow the official Microsoft guide on Mac OS RDP.
Once you’ve set up your RDP client, copy the connection details from the “Sharing” section of the Gnome desktop. Then, go to Gnome Connections, and click on the “+” button.
After selecting the “+” button, type in the connection address. However, do not use ms-rd://, but rdp:// instead. Click the “Connect” button. Once you select “Connect,” you’ll need to enter your RDP username and password (provided in the “Sharing” area in Gnome).
You’ll have access to the Gnome desktop when you enter your username and password.
MacOS/Windows RDP
In this guide, we focused mainly on Linux and Gnome Connections. However, if you use MacOS or Windows RDP, you’ll be able to connect using the Gnome Remote Desktop login information provided in the “Sharing” section.
