How to securely erase a USB flash drive on Linux
Have a USB flash drive with sensitive files on it? Do you plan on giving it away to a family member or friend, but want to securely erase it first? We can help! Follow along and we’ll show you how to securely erase a USB flash drive on Linux.
Option 1 – Erase USB flash drive with KDE Partition Manager
If you’re a beginner Linux user, the best way to erase a USB flash drive securely is with the KDE Partition Manager. Why? It has a built-in “Shred” function that can safely delete any partition on any device, including USB ones.
To start the process of erasing your USB flash drive securely, the KDE Partition Manager must be installed. Open up a terminal window on your Linux PC by pressing Ctrl + Alt + T or Ctrl + Shift + T on the keyboard. Then, follow command-line instructions outlined below that correspond to your Linux distribution.
Ubuntu
sudo apt install partitionmanager
Debian
sudo apt-get install partitionmanager
Arch Linux
sudo pacman -S partitionmanager
Fedora
sudo dnf install kde-partitionmanager
OpenSUSE
The KDE Partition Manager app is available to all OpenSUSE Linux users running 15.1 LEAP or Tumbleweed. If you are still using 15.0 LEAP, you must upgrade, or KDE Partition Manager will not install from the software repositories.
sudo zypper install partitionmanager
Once the KDE Partition Manager is installed on your Linux PC, follow the step-by-step instructions below to learn how to erase your USB flash drive securely.
Step 1: Launch the KDE Partition Manager on your Linux desktop. To do this, open up the app menu by pressing Win. Then, type “Partition Manager” and launch it.
Step 2: When you launch the KDE Partition Manager, a password box will appear. Enter the password to your user account, as root privileges are required to use the program.
Step 3: With KDE Partition Manager open, plug in the USB flash drive you are trying to securely erase into the USB port (if it is not plugged in already).
Step 4: Press the F5 key on the keyboard to refresh the KDE Partition Manager. Refreshing the app will force it to re-scan your devices, which will allow it to detect the newly plugged in USB flash drive.
Step 5: When the KDE Partition Manager app has successfully detected your USB flash drive, look to the “Devices” column and click on it with the mouse to select it.
Unsure about what device is your USB Flash Drive? Look at the box it comes with (or the device itself) and determine the brand-name of the device. For example, if you have a Sandisk Cruzer Glide, “Sandisk Cruzer Glide” will appear in the device list.
Step 6: Upon selecting the USB Flash drive from the “Devices” list, you will be shown the USB flash drive’s partitions. Select each partition on the device with the mouse and right-click on it to reveal the right-click menu.
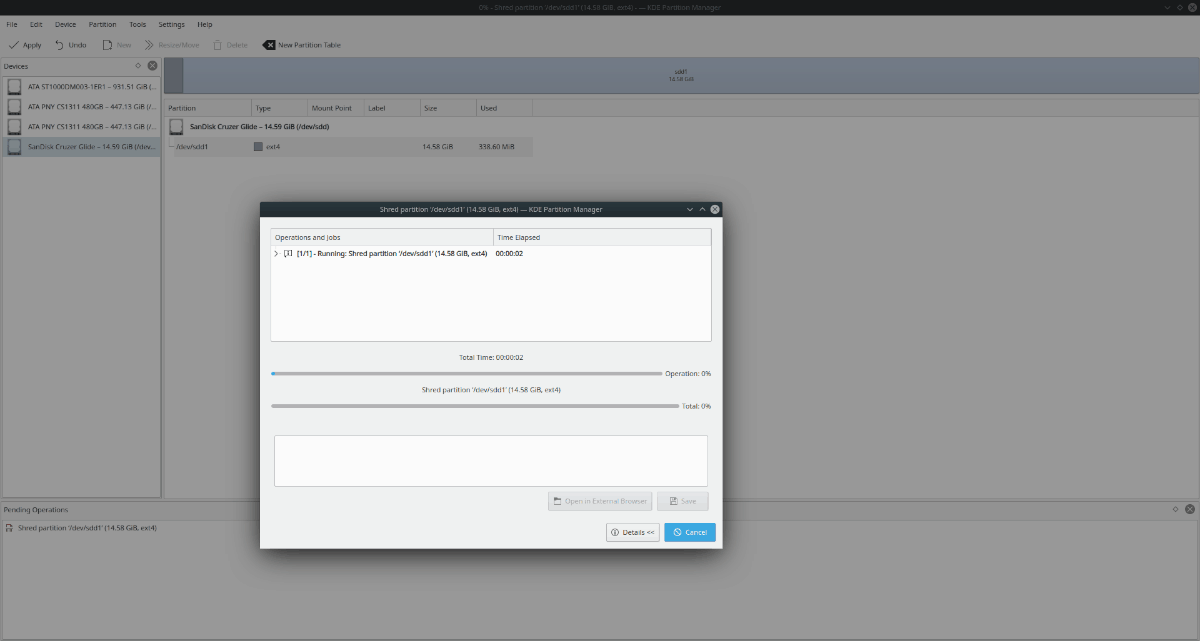
In the right-click menu, locate the “Shred” option, and select it to tell KDE Partition Manager you’d like to shred the partition (AKA erase it securely).
Step 7: Find the “Apply” button at the top-left section of the app and click it. Clicking “Apply” will initiate the shredding process.

Be patient and wait for KDE Partition Manager to erase your USB flash drive securely. When the percentage in the pop-up window “reads 100%”, the process is complete!
Option 2 – Erase USB flash drive in the command-line
Not a fan of using GUI tools like the KDE Partition Manager but still want to erase your USB flash drive securely? Good news! It is possible to securely erase your drive with the Linux command-line.
To start the erasing process, open up a terminal window by pressing Ctrl + Alt + T or Ctrl + Shift + T on the keyboard. Then, once the terminal window is open, plug in the USB flash drive into the USB port and run the lsblk command.
lsblk
Look through the lsblk output and try to find the name of your USB flash drive. The name should be /dev/sdLETTER. For more help finding out your USB flash drive’s ID, follow our guide on how to find hard drive info on Linux, as it can demonstrate how to use the lsblk command.
Once you’ve found the USB flash drive’s name, take note of it and unmount it from the system using the umount command.
Note: /dev/sdLETTER is an example. Your USB flash drive’s name will be different. Be sure to change /dev/sdLETTER in the command example below, or it will not work!
sudo umount /dev/sdLETTER
If the USB flash drive refuses to unmount, run the command with the -l switch.
sudo umount /dev/sdLETTER -l
With the USB flash drive unmounted, use the DD tool to erase it securely. Once again, be sure to change /dev/sdLETTER in the command below to the actual name of your USB flash drive found in the lsblk command output.
sudo sudo dd if=/dev/urandom of=/dev/sdLETTER bs=10M
The DD tool takes a long time, so be patient. When the process is complete, your USB flash drive will be securely erased.

I did Option 2: Command Line – but would ask that you provide a ScrnCap of ENDING MESSAGE so one knows what to expect when the Secure File Deletion/Overwrite is finished.