How To Password Protect Spreadsheets In Google Drive
Passwords have protected our computers, phones, and files for a long time. Just about any device can be locked with a password, and files. folders, and drives, can be encrypted with no hassle using tools built for the purpose. What’s less common is a way to encrypt files selectively in the cloud. You can always encrypt them before you upload them to services like Dropbox or Box, etc but for services like Google Drive that allow you to view files online, the encrypted files become inaccessible. This method details how you can password-protect a spreadsheet you’ve uploaded to Google Drive, while retaining the ability decrypt it right from your browser in order to view or edit it.
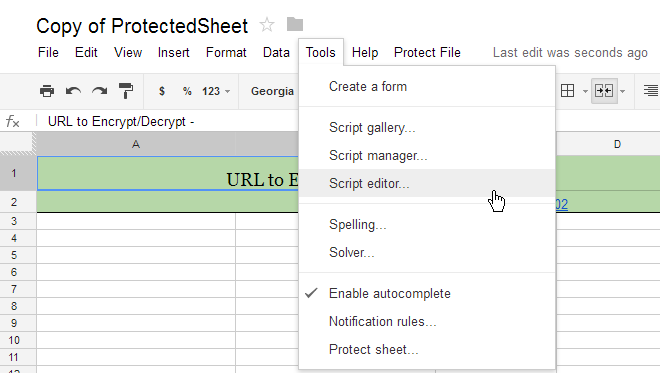
Start by creating a copy of this spreadsheet in your Google Drive. The sheet is what you will use to add the data you want to protect. A limitation of this method is that doesn’t allow you to password-protect an existing file; you will always need to create a copy of the spreadsheet linked above and then enter your data into it. It’s not exactly an ideal solution, but it works. The steps that follow here need only be performed once. After you’ve copied the spreadsheet, go to Tools > Script editor.
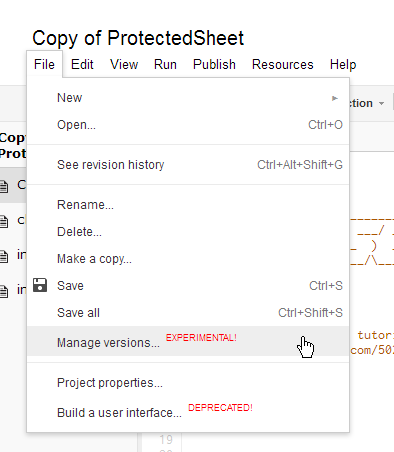
This will open a script in a new tab. Go to File > Manage Versions. You don’t have to enter anything in the options that follow; just wiz through it all. Don’t close the script though. Once the version has been created, go to Publish > Deploy as web app.
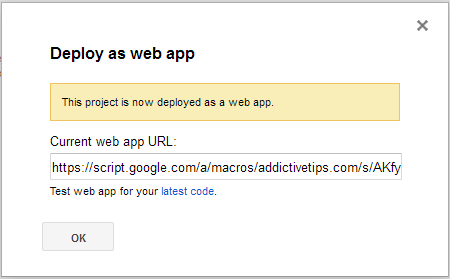
Click ‘Deploy when the ‘Deploy as web app’ popup appears; you need not make any changes here either. You will receive a confirmation message that the app has been deployed.
Return to the spreadsheet you copied, and you’ll see that a ‘Protect File’ option has been added to the menu. Click it, select ‘Initialize’ and grant it permission to run when it prompts you. You can now start editing the spreadsheet. Add the data that you want to protect, go to the Protect File menuu, and select ‘Encrypt File’. Give the script permission to run. 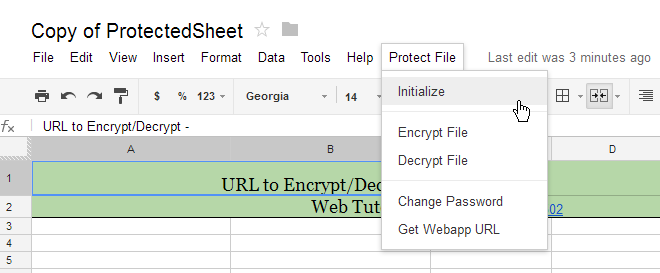
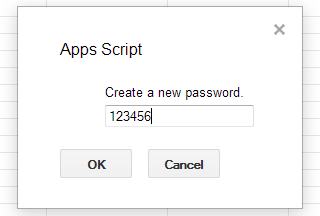
The first time you encrypt a file, it will ask you enter a password. Once the script has worked its magic, the text entered in the spreadsheet will scramble. You can decrypt it by going to Protect File > Decrypt File and entering your password. (On a side note, 123456 is not a secure password, so use a more suitable one.)
So long as you’re viewing the files in your desktop browser, you shouldn’t have any trouble decrypting them. On a smartphone though, things will be a little different. To decrypt the file, click the Encrypt/Decrypt URL given in it. You will be taken to a webpage where you can enter the password in order to unlock your file.

Don’t do it!!
This requires you to give access to all your Google Drive to a third party (the author of this article) when we click on “Deploy”, granting him access to read all your documents!
The information given step-by-step in regards to PROTECTED sheets is excellent and highly informative in an easy way. A big THANK YOU. Only thing is that, I am not able to open/view the proted sheet in my SMART PHONE. Not getting / moving further after clicking on ” Encrypt/Decrypt “. Do not know what’s happening ? Screen is not moving or taking further to a URL position so as to furnish the password, as required. Request you to help and elaborate the position.
Ugh. This doesn’t work for me. When I return to the sheet, no “Protect file” menu item is added. Tried refreshing it, still nothing. Ideas?
How do we decrypt the Google drive file on an ipad?
How can we make our own version of that spreadsheet? If I want the data to be password-protected, there’s a good chance I don’t want to start with your template which maybe will compromise my security…