Easily Remove Unwanted Objects From Photos On Windows Phone With Smartest Eraser
A memorable photo is one snapped with perfect timing to capture the complete essence of a moment. A lot of great photos are ruined by objects or other people who weren’t intended to be there. Perhaps someone was trying to photo-bomb you in the background, or you just wish there was some way that ugly truck had moved away before the picture was taken. Of course you can use Photoshop or other desktop tools to fix these blemishes, but not many bother going through all that trouble if the picture was shot using a phone. If you own a Windows Phone device, Smartest Eraser provides the easiest way of removing unwanted parts of any photo. You also get the option to edit the photos thoroughly, thanks to the zooming and ‘protect’ features offered by the app.


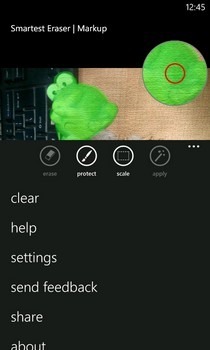
The app displays a step-by-step tutorial when you launch it to acquaint you with the usage. You can also view these tips any time later simply by hitting the ‘help’ button located in the bottom menu. To get started, load a photo from the camera roll or any other album on your device by hitting the picture icon in the middle of the bottom bar. First of all, zoom into the undesired object as much as possible. Smartest Eraser supports the ‘pinch to zoom’ gesture, but you will have to hit the ‘scale’ button before using that.
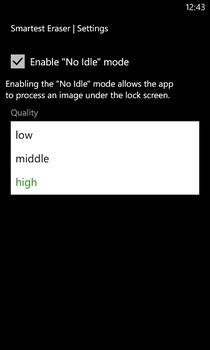
Smartest Eraser has two brushers: ‘erase’ and ‘protect’. You should use protect first, since every part of the photo marked by it is retained in the edited version. However, this doesn’t mean you have to protect the whole photo before erasing its parts, because this brush is designed for use in only the surrounding area of the object being removed, and any entirely untouched parts are not taken out of the picture. An undo button would have been really useful in the app, but editing isn’t too difficult since using erase and protect doesn’t alter the image until you hit the ‘apply’ button. Smartest Eraser does take a bit of time in processing the changes, but you can trade that off by choosing a lower quality level for output images. The app has the ability to continue processing in the background, even when the screen is locked.
Once the processing is complete, you are presented with the option to choose from an expanded or cropped version of the photo that doesn’t contain the erased parts. In our experience, the cropped copy looks better, but result may vary. These output photos can then be saved to the camera roll or shared over Facebook.
Smartest Eraser works on both Windows Phone 7 and Windows Phone 8 devices, and can be downloaded for free by heading to the link provided below.
Download Smartest Eraser For Windows Phone

Thanks a lot for your review of the app. In future I’m going to eliminate this confusing scale button and add the undo button.
I’d like to say that there is no this confusing “scale” button anymore!