How to Fix 0x80240fff Error on Windows 10 Update
Millions of Windows users face error codes on a daily basis. They prevent PCs and laptops from running properly and must get fixed as soon as possible.
0x80240fff is a good example. It’s an error code that plagues users who try to upgrade to Windows 10 from an older edition.
We can all agree that the Windows Update error 0x80240fff can be really annoying. But it’s still possible to repair it without any special computer skills and without resorting to an expert.
How to fix error 0x80240fff on Windows 10
Before you start troubleshooting, you should create a system restore point. It will be a life-saver later if you make any mistakes and need to undo your changes.
If you want to take things a step further, you could run a complete backup. Once you’re ready, check out the following solutions.
1. Run a clean boot
If the 0x80240fff error code was caused by a faulty driver, process, or service, you can run a clean Windows 10 boot. It will start your operating system only with the required software components.
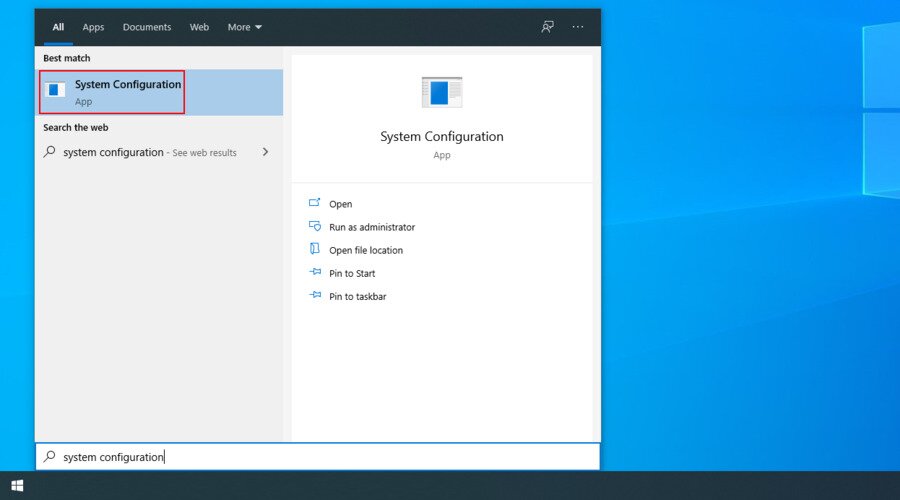
How to clean boot Windows 10:
- Press the Windows key, type system configuration, and open this app

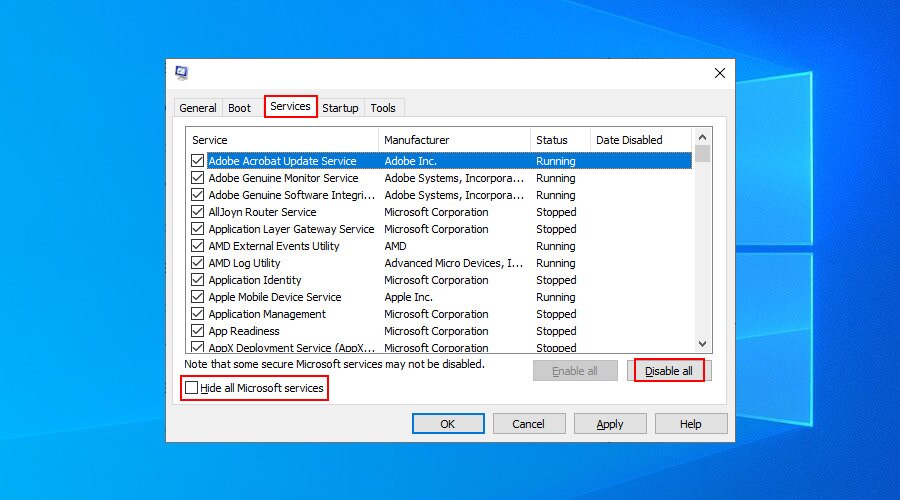
- Select the Services tab, uncheck Hide all Microsoft services, and click Disable All

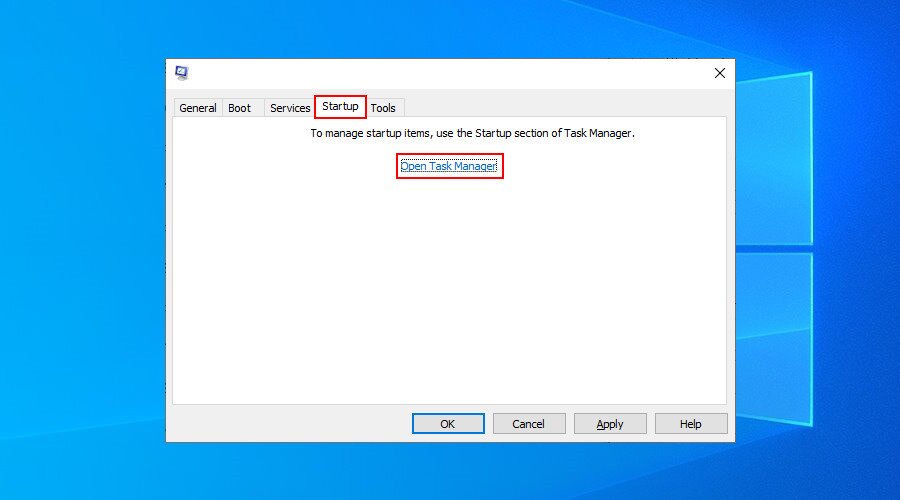
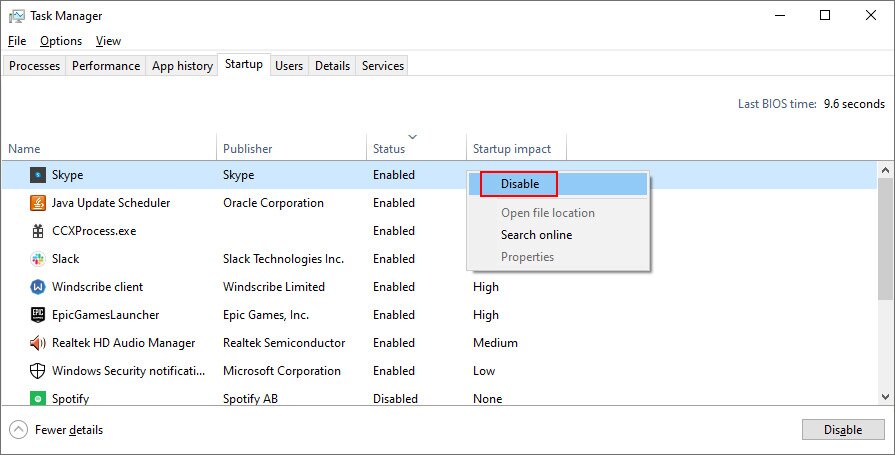
- Go to the Startup tab and click Open Task Manager

- Click Status to sort all services by status (Enabled first)
- Right-click the first process and select Disable

- Do this for all processes with the Enabled status
- Reboot your PC
2. Enable Defer Updates
Windows 10 Pro, Windows 10 Enterprise, Windows 10 Education, and Windows 10 S have a special feature for deferring system updates. Many users claimed they repaired the 0x80240fff error by turning on this option.
Except for security updates, this enabled setting will postpone pending updates by taking into account the deferred time period you specify.
How to enable Defer Updates:
- Access the system settings
- Go to Advanced Options
- Enable Defer updates
On other Windows editions, you can pause updates:
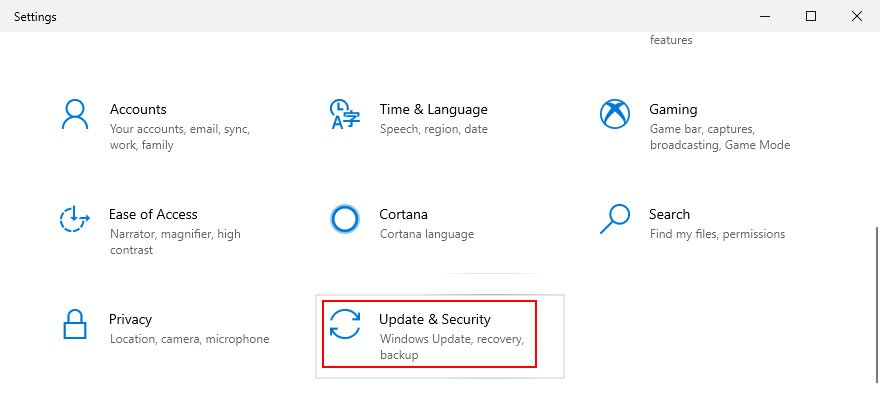
- Right-click the Start button and go to the Settings area

- Go to Update & Security

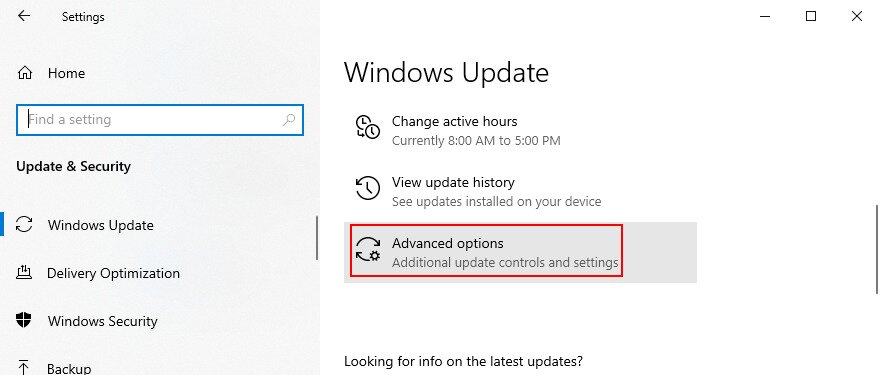
- Click Advanced options

- At Pause updates, click Select date and specify the new date (up to 35 days)

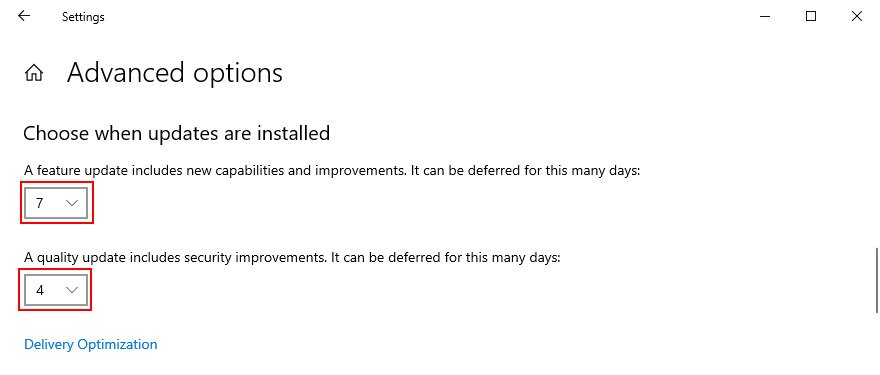
- Scroll down to Choose when updates are installed

- Set the number of days to defer feature and quality updates (separately)


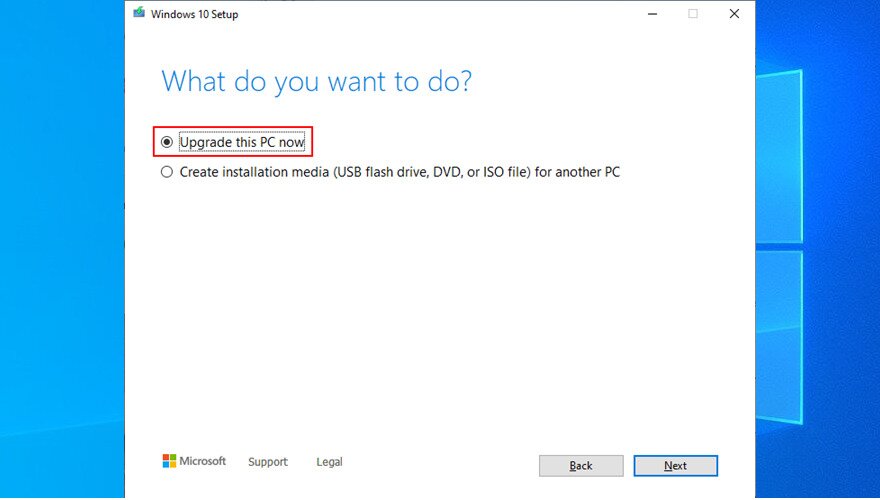
3. Use Media Creation Tool
One of the safest ways to upgrade to the newest Windows 10 version without encountering error codes like 0x80240fff error is by using Media Creation Tool.
- Download Media Creation Tool from the official website
- Run the application
- Select Upgrade this PC now and follow the on-screen instructions

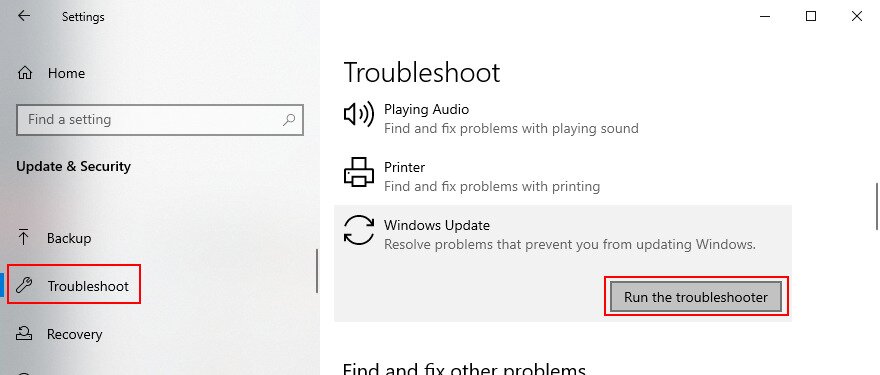
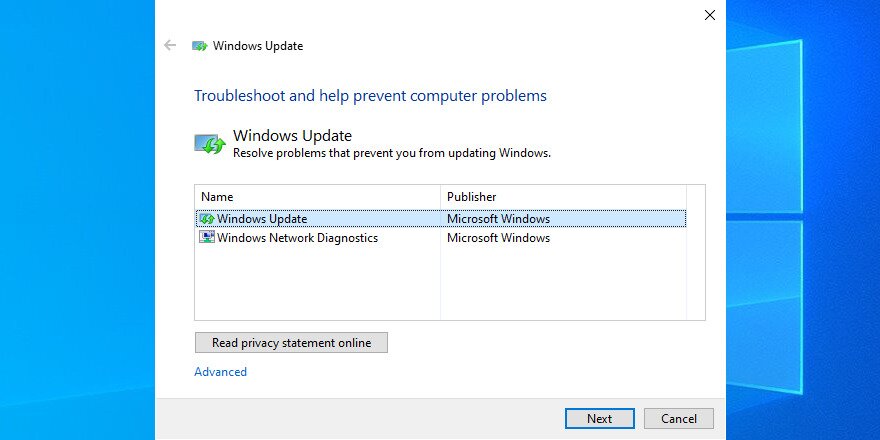
4. Use the Windows Update troubleshooter
Common problems with Windows Update can be solved using an internal troubleshooter, so you don’t have to make any changes or turn to a specialist for help.
- Right-click the Start button and visit Settings
- Select Update & Security
- Go to Troubleshoot
- Select Windows Update and click Run the troubleshooter

- Follow the on-screen instructions
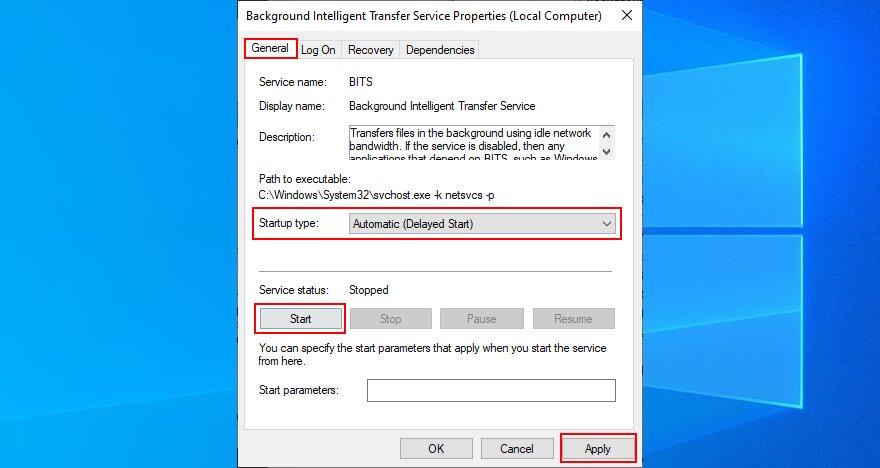
5. Restart Background Intelligent Transfer Service
Background Intelligent Transfer Service is a service that Windows Update depends on. If it stops running or fails to run properly, it could be the reason why you get the 0x80240fff Windows Update error.
- Press Win key + R, type services.msc, and press Enter

- Find and right-click Background Intelligent Transfer Service, then select Properties

- Go to the General tab and select Startup type to Automatic (Delayed Start)

- If Service status says Stopped, click Start
- Click Apply to commit changes


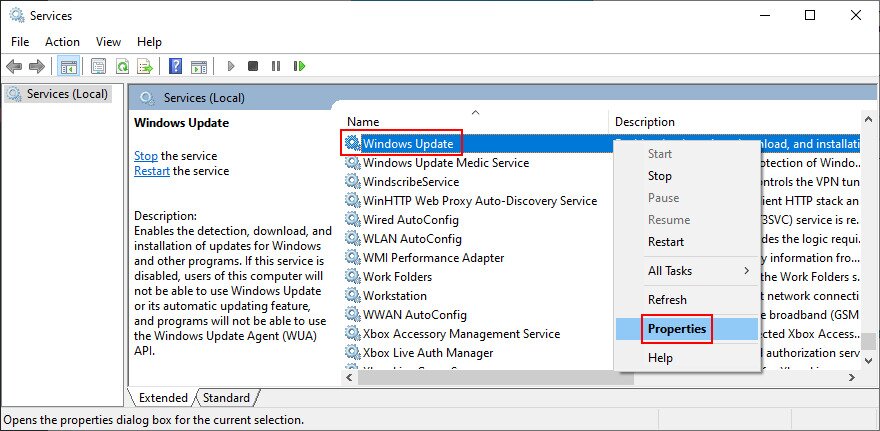
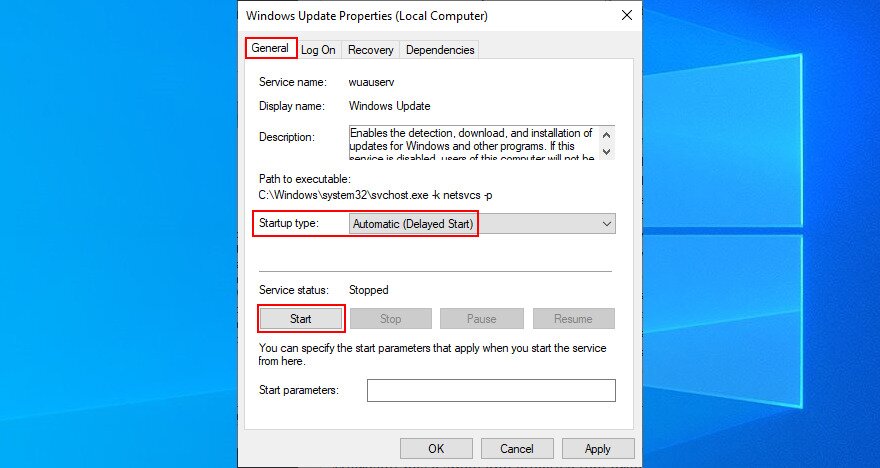
6. Restart the Windows Update service
If the Windows Update service doesn’t start automatically, this could trigger the Windows 10 update error 0x80240fff on your computer. But you can restart it manually and change the startup type.
- Press Win key + R, type services.msc, and hit Enter
- Locate and right-click Windows Update, then select Properties

- In the General tab, set Startup type to Automatic (Delayed Start)

- If Service status is Stopped, click Start
- Click Apply
7. Run Windows Update Diagnostic
Microsoft has a small and effective tool prepared to help you troubleshoot Windows Update problems, even the ones that cause the 0x80240fff error code.
- Make sure you’re logged in as the PC administrator
- Download Windows Update Diagnostic from Microsoft
- Run the app
- Select Windows Update, click Next, and follow the on-screen instructions

- Launch the utility again, select Windows Network Diagnostics, and follow the steps
- Restart your computer
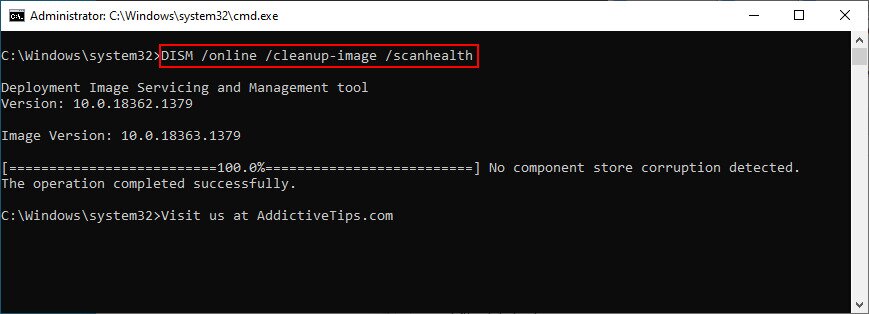
8. Run DISM
If the component store of the Windows image has corrupt data, this can cause serious problems on your computer as well as the 0x80240fff error code. But you can easily fix it with DISM (Deployment Image Servicing and Management). It’s a powerful tool and part of the Windows package.
- Press Win key + R, type cmd, and press Ctrl + Shift + Enter to launch Command Prompt with admin rights

- Type
DISM /online /cleanup-image /scanhealthand press Enter
- If CMD show any errors, type
DISM /online /cleanup-image /restorehealthand hit Enter - Restart your computer and launch Command Prompt with elevation rights
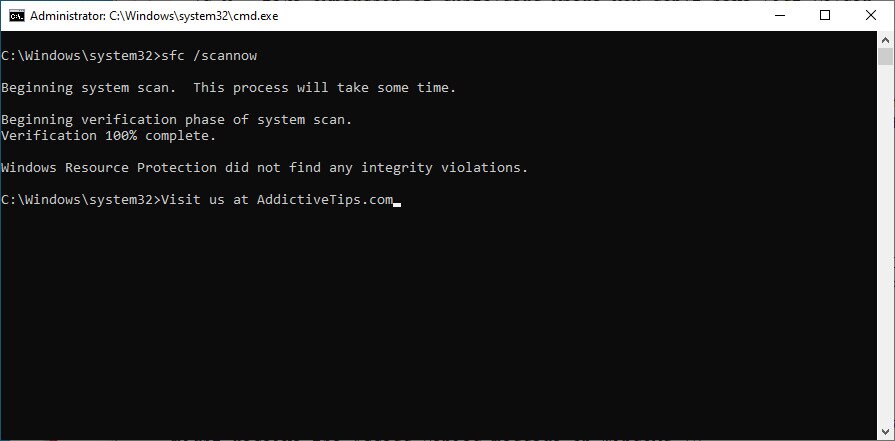
- Run
sfc /scannow
- Wait until the scan is complete
- Reboot your PC

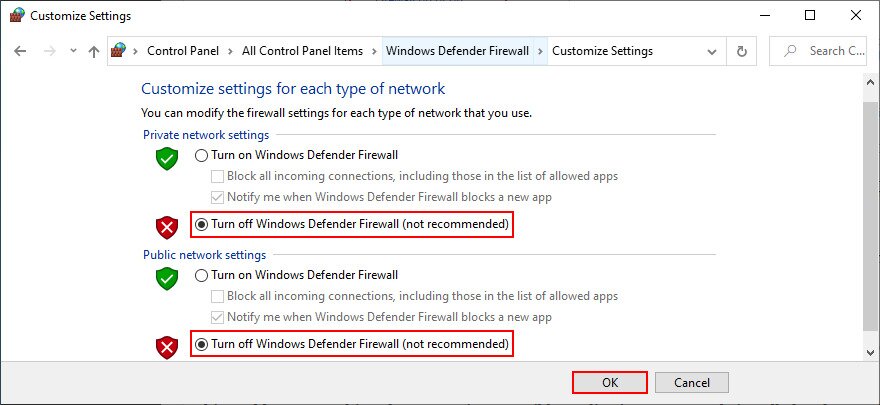
9. Temporary disable the firewall
The system firewall could block Internet access to Windows Update or other critical processes it relies on. However, you should be able to quickly repair this by temporarily switching off your firewall.
- Log in as the computer administrator
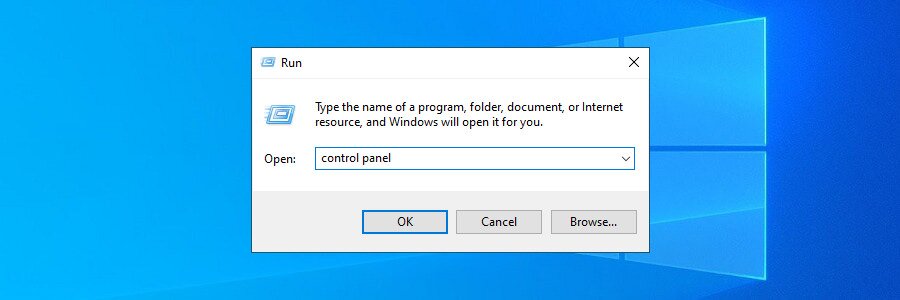
- Press Win key + R, type control panel, and hit Enter

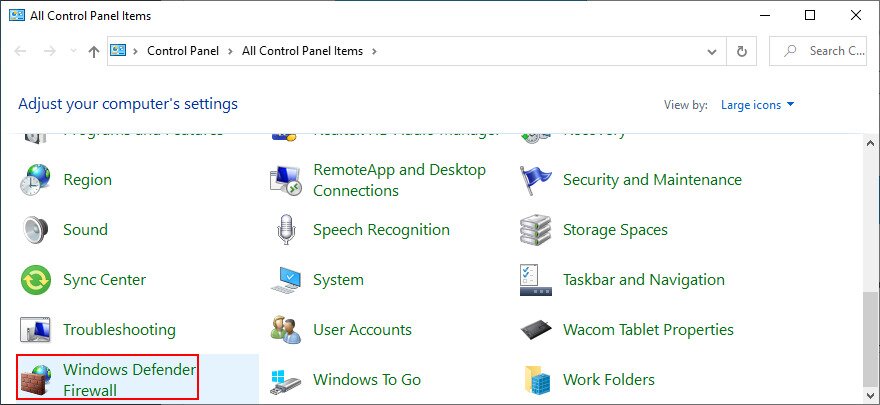
- Find and open Windows Defender Firewall

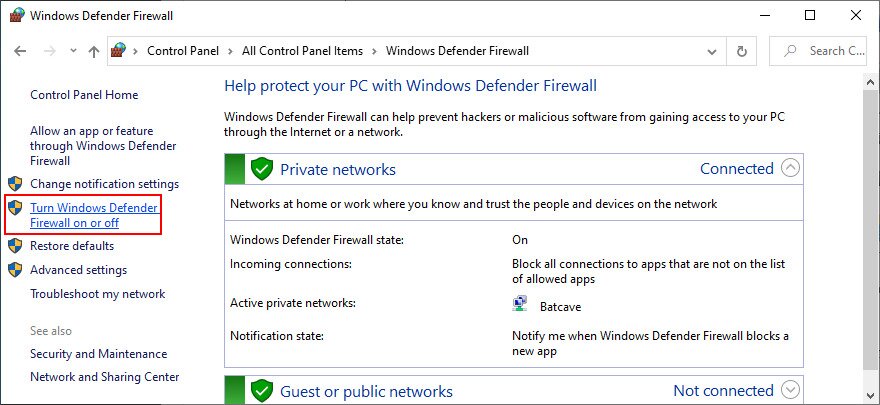
- On the left side, click Turn Windows Defender on or off

- Select Turn off Windows Defender Firewall (not recommended) at Private and Public network settings

- Click OK
Once you manage to update Windows, be sure to restart your firewall so that you won’t leave your computer defenseless.
10. Roll back Windows 10
Rolling back Windows 10 to a previous restore point is a good way to fix the 0x80240fff error code if Windows Update was broken by a significant change at the software level.
This could mean anything, from an an incompatible application you recently installed to damaged registry data or services that stopped working properly.
However, keep in mind that, if you restore Windows to a previous checkpoint, you will lose the current applications and games installed on the same drive as the OS.
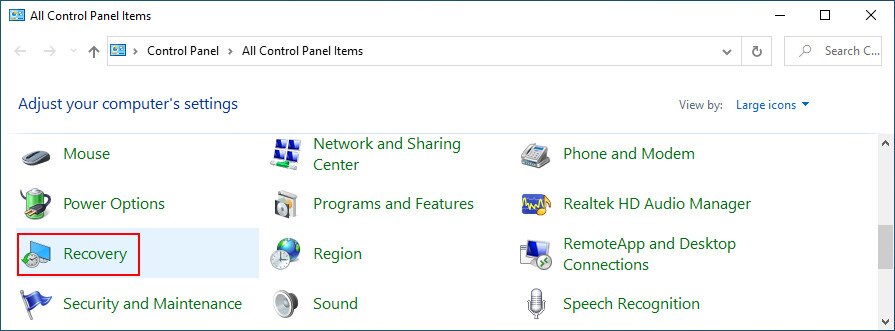
How to use System Recovery
- Sign in as the computer administrator
- Press Win key + R, type control panel, and hit Enter
- Click Recovery

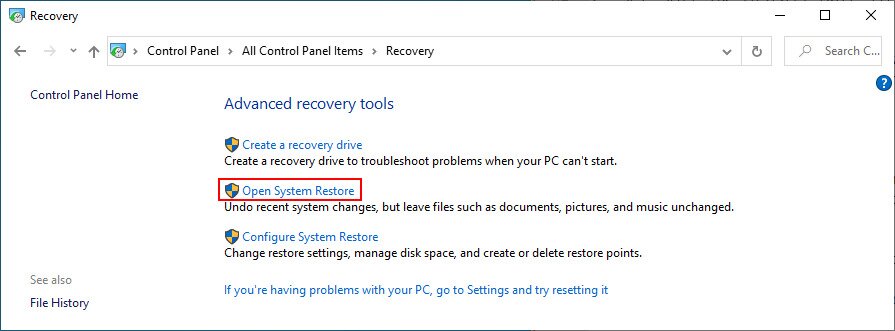
- Click Open System Restore

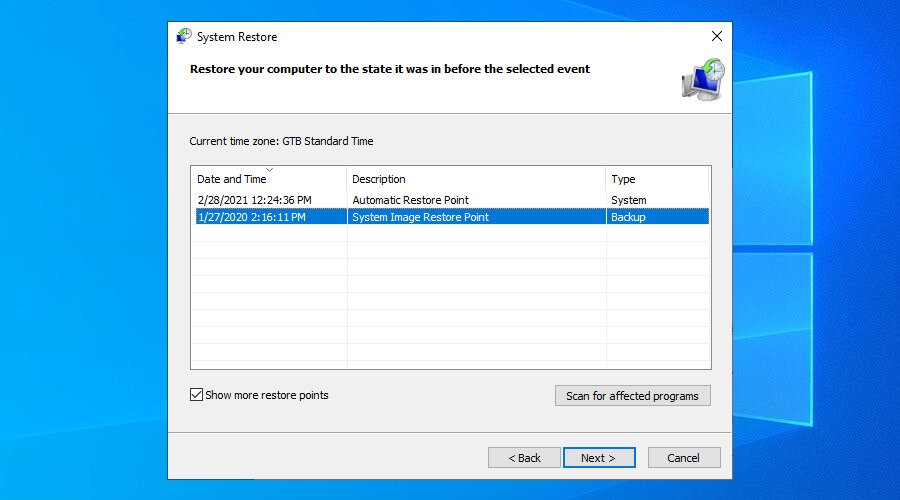
- Select a restore point, click Next, and proceed with the on-screen instructions

- Restart your computer
0x80240fff Conclusion
To recap, 0x80240fff is an annoying error code you might receive when trying to upgrade to the latest Windows version. However, you should be able to fix it without performing a factory reset.
For instance, you can clean boot Windows 10, suspend non-security updates, use Media Creation Tool, and run the internal Windows Update troubleshooter.
It’s also a good idea to restart the Windows Update service and Background Intelligent Transfer Service, run diagnostics, and use DISM to check the component store for errors.
Finally, you should temporarily turn off the system firewall and roll back Windows 10 to a previous restore point.
Did these solutions solve error code 0x80240fff on your Windows 10? Let us know in the comment area below.
