Auto backup Jellyfin in Windows Server
If you have a Jellyfin media server running on Windows Server, you may want to consider setting up a backup system to take care of your media files. In this guide, we’ll show how you can leverage the built-in Windows Server Backup tool scheduler to automatically back up your Jellyfin library.
How to Install Windows Server Backup
To utilize the built-in Windows Server backup tool, you first need to install it as a feature on your Windows Server. Start by opening the Server Manager app. Once open, click on the “Manage” button and then select “Add Roles and Features.”
In the “Add Roles and Features Wizard,” go to “Server Selection” and choose your server. Then, navigate to the “Features” section. Here, scroll down to find “Windows Server Backup.” Check its box to enable it and click “Install” to add the backup feature to your Windows Server.
After the installation of the “Windows Server Backup” feature, it’s necessary to reboot the Windows Server. Following the reboot and logging back in, the backup feature will be ready for use.
How to Configure Windows Server Backup
To configure Windows Server Backup, begin by launching the program. Open the Start menu on the Windows Server desktop, and search for “Windows Server Backup.” Open it and select “Local Backup.”
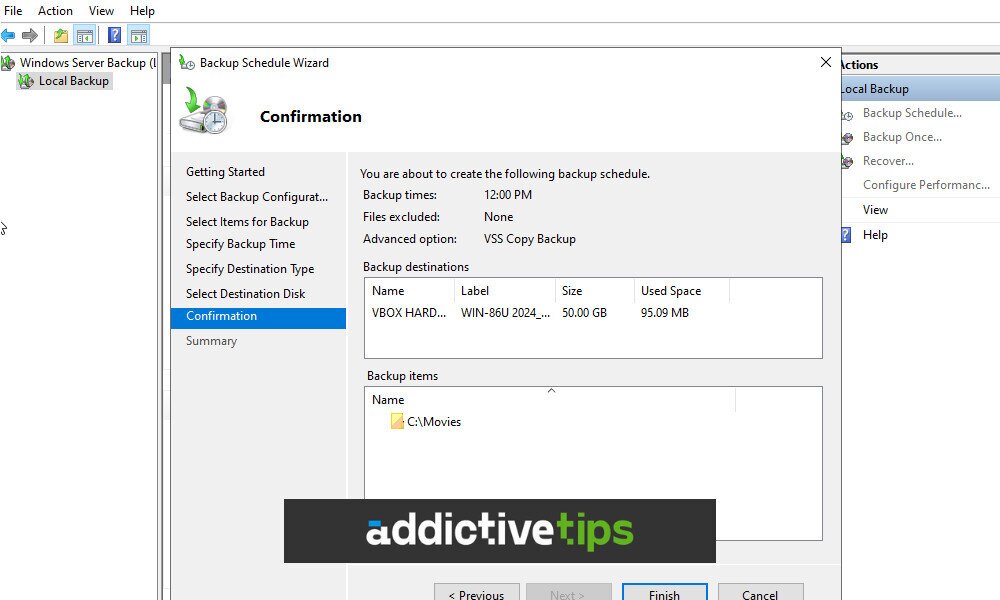
After selecting “Local Backup,” proceed to choose the “Backup Schedule” option. This action will open the “Backup Schedule Wizard.” Read the “Getting Started message,” and then click “Next.”
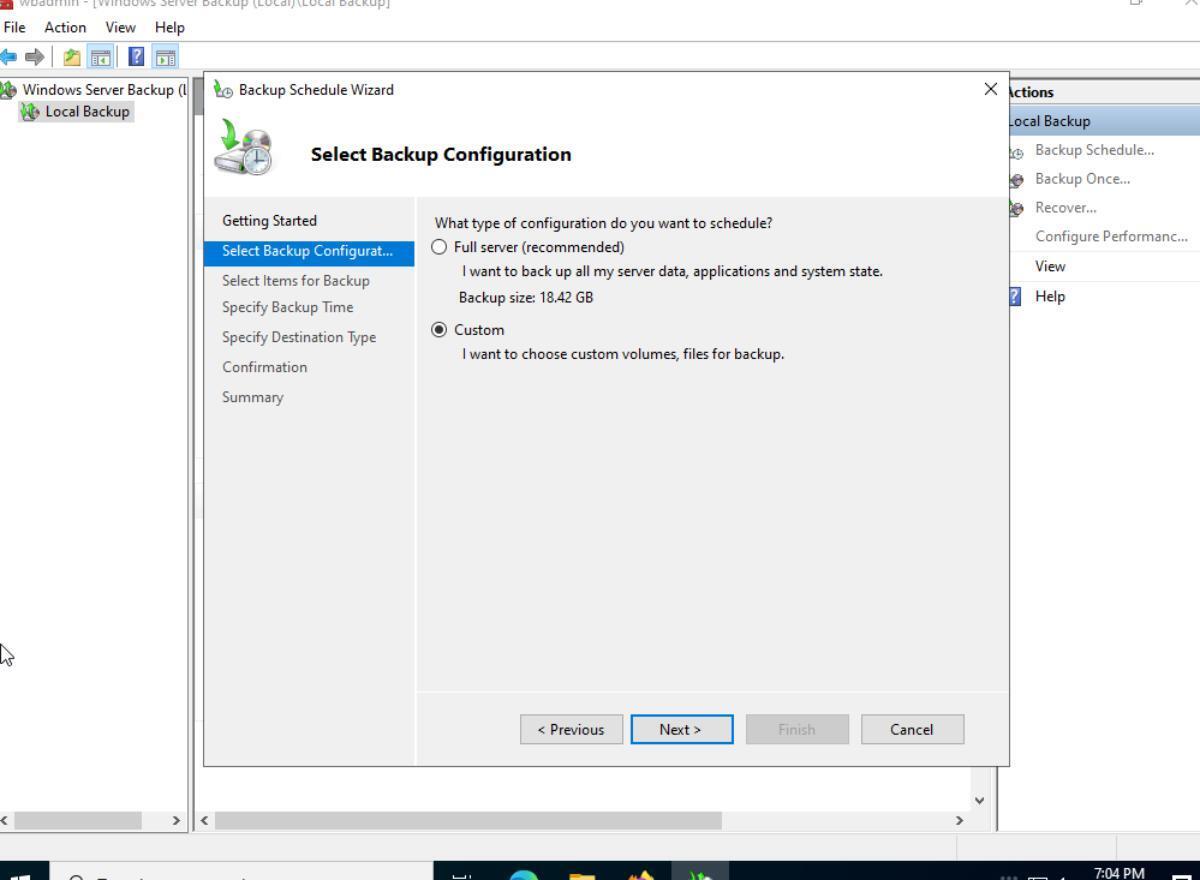
The scheduler will then ask you to select the type of backup configuration desired. Although the default setting prompts for a full system backup, for backing up specific items like the Jellyfin library, select “Custom.” After making this selection, click “Next.”
Note: it is possible to back more than just Jellyfin Media files. If you want to also backup your metadata, consider adding C:\Users\[YourUsername]\AppData\Local\jellyfin\metadata to your backup sources in Windows Server Backup.
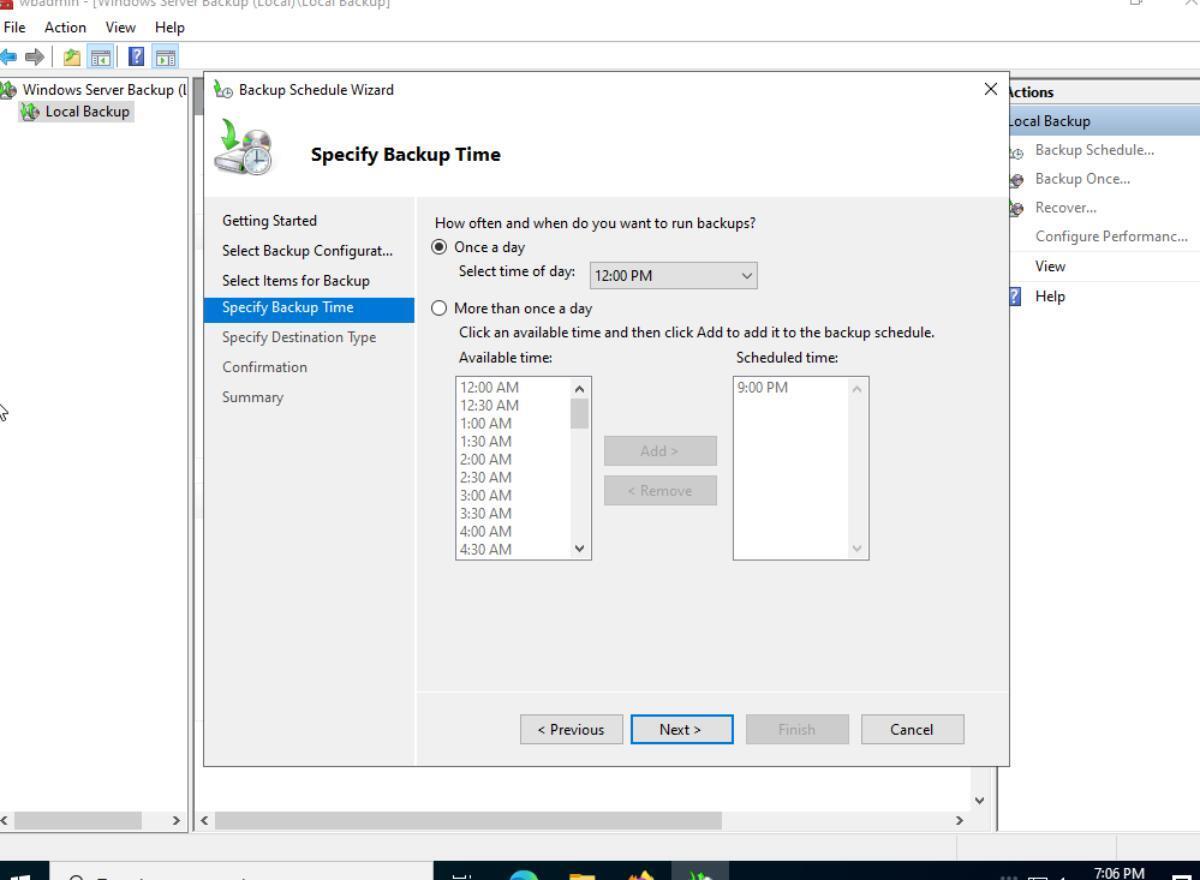
Next, find and click on the “Add Items” button. Choose your Jellyfin library from the available options. After finding and selecting it, schedule your backup in the “Specify Backup Time” area, deciding on the frequency and specific times for backup. After configuring, click “Next.”
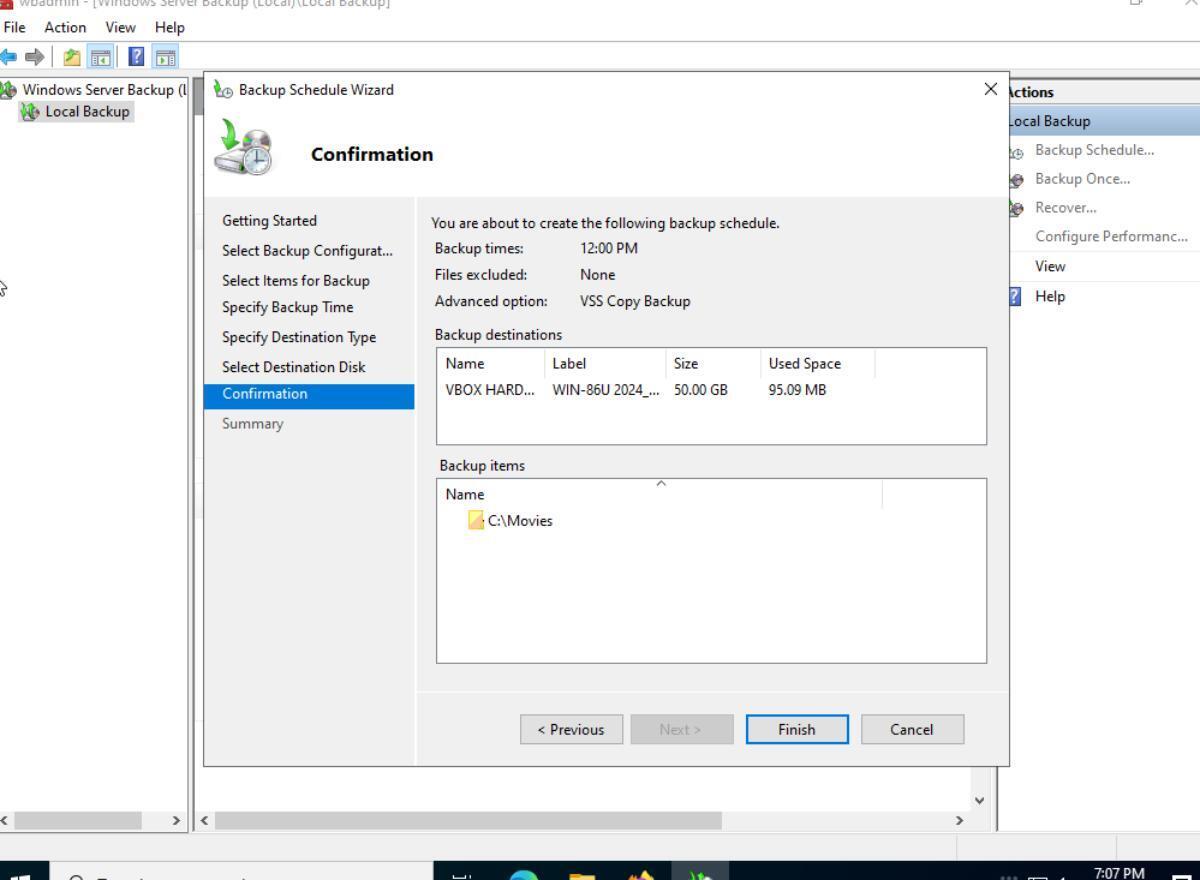
The final step involves choosing a backup location. Options include “Backup to a hard disk that is dedicated for backups,” “Backup to a volume,” or “Backup to a shared network folder.” After selecting and configuring your preferred backup location, click “Next” to finalize the setup.
How to create a manual backup with Windows Server Backup
Scheduling Backups is a great way to ensure your data is always backed up. However, you’ll also want to occasionally create manual backups of your Jellyfin library, just in case. Here’s how you can create a manual backup with Windows Server Backup.
To start, launch the Windows Server Backup tool. Once it is open, click on “Local Backup” in the sidebar. After selecting the “Local Backup” option in the sidebar, find the “Actions” area, and click “Backup Once” with the mouse.
When you select the “Backup Once” option, the “Backup Once Wizard” will appear. In this wizard, find “Scheduled backup options.” Selecting this will allow you to use the same backup options as those configured for the backup schedule.
After choosing “Scheduled backup options,” select the “Backup” button to create a first-time backup. This backup will take some time, depending on the amount of data you are attempting to back up.
How to restore a backup with Windows Server
To restore a previously created backup (either manual or automatic,) do the following. First, find the “Recover” in the “Actions” area, and click on it with the mouse. When you select this option, the “Recovery Wizard” window will appear on the screen.
Look through the “Getting Started” page, and find the “Where is the backup stored that you want to use for the recovery” area. Then, select your server. If your backup is not stored on your server, you’ll need to choose the “A backup stored on another location” option instead.
After selecting your location, you’ll see a calendar view of available backups. Look through the calendar and choose a backup to recover. Once you’ve selected it, click the “Next” button to continue to the next page.
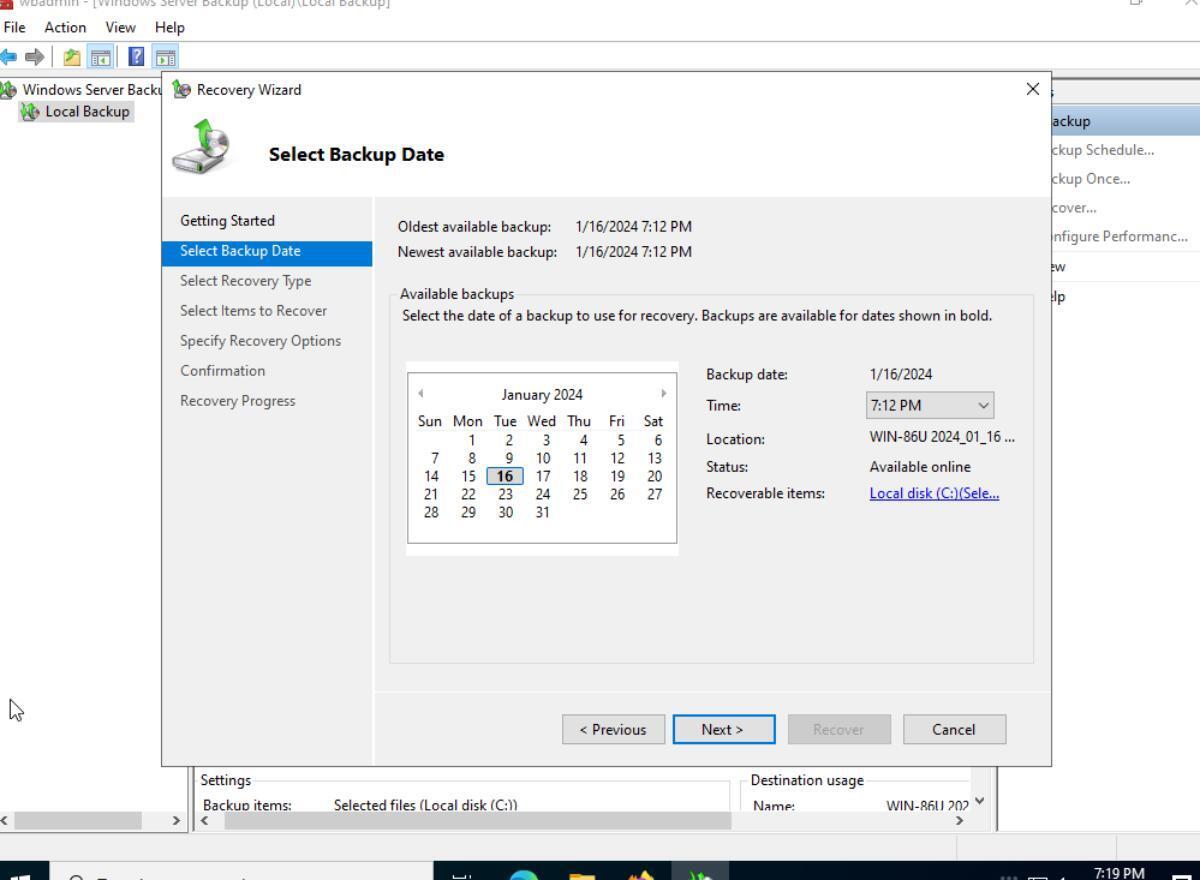
When you’ve chosen your backup, you need to select a recovery type. To recover via “Files and folders,” select “Files and folders.” To recover via “Volumes,” select “Volumes,” etc.
Once you’ve chosen your method of recovery, use the Windows Server Backup tool to recover your data.
