Create And Automate Timelapse Videos Using Webcam Timelapse
Many of us have been left awestruck after watching time-lapse videos where the flow of time can be accelerated in order to give us a better view of changes in areas of interest over time. Now, creating, modifying and processing time-lapse videos through your webcam has been simplified and made accessible through the Webcam Timelapse tool. Although this utility appears simple, it equips you with advanced functionality through features including Daily SelfPic, Adjustable delay, Avi video creator, reverse video mode, manual capture mode and the like, making it relevant for time-lapse and stop motion applications. If you want to see yourself grow in age over the years, you don’t need to consistently record all your activities anymore, just use the Daily SelfPic feature, which takes your picture at a specified time every day, so that it can be compiled for a final video time-lapse all through your webcam.
After installation, Webcam Timelapse automatically detects your webcam and allows you to access its features through the interface segmented in three areas in the active window: capture, frame processing and video conversion.
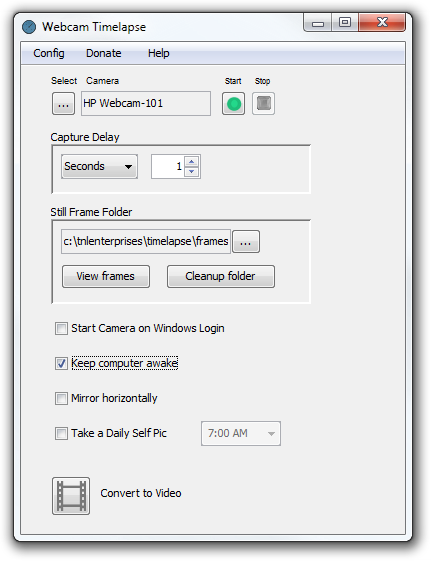
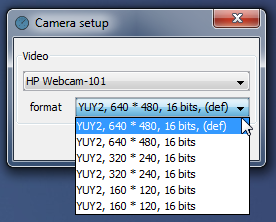
It takes snapshots of the webcam video after small periods of time. As a result when these selected frames are converted to video, the speed of the recording naturally increases to give a time-lapse effect. From the Welcome window, you can specify Capture Delay that would define the time-lapse speed. In addition, you can further specify the video quality of your webcam by accessing the options through the Select button, which opens the Camera Setup window. You can configure the size and quality of the output by selecting the relevant format.
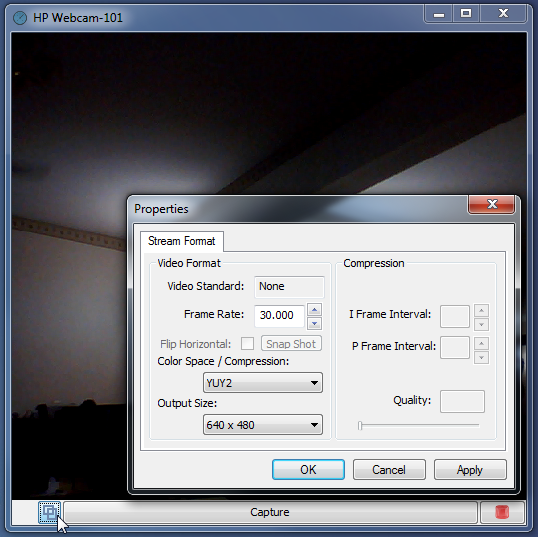
After confirming the Still Frame Folder path, you are now in a position to begin operation. Don’t forget to check the features like ‘Keep computer awake’ or ‘mirror horizontally’. Upon clicking the green Start button on the main window, the webcam window opens with Configure and Format buttons present at the bottom left corner. Here, you can easily modify the video specifications with respect to output in order to check the actual effect.
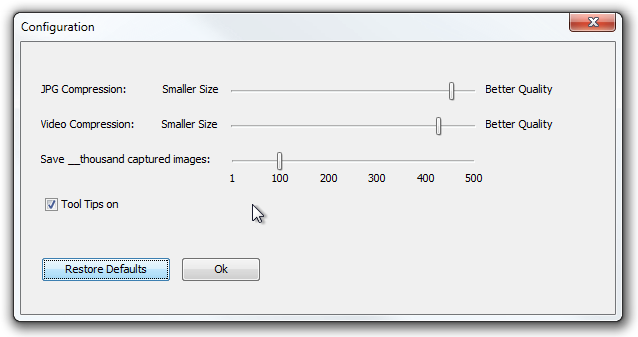
The Configuration window illustrates a tradeoff between size and quality whereby the slider compromises between each extreme from left to right. In cases, where either one of video and audio are of value, you can adjust each slider appropriately to set a required combination. In addition, you can modify the image capture frequency in order to relieve space on your storage drive.
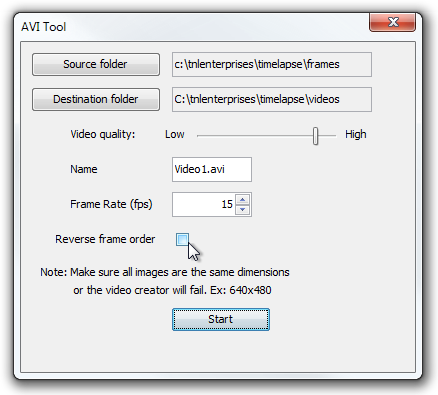
Finally, the Convert to Video button activates the camera, and opens a new window, demanding the source and destination paths and features selection. Enable the Reverse frame order option to specify the time progress of the desired video output.
Although there are other alternatives present, Webcam Timelapse distinguishes itself on the basis of easy operation, comprehensive online support and powerful feature set. We tested this software on Windows 7, 64-bit edition, and found it compatible with Windows XP, Windows Vista, Windows 7 and Windows 8.
