Fix Steam Needs to Be Online to Update Error [Windows]
Steam launched in 2003 with Valve’s Half-Life 2 as a first of its kind digital delivery service. The idea of digital content soon became so popular that Steam became the go-to store for gamers around the world. Today, the Steam model is being used by major companies like EA’s Origin Store and Windows Store, but none have enjoyed the popularity of Steam. That said, Steam isn’t perfect. Sometimes, Steam tends to generate the Steam needs to be online to update error, even though you are connected to the internet. Here are a few things you can try to resolve the Steam needs to be online to update error.
When trying any of these solutions, in order to avoid having to download your steam library all over again, make sure you make a backup of the Steamapps folder – located in Steam installation folder (default location C:\Program Files\Steam\Steamapps). If you are short on space, just cut the folder from its original location and paste it elsewhere in the same drive. You can restore it later without affecting storage space.
Solution 1 – Run Steam in Admin mode
Locate Steam’s shortcut > Right-Click > Run As Administrator
Ideally, this should solve the problem. If you still see the Steam Needs to Be Online to Update error, read ahead for more solutions to try.
Solution 2 – Disable Windows Firewall
It can be argued that sometimes Windows Firewall becomes overzealous and starts blocking safe programs. In order to prevent that, temporarily disable the firewall (keyword: temporarily) and try again.
- Open Control Panel and go to System and Maintenance>Windows Firewall.
- In the menu on the left, you will see the option to turn Windows Firewall off, click on it.
- When prompted, turn off Windows Firewall for both public and private networks.
- Click OK to save changes.
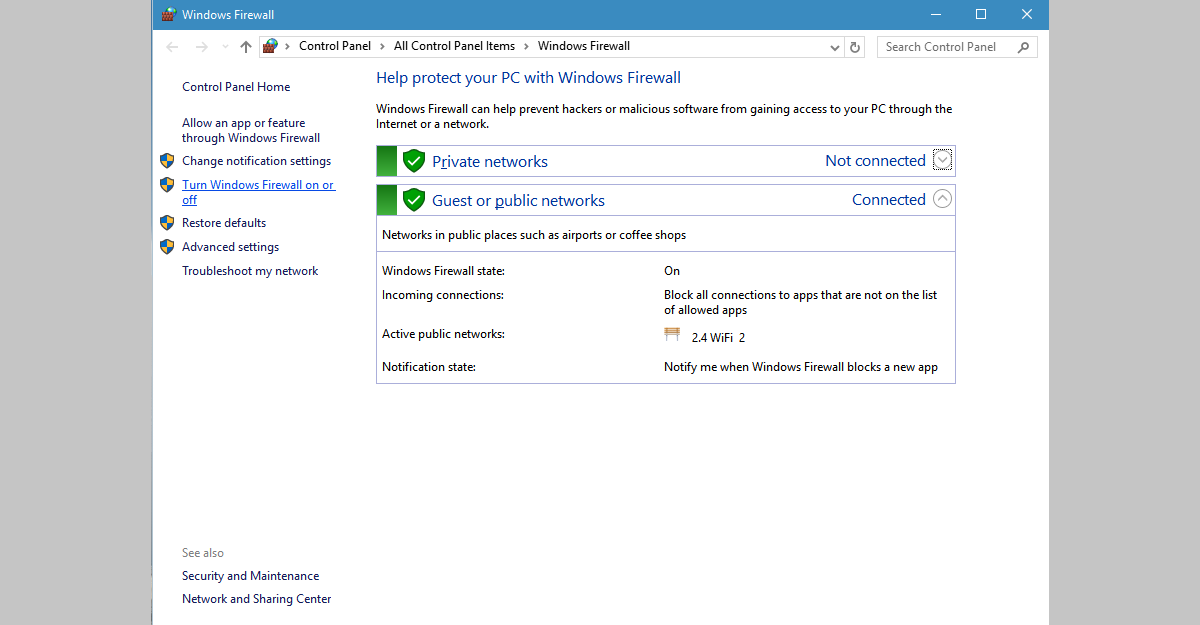
You should be able to update Steam. Make sure to turn your Firewall back on afterwards, or you risk opening your computer up to a security breach.
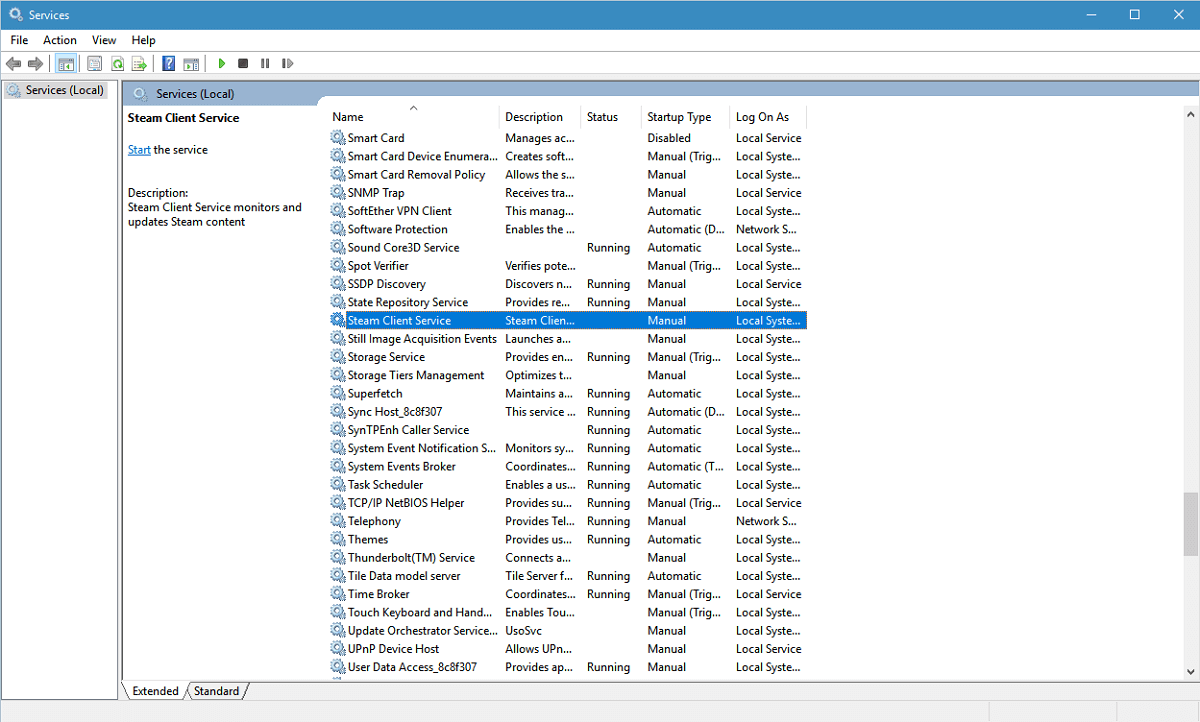
Solution 3 – Restart Steam Client Services
- Search for Services in Windows Search and open the Services desktop app from the results.
- Search for Steam Client Services and select it. A new column will appear on the left of the services list.
- In the menu on the left, click Restart Services
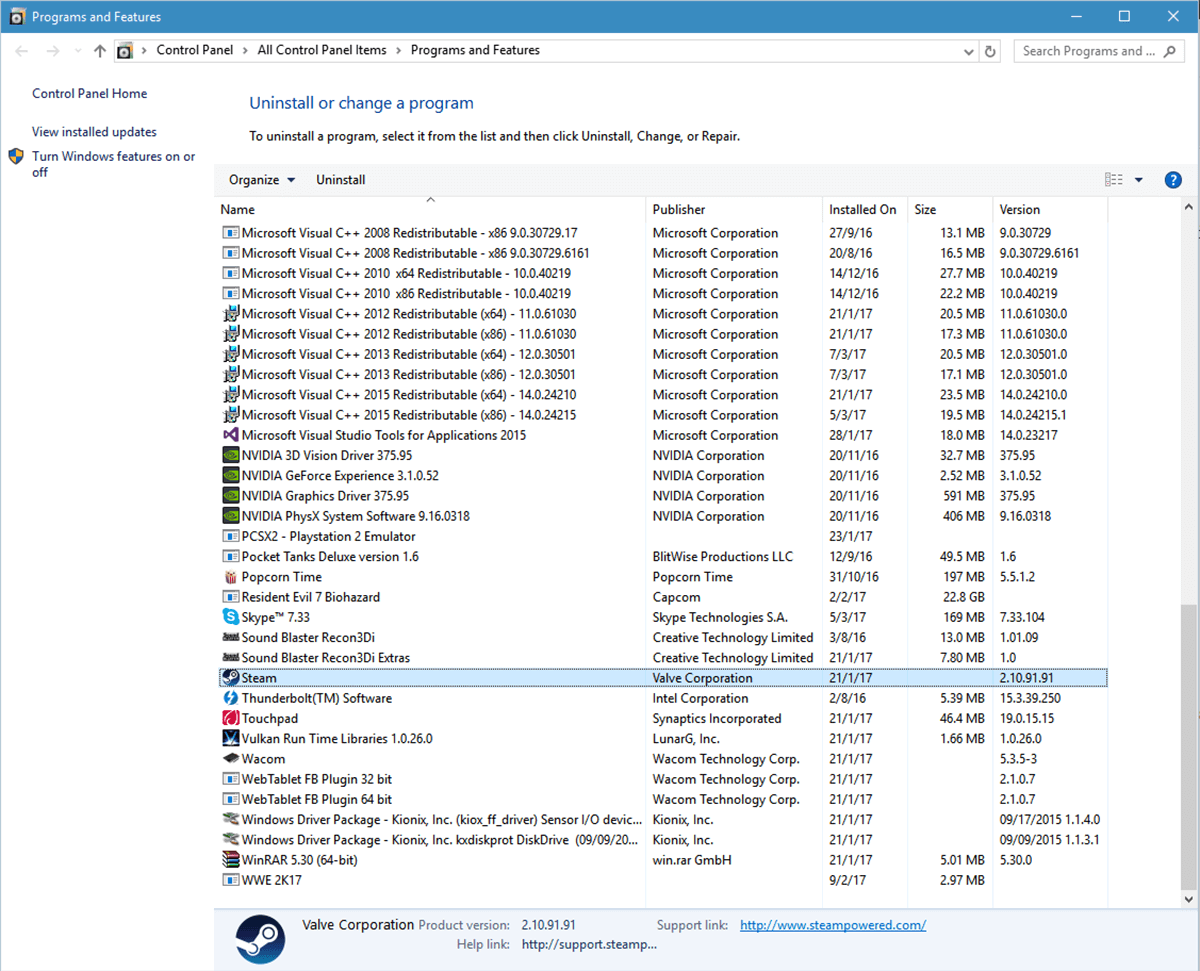
Solution 4 – Reinstall Steam
- Open the Control Panel and go to Programs>Programs and features.
- Select Steam from the list of installed programs and click the Change/Remove button
- Select the Automatic option and click Next
- Click Finish to uninstall Steam
- Go to store.steampowered.com
- In the top right of this page, find “Install Steam”
- Download the steam app and install it again
Solution 5 – Copy Steam files from another computer
Sometimes, Steam gets entangled in a set of instructions that work against itself. In order to overcome that, you could try copying Steam from another system where it is working flawlessly. For this, you will need a USB storage drive and a sound Steam installation.
- Plug your USB in the computer you want to copy from
- Go to the Steam installation directory
- Copy everything in this folder, except Steamapps. This folder where game content is installed and you only need Steam data files
- Paste it in your USB.
- Plug your USB in to your own machine
- Go to your Steam installation directory and open the Steam folder
- Paste the copied content here, overwrite everything
Run Steam to see if the problem is gone now.
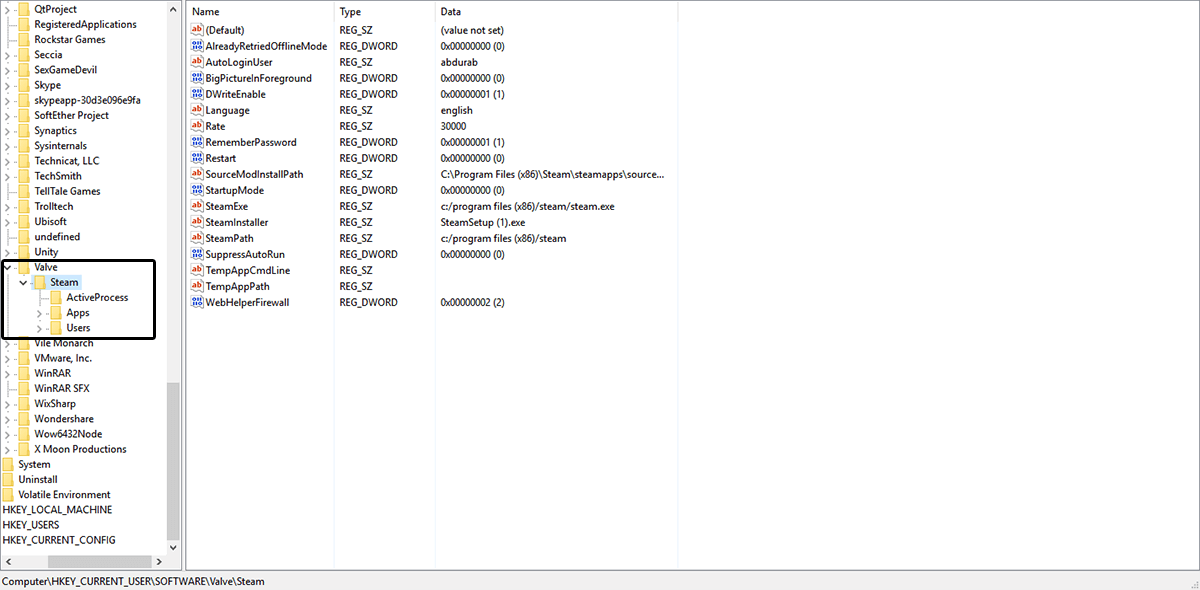
Solution 6 – Use Registry Editor
For “Steam needs to be online to update” error on Windows 10, there is a solution that requires editing the Registry entry for Steam. Note: You need to follow the steps listed below down to the letter, one wrong turn in the wrong entry and you risk catastrophic damage. It’s a good idea to back up the registry before you make any changes to it.
- Open the Start Menu and type Regedit to open Registry Editor.
- Go to HKEY_CURRENT_USER > Software > Valve > Steam.
- There will be two panes here – in the right hand pane find “AlreadyRetriedOfflineMode”. Double click it and a box will pop up. Set its Value Data to 0.
- Close Registry editor
Restart your computer and see if your problem has been resolved.
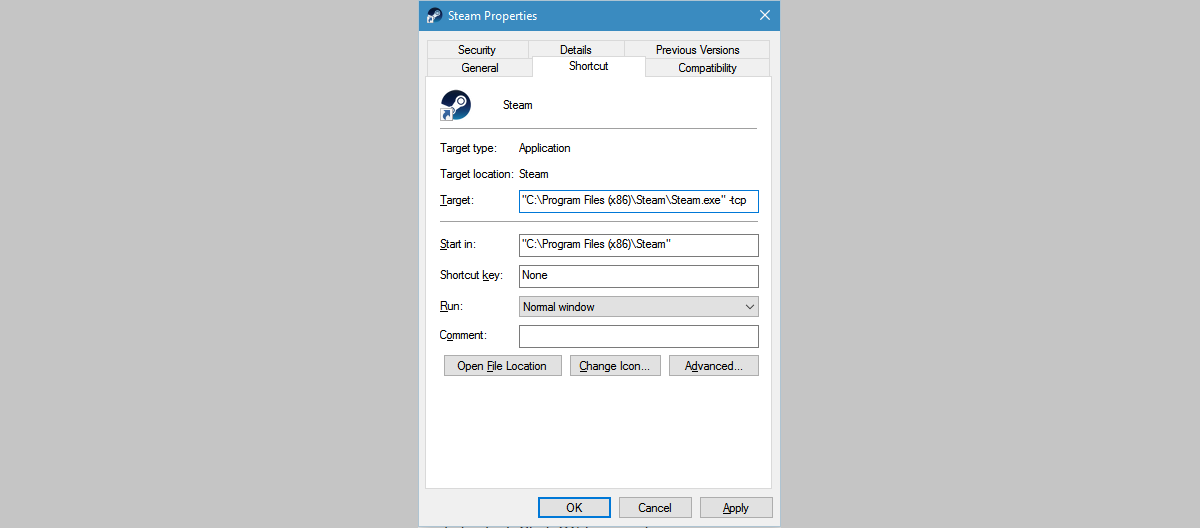
Solution 7 – Add -tcp parameter to Steam shortcut
- You will need to locate the Steam shortcut to try this.
- If you don’t have a steam shortcut, go to the Steam installation directory, right-click Steam.exe and from the context menu select Send-t0 > Desktop (create shortcut)
- Right-click the Steam shortcut on your desktop and select Properties from the context menu
- In the properties window, go to the Shortcut tab
- In the Target section add -tcp after the quotation marks
- Click Apply and OK to save changes.
Try updating Steam now.
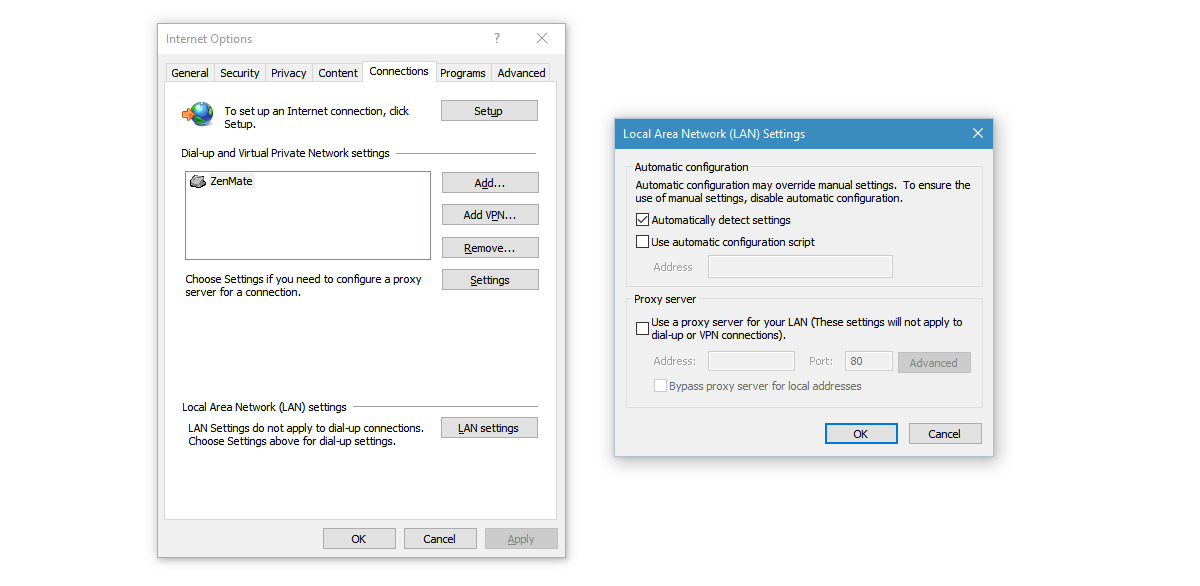
Solution 8 – Turn off Proxy settings in Internet Explorer
- Open Internet Explorer and click on the gear like icon at the top right (next to the smiley face)
- From the menu that appears, select Internet Options
- From the tabs, go to Connections > LAN Settings
- Make sure that Automatic Settings is checked and Use a Proxy Server for your LAN is unchecked
- Press OK.

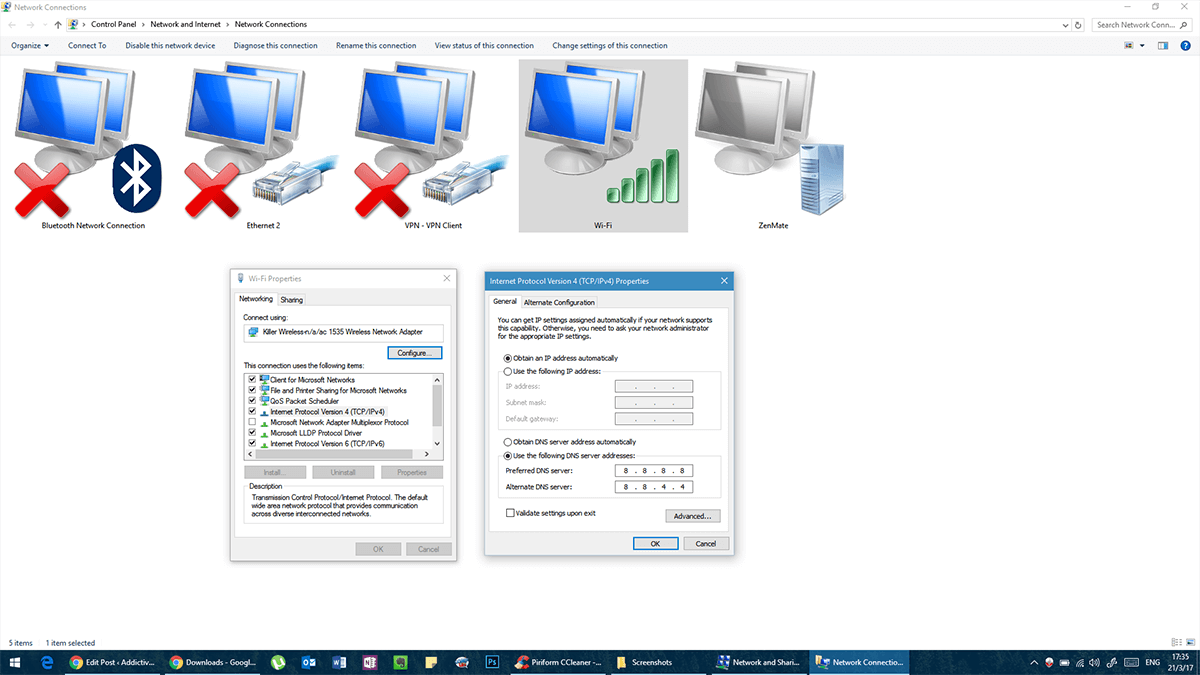
Solution 9 – Use Google’s DNS
Sometimes this error can be caused because of some conflict with DNS settings. If you have purchased DNS, then ask your provider to help you configure it. If not, you can use a public DNS, like Google DNS.
- Open the Control Panel and go to Network and Internet. Select Network and Sharing.
- Click on Change Adapter Settings in the column on the left
- You will see a list of Network Devices. Right Click on your current network adapter (in case you don’t know, do this for all adapters – just remember to restore them later).
- Select Internet Protocol Version 4 (TCP/IPv4) > Properties > Advanced
- Go to DNS. If you have any addresses already written here, note them down in case you need to use them again.
- Click Add and put in 8.8.8.8 or 8.8.4.4 (or both)
- Save and restart
Try it now.
Solution 10 – Edit hosts file
Without getting overly technical, a host file is a list of domains that your computer can have access to regardless of your Firewall settings.
- Open Notepad with administrative rights.
- In Notepad, go to File > Open and go to C:\Windows\System32\drivers\etc
- Open the hosts file (no extension).
- If you don’t see any files here, look at the bottom right corner and make sure it says All Files rather than Text Documents.
- When hosts file opens add the following lines at the end:
- 68.142.122.70 cdn.steampowered.com
- 208.111.128.6 cdn.store.steampowered.com
- 208.111.128.7 media.steampowered.com
- Save changes and close Notepad.
- Open the Command Prompt and run the following command
ipconfig /flushdns
Try running Steam now.

Did anyone find any fix to this in 2020?
thanks! solution 9 worked for me :))
none of them worked
it just wasted 2hours
Another more recently working fix is to make sure it’s not being blocked by controlled folder access. I had to manually add it to my allow list for it to work.
Not even one of them worked
i tried it all but still not working
Thank you , changing to google DNS works for me
**Change my Google DNS according to solution no 9, and guess what ??
It works !! Thanks alot man ..i’ve been trying to install and update steam for nearly a week and had accidentally deleted all my steam games. Can’t log on to Origin or Uplay as well. Now things back to normal..Hei thanks again man..
Thanks! No. 7 worked.
Windows + R
type “regedit”
Hit enter
find “valve”
Delete
Run steam
It did nothing…
it worked thxs