How To Change The Default Downloads Folder Path In Windows
Every Windows installation comes with a few default libraries and folders. The system adds these for each individual user. It also adds a few default locations for saving files. The Screenshots folder in Windows 10 is a good example of such a folder. You can take screenshots in Windows 10 via the Win+PrntScrn key and they save to the Screenshots folder. Another auto-folder in Windows is the Downloads folder. This is where apps download files to by default. You can select a different location for saving files but it doesn’t change the default downloads folder path in Windows. Here’s how you can do that.
Change The Default Downloads Folder Path
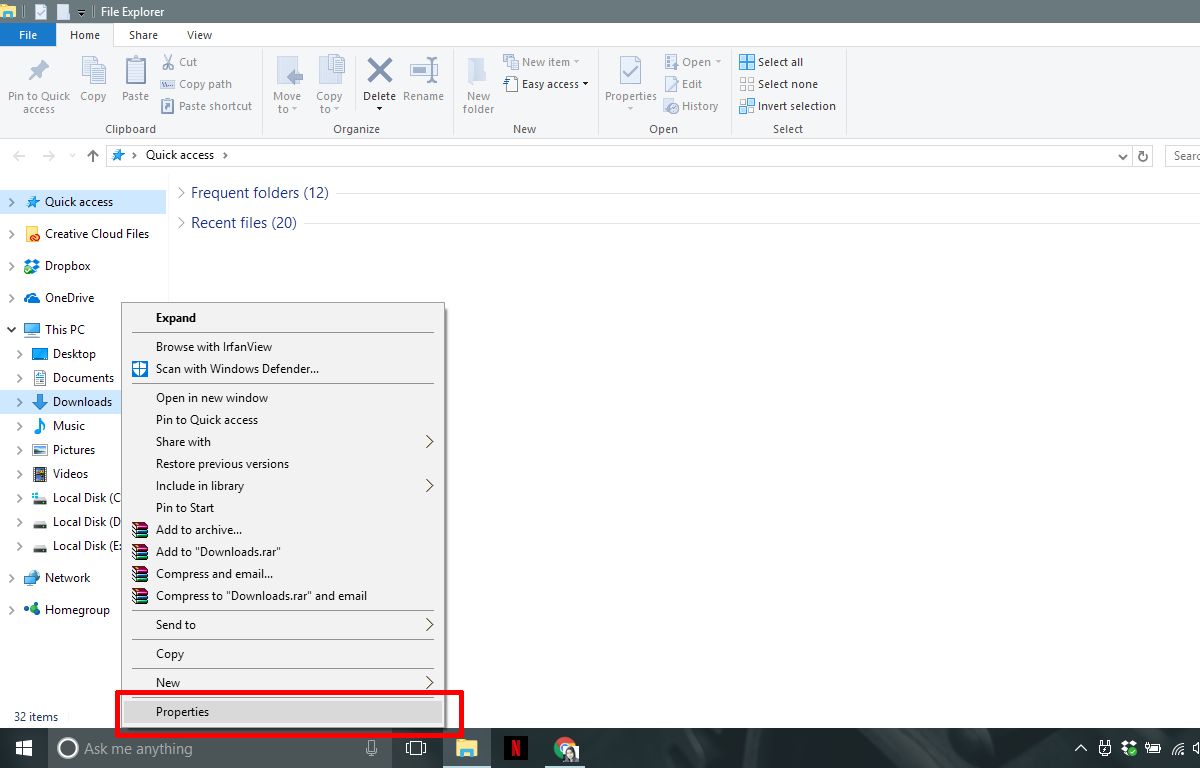
Open File Explorer and right-click the Downloads folder under This PC in the navigation column. Select Properties from the context menu.

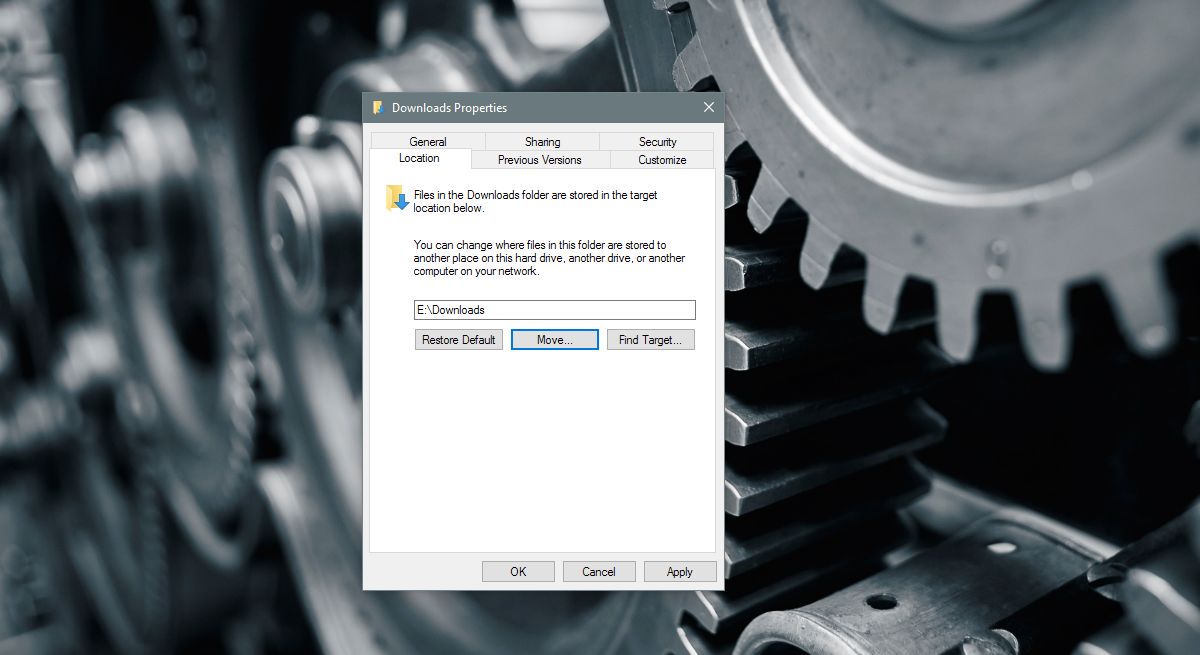
Go to the location tab in the Properties window. Click the ‘Move’ button and select a different folder to use as the default downloads folder. Click ‘Apply’.

Keep Or Move Files
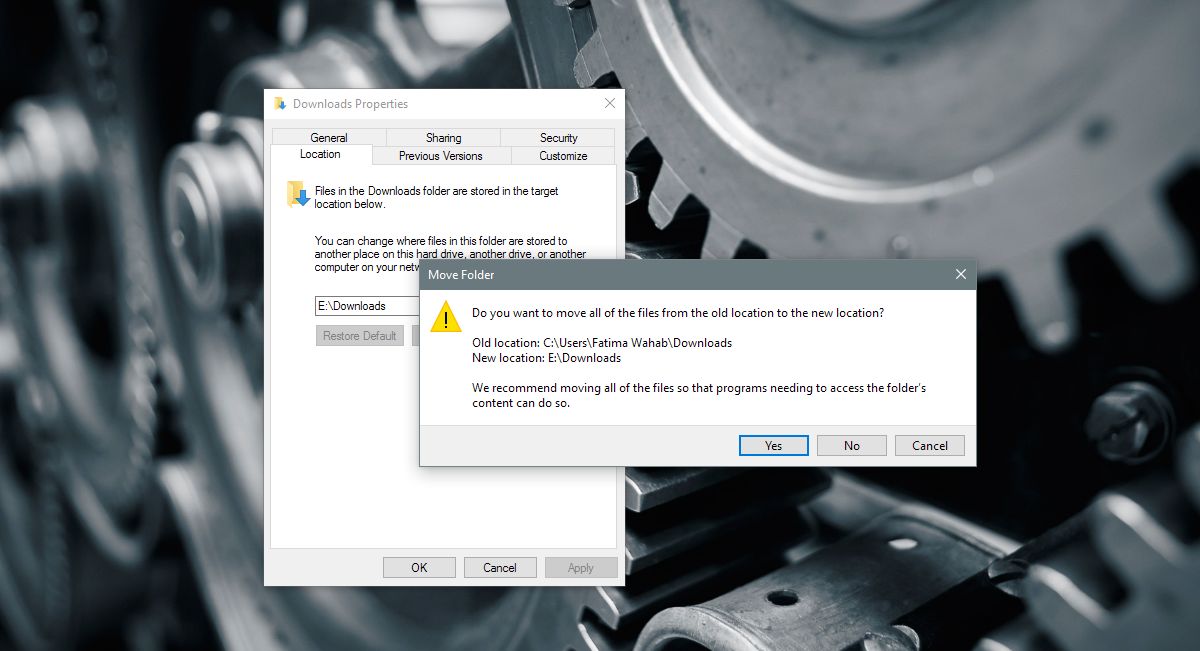
When you click ‘Apply’, Windows will ask you if you want to move all files in the current Downloads folder to the new one. If you click ‘Yes’, all files in the default downloads folder will be moved to the new location. If you click ‘No’, the files will not be moved and only the location of the downloads folder will be changed. Needless to say, if you choose to move the files as well, it will take a little longer.

All apps that save files to the default Downloads folder will start to save files to the new location. If you’ve told an app to save files to a different location e.g., the Desktop, they will continue to save files to the desktop. In order to get those apps to save to the new downloads folder, you have to select it again from the Save As window. If the app has dedicated settings for selecting a download location, use that to select the default location.
Restore Default Location
You can undo the change easily enough. Open File Explorer and right-click Downloads in the navigation bar. Select Properties from the context menu and go to the Location tab. Under the location field is a ‘Restore Default’ button. Click it and Windows will return the downloads folder to the default location. It will again ask if you want to move files or not.
The downloads folder for any and all users on Windows resides in the C drive. If you don’t regularly purge the Downloads folder of files you do not need, it can grow to a substantial size. It can get to a point where your Windows drive starts to run short on space. The obvious solution is to clean your Downloads folder regularly. If you can’t do that regularly enough, or you have a small Window drive, move the Downloads folder to a drive with more space.

Don’t do this. First of all, the files didn’t download to the photo folder that I made the download default, and the icon for that folder changed to a down arrow and the name to “downloads.” When I tried to revert, it kept the down-arrow icon and the name “Downloads” for the photo folder, and when I tried to rename it the original file name, it said I couldn’t because that filename already exists, but I can’t find it anywhere. All this did was mess things up. All I wanted was a shorter route to take to download my iCloud photos to a USB drive to open up iCloud space (instead of downloading, copying zipped file to folder, extracting to photo folder, moving from folder it created within that folder into the main photo folder, deleting new folder, deleting download file, deleting photos from iCloud); thought I could download the zipped file straight to my photo file and skip two steps, but now the whole dang thing is messed up.
Try using Long Path Tool .. It is the Best