How To Get The Standard Layout On The On-Screen Keyboard In Windows 10
Windows 10 has a tablet mode that you can switch to if you have a touch screen or a two-in-one laptop. The on-screen keyboard is centered and much smaller in width lacking a dedicated number pad as well as Control, Function, Windows, and Alt keys, among many others. The keyboard can be split down the middle for anyone who finds the keyboard too narrow to work with. If you would still prefer the same layout you have on your physical keyboard, here’s how you can enable it.
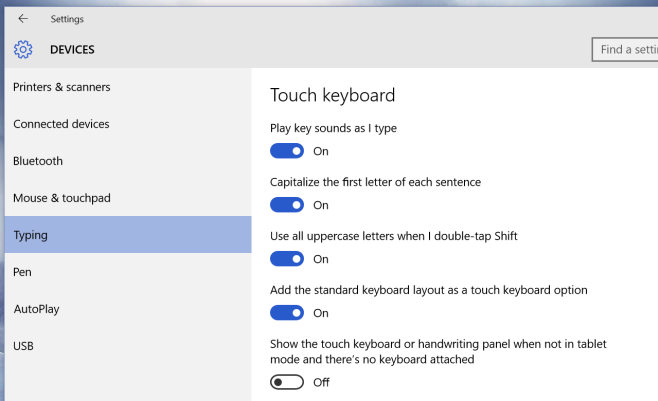
Open the Settings app and go to the Devices group of setting. In the Typing tab, scroll down to the Touch Keyboard section and turn on the ‘Add the standard keyboard layout as a touch keyboard option’.
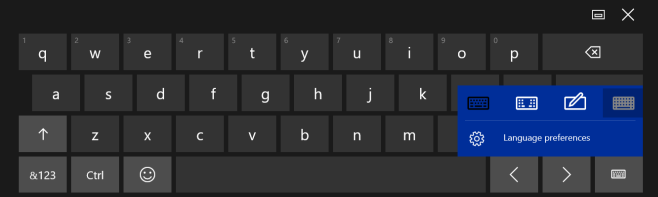
Next, bring up the on-screen keyboard and tap the keyboard button at the bottom right of the default layout. Select the button at the far left of the split keyboard button.
You will get the following keyboard that has an Escape, Tab, Caps lock, right and left Shift, right and left Control, right and left Alt, four arrow keys, and Windows key. There is no dedicated number pad in this version either but you do have dedicated number keys at the very top which isn’t a bad trade-off.
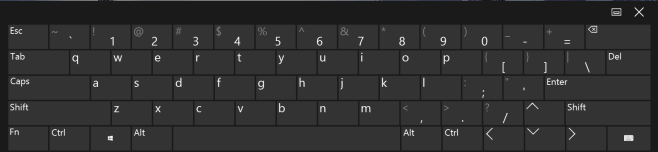
This keyboard is much wider and you’re likely to be more comfortable working with it. The Home, Page up, Page Down, End, Insert, and Prnt Screen buttons are still missing though which means you can’t use the Windows+Print Screen shortcut to take screenshots but it is otherwise easy to work with.

ihaveupgradewindows7towindows10