How to install and use Jenkins on Windows Server
Jenkins is an open-source automation server that simplifies the software development process by automating tasks such as code changes, building, and testing. This guide will show you how to deploy and use Jenkins on your Windows Server system.

Before we begin
Jenkins relies on Java (JDK or JRE) to work. As of now, Jenkins only supports versions 11 through 17. Before attempting to install Jenkins on your Windows Server, you must install Java. For more information on installing Java, head over to the official website.
How to download Jenkins on Windows Server
Before you can use Jenkins on your Windows Server system, it needs to be downloaded. Thankfully, Jenkins provides a Windows version in the form of a downloadable MSI file.
To get your hands on the latest Jenkins for Windows Server, head over to the official download page on the website. Once there, scroll down and choose either Jenkins LTS or the newer version.
On the version you’ve chosen, scroll down and select “Windows.” When you’ve selected your version of Windows, the Jenkin website will begin a download for the Jenkins MSI installer.
How to install Jenkins on Windows Server
To install Jenkins on Windows Server, open up the Windows Explorer app and select the “Downloads” folder. When you select this folder, you’ll have access to all of your downloads on Windows Server, including the Jenkins MSI installer.
Double-click on the Jenkins MSI installer with the mouse to start it up. When started, you’ll see a welcome message that says “Welcome to the Jenkins 2.X Setup Wizard.” After reading the message, click the “Next” button to move to the next page.
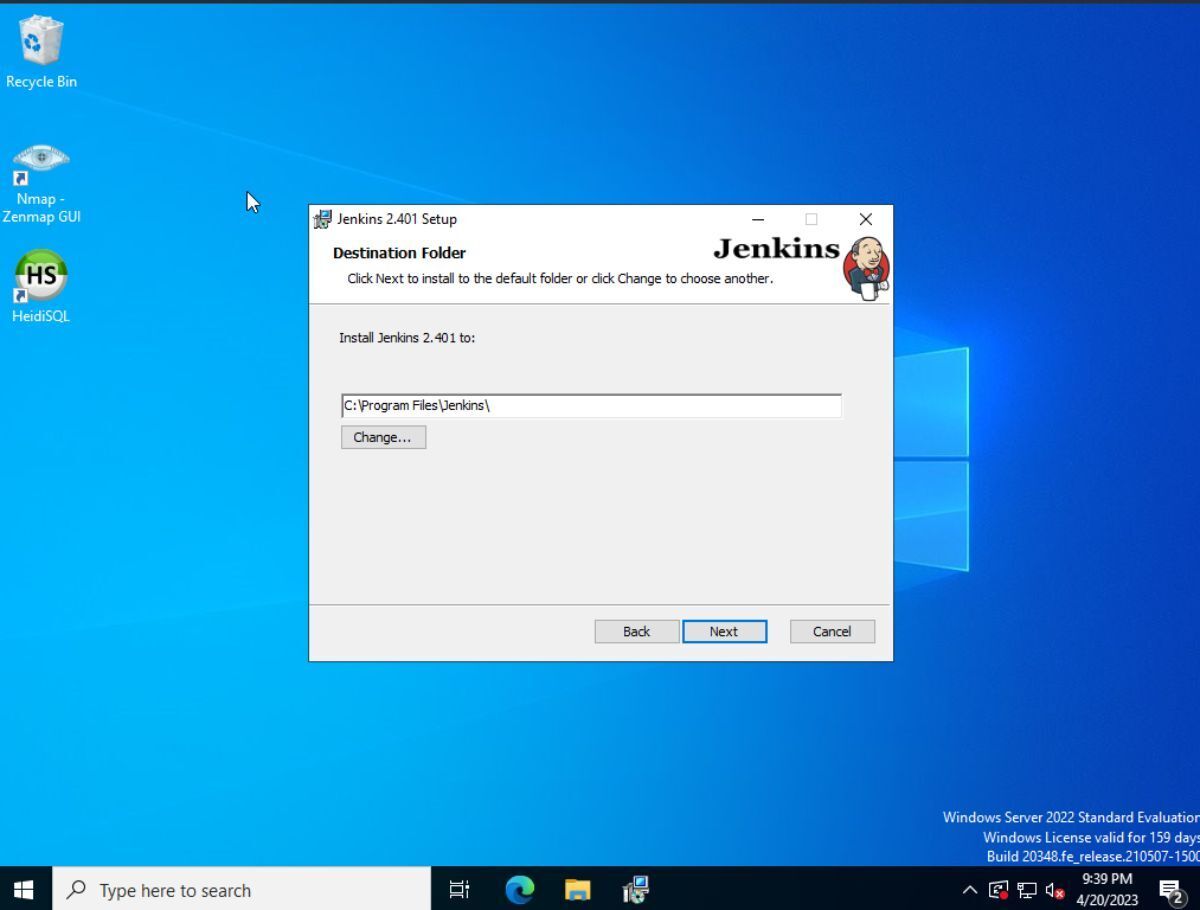
Once you’ve read the welcome message, you must choose where Jenkins will be installed on your Windows Server. By default, it chooses the “Program Files” folder. If you wish to change it, click the “Change” button.
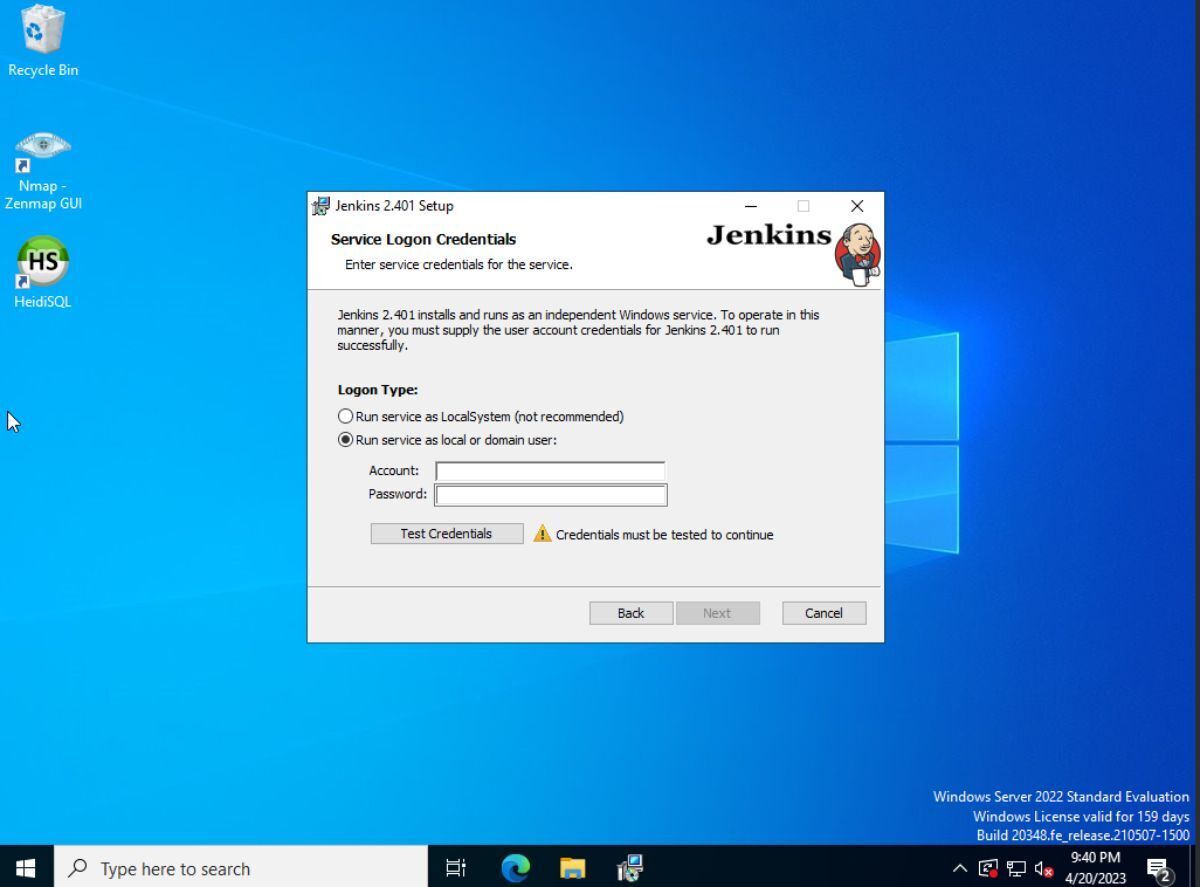
You must now choose the type of “Logon” that Jenkins will use. You can specify either “Run service as LocalSystem” or “Run service as local or domain user.” Make your choice and click the “Next” button to move to the next page.
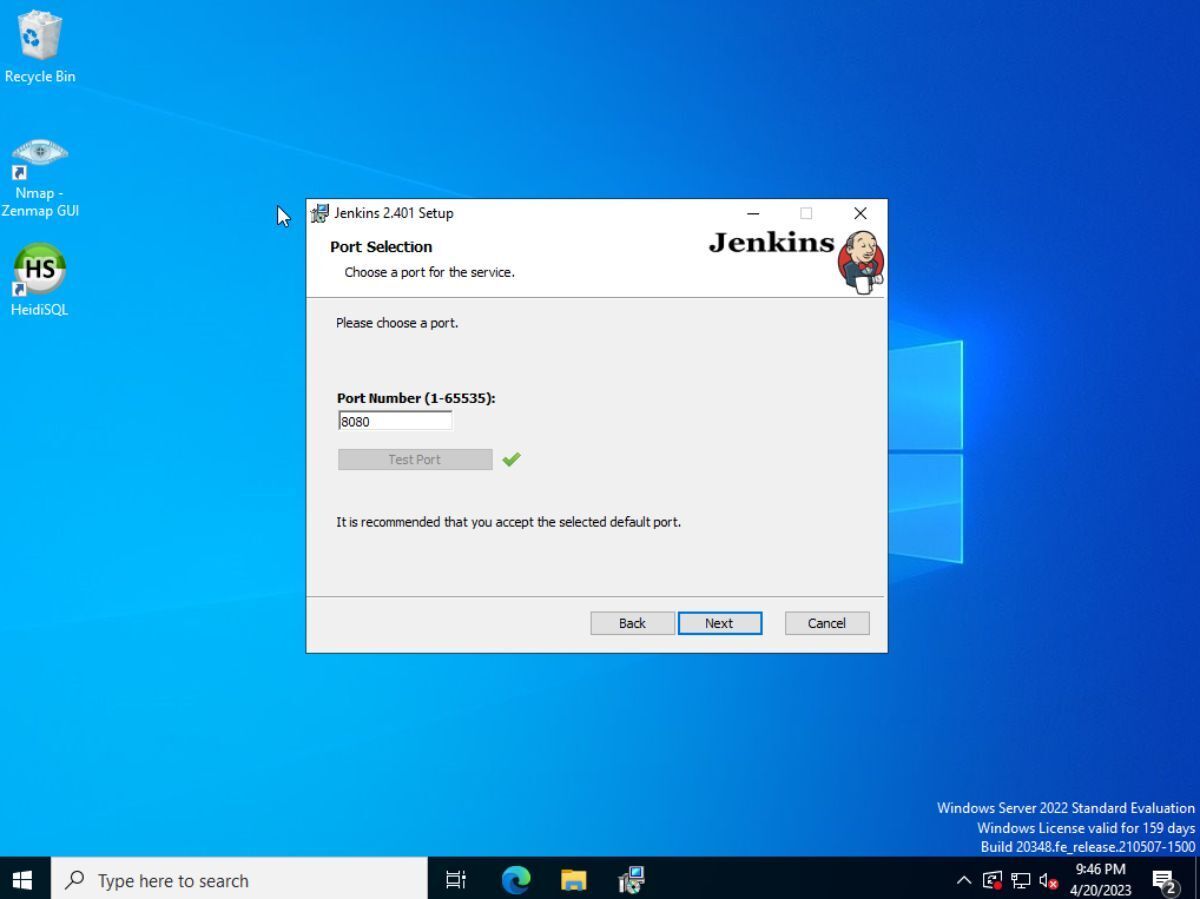
After setting up the Jenkins credentials, you must set up a port number for the installation. By default, Jenkins will choose port 8080. To choose a different port, enter a port number between 1-65535. When you’ve chosen a port, press the “Test Port” button. Then, click “Next” to continue.
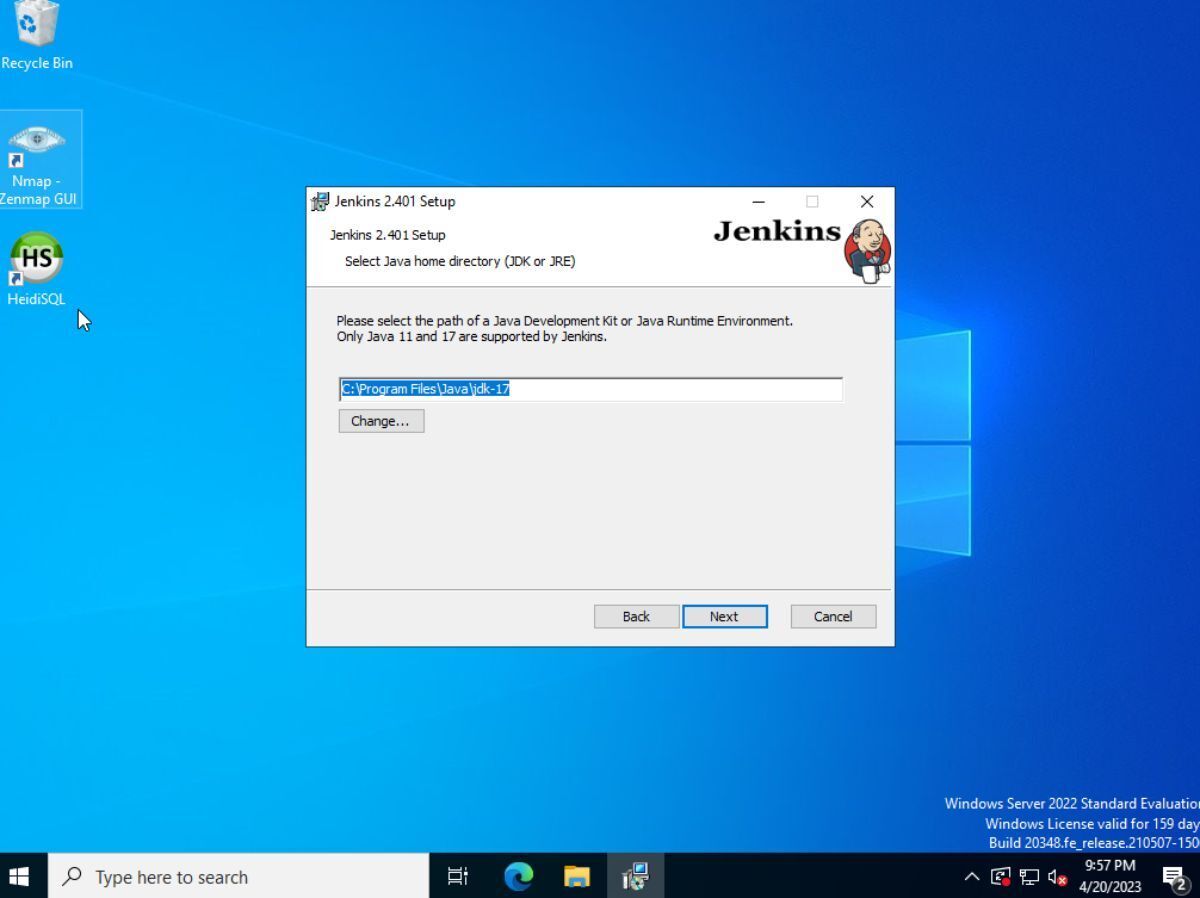
You must now specify the location of Java (JDK or JRE) on your Windows Server system. By default, the Jenkins installer will assume that Java is installed to “C:\Program Files”. Add the location of your Java installation and click “Next.”
You’ll now be brought to the “Custom Setup” page. Customize what you want Jenkins to install. When you’ve made your choices, click the “Next” button to move to the next page.
After choosing what Jenkins should install, click the “Install” button to install Jenkins to Windows Server.
How to use Jenkins on Windows Server
To use Jenkins, you need to unlock it first. To unlock Jenkins on your system, start by launching the web UI. You can achieve this by visiting the following URL in a web browser:
localhost:8080
or
windows-server-ip:8080
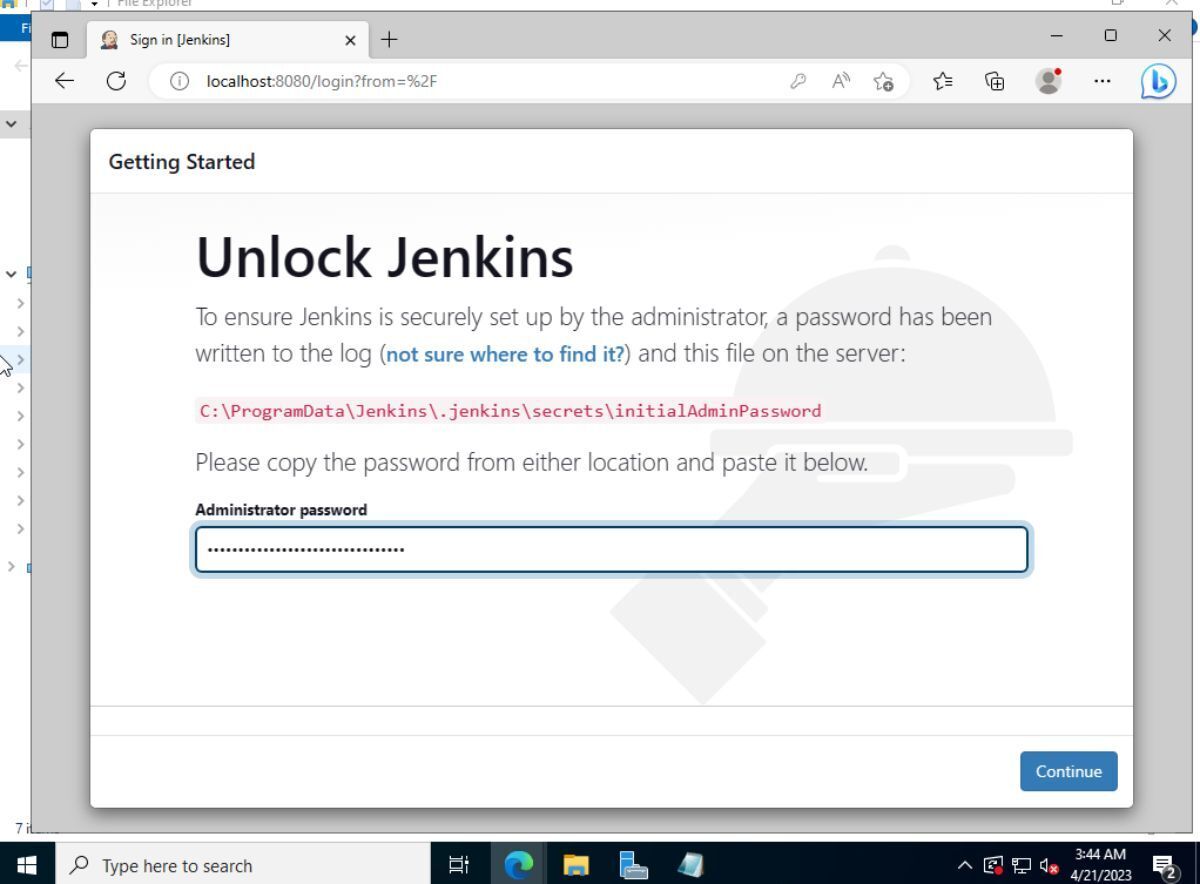
Once you’ve loaded the URL, you’ll see the “Unlock Jenkins” page with a message that says, “To ensure that Jenkins is securely set up by the administrator, a password has been written to the log.” Open the log file and copy the password provided into the text box to unlock Jenkins.
After logging in to Jenkins with the password, a pop-up window called “Getting Started” will appear. Choose “Install suggested plugins” to install the Jenkins plugins most valued by the Jenkins community.

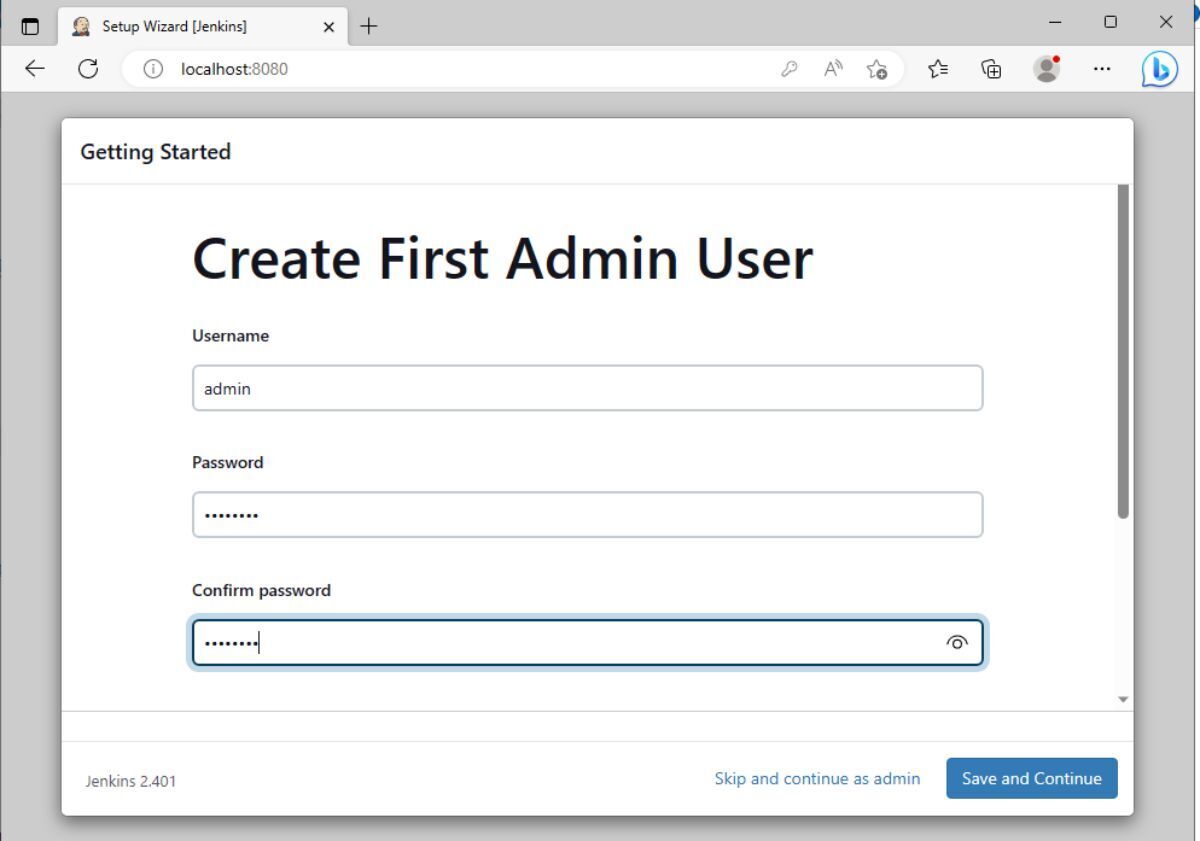
After selecting the “Install” button, Jenkins will install various plugins that most users find useful. When the installation process is complete, you will need to create your Admin user. To do so, enter a username and password in the pop-up window in the Jenkins UI.
Once you have created your Admin account, select the “Start using Jenkins” button to use Jenkins on your Windows Server.
How to create a job in Jenkins
When it comes to Jenkins, there is a lot to cover, to the point that this guide would be endless if we attempted to address every aspect of it. Instead, we will focus on its most basic functionality, which is creating jobs.
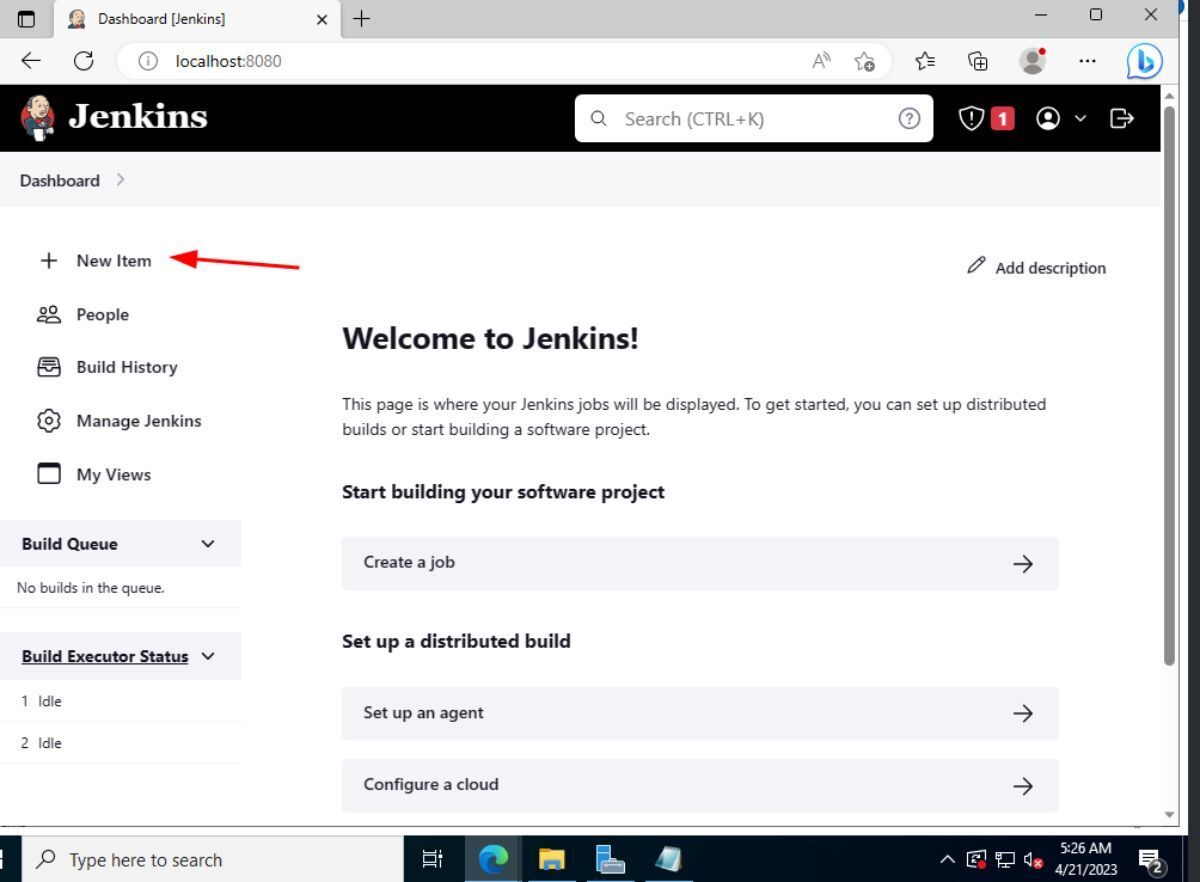
To create a new job in Jenkins, start by clicking “New Item” in the left-hand sidebar. Once you have selected “New Item,” provide an item name and then select the type of job you want to create (e.g., Freestyle project, Pipeline, Multi-configuration project).
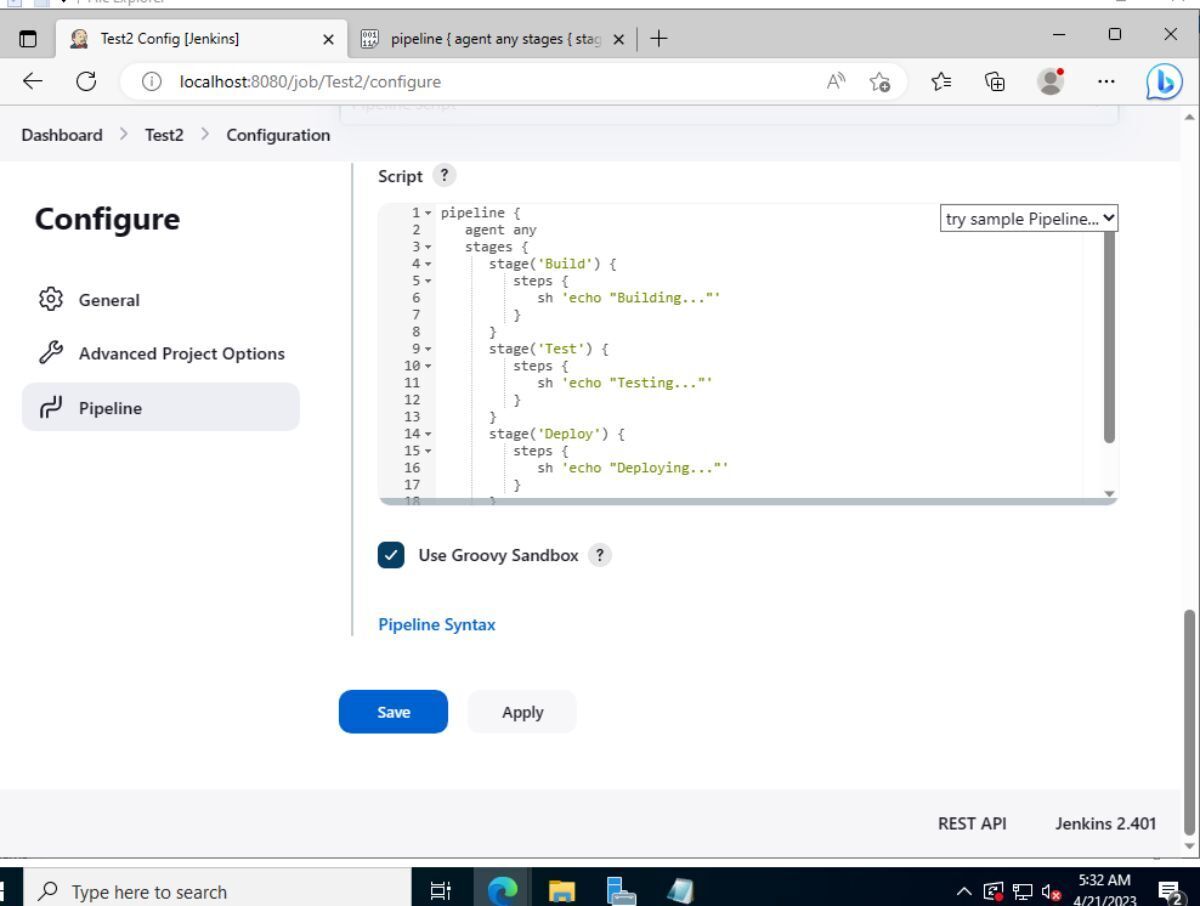
You can now configure your job by adding build steps. These build steps could include executing shell commands, build scripts or other custom actions. Once you have finished adding everything, click “Save” to save your Jenkins job.
When your job is fully configured, you can run it in Jenkins.
More information about Jenkins and its uses
If you’d like more information about Jenkins than was covered in this guide, please check out the official website’s documentation pages. They go over every feature and every aspect of Jenkins in great detail.
