How to install Windows Server Core 2022
Windows Server core is a minimalist version of Windows Server. It is highly efficient, uses fewer resources, and comes with fewer updates and reboots. This version of Windows Server is ideal if you’re hosting Hyper-V vms, or prefer to use the CLI for administration.
In this guide, we’ll show you how you can deploy Windows Server Core 2022. To get started, ensure your server meets the following requirements:
- At least 2 to 4 GB of RAM is available.
- A modern, multi-core CPU with a clock speed of 2.5 GHz or higher for ideal performance.
- Gigabit Ethernet or faster for speedy network connectivity.
- A large enough hard drive to handle the size of the operating system, as well as the data you plan to store on the device (50 GB to 100 GB).
Download Windows Server
You can download Windows Server 2022 to get Windows Server Core working on your system free of charge from the official Microsoft evaluation center. Head over to the official Microsoft evaluation center.
Once you’ve made it to the Microsoft evaluation center, find your preferred language in the table. Then, find the “ISO downloads” section. Select the 64-bit edition with the mouse to begin the download process.
Note that in this guide, we’re covering the ISO download of Windows Server for Windows Server core. However, it is also available as a VHD for download, or on Azure. For more information, refer to the Microsoft evaluation center.
Creating a Windows Server core installation USB
Windows Server Core needs to be installed on a machine via a USB installation disk. As a result, you’ll need to create a bootable USB. Load up the nearest Windows PC, and do the following.
- Load up Rufus.ie, and download the latest version of the Rufus USB imaging tool. This tool can be used to create a bootable installer for Windows Server Core 2022.
- Once you’ve downloaded Rufus to your Windows PC, launch it, and insert a USB flash drive into your Windows PC’s USB port.
- After inserting a USB flash drive into your Windows PC’s USB port, find the “Select” button, and browse for the Windows Server ISO downloaded previously.
- Select the “Start” button for the USB flash drive installation process. This process will take some time to complete, as Rufus has to move all of the files from the ISO to your USB.
When Rufus is done creating the Windows Server bootable USB, reboot your server into the BIOS. Then, configure it to boot from USB. Once the server boots up the installer USB, you’ll be ready to install Windows Server Core 2022.
How to install Windows Server Core 2022
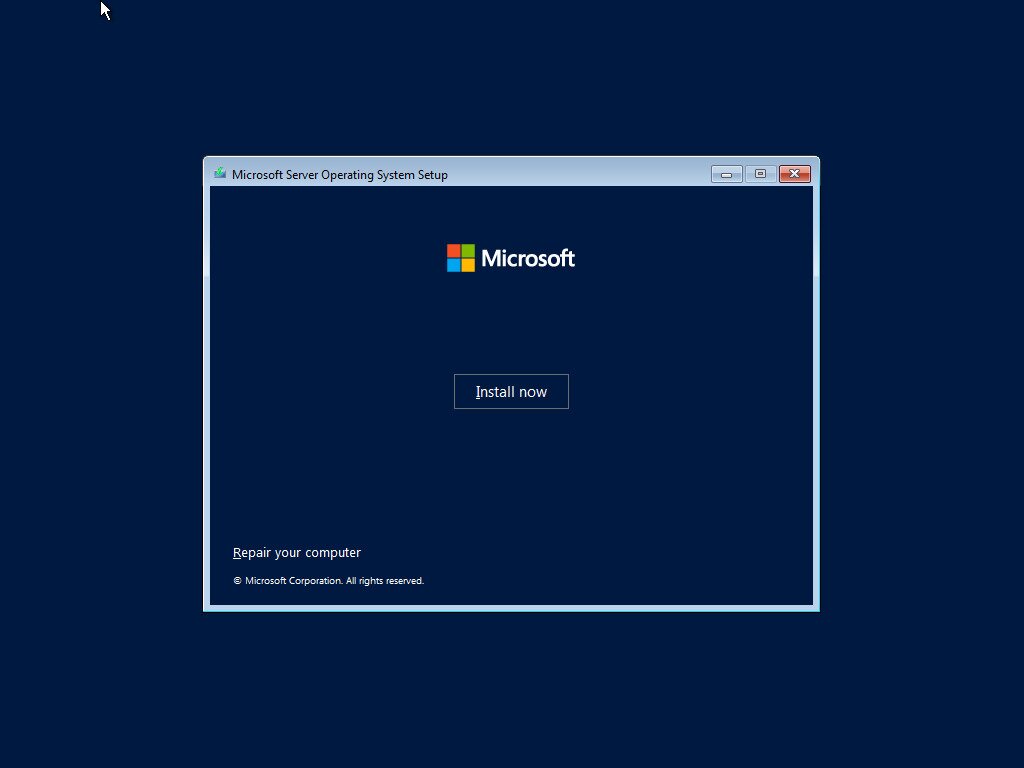
To install Windows Server Core 2022 on your server, do the following. First, after the Windows Server installation USB has loaded up, find the “Install now” button, and click on it with the mouse.
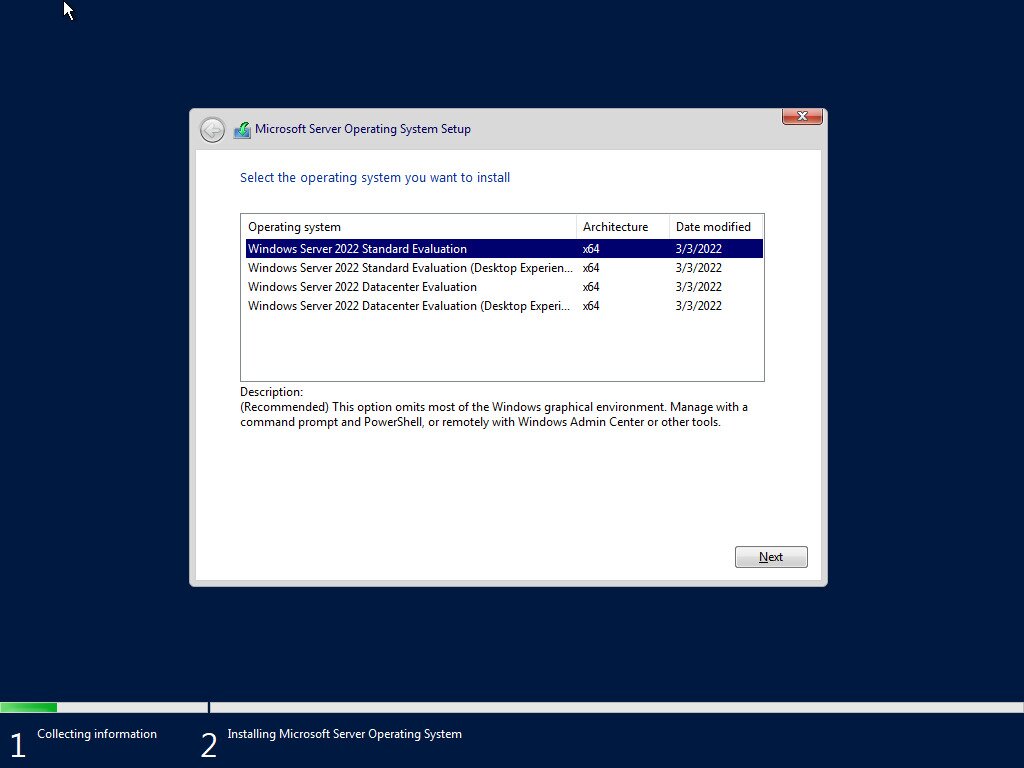
After clicking the ‘Install now’ button, you’ll be asked to choose the operating system to install. To install Windows Server Core 2022, select ‘Windows Server 2022 Standard Evaluation.’ Windows Server Core 2022 is the option that excludes the “Desktop Experience”.
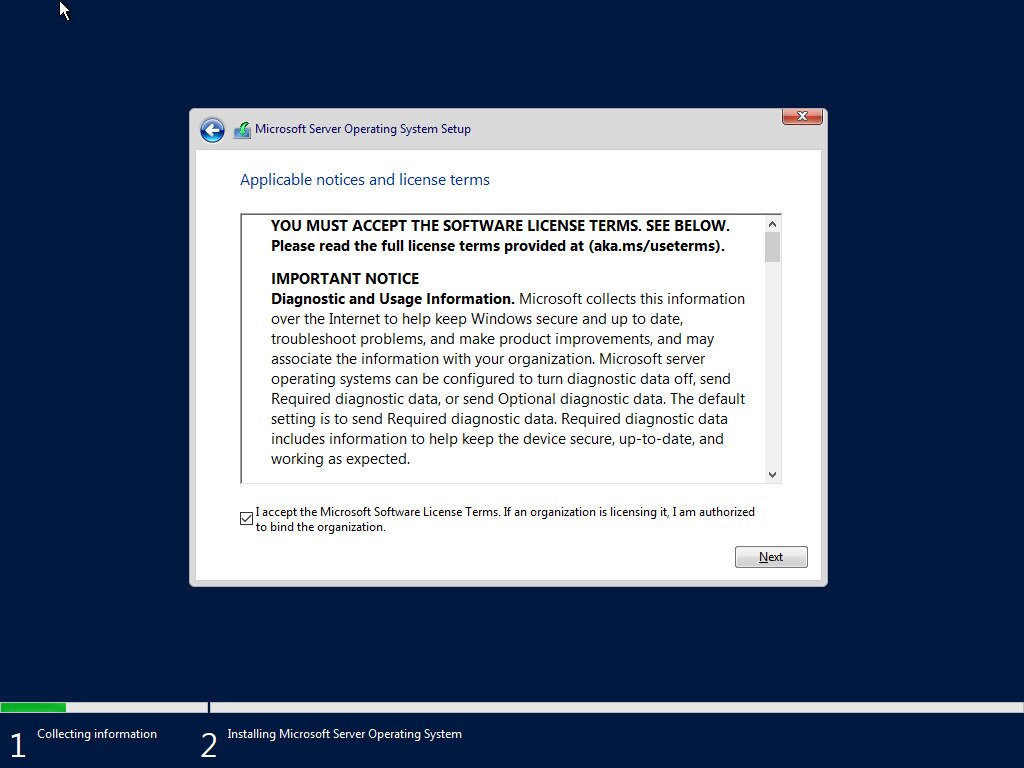
Once you’ve chosen Windows Server Core in the installer, you’ll see the “Applicable notices and license terms” message. Please read it. When you’ve finished reading it, check the box that says “I accept the Microsoft Software License Terms. If an organization is licensing it, I am authorized to bind the organization.” Click “Next” when done to move to the next page in the installer.
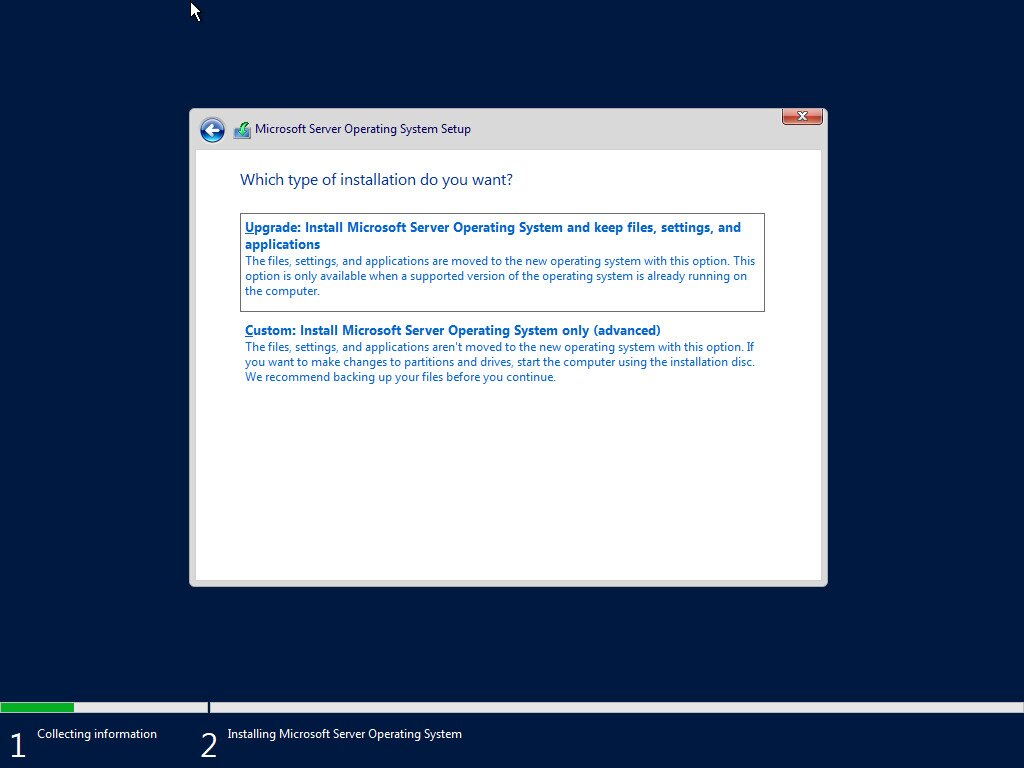
You must now choose the type of installation you want. For a fresh install, select “Custom”. However, if you are already running Windows Server, select “Upgrade,” Windows Server will guide you through the upgrade. In this guide, we’ll focus on the “Custom” option.
You now need to choose where you want to install the operating system. Select your drive in the installer, and select “Next.” Windows Server should automatically populate your drive with the correct partition layout. Alternatively, do everything manually with the GUI.
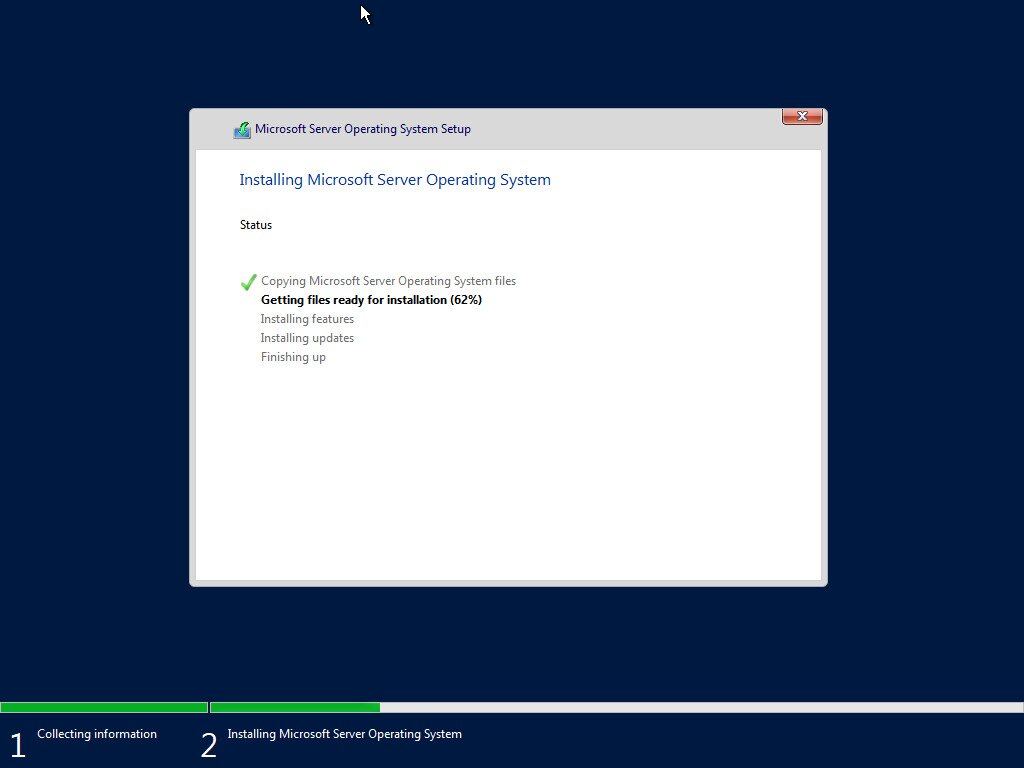
When you click “Next” after selecting a hard drive, Windows Server will begin installing itself to the drive you selected. Sit back, be patient, and allow the Windows Server installer to complete what it is doing. It’ll reboot when the installation is complete.
Setting everything up
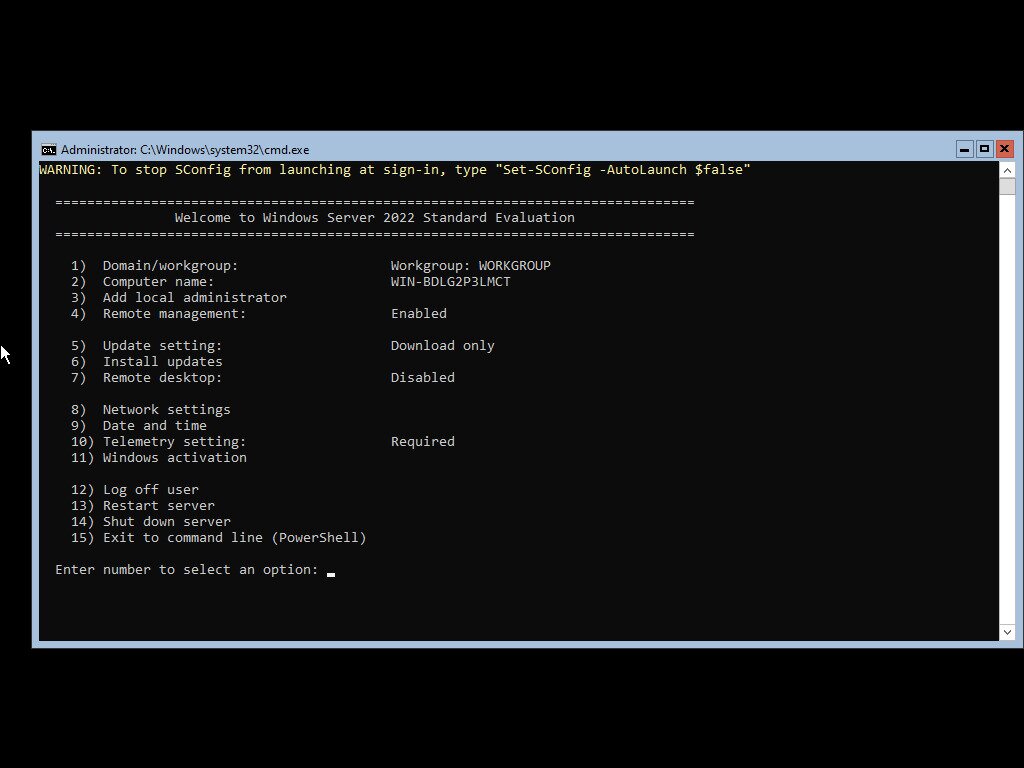
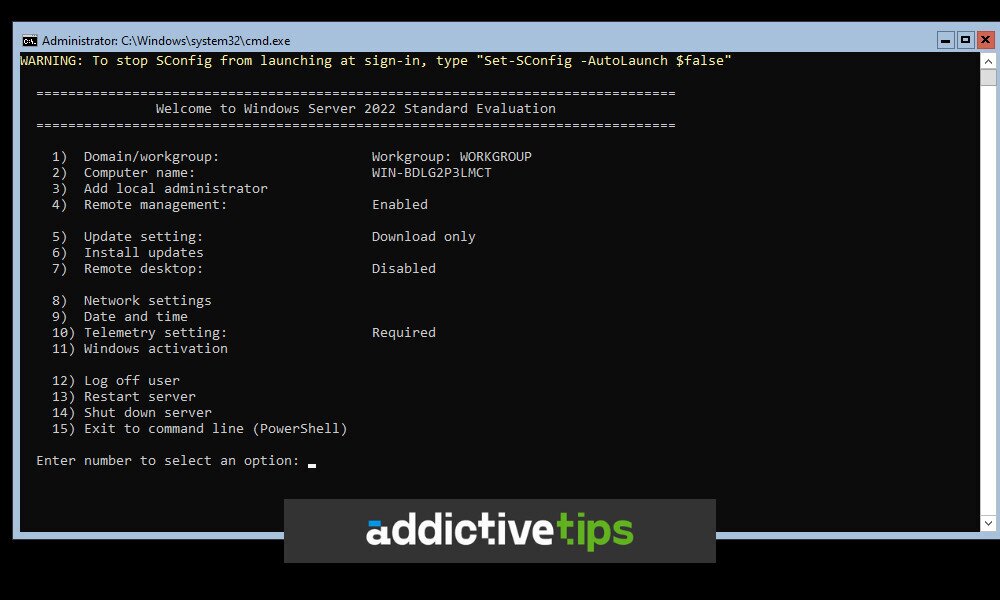
Now that Windows Server core is installed on your system, it will reboot. After rebooting, you’ll see a command prompt window that asks you to configure the Administrator account password. Do so.
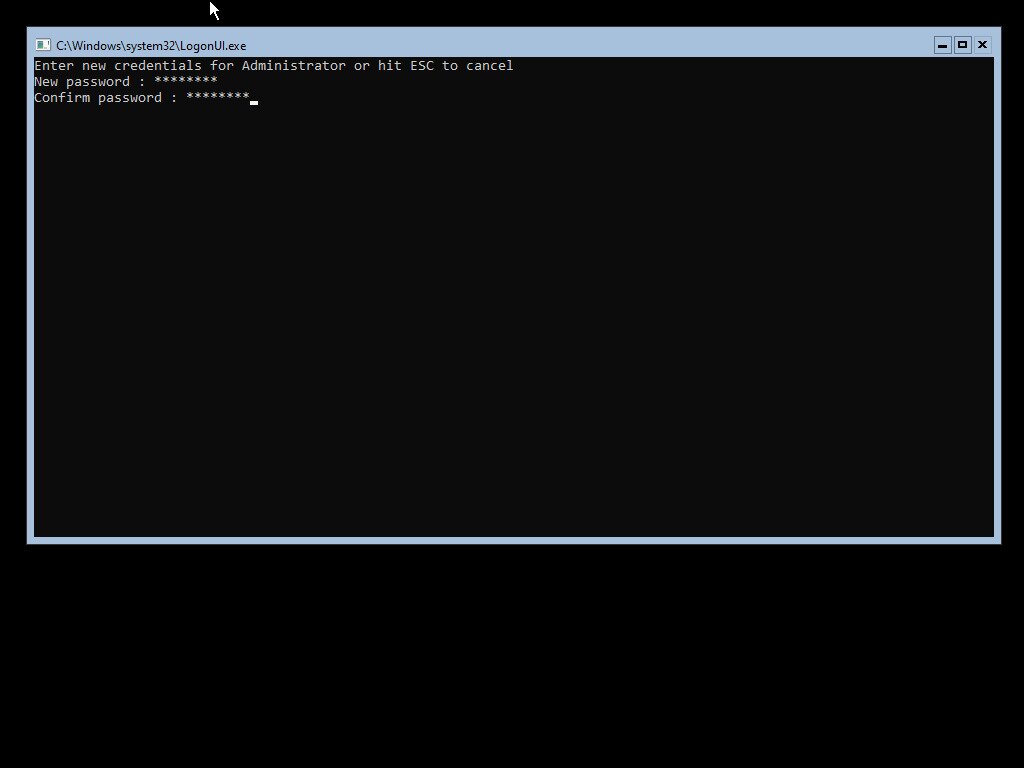
Once you’ve set your password, you’ll see a list of available options in a command prompt window. From here, you can choose various options and settings to better configure your Windows Server Core 2022 installation.