How to Take a Screenshot on Windows: Quick & Easy Methods
Editor's Pick July 2026
A screenshot is a quick way to visually share what’s on your screen. Screenshots can serve as proof of submission, a way to save information you can’t easily copy, or to document an error or process. Whether you use a desktop, laptop, or tablet, knowing how to take a screenshot on Windows is an essential skill.

How to Take a Screenshot on Windows (All Versions)
Windows offers several built-in methods to capture your screen, from keyboard shortcuts to dedicated apps. Below, you’ll find step-by-step instructions for the most common ways to take screenshots on Windows 11, Windows 10, and earlier versions.
Quick Screenshot Methods
Print Screen (PrtScn) Key
- Press the Print Screen (PrtScn) key on your keyboard. This copies the entire screen to your clipboard.
- Open an image editor like Paint and press Ctrl+V to paste the screenshot.
- Save the image to your desired location.
Tip: On some laptops, you may need to press Fn + PrtScn to activate the Print Screen function.
Windows + Print Screen
- Press Windows + PrtScn together. The screen will briefly dim or flash.
- The screenshot is automatically saved as a PNG file in the Pictures > Screenshots folder.
Alt + Print Screen
- Press Alt + PrtScn to capture only the active window.
- Paste it into an image editor with Ctrl+V and save.
Windows + Shift + S (Snipping Tool Shortcut)
- Press Windows + Shift + S to open the Snipping Tool overlay (Snip & Sketch in Windows 10/11).
- Select the area you want to capture: rectangular, freeform, window, or full-screen snip.
- The screenshot is copied to your clipboard. Paste it into an app or save it using the notification that appears.
How to Take Screenshots on a Surface Tablet or Touchscreen Laptop
- Press and hold the Windows button and the Volume Down button simultaneously. The screen will dim briefly, and the screenshot will be saved to the Pictures > Screenshots folder.
- If this doesn’t work, try Windows + Volume Up for some devices.
Timing is important—press both buttons at the same time for best results.

Different Types of Screenshots
Screenshot of a Window: Alt + PrtScn
- Click the window you want to capture to make sure it’s active.
- Press Alt + PrtScn (or Fn + Alt + PrtScn on some laptops).
- Paste and save the screenshot in your preferred app.
Note: If your keyboard does not have a dedicated Print Screen key, try Windows + Fn + Space Bar to capture the screen.
Screenshot of a Specific Area: Windows + Shift + S
- Press Windows + Shift + S. Your screen will dim and your cursor will change to a crosshair.
- Click and drag to select the area you want to capture.
- Release the mouse to take the screenshot. The image is copied to your clipboard and a notification will appear for further options.
Snipping Tool (Windows 11 & 10)
- Search for Snipping Tool from the Start Menu.
- Click New to start a screenshot.
- Select your snip mode: Rectangle, Window, Full-screen, or Free-form.
- Take the screenshot, then use the built-in editor to annotate, save, or share.
Tip: In Windows 11, Snip & Sketch and Snipping Tool have been combined into a single app.
Time-Delayed Screenshot (Snip & Sketch)
- Open Snipping Tool (or Snip & Sketch in Windows 10/11).
- Click the Delay button and choose a delay (3, 5, or 10 seconds).
- Click New and set up your screen as needed before the screenshot is taken.
- Select the snip type and capture your screenshot.
- Save or edit as desired.

How to Take a Screenshot Without Print Screen or Windows Key
If your keyboard lacks a Print Screen or Windows key, try these alternatives:
- Use Snipping Tool or Snip & Sketch from the Start Menu.
- On some laptops, Fn + Space Bar may capture the screen.
- Install a third-party screenshot tool (see below).
Enhance Windows Screenshots with Third-Party Tools
While Windows offers robust built-in screenshot options, third-party apps provide advanced features like annotation, instant sharing, and cloud uploads. Here are two popular options:
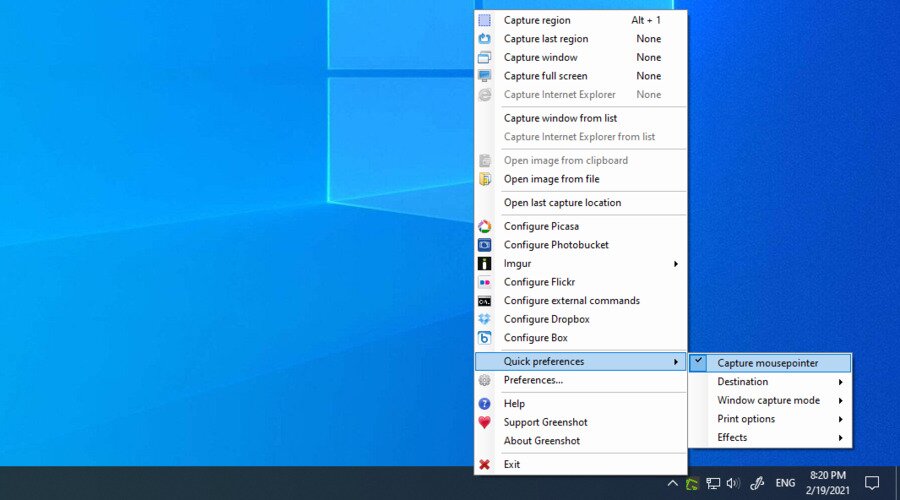
GreenShot is a free, open-source utility for taking screenshots. After capturing, you can annotate, highlight, or obfuscate parts of the image. GreenShot lets you:
- Press Print Screen to select and capture a region.
- Customize settings, effects, and output formats (JPG, PNG, BMP, GIF).
- Save, copy, or upload screenshots directly.
GreenShot works on Windows XP, Vista, 7, 8, 10, and 11.
Shotty is another full-featured screenshot tool. It supports Windows Aero-Glass effects, lets you crop, annotate, and upload images to hosting sites, and offers customizable hotkeys. Use Ctrl + Print Screen for high-quality screenshots with effects.
Frequently Asked Questions
How do you capture a screenshot on a PC?
You can capture a screenshot on a PC by pressing PrtScn to copy the whole screen, Alt + PrtScn for the active window, or Windows + Shift + S to select a specific area. Screenshots can be pasted into an image editor or saved automatically, depending on the method.
How do I take a screenshot on a Windows keyboard?
On most Windows keyboards, use the PrtScn key for a full-screen screenshot, Alt + PrtScn for the active window, or Windows + PrtScn to save the screenshot directly to your Pictures folder. On some laptops, you may need to hold Fn with these keys.
Which key is for screenshot in Windows?
The Print Screen (PrtScn) key is the primary key for taking screenshots in Windows. It may be labeled as “PrtScn,” “PrtSc,” or similar. Additional shortcuts like Windows + Shift + S and Alt + PrtScn offer more options.
How to take a screenshot in Windows 11?
In Windows 11, you can use:
- Windows + Shift + S for the Snipping Tool overlay.
- PrtScn to copy the screen to your clipboard.
- Windows + PrtScn to save a screenshot automatically.
- The Snipping Tool app for delayed or custom screenshots.
Conclusion
Windows provides multiple ways to take screenshots, from simple keyboard shortcuts to advanced tools like Snipping Tool and Snip & Sketch. For more features, third-party apps like GreenShot and Shotty offer annotation and sharing options. Whether you’re using Windows 11, 10, or earlier, you’ll find a method that fits your needs. Explore the options above to capture, edit, and share your screen with ease.
What’s new in this update
- Added sections: How to Take a Screenshot on Windows (All Versions), Quick Screenshot Methods, How to Take Screenshots on a Surface Tablet or Touchscreen Laptop, Time-Delayed Screenshot (Snip & Sketch), How to Take a Screenshot Without Print Screen or Windows Key…
Last updated: 2025-09-18
