What Is A Static IP Address and How to Customize It
A static IP address is a public IP address that remains the same for a given device. Normally, a public IP address is assigned at random to computers and other devices that connect to the internet. In contrast, a dynamic IP address changes. For a dynamic IP addresses, the refresh interval is 7 days but, it may be more or less depending on your ISP. If you want a static IP address, you will likely have to get in touch with your ISP, or a similar governing authority to get it. You cannot simply pick a static IP for yourself.
How you get a static IP will differ from country to country. The laws and regulatory authorities of a country will dictate the process that’s involved in getting a static IP. If you’re unsure of how to get one in your country, start by talking to your ISP. Even if your ISP cannot give you a static IP address, it can probably guide you on how to get one.
Why Use A Static IP Address?
A static IP address makes it easy to connect to a computer or a server as is the common case. If you’re hosting a website on a server you will want it to have a static IP address. If you want to be able to remotely access a file on your network you will again want a static IP address.
End users normally have dynamic IP addresses but businesses will often opt for a static IP address in order to function.
Assign A Static IP
Assuming you already have a static IP address, you need to assign it to your system. On Windows 7 and above, this is a fairly simple process. You will need the following information in order to assign a static IP address to your Windows PC.
- Administrative rights on the computer
- A static IP address
- Subnet mask and default gateway that goes with it
- DNS server
Items 2 & 3 will be assigned by the same authority that gives you the IP address. You can use any DNS you want. Many people prefer to use Google DNS.
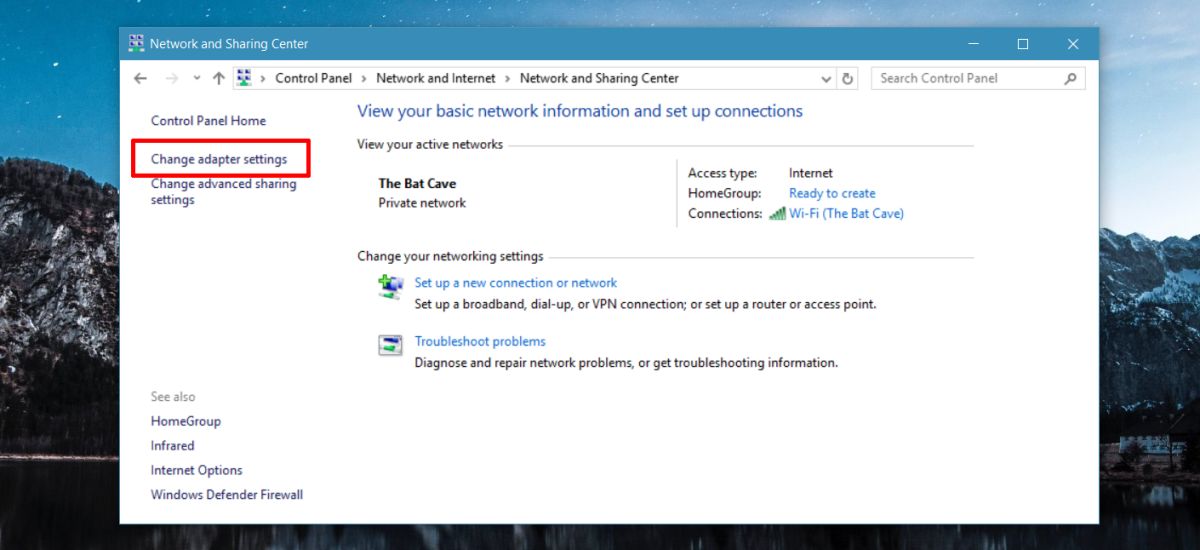
Open the Control Panel and go to Network & Internet>Network and Sharing Center. On the left, click Change Adapter Settings.

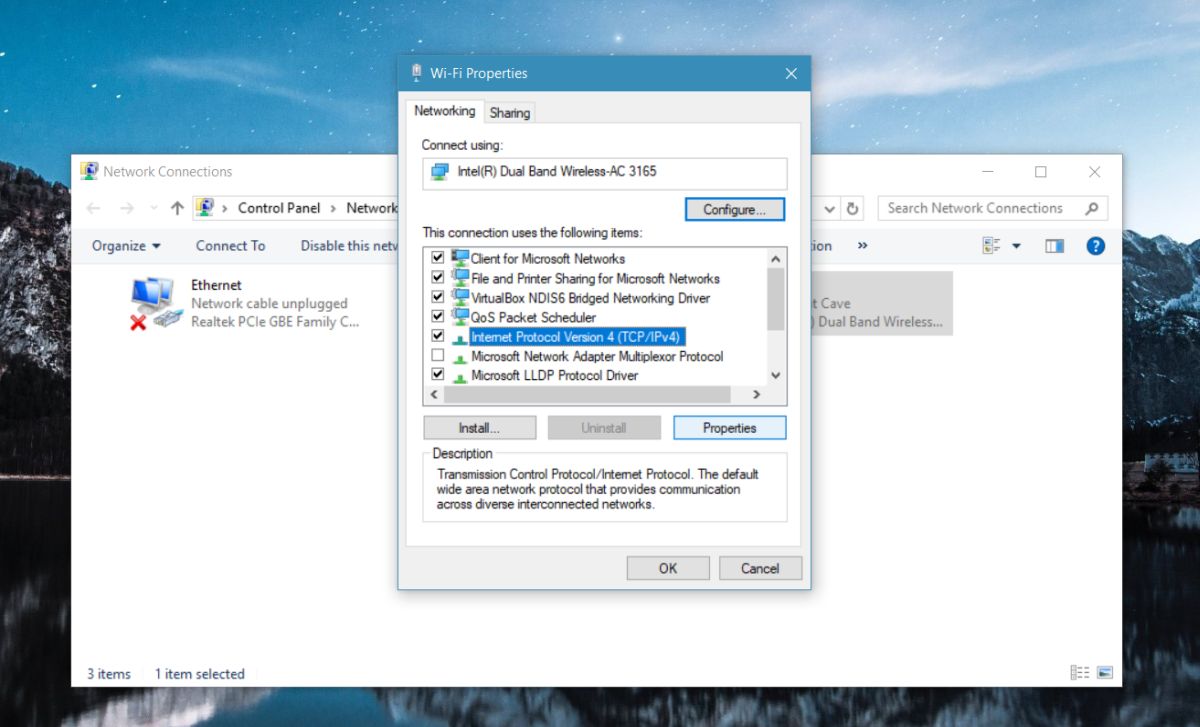
Select the adapter you want to assign a static IP to. If you connect via WiFi, select it. Right-click the adapter and select Properties from the context menu.
On the Properties window, select Internet Protocol Version 4, and click the properties button.

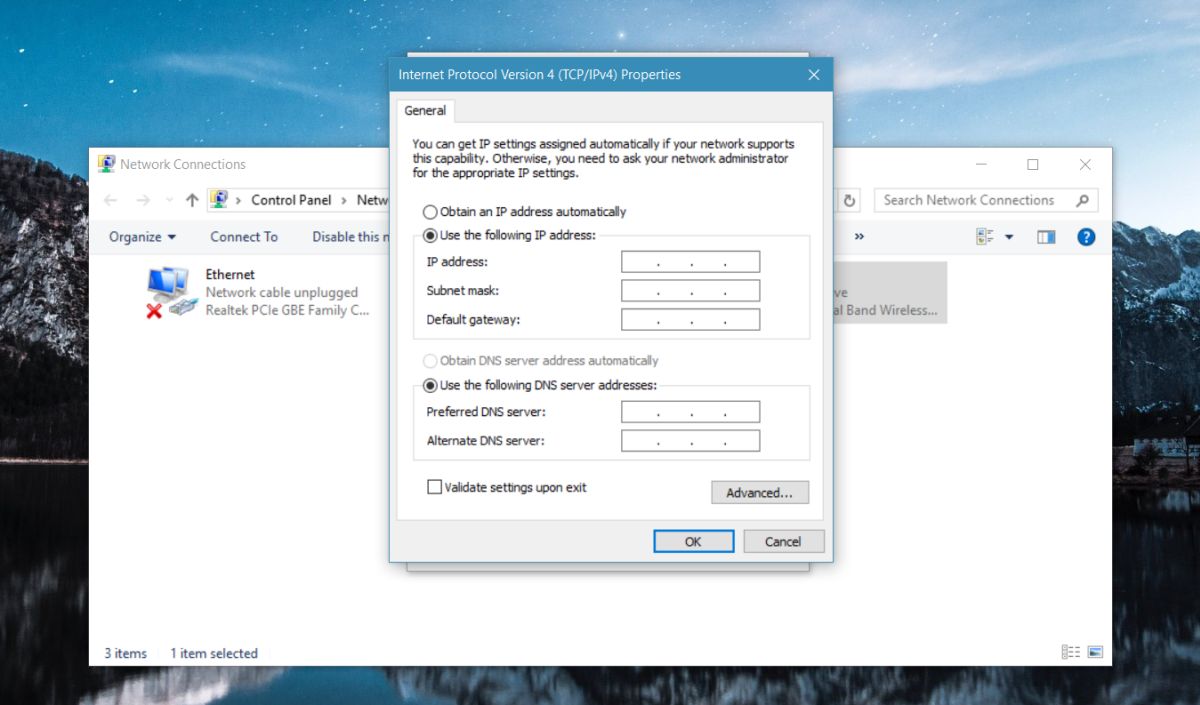
Select the ‘Use the following IP address’ option. Enter the static IP you want to set for your computer as well as the subnet mask, default gateway, and the DNS server.

That’s all you need to do. The IP will be set for your system.
