Use Your Computer’s Keyboard To Type On Android Over WiFi Or USB
Ever wondered if you could use a full computer keyboard to type messages and emails, and jot down those notes on your Android device? There are those Bluetooth keyboards that you can pair with your smartphone but if you’re looking for a free solution, there’s a very simple method that works like a charm, thanks to free Android app Remote Keyboard. The app allows you to connect your desktop keyboard to your Android phone or tablet via Wi-Fi. And the best thing is that the app is fairly simple to configure, requiring no complicated connection methods, and we’re gonna tell you exactly how. Read on for details.
First of all, make sure both your phone and your PC are connected to the same Wi-Fi network. Next, download Remote Keyboard from Google Play Store using the link provided at the end of this post. Once installed, fire up the app and follow the on-screen instructions it tells you along the way. This will also require you to enable and select Remote Keyboard as an input method in your language and keyboard settings when asked by the app. If you’re unsure on how to do it, the screenshots below should help.
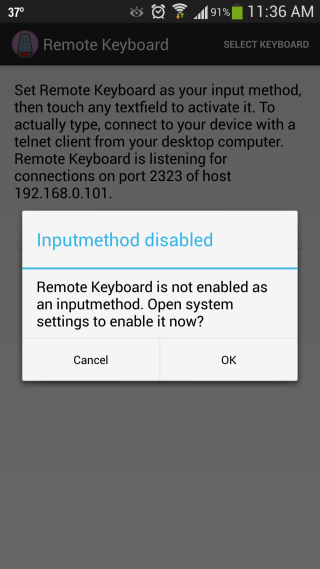
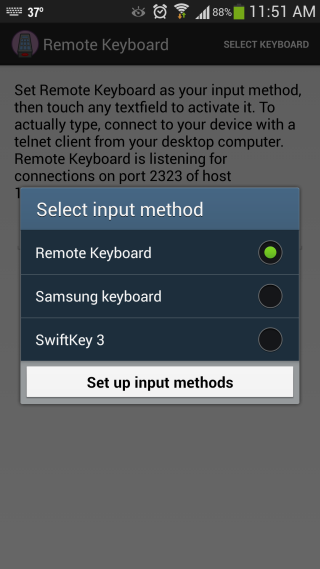
After enabling Remote Keyboard as your default input method, the app will tell you the listening port and IP of your phone, which you’re going to need to connect it to your computer via Wi-Fi. This can be accomplished by using a Telnet client on your PC. Don’t get intimidated; it’s also fairly simple to configure. Let us show you how.
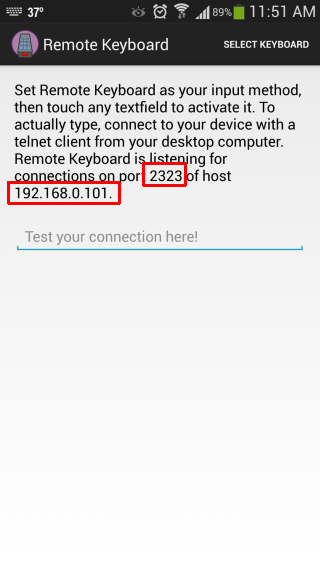
Pretty much all major operating systems come preinstalled with a telnet client, but you can also use something as easy to use and configure as PuTTY. It’s an open-source tool that allows you create Telnet and SSH sessions with a few clicks. It’s also portable, so you won’t be needing to install it on your system – just download and run it!
So, download PuTTy via the link provided at the end of the post and run its EXE file. When launched, you need to enter the same host information that was mentioned in Remote Keyboard. Type the IP address and Port in the relevant fields and choose ‘Telnet’ under ‘Connection Type’. It should look something like what’s shown in the screenshot below. When you’re done configuring PuTTY, simply click the ‘Open’ button to start your session.
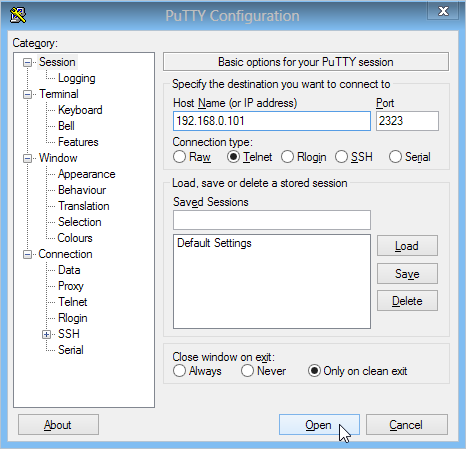
You will be presented with a Command Prompt-like console that displays the status of the Telnet connection, and that’s it! Your connection will be created through Wi-Fi. As long as this window in focus, anything you type on your computer goes to your Android device, regardless of the app that’s open there.
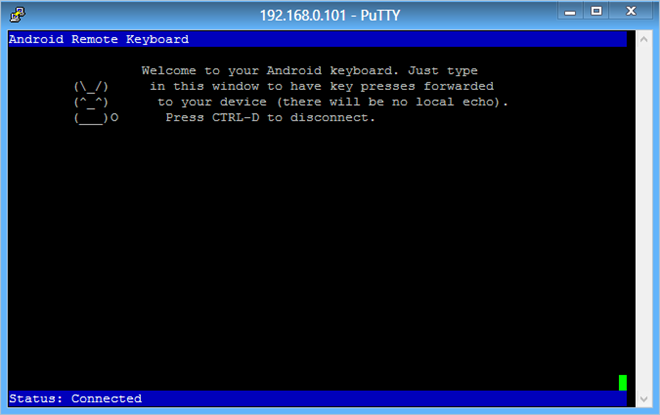
You can test its status via typing on the Test Field to see if everything’s working as it should.
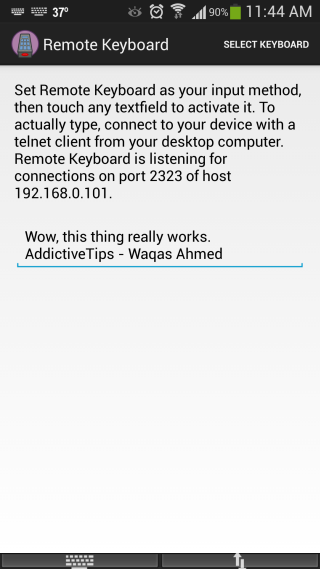
Although, it’s fairly limited in usage – as one will need to keep their PC on in order to use this app – Remote Keyboard seems to have a lot of potential and is pretty easy to use. Testing was carried out on Windows 8 Pro, 64-bit and Galaxy S4 running Android 4.2.2 Jelly Bean.
Download Remote Keyboard For Android

Amazing 🙂
1st OTG cable required that sported your cell ( android, iPad, apple, win mobile etc..)
Some phone or tablet sported OTG cable.
When connected OTG cable put the mouse , keyboard or USB ..
Thanks
Afzaal akhtar
T U guys rly helps 🙂
how to use it on mac…
I think the title of this article is incorrect. Where are the USB instructions?
How does it work over usb? I’m using it via Wifi b ut I would love to use with USB too.
WiFi Keyboard is a better alternative. It lets you use it via a web browser.