Step-by-Step Guide to Set Up Your Apple Pencil with iPad
Apple Pencil is the perfect precision stylus for iPads when you need to sketch, draw, color, edit PDFs, or take notes. It has the minimum latency so that you get the real-time feeling of using a pencil in the digital age.
If you’ve bought a new Apple Pencil or already have one but don’t know how to set up Apple Pencil, you’ve come to the right place. Continue reading to learn the best tips and tricks.
Check Which Apple Pencil Works With Your iPad
Before you try to pair your Apple Pencil, it’s worth taking a moment to confirm you have the right model for your iPad. The setup steps differ depending on which Apple Pencil you own, and pairing will simply fail if the two aren’t compatible. Here’s a quick reference:
- Apple Pencil Pro — Works with iPad Pro (M4), iPad Air (M2), and iPad mini (A17 Pro). Connects and charges magnetically via the iPad’s magnetic connector strip.
- Apple Pencil (USB-C) — Works with iPad (10th generation), iPad mini (6th generation), iPad Air (4th generation and later), and iPad Pro (all USB-C models). Pairs via a USB-C cable and can be used wirelessly after pairing, but does not charge magnetically.
- Apple Pencil (2nd generation) — Works with iPad Pro 11-inch (1st through 4th generation), iPad Pro 12.9-inch (3rd through 6th generation), iPad Air (4th and 5th generation), and iPad mini (6th generation). Connects and charges magnetically.
- Apple Pencil (1st generation) — Works with most older iPads that have a Lightning port, plus iPad (10th generation) via a USB-C to Apple Pencil Adapter. Does not connect magnetically — it plugs in to pair.
How to tell the models apart: The Apple Pencil Pro and 2nd generation both have a flat side designed for magnetic attachment. The USB-C model has a sliding cap that reveals a USB-C port underneath. The 1st generation has a removable magnetic cap on one end that covers a Lightning connector.
Always confirm compatibility before pairing — the setup method depends entirely on which model combination you have.
How to Set Up Apple Pencil: 2nd Generation
Apple Pencil (2nd generation) works only with supported iPad models, specifically iPad Pro 11-inch (1st through 4th generation), iPad Pro 12.9-inch (3rd through 6th generation), iPad Air (4th and 5th generation), and iPad mini (6th generation). Note that newer iPad Pro (M4) and iPad Air (M2) models require Apple Pencil Pro instead — the 2nd generation will not pair with them. Here are the steps to set up the stylus with a compatible iPad:
- You need to utilize the magnetic connector of the iPad to set up an Apple Pencil 2nd gen.
- You’ll find the magnetic connector strip at the center of the edge of the iPad.
- It’s on the edge where you also find the volume up and down buttons.
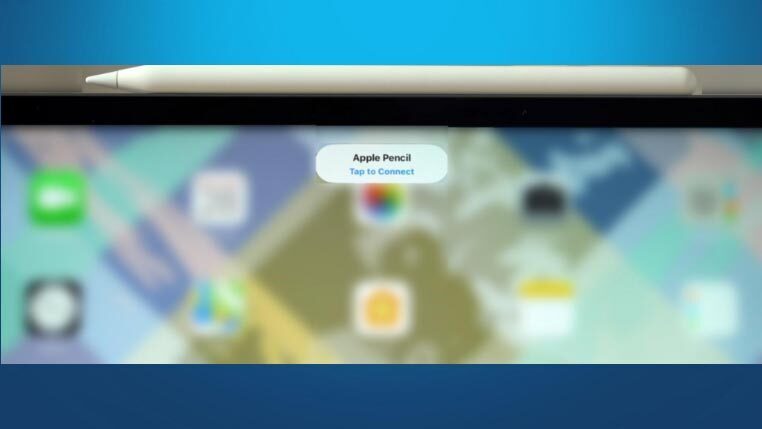
- Once you’ve located the magnetic strip, place the Apple Pencil on it.
- The stylus will stick to the edge of the iPad.
- Almost immediately, the iPad will show a visual notification on the screen to connect the stylus.
- Just tap on the Connect button on the screen to proceed.
- You can disconnect it from Settings > Bluetooth > the Apple Pencil > Forget.
How to Set Up Apple Pencil: 1st Generation
The 1st generation Apple Pencil pairs by plugging in rather than attaching magnetically. How you do this depends on which iPad you have — most iPads use the Lightning port directly, but the iPad (10th generation) requires an adapter since it uses USB-C instead of Lightning.
iPads With a Lightning Port
- Remove the pencil cap on the back of the stylus. By the way, it’s a magnetic cap.
- Insert the Lightning connector into the iPad’s Lightning port.
- You’ll now see a notification on the iPad’s screen.
- It should say Bluetooth Pairing Request: “Apple Pencil” would like to pair with your iPad.
- Tap Pair to accept the connection.
iPad (10th Generation) With USB-C
The 1st generation Apple Pencil cannot be plugged directly into the iPad (10th generation) because that iPad has a USB-C port, not a Lightning port. You’ll need the USB-C to Apple Pencil Adapter, sold separately by Apple.
- Remove the magnetic cap on the back of the Apple Pencil to reveal the Lightning connector.
- Plug the Lightning connector into the USB-C to Apple Pencil Adapter.
- Connect the adapter to the iPad (10th generation) using a compatible USB-C cable.
- A Bluetooth Pairing Request notification will appear on screen.
- Tap Pair to complete the connection.
The gen 1 Apple Pencil stays connected with a compatible iPad until you restart the device, switch off Bluetooth, or put the iPad in Airplane mode. Also, connecting the stylus with another iPad will sever the connection with the existing iPad.
How to Set Up Apple Pencil Pro and Apple Pencil (USB-C)
If you have one of the two newer Apple Pencil models, here’s how to get each one paired with your iPad.
Apple Pencil Pro
Apple Pencil Pro works with iPad Pro (M4), iPad Air (M2), and iPad mini (A17 Pro). It connects and charges magnetically, in a similar fashion to the 2nd generation Apple Pencil.
- Make sure Bluetooth is turned on by going to Settings > Bluetooth.
- Hold the Apple Pencil Pro with its flat side facing the magnetic connector strip on the edge of the iPad.
- Attach it to the connector strip — the Pencil will snap into place magnetically.
- A Connect prompt will appear on the iPad screen almost immediately.
- Tap Connect to finish pairing.
- Once paired, the Apple Pencil Pro also charges magnetically whenever it is attached to the connector strip.
Apple Pencil (USB-C)
Apple Pencil (USB-C) pairs via a USB-C cable. Once paired, you can use it wirelessly, but it does not charge magnetically — you’ll need to plug it in to charge.
- Make sure Bluetooth is turned on by going to Settings > Bluetooth.
- Slide back the cap on the Apple Pencil (USB-C) to reveal the USB-C port underneath.
- Connect the Apple Pencil to the iPad using a USB-C cable.
- A Connect prompt will appear on the iPad screen.
- Tap Connect to finish pairing.
- After pairing, you can disconnect the cable and use the Apple Pencil wirelessly. To charge it later, reconnect it via USB-C cable — either to the iPad directly or to a USB-C charger.
How to Set Up Apple Pencil: Troubleshooting
Toggle Bluetooth Off and On
Apple Pencil and iPad communicate with each other via Bluetooth technology. Hence, if the Bluetooth frequency is busy connecting with another accessory or just not responding anymore, you may face challenges in pairing an Apple Pencil.
To resolve the connectivity issue, switch off and switch on the Bluetooth service. You can do that from the iPad’s Settings app > Bluetooth.
Properly Charge the Apple Pencil
A common cause of the connectivity issue is battery level. Charge the Apple Pencil more often to increase battery health and avoid the inconvenience of connectivity issues.
Update iPadOS
An outdated version of iPadOS can prevent the Apple Pencil from pairing correctly. Go to Settings > General > Software Update and install any available updates before trying to pair again.
Keep the Pencil Connected and Restart Your iPad
If the Pair or Connect button doesn’t appear, keep the Apple Pencil attached or plugged in and restart your iPad. After the iPad reboots, try pairing again — a restart clears temporary software issues that can block the pairing prompt from showing up.
Leave the Pencil Connected for at Least a Minute
If the Pair or Connect button still doesn’t appear right away, don’t disconnect the Pencil immediately. Leave it attached or plugged in for at least a full minute. The iPad sometimes needs extra time to recognize the Pencil, especially if the Pencil’s battery is very low.
Forget the Device and Re-Pair
If the Apple Pencil was previously paired and is now unresponsive, try removing it from Bluetooth settings entirely and starting fresh:
- Go to Settings > Bluetooth.
- Find the Apple Pencil in the list of devices.
- Tap the info icon next to it and select Forget This Device.
- Then follow the pairing steps for your specific Apple Pencil model again from the beginning.
Remove Thick Cases or Covers
If you’re using a magnetic Apple Pencil — either the Pro or 2nd generation model — a thick case or cover on the iPad can prevent the Pencil from making proper contact with the magnetic connector strip. Remove the case and try attaching the Pencil directly to the bare edge of the iPad.
Contact Apple Support
If you’ve worked through every step above and the Apple Pencil still won’t pair, the issue may be hardware-related. Visit Apple Support at support.apple.com or bring your iPad and Apple Pencil to an Apple Store or Apple Authorized Service Provider for further diagnosis.
Conclusion
Whether you’ve got the 1st gen or 2nd gen Apple Pencil stylus, you’ll find all the necessary setup tips and instructions above. Moreover, if you face any challenges during setup, we’ve listed some self-service troubleshooting as well.
Hope you’ve got the best answer to your Google search query for, “how to set up Apple Pencil.”
You may also be interested to find out what new products did Apple unveil recently.
